一、centos7.4 下安装及汉化
===============================================
2017/11/12_第6次修改 ccb_warlock
更新说明:
2017/11/12:五中增加管理员账号的内容
2017/11/8:修复3.6中命令错误的问题;
2017/10/20:3.4中增加“途径2:从官方获取RPM包后上传到/root目录下”的内容;4.5中增加安装patch的命令;2.2中增加git clone老版本的命令;
2017/10/18:在“环境准备”中增加硬件环境的描述;
2017/10/9:增加3.5的内容;
===============================================
作为公司层面使用gitlab,进行维护时一定要考虑升级、备份、迁移/恢复的事情,代码安全是研发部门的重心之一,故我也整理了下面的内容供维护人员参考。
升级:http://www.cnblogs.com/straycats/p/7707359.html
本地备份:http://www.cnblogs.com/straycats/p/7671204.html
远程备份:http://www.cnblogs.com/straycats/p/7672692.html
迁移/恢复:http://www.cnblogs.com/straycats/p/7702271.html
gitlab接触了一段时间,觉得是一个很不错的开源产品(gitlab的社区版),值得我整理一篇部署教程作为记录。
安装全程选择的用户为root。
一、环境准备
操作系统:centos7(minimal,www.centos.org下载的包是CentOS-7-x86_64-Minimal-1708.iso)
CPU:2核
内存:6G
说明:硬件根据我查到的资料(http://www.cnblogs.com/gnool/p/6128546.html),结合使用人数的考虑,故选择了2核6G的配置,实际配置时需要根据gitlab使用人数的负载来决定硬件配置。
1.1 更换阿里yum(个人习惯)
步骤:
1)下载wget
yum install -y wget
2)备份默认的yum
mv /etc/yum.repos.d /etc/yum.repos.d.backup
3)设置新的yum目录
mkdir /etc/yum.repos.d
4)下载阿里yum配置到该目录中
wget -O /etc/yum.repos.d/CentOS-Base.repo http://mirrors.aliyun.com/repo/Centos-7.repo
5)重建缓存
yum clean all
yum makecache
6)升级所有包(改变软件设置和系统设置,系统版本内核都升级,故需要几分钟耐心等待)
yum update -y
1.2 安装vim(个人习惯)
yum install -y vim
二、获取gitlab汉化包(要部署非汉化版,可以跳过这一块内容)
说明:gitlab中文社区版的项目,v7-v8.8是由Larry Li发起的“GitLab 中文社区版项目”(https://gitlab.com/larryli/gitlab),从 v8.9 之后,@xhang 开始继续该汉化项目(https://gitlab.com/xhang/gitlab)。
2.1 安装git
yum install -y git
2.2 克隆获取汉化版本库
下载最新的汉化包
git clone https://gitlab.com/xhang/gitlab.git
如果是要下载老版本的汉化包,需要加上老版本的分支,比如今天已经是10.0.4,我依旧想下载10.0.2,可以运行下面的语句
git clone https://gitlab.com/xhang/gitlab.git -b v10.0.2-zh
2.3 查看该汉化补丁的版本
cat gitlab/VERSION
我安装的时候正好是国庆,最新的版本才刚出,所以汉化版为10.0.2,故我选择原版也安装10.0.2。

三、部署社区版gitlab
3.1 安装gitlab的依赖项
yum install -y curl openssh-server openssh-clients postfix cronie policycoreutils-python
// 10.x以后开始依赖policycoreutils-python,我之前在使用9.x时还没有依赖该项。
3.2 启动postfix,并设置为开机启动
systemctl start postfix
systemctl enable postfix
如果上面报错:
[root@ ~]# systemctl start postfix
Job for postfix.service failed because the control process exited with error code. See "systemctl status postfix.service" and "journalctl -xe" for details.
debug的过程:中发现具体的问题是:parameter inet_interfaces: no local interface found for ::1
解决方法:
修改 /etc/postfix/main.cf的设置

inet_protocols = ipv4

inet_interfaces = all
3.3 设置防火墙
firewall-cmd --add-service=http --permanent
firewall-cmd --reload
3.4 获取gitlab的rpm包
途径1:通过清华开源镜像站
查看清华开源镜像站,有我需要的10.0.2的rpm包。

获取rpm包
wget https://mirrors.tuna.tsinghua.edu.cn/gitlab-ce/yum/el7/gitlab-ce-10.0.2-ce.0.el7.x86_64.rpm
途径2:从官方获取RPM包后上传到/root目录下
官方下载:https://packages.gitlab.com/gitlab/gitlab-ce/
因为要在centos7上安装版本10.0.2的gitlab,故找到gitlab-ce-10.0.2-ce.0.el7.x86_64.rpm下载到本地后,通过Bitvise SSH Client工具将rpm包上传到gitlab虚拟机的/root目录下。
说明:从下载速度和方便程度来说,走清华的镜像站的方式更优,但是我2017/10/20想下载gitlab10.0.4时,发现清华的镜像站最新只有10.0.3,故在增补“途径2”获取最新的安装包。
3.5 安装rpm包
rpm -i gitlab-ce-10.0.2-ce.0.el7.x86_64.rpm

根据提示,继续执行指令配置gitlab。
gitlab-ctl reconfigure
3.6 修改配置文件gitlab.rb
vim /etc/gitlab/gitlab.rb
将external_url变量的地址修改为gitlab所在centos的ip地址。(因为我这台centos是16.5,故配成图中的地址)。

因为修改了配置文件,故需要重新加载配置内容。
gitlab-ctl reconfigure
gitlab-ctl restart
3.7 查看gitlab版本
head -1 /opt/gitlab/version-manifest.txt
四、覆盖汉化包
4.1 停止gitlab服务
gitlab-ctl stop
4.2 切换到gitlab汉化包所在的目录(即步骤二获取的汉化版gitlab)
cd /root/gitlab
4.3 比较汉化标签和原标签,导出 patch 用的 diff 文件到/root下
git diff v10.0.2 v10.0.2-zh > ../10.0.2-zh.diff
4.4 回到/root目录
cd
4.5 将10.0.2-zh.diff作为补丁更新到gitlab中
yum install patch -y
patch -d /opt/gitlab/embedded/service/gitlab-rails -p1 < 10.0.2-zh.diff
4.6 启动gitlab
gitlab-ctl start
4.7 重新配置gitlab
gitlab-ctl reconfigure
五、设置管理员密码
管理员账号登录的用户名:root
(虽然登录后管理员的用户名为Administrator,但是实际登录的用户名是root)
方法一:网页方式
浏览器访问gitlab所在的ip,输入密码后点击 “Change your password”(如果进行汉化,点击“修改密码”)。


方法二:指令方式
gitlab-rails console production
稍等一会后会出现

irb(main):001:0> user = User.where(id: 1).first     // id为1的是超级管理员
irb(main):002:0>user.password = 'yourpassword'      // 密码必须至少8个字符
irb(main):003:0>user.save!                          // 如没有问题 返回true
exit                                                // 退出
参考资料:
1. https://github.com/marbleqi/gitlab-ce-zh(安装原版)
2. https://gitlab.com/xhang/gitlab(汉化步骤)
转自:https://www.cnblogs.com/straycats/p/7637373.html
三、更改仓库存储位置
默认时GitLab的仓库存储位置在“/var/opt/gitlab/git-data/repositories”,在实际生产环境中显然我们不会存储在这个位置,一般都会划分一个独立的分区来存储仓库的数据,我这里规划把数据存放在“/data/git-data”目录下。
root@test1:~/tools# mkdir -pv /data/git-data
mkdir: 已创建目录 "/data"
mkdir: 已创建目录 "/data/git-data"
root@test1:~# chown -R git.git /data/git-data #修改创建目录的属主和属组为git用户
root@test1:~/tools# cp /etc/gitlab/gitlab.rb /etc/gitlab/gitlab.rb.bak
root@test1:~/tools# vim /etc/gitlab/gitlab.rb
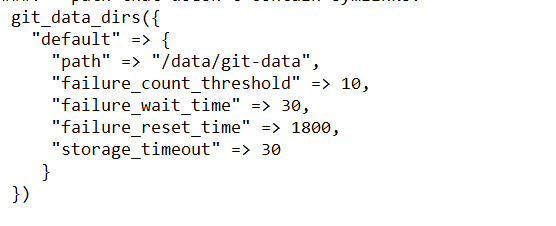
#启用git_data_dirs参数,并修改如下:
git_data_dirs 路径 "/data/git-data"
#并修改external_url的值修改为规划的访问域名
external_url 'http://test.gitlab.net'
root@test1:~/tools# gitlab-ctl reconfigure #重新编译gitlab.rb文件,使用做的修改生效
重新编辑后,GitLab在仓库目录会自动创建一个repositories文件,如下:
root@test1:~# ls -ld /data/git-data/repositories/
drwxrws--- 2 git git 4096 1月 4 14:15 /data/git-data/repositories/
四、修改发送邮箱
1.开启qq邮箱的POP3/SMTP服务并保存好授权码
POP3/IMAP/SMTP/Exchange/CardDAV/CalDAV服务
开启服务:
POP3/SMTP服务 (如何使用 Foxmail 等软件收发邮件?)
已开启 |  关闭
IMAP/SMTP服务 (什么是 IMAP,它又是如何设置?)
已关闭 |  开启
Exchange服务 (什么是Exchange,它又是如何设置?)
已关闭 |  开启
CardDAV/CalDAV服务 (什么是CardDAV/CalDAV,它又是如何设置?)
已关闭 |  开启
2.修改gitlab的配置文件:/etc/gitlab/gitlab.rb

 gitlab_rails['smtp_enable'] = true
 gitlab_rails['smtp_address'] = "smtp.qq.com"
 gitlab_rails['smtp_port'] = 465
 gitlab_rails['smtp_user_name'] = "******@qq.com"
 gitlab_rails['smtp_password'] = "授权码"
 gitlab_rails['smtp_domain'] = "smtp.qq.com"
 gitlab_rails['smtp_authentication'] = "login"
 gitlab_rails['smtp_enable_starttls_auto'] = true
 gitlab_rails['smtp_tls'] = true
 gitlab_rails['gitlab_email_from'] = '******@qq.com'
重启生效:gitlab-ctl reconfigure
五、修改默认端口
1、更改端口
vim /etc/gitlab/gitlab.rb
输入内容:
external_url 'http://10.68.166.10:815'
nginx['listen_port'] = 815
nginx['listen_https'] = false
2、改nigx端口
vim /var/opt/gitlab/nginx/conf/gitlab-http.conf
查找如下内容并修改:
server {
listen *:815;
server_name 10.68.166.10
if ($http_host = "") {
set $http_host_with_default "10.68.166.10:815";
}
}
--------------------------------------------------------------
修改完成后,执行
gitlab-ctl reconfigure
gitlab-ctl restart