SpringSecurity
简介
Spring Security 基于 Spring 框架,提供了一套 Web 应用安全性的完整解决方案。
关于安全方面的两个主要区域是“认证”和“授权”(或者访问控制),一般来说,Web 应用的安全性包括用户认证(Authentication)和用户授权(Authorization)两个部分,这两点也是 Spring Security 重要核心功能。
1、用户认证:验证某个用户是否为系统中的合法主体,也就是说用户能否访问该系统。用户认证一般要求用户提供用户名和密码。系统通过校验用户名和密码来完成认证过程。通俗点说就是系统认为用户是否能登陆。
2、用户授权:验证某个用户是否有权限执行某个操作。在一个系统中,不同用户说具有的权限是不同的。比如对一个文件夹来说,有的用户只能进行读取,有的用户可以进行修改。一般来说,系统不会为不同的用户分配不同的角色,二每个角色则对应一些列的权限。通俗点说就是系统判断用户是否有权限去做某些事情。
SpringSecurity特点:
1、与Spring无缝整合
2、全面的权限控制
3、专门为web开发而设计
3.1、旧版本不能脱离Web环境使用
3.2、新版本对整个框架进行了分层抽取,分成了核心模块和Web模块。单独引入核心模块就可以脱离Web环境
4、重量级
入门案例
搭建基础环境
采用SpringBoot+SpringSecurity的方式搭建项目
<parent>
    <groupId>org.springframework.boot</groupId>
    <artifactId>spring-boot-starter-parent</artifactId>
    <version>2.2.1.RELEASE</version>
    <relativePath/>
</parent>
<dependency>
    <groupId>org.springframework.boot</groupId>
    <artifactId>spring-boot-starter-web</artifactId>
</dependency>
<dependency>
    <groupId>org.springframework.boot</groupId>
    <artifactId>spring-boot-starter-security</artifactId>
</dependency>
controller
@RestController
@RequestMapping("/test")
public class TestController {
    @GetMapping("hello")
    public String add(){
        return "hello security";
    }
}
config:主要是security的安全配置
@Configuration
public class SecurityConfig extends WebSecurityConfigurerAdapter {

    public void Configure(HttpSecurity http) throws Exception {
        http.formLogin()//表单登陆
                .and()
                //认证配置
                .authorizeRequests()
                // 任何请求
                .anyRequest()
                // 都需要身份验证
                .authenticated();
    }
}
yml:
server:
  port: 8080
测试
访问http://localhost:8080/test/hello,他会自动跳转到http://localhost:8080/login
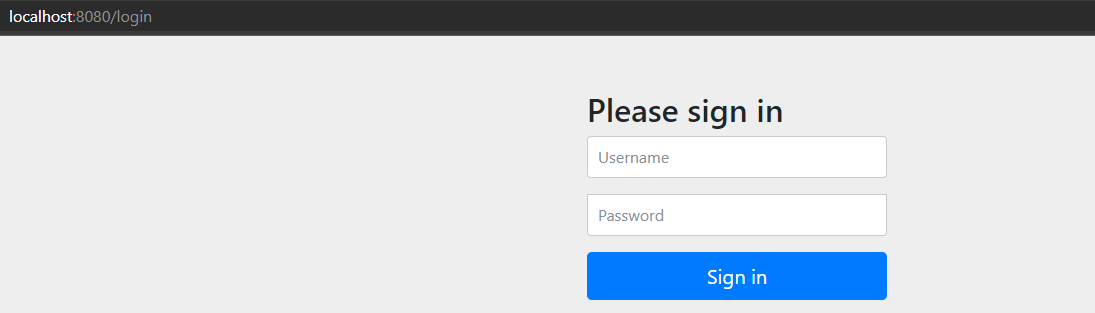
这样,我们的Security初始配置就完成了。我尝试把config注释掉,然后继续访问test/hello,发现,还是能跳转到login页面,这是由于SpringBoot给我们做了一些自动配置。
我们登录一下看看。SpringSecurity默认的用户名为user,密码是:
Using generated security password: 8f777589-cc2f-4649-a4d7-622ddaca7ae2
每次启动都会生成一个密码打印在控制台。
登录:

返回成功。
SpringSecurity基本原理
SpringSecurity本质是一个过滤器链:
项目启动就可以加载过滤器链:
org.springframework.security.web.context.request.async.WebAsyncManagerIntegrationFilter
org.springframework.security.web.context.SecurityContextPersistenceFilter
org.springframework.security.web.header.HeaderWriterFilter
org.springframework.security.web.csrf.CsrfFilter
org.springframework.security.web.authentication.logout.LogoutFilter
org.springframework.security.web.authentication.UsernamePasswordAuthenticationFilter
org.springframework.security.web.authentication.ui.DefaultLoginPageGeneratingFilter
org.springframework.security.web.authentication.ui.DefaultLogoutPageGeneratingFilter
org.springframework.security.web.savedrequest.RequestCacheAwareFilter
org.springframework.security.web.servletapi.SecurityContextHolderAwareRequestFilter
org.springframework.security.web.authentication.AnonymousAuthenticationFilter
org.springframework.security.web.session.SessionManagementFilter
org.springframework.security.web.access.ExceptionTranslationFilter
org.springframework.security.web.access.intercept.FilterSecurityInterceptor
我们下面就找几个过滤器来看一下
FilterSecurityInterceptor:是一个方法级的权限过滤器,基本位于过滤器链的最底层
public class FilterSecurityInterceptor extends AbstractSecurityInterceptor implements Filter {
    private static final String FILTER_APPLIED = "__spring_security_filterSecurityInterceptor_filterApplied";
    private FilterInvocationSecurityMetadataSource securityMetadataSource;
    private boolean observeOncePerRequest = true;

    public FilterSecurityInterceptor() {
    }

    public void init(FilterConfig arg0) {
    }

    public void destroy() {
    }

    /**
    	真正的过滤方法
    */
    public void doFilter(ServletRequest request, ServletResponse response, FilterChain chain) throws IOException, ServletException {
        FilterInvocation fi = new FilterInvocation(request, response, chain);
        this.invoke(fi);
    }

    public FilterInvocationSecurityMetadataSource getSecurityMetadataSource() {
        return this.securityMetadataSource;
    }

    public SecurityMetadataSource obtainSecurityMetadataSource() {
        return this.securityMetadataSource;
    }

    public void setSecurityMetadataSource(FilterInvocationSecurityMetadataSource newSource) {
        this.securityMetadataSource = newSource;
    }

    public Class<?> getSecureObjectClass() {
        return FilterInvocation.class;
    }

    public void invoke(FilterInvocation fi) throws IOException, ServletException {
        if (fi.getRequest() != null && fi.getRequest().getAttribute("__spring_security_filterSecurityInterceptor_filterApplied") != null && this.observeOncePerRequest) {
            fi.getChain().doFilter(fi.getRequest(), fi.getResponse());
        } else {
            if (fi.getRequest() != null && this.observeOncePerRequest) {
                fi.getRequest().setAttribute("__spring_security_filterSecurityInterceptor_filterApplied", Boolean.TRUE);
            }
			//如果之前的过滤器做了放行操作,才会往下执行
            InterceptorStatusToken token = super.beforeInvocation(fi);

            try {
                //执行本身的过滤器方法
                fi.getChain().doFilter(fi.getRequest(), fi.getResponse());
            } finally {
                super.finallyInvocation(token);
            }

            super.afterInvocation(token, (Object)null);
        }

    }

    public boolean isObserveOncePerRequest() {
        return this.observeOncePerRequest;
    }

    public void setObserveOncePerRequest(boolean observeOncePerRequest) {
        this.observeOncePerRequest = observeOncePerRequest;
    }
}
ExceptionTranslationFilter:是一个异常过滤器,用来处理在认证授权过程中抛出异常
public class ExceptionTranslationFilter extends GenericFilterBean {
    private AccessDeniedHandler accessDeniedHandler;
    private AuthenticationEntryPoint authenticationEntryPoint;
    private AuthenticationTrustResolver authenticationTrustResolver;
    private ThrowableAnalyzer throwableAnalyzer;
    private RequestCache requestCache;
    private final MessageSourceAccessor messages;

    public ExceptionTranslationFilter(AuthenticationEntryPoint authenticationEntryPoint) {
        this(authenticationEntryPoint, new HttpSessionRequestCache());
    }

    public ExceptionTranslationFilter(AuthenticationEntryPoint authenticationEntryPoint, RequestCache requestCache) {
        this.accessDeniedHandler = new AccessDeniedHandlerImpl();
        this.authenticationTrustResolver = new AuthenticationTrustResolverImpl();
        this.throwableAnalyzer = new ExceptionTranslationFilter.DefaultThrowableAnalyzer();
        this.requestCache = new HttpSessionRequestCache();
        this.messages = SpringSecurityMessageSource.getAccessor();
        Assert.notNull(authenticationEntryPoint, "authenticationEntryPoint cannot be null");
        Assert.notNull(requestCache, "requestCache cannot be null");
        this.authenticationEntryPoint = authenticationEntryPoint;
        this.requestCache = requestCache;
    }

    public void afterPropertiesSet() {
        Assert.notNull(this.authenticationEntryPoint, "authenticationEntryPoint must be specified");
    }

    public void doFilter(ServletRequest req, ServletResponse res, FilterChain chain) throws IOException, ServletException {
        HttpServletRequest request = (HttpServletRequest)req;
        HttpServletResponse response = (HttpServletResponse)res;

        try {
            chain.doFilter(request, response);
            this.logger.debug("Chain processed normally");
        } catch (IOException var9) {
            throw var9;
        } catch (Exception var10) {
            Throwable[] causeChain = this.throwableAnalyzer.determineCauseChain(var10);
            RuntimeException ase = (AuthenticationException)this.throwableAnalyzer.getFirstThrowableOfType(AuthenticationException.class, causeChain);
            if (ase == null) {
                ase = (AccessDeniedException)this.throwableAnalyzer.getFirstThrowableOfType(AccessDeniedException.class, causeChain);
            }

            if (ase == null) {
                if (var10 instanceof ServletException) {
                    throw (ServletException)var10;
                }

                if (var10 instanceof RuntimeException) {
                    throw (RuntimeException)var10;
                }

                throw new RuntimeException(var10);
            }

            if (response.isCommitted()) {
                throw new ServletException("Unable to handle the Spring Security Exception because the response is already committed.", var10);
            }

            this.handleSpringSecurityException(request, response, chain, (RuntimeException)ase);
        }

    }

    public AuthenticationEntryPoint getAuthenticationEntryPoint() {
        return this.authenticationEntryPoint;
    }

    protected AuthenticationTrustResolver getAuthenticationTrustResolver() {
        return this.authenticationTrustResolver;
    }

    private void handleSpringSecurityException(HttpServletRequest request, HttpServletResponse response, FilterChain chain, RuntimeException exception) throws IOException, ServletException {
        if (exception instanceof AuthenticationException) {
            this.logger.debug("Authentication exception occurred; redirecting to authentication entry point", exception);
            this.sendStartAuthentication(request, response, chain, (AuthenticationException)exception);
        } else if (exception instanceof AccessDeniedException) {
            Authentication authentication = SecurityContextHolder.getContext().getAuthentication();
            if (!this.authenticationTrustResolver.isAnonymous(authentication) && !this.authenticationTrustResolver.isRememberMe(authentication)) {
                this.logger.debug("Access is denied (user is not anonymous); delegating to AccessDeniedHandler", exception);
                this.accessDeniedHandler.handle(request, response, (AccessDeniedException)exception);
            } else {
                this.logger.debug("Access is denied (user is " + (this.authenticationTrustResolver.isAnonymous(authentication) ? "anonymous" : "not fully authenticated") + "); redirecting to authentication entry point", exception);
                this.sendStartAuthentication(request, response, chain, new InsufficientAuthenticationException(this.messages.getMessage("ExceptionTranslationFilter.insufficientAuthentication", "Full authentication is required to access this resource")));
            }
        }

    }

    protected void sendStartAuthentication(HttpServletRequest request, HttpServletResponse response, FilterChain chain, AuthenticationException reason) throws ServletException, IOException {
        SecurityContextHolder.getContext().setAuthentication((Authentication)null);
        this.requestCache.saveRequest(request, response);
        this.logger.debug("Calling Authentication entry point.");
        this.authenticationEntryPoint.commence(request, response, reason);
    }

    public void setAccessDeniedHandler(AccessDeniedHandler accessDeniedHandler) {
        Assert.notNull(accessDeniedHandler, "AccessDeniedHandler required");
        this.accessDeniedHandler = accessDeniedHandler;
    }

    public void setAuthenticationTrustResolver(AuthenticationTrustResolver authenticationTrustResolver) {
        Assert.notNull(authenticationTrustResolver, "authenticationTrustResolver must not be null");
        this.authenticationTrustResolver = authenticationTrustResolver;
    }

    public void setThrowableAnalyzer(ThrowableAnalyzer throwableAnalyzer) {
        Assert.notNull(throwableAnalyzer, "throwableAnalyzer must not be null");
        this.throwableAnalyzer = throwableAnalyzer;
    }

    private static final class DefaultThrowableAnalyzer extends ThrowableAnalyzer {
        private DefaultThrowableAnalyzer() {
        }

        protected void initExtractorMap() {
            super.initExtractorMap();
            this.registerExtractor(ServletException.class, (throwable) -> {
                ThrowableAnalyzer.verifyThrowableHierarchy(throwable, ServletException.class);
                return ((ServletException)throwable).getRootCause();
            });
        }
    }
}
它判断是哪个异常,然后针对不同异常进行处理handleSpringSecurityException。
UsernamePasswordAuthenticationFilter:对/login的POST请求做拦截,校验表单中用户名、密码。
public class UsernamePasswordAuthenticationFilter extends AbstractAuthenticationProcessingFilter {
    public static final String SPRING_SECURITY_FORM_USERNAME_KEY = "username";
    public static final String SPRING_SECURITY_FORM_PASSWORD_KEY = "password";
    private String usernameParameter = "username";
    private String passwordParameter = "password";
    private boolean postOnly = true;

    public UsernamePasswordAuthenticationFilter() {
        super(new AntPathRequestMatcher("/login", "POST"));
    }

    public Authentication attemptAuthentication(HttpServletRequest request, HttpServletResponse response) throws AuthenticationException {
        if (this.postOnly && !request.getMethod().equals("POST")) {
            throw new AuthenticationServiceException("Authentication method not supported: " + request.getMethod());
        } else {
            String username = this.obtainUsername(request);
            String password = this.obtainPassword(request);
            if (username == null) {
                username = "";
            }

            if (password == null) {
                password = "";
            }

            username = username.trim();
            UsernamePasswordAuthenticationToken authRequest = new UsernamePasswordAuthenticationToken(username, password);
            this.setDetails(request, authRequest);
            return this.getAuthenticationManager().authenticate(authRequest);
        }
    }

    @Nullable
    protected String obtainPassword(HttpServletRequest request) {
        return request.getParameter(this.passwordParameter);
    }

    @Nullable
    protected String obtainUsername(HttpServletRequest request) {
        return request.getParameter(this.usernameParameter);
    }

    protected void setDetails(HttpServletRequest request, UsernamePasswordAuthenticationToken authRequest) {
        authRequest.setDetails(this.authenticationDetailsSource.buildDetails(request));
    }

    public void setUsernameParameter(String usernameParameter) {
        Assert.hasText(usernameParameter, "Username parameter must not be empty or null");
        this.usernameParameter = usernameParameter;
    }

    public void setPasswordParameter(String passwordParameter) {
        Assert.hasText(passwordParameter, "Password parameter must not be empty or null");
        this.passwordParameter = passwordParameter;
    }

    public void setPostOnly(boolean postOnly) {
        this.postOnly = postOnly;
    }

    public final String getUsernameParameter() {
        return this.usernameParameter;
    }

    public final String getPasswordParameter() {
        return this.passwordParameter;
    }
}
attemptAuthentication方法:判断是不是post提交,然后得到用户名和密码,然后进行校验,当然,它用的是默认的用户名和密码来进行校验的。实际开发中,这里要查询数据库来进行校验。
我们查看了几个过滤器,那么这些过滤器是如何加载的呢?下面就来看看。
过滤器是如何加载的
由于我们使用的是SpringBoot,它自动的配置了SpringSecurity的相关内容,本质上需要一些过程。SpringSecurity配置过滤器,这个过滤器叫做DelegatingFilterProxy,这些过程就是在这个过滤器中执行
DelegatingFilterProxy
public void doFilter(ServletRequest request, ServletResponse response, FilterChain filterChain) throws ServletException, IOException {
    //得到当前对象
    Filter delegateToUse = this.delegate;
    if (delegateToUse == null) {
        synchronized(this.delegateMonitor) {
            delegateToUse = this.delegate;
            if (delegateToUse == null) {
                WebApplicationContext wac = this.findWebApplicationContext();
                if (wac == null) {
                    throw new IllegalStateException("No WebApplicationContext found: no ContextLoaderListener or DispatcherServlet registered?");
                }
				// 进行一系列的初始化后,调用初始化方法
                delegateToUse = this.initDelegate(wac);
            }

            this.delegate = delegateToUse;
        }
    }

    this.invokeDelegate(delegateToUse, request, response, filterChain);
}
initDelegate
protected Filter initDelegate(WebApplicationContext wac) throws ServletException {
    String targetBeanName = this.getTargetBeanName();
    Assert.state(targetBeanName != null, "No target bean name set");
    // 从容器中获取Filter,targetBeanName有一个固定的值FilterChainProxy
    Filter delegate = (Filter)wac.getBean(targetBeanName, Filter.class);
    if (this.isTargetFilterLifecycle()) {
        delegate.init(this.getFilterConfig());
    }

    return delegate;
}
FilterChainProxy:主要是将所有过滤器加载到过滤器链中。
public void doFilter(ServletRequest request, ServletResponse response, FilterChain chain) throws IOException, ServletException {
    boolean clearContext = request.getAttribute(FILTER_APPLIED) == null;
    if (clearContext) {
        try {
            request.setAttribute(FILTER_APPLIED, Boolean.TRUE);

            this.doFilterInternal(request, response, chain);
        } finally {
            SecurityContextHolder.clearContext();
            request.removeAttribute(FILTER_APPLIED);
        }
    } else {
        this.doFilterInternal(request, response, chain);
    }

}
doFilterInternal:
private void doFilterInternal(ServletRequest request, ServletResponse response, FilterChain chain) throws IOException, ServletException {
    FirewalledRequest fwRequest = this.firewall.getFirewalledRequest((HttpServletRequest)request);
    HttpServletResponse fwResponse = this.firewall.getFirewalledResponse((HttpServletResponse)response);
    //加载过滤器中的所有过滤器
    List<Filter> filters = this.getFilters((HttpServletRequest)fwRequest);
    if (filters != null && filters.size() != 0) {
        FilterChainProxy.VirtualFilterChain vfc = new FilterChainProxy.VirtualFilterChain(fwRequest, chain, filters);
        vfc.doFilter(fwRequest, fwResponse);
    } else {
        if (logger.isDebugEnabled()) {
            logger.debug(UrlUtils.buildRequestUrl(fwRequest) + (filters == null ? " has no matching filters" : " has an empty filter list"));
        }

        fwRequest.reset();
        chain.doFilter(fwRequest, fwResponse);
    }
}
总结:
流程:
1、配置DelegatingFilterProxy
2、调用DelegatingFilterProxy中的doFilter方法,这个方法中调用了initDelegate
3、通过targetBeanName从容器中拿到所有的过滤器,targetBeanName有一个固定的值FilterChainProxy。
4、掉用FilterChainProxy中的doFilter方法,这个方法中调用doFilterInternal方法,doFilterInternal会获取到所有的过滤器,并执行这些过滤器
SpringSecurity两个重要的接口
UserDetailsService接口
当什么也没有配置的时候,帐号和密码是由SPring Security定义生成的,而在实际开发中账户和密码都是从数据库中查询出来,所以要通过自定义逻辑控制认证逻辑。
如果要自定义逻辑时,只需实现UserDetailsService接口即可。接口如下:
public interface UserDetailsService {
    UserDetails loadUserByUsername(String var1) throws UsernameNotFoundException;
}
返回值:UserDetails
方法参数:username
如果我们要自己去查数据库,然后认证,需要我们去继承UsernamePasswordAuthenticationFilter,然后实现attemptAuthentication和UsernamePasswordAuthenticationFilter父类的successfulAuthentication和unsuccessfulAuthentication方法,在attemptAuthentication方法中得到用户名和密码,如果认证成功,就会调用successfulAuthentication,不成功就调用unsuccessfulAuthentication。从数据库中获取密码的操作是在UserDetailsService中完成的,这个方法会返回一个User对象,这个对象是由Security提供的。
PasswordEncoder接口
数据加密接口,用于返回User对象里面密码的加密
用户认证案例
web权限控制方案:
1、认证:
就是通过用户名和密码进行登录的过程。
要想登录,就需要设置用户名和密码。而设置用户名和密码有三种方式
第一种、通过配置文件配置
spring:
  security:
    user:
      name: zhangsan
      password: 123456
第二种、通过配置类
@Configuration
public class SecurityConfig extends WebSecurityConfigurerAdapter {

    @Override
    protected void configure(AuthenticationManagerBuilder auth) throws Exception {
        BCryptPasswordEncoder bcp = new BCryptPasswordEncoder();
        //将密码进行加密
        String password = bcp.encode( "123456" );
        //认证信息加载到内存中
        auth.inMemoryAuthentication()
                //添加用户名
                .withUser( "zhangsan" )
                //密码
                .password( password )
                //角色
                .roles( "Admin" );
    }

    /**
     * 加密时需要用到PasswordEncoder接口,所以需要在容器中配置PasswordEncoder,
     * 这里我们创建PasswordEncoder的实现类BCryptPasswordEncoder。
     * 如果不设置会报错There is no PasswordEncoder mapped for the id "null"
     * @return
     */
    @Bean
    public PasswordEncoder getPasswordEncoder(){
        return new BCryptPasswordEncoder();
    }
}
第三种、自定义实现类
1、创建配置类,设置使用哪个userDetailsService实现类
@Configuration
public class SecurityConfigDetails extends WebSecurityConfigurerAdapter {

    @Autowired
    private UserDetailsService userDetailsService;

    @Override
    protected void configure(AuthenticationManagerBuilder auth) throws Exception {
        auth.userDetailsService( userDetailsService )
                .passwordEncoder( getPasswordEncoder() );
    }

    @Bean
    public PasswordEncoder getPasswordEncoder(){
        return new BCryptPasswordEncoder();
    }
}
2、编写实现类,返回User对象,User对爱过你有用户名、密码、角色信息。
@Service("userDetailsService")
public class MyUserDetailsService implements UserDetailsService {

    @Override
    public UserDetails loadUserByUsername(String s) throws UsernameNotFoundException {
        //构造权限信息
        List<GrantedAuthority> auths
                    = AuthorityUtils.commaSeparatedStringToAuthorityList( "" );
        //这里账户和密码可以通过数据库查出
        return new User( "zhangsan", new BCryptPasswordEncoder().encode( "123456" ), auths);
    }
}
整合Mybatis-plus测试
1、导入依赖
<dependency>
    <groupId>org.springframework.boot</groupId>
    <artifactId>spring-boot-starter-web</artifactId>
</dependency>
<dependency>
    <groupId>org.springframework.boot</groupId>
    <artifactId>spring-boot-starter-security</artifactId>
</dependency>
<dependency>
    <groupId>org.springframework.boot</groupId>
    <artifactId>spring-boot-starter-test</artifactId>
    <scope>test</scope>
    <exclusions>
        <exclusion>
            <groupId>org.junit.vintage</groupId>
            <artifactId>junit-vintage-engine</artifactId>
        </exclusion>
    </exclusions>
</dependency>
<dependency>
    <groupId>com.baomidou</groupId>
    <artifactId>mybatis-plus-boot-starter</artifactId>
    <version>3.0.5</version>
</dependency>
<dependency>
    <groupId>mysql</groupId>
    <artifactId>mysql-connector-java</artifactId>
</dependency>
<dependency>
    <groupId>org.projectlombok</groupId>
    <artifactId>lombok</artifactId>
</dependency>
2、数据库

3、实体类
@Data
@NoArgsConstructor
@AllArgsConstructor
public class Users {
    private Integer id;
    private String userName;
    private String password;
}
4、整合MybatisPlus
@Repository
public interface UserMapper extends BaseMapper<Users> {
}
5、SecurityConfigDetails中调用mapper里面的方法查询数据库
@Service("userDetailsService")
public class MyUserDetailsService implements UserDetailsService {

    @Autowired
    private UserMapper userMapper;

    @Override
    public UserDetails loadUserByUsername(String userName) throws UsernameNotFoundException {
        // 根据用户名查询用户信息
        QueryWrapper<Users> wrapper = new QueryWrapper<Users>();
        wrapper.eq( "userName", userName );

        Users users = userMapper.selectOne( wrapper );
        if (users == null) {
            throw new UsernameNotFoundException( "用户名找不到!" );
        }
        //构造权限信息
        List<GrantedAuthority> auths
                = AuthorityUtils.commaSeparatedStringToAuthorityList( "" );
        //从数据库返回users对象,得到用户名和密码,返回
        return new User( users.getUserName(), new BCryptPasswordEncoder().encode( users.getPassword() ), auths );
    }
}
6、yml
spring:
  datasource:
    driver-class-name: com.mysql.jdbc.Driver
    url: jdbc:mysql://192.168.101.128:3306/springsecurity?useSSL=false
    username: root
    password: 123456
7、启动类
@SpringBootApplication
@MapperScan("com.ybl.securitydemo1.mapper")
public class Securitydemo1Application {

    public static void main(String[] args) {
        SpringApplication.run( Securitydemo1Application.class, args );
    }

}
自定义登录页面
在config中添加一下代码
@Override
protected void configure(HttpSecurity http) throws Exception {
    //跳转到自定义的登录页面
    http.formLogin()
            //登录页面地址
            .loginPage( "/login.html" )
            //登录访问路径
            .loginProcessingUrl( "/user/login" )
            //登录成功后跳转路径
            .defaultSuccessUrl( "/test/index" ).permitAll()
            //表示访问下面这些路径的时候不需要认证
            .and().authorizeRequests()
                .antMatchers( "/","/test/hello","/user/login" ).permitAll()
            .anyRequest().authenticated()
            //关闭csrf防护
            .and().csrf().disable();

}
html
<!DOCTYPE html>
<html lang="zh">
<head>

    <title>login</title>
</head>
<body>
    <form action="/user/login" method="post">
        用户名:<input name="username" type="text"/>
        <br/>
        密码:  <input name="password" type="password"/>
        <input type="submit" value="login">
    </form>
</body>
</html>
controller
@GetMapping("/index")
public String index(){
    return "hello index";
}
2、授权:
基于角色或权限进行访问控制
hasAuthority:如果当前的主体具有指定的权限,返回true,没有返回false
1、在配置类中设置当前访问地址需要哪些权限
http.formLogin()
    .loginPage( "/login.html" )
    .loginProcessingUrl( "/user/login" )
    .defaultSuccessUrl( "/test/index" ).permitAll()
    .and().authorizeRequests()
    .antMatchers( "/","/test/hello","/user/login" ).permitAll()
    //当前用户,只有具有amdins权限才可以访问这个路径
    .antMatchers( "/test/index" ).hasAuthority("admins")
    .and().csrf().disable();
2、在userDetailsServcer中在User对象中设置权限
@Override
public UserDetails loadUserByUsername(String userName) throws UsernameNotFoundException {
    // 根据用户名查询用户信息
    QueryWrapper<Users> wrapper = new QueryWrapper<Users>();
    wrapper.eq( "userName", userName );

    Users users = userMapper.selectOne( wrapper );
    if (users == null) {
        throw new UsernameNotFoundException( "用户名找不到!" );
    }
    //构造权限信息
    List<GrantedAuthority> auths
            = AuthorityUtils.commaSeparatedStringToAuthorityList( "admins" );
    //从数据库返回users对象,得到用户名和密码,返回
    return new User( users.getUsername(), new BCryptPasswordEncoder().encode( users.getPassword() ), auths );
}

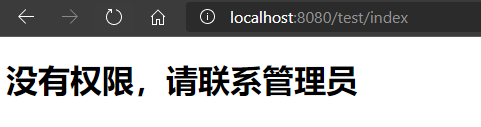
将权限信息改为admins试试
表示没有权限访问。
hasAuthority只能有一个权限,如果设置的是两个或多个权限,也是不能访问的。如hasAuthority("admins","manager")这种就是不能访问的。这就需要hasAnyAuthority这种方式来设置了。
hasAnyAuthority
如果当前的主体有任何提供的角色(给定的作为一个逗号分割的字符串列表)的话,返回true。
设置hasAnyAuthority,其他不变
hasAnyAuthority("admins","manager")

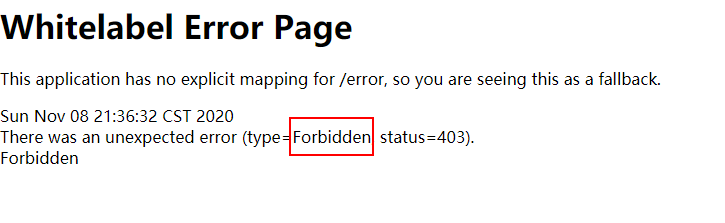
hasRole
如果用户具备给定角色就允许访问,否则出现403,有指定角色,返回true
底层源码
private static String hasRole(String role) {
    Assert.notNull(role, "role cannot be null");
    if (role.startsWith("ROLE_")) {
        throw new IllegalArgumentException(
            "role should not start with 'ROLE_' since it is automatically inserted. Got '"
            + role + "'");
    }
    return "hasRole('ROLE_" + role + "')";
}
所以在构造权限的时候,需要在角色前面拼接上ROLE_.
//构造权限信息
List<GrantedAuthority> auths
    = AuthorityUtils.commaSeparatedStringToAuthorityList( "admins,ROLE_sale" );
http.formLogin()
    //登录页面地址
    .loginPage( "/login.html" )
    //登录访问路径
    .loginProcessingUrl( "/user/login" )
    //登录成功后跳转路径
    .defaultSuccessUrl( "/test/index" ).permitAll()
    //表示访问下面这些路径的时候不需要认证
    .and().authorizeRequests()
    .antMatchers( "/","/test/hello","/user/login" ).permitAll()
    //设置角色
    .antMatchers( "/test/index" ).hasRole("sale")
    //关闭csrf防护
    .and().csrf().disable();
hasAnyRole
这个和上面类似,用于多个角色的认证。
3、自定义403页面
config:
@Override
protected void configure(HttpSecurity http) throws Exception {
    http.exceptionHandling().accessDeniedPage( "/unauth.html" );
    /**省略*
}
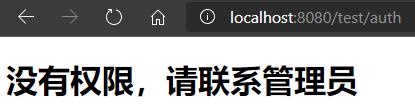
unauth.html
<!DOCTYPE html>
<html lang="zh">
<head>
<title>Title</title>
</head>
<body>
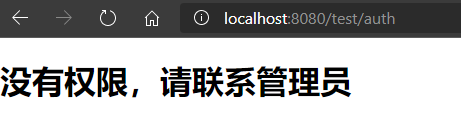
<h1>没有权限,请联系管理员</h1>
</body>
</html>
MyUserDetailsService
List<GrantedAuthority> auths
        = AuthorityUtils.commaSeparatedStringToAuthorityList( "ROLE_GG" );
用户认证授权注解的使用
@Secured
要想使用权限注解,需要启用权限注解功能。在启动类上加上下面注解
@EnableGlobalMethodSecurity(securedEnabled = true)
判断是否具有某个角色,另外需要注意的是这里匹配的字符串需要添加前缀“ROLE_”
使用前,要注释掉配置文件中的权限配置信息。
controller
@GetMapping("/auth")
@Secured( "ROLE_GG" )
public String auth(){
    return "hello auth";
}

将权限信息中,角色改为ROLE_XX,再次测试
@PreAuthorize
开启注解功能
@EnableGlobalMethodSecurity(prePostEnabled = true)
这个注解适合进入方法前的权限验证,@PreAuthorize可以将登录用户的roles/permissions参数传递到方法中
//这种表示具有某个权限
@PreAuthorize( "hasAnyAuthority('menu:update')" )
//这中表示具有某个角色
//@PreAuthorize( "hasRole('ROLE_admin')" )
public String auth(){
    return "hello auth";
}
List<GrantedAuthority> auths
        = AuthorityUtils.commaSeparatedStringToAuthorityList( "menu:update" );

在权限构造信息中将menu:update改为menu:select再次进行测试。
@PostAuthorize
@EnableGlobalMethodSecurity(prePostEnabled = true)
这个注解使用不多,在方法执行后在进行权限验证,适合验证带有返回值的权限。
@PostFilter
权限验证之后对数据进行过滤,留下用户名是admin的数据
表达式中的filterObject引用的是方法返回值List中的某一个元素
例子:
@PostFilter("filterObject.username='admin1'")
public List<UserInfo> getAllUser(){
   List<UserInfo> list = new ArrayList<>();
   list.add(new UserInfo(1,"admin1","666"));
   list.add(new UserInfo(2,"admin2","777"));
   return list
}
这种情况下,返回的list中admin1着跳数据不会返回
对返回数据做过滤
@PreFilter
这个就是对请求参数做过滤
@PreFilter(value="filterObject.id%2==0")
public List<UserInfo> getAllUser(@RequestBody List<UserInfo> list){
   list.forEach(t->{
      System.out.println(t.getId()+"	"+t.getUsername());
   });
}
这里只会打印能被2整除的UserInfo
用户注销
success.html
<!DOCTYPE html>
<html lang="zh">
<head>

    <title>Title</title>
</head>
<body>
login success<br/>
    <a href="/logout">退出</a>
</body>
</html>
config
@Override
protected void configure(HttpSecurity http) throws Exception {
    http.exceptionHandling().accessDeniedPage( "/unauth.html" );
    //跳转到自定义的登录页面
    http.formLogin()
        //登录页面地址
        .loginPage( "/login.html" )
        //登录访问路径
        .loginProcessingUrl( "/user/login" )
        //登录成功后跳转路径
        .defaultSuccessUrl( "/success.html" ).permitAll()
        //表示访问下面这些路径的时候不需要认证
        .and().authorizeRequests()
        .antMatchers( "/","/test/hello","/user/login" ).permitAll()
        //当前用户,只有具有amdins权限才可以访问这个路径
        //.antMatchers( "/test/index" ).hasAuthority("admins")
        //.antMatchers( "/test/index" ).hasAnyAuthority("admins","manager")
        //
        //.antMatchers( "/test/index" ).hasRole("sale")
        //关闭csrf防护
        .and().csrf().disable();

    http.logout().logoutUrl( "/logout" ).logoutSuccessUrl( "/test/hello" ).permitAll();

}

点击退出

然后访问test/index,发现可以访问

访问test/auth,发现回到了登录页面
记住我功能
实现原理
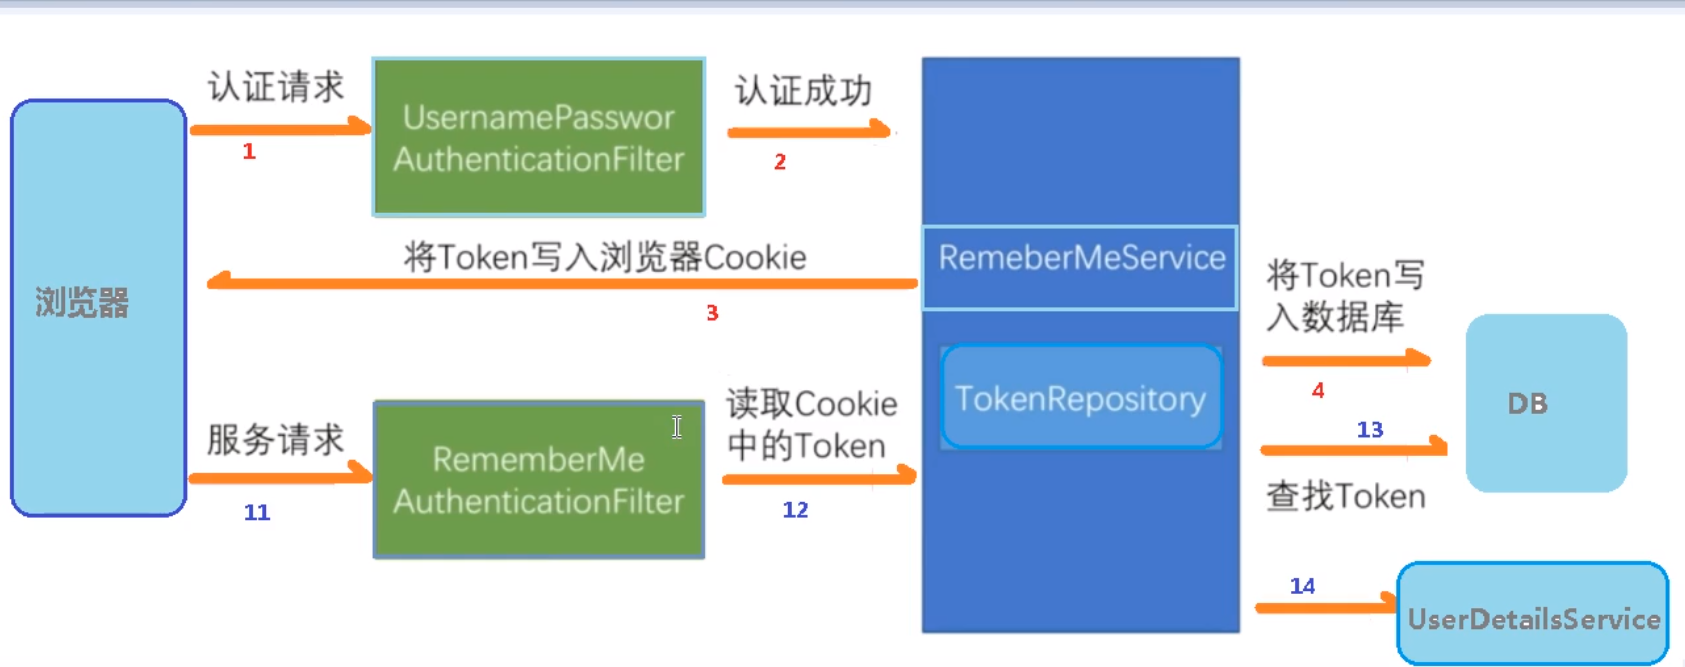
具体实现
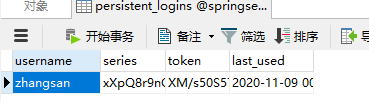
这个创建表语句在org.springframework.security.web.authentication.rememberme.JdbcTokenRepositoryImpl中
创建数据库表:
CREATE TABLE persistent_logins (
	`username` VARCHAR(64) NOT NULL,
	`series` VARCHAR(64) PRIMARY KEY,
	`token` VARCHAR(64) NOT NULL,
	`last_used` TIMESTAMP NOT NULL DEFAULT CURRENT_TIMESTAMP ON UPDATE CURRENT_TIMESTAMP
)ENGINE=INNODB DEFAULT CHARSET=utf8;
修改配置类
@Autowired
private DataSource dataSource;

@Bean
public PersistentTokenRepository persistentTokenRepository() {
    JdbcTokenRepositoryImpl tokenRepository = new JdbcTokenRepositoryImpl();
    tokenRepository.setDataSource(dataSource);
    //这个方法是自动创建数据库,我们自己创建了,这里就不用创建了
    //tokenRepository.setCreateTableOnStartup( true );
    return tokenRepository;
}

@Override
    protected void configure(HttpSecurity http) throws Exception {
        http.exceptionHandling().accessDeniedPage( "/unauth.html" );
        http.formLogin()
                .loginPage( "/login.html" )
                .loginProcessingUrl( "/user/login" )
                .defaultSuccessUrl( "/success.html" ).permitAll()
                .and().authorizeRequests()
                .antMatchers( "/", "/test/hello", "/user/login" ).permitAll()
            	//记住我功能
                .and().rememberMe().tokenRepository( persistentTokenRepository() )
                //设置有效时长
                .tokenValiditySeconds( 60 )
                .userDetailsService(userDetailsService)
                .and().csrf().disable();

        http.logout().logoutUrl( "/logout" ).logoutSuccessUrl( "/test/hello" ).permitAll();
    }
在登录页面添加一个复选框,勾选表示需要自动登录功能,不勾选表示不需要
<!DOCTYPE html>
<html lang="zh">
<head>

    <title>login</title>
</head>
<body>
    <form action="/user/login" method="post">
        用户名:<input name="username" type="text"/>
        <br/>
        密码:  <input name="password" type="password"/>
        <input type="submit" value="login">
        <br/>
        <input type="checkbox" name="remember-me"/>自动登录
    </form>
</body>
</html>
checkbox的name必须为remeber-me
访问测试

CSRF理解
跨站请求伪造(Cross-site request forgery),也被称为one-click attack或者sessionriding,通常写为CSRF或者XSRF,是一种挟制用户在当前已登录的Web应用程序上执行非本意的操作的攻击方式。跟跨站脚本(XSS)相比,XSS利用的是用户对指定网站的信任,CSRF利用的是网站对用户网页浏览器的信任。
跨站请求攻击,简单地说,是攻击者通过一些技术手段欺骗用户的浏览器去访问自己曾经认证过的网站并运行一些操作(如发邮件、信息、甚至财产操作如转账和购买商品)。由于浏览器曾经认证过,所以被访问的网站会认为是真正的用户操作而去运行。这利用了web中用户身份验证的一个漏洞:简单的身份验证只能保证请求发自某个用户的浏览器,缺不能保证请求本身是用户自愿发出的。
SpringSecurity 4.0开始,默认情况下会启用CSRF保护,以防止CSRF攻击应用程序,SpringSecurity CSRF会针对PATCH、POST、PUT和DELETE方法进行保护,对get请求不会保护。
SpringSecurity 怎么开启呢?
我们先把.and().csrf().disable();这行代码注释掉就行,SpringSecurity默认是开启的。然后在需要PATCH、POST、PUT和DELETE的请求的form表单中加上一个隐藏域就行。
隐藏域:
<input type="hidden" th:name="${_csrf.parmameterName}" th:value="${_csrf.token}}"/>
这里th:name 是用的是thymeleaf模板的标签。要想使用thymeleaf模板引擎,需要在html标签上添加如下代码
<html lang="zh" xmlns:th="http://www.thymeleaf.org">
导入依赖
<dependency>
    <groupId>org.springframework.boot</groupId>
    <artifactId>spring-boot-starter-thymeleaf</artifactId>
</dependency>
CSRF原理
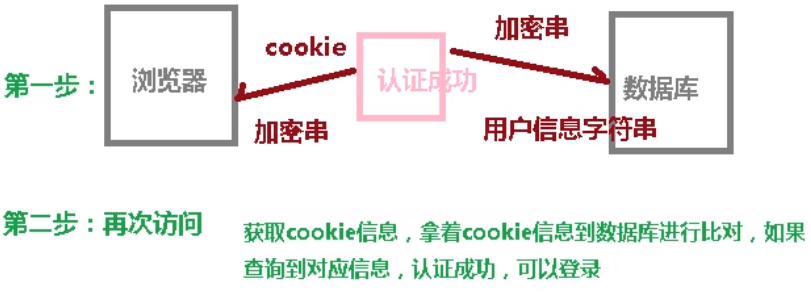
1、生成csrfToken保存到HttpSession或者Cookie中
2、再次访问的时候,需要携带token到后台和session存储的token进行比对,一样的话就可以访问,不一样就不允许访问。
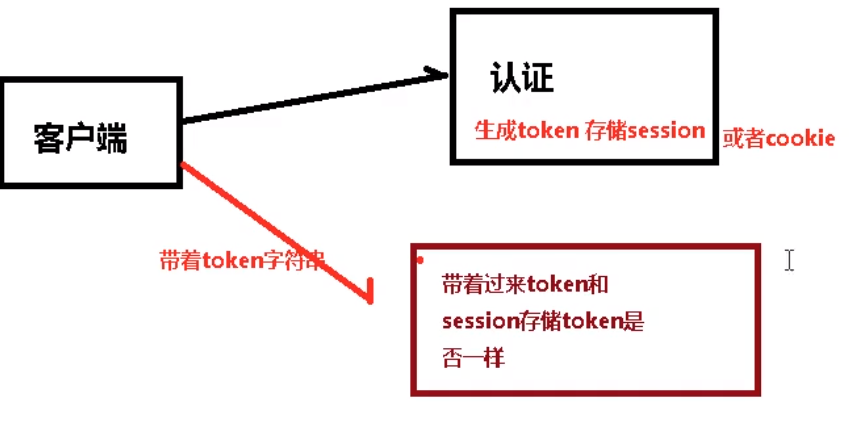
csrf使用CSRFFilter过滤器实现的
Oauth2.0
什么是OAuth2.0?
OAuth(开放授权)是一个开放标准,允许用户授权第三方应用访问他们存储在另外的服务提供者上的信息,而不需要将用户名和密码供给第三方应用或分享他们数据的所有内容。OAuh2.0是 OAuth协议的延续版本,但不向后兼容 OAuth1.0即完全废止了 OAuth1.0。很大公司如 Google, Yahoo, Microsoft等都提供了 OAuh认证服务,这些都足以说明 OAuh标准逐渐成为开放资源授权的标准。
参考:https://baike.baidu.com/item/oAuth/7153134?rf=aladdin
Oauth协议:https://tools.ietf.org/html/rfc6749
OAuth2.0流程示例
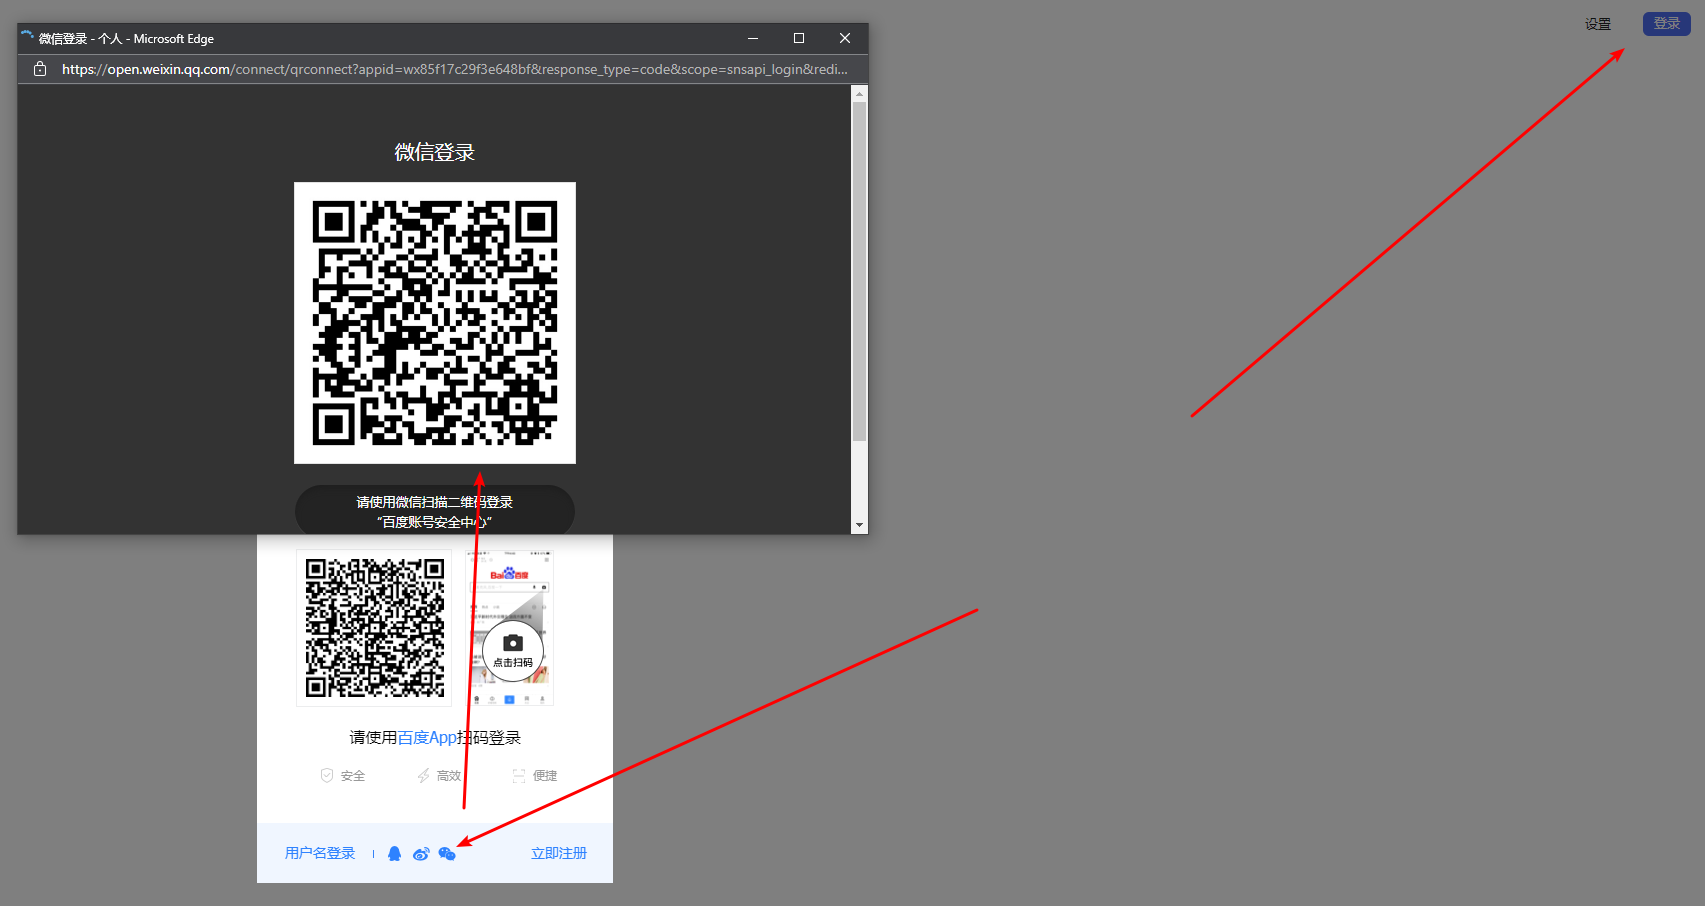
OAuth认证流程,简单理解,就是允许我们将之前实现的认证和授权的过程交由一个独立的第三方来进行担保。而OAuth协议就是用来定义如何让这个第三方的担保有效且双方可信。例如我们下面用户访问百度登录后的资源为例:
1、用户希望登录百度,访问百度登录后的资源。而用户可以选择使用微信账号进行登录,实际上是将授权认证的流程交由微信(独立第三方)来进行担保。
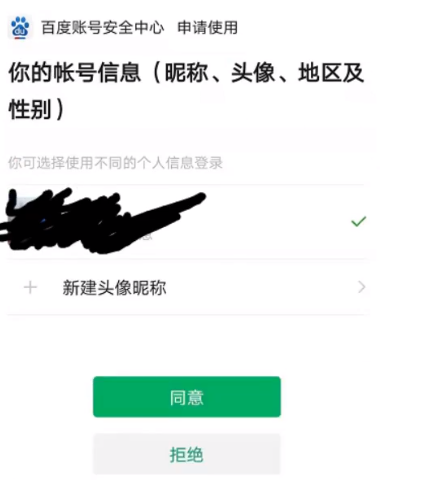
2、用户扫描二维码的方式,在微信完成登录认证
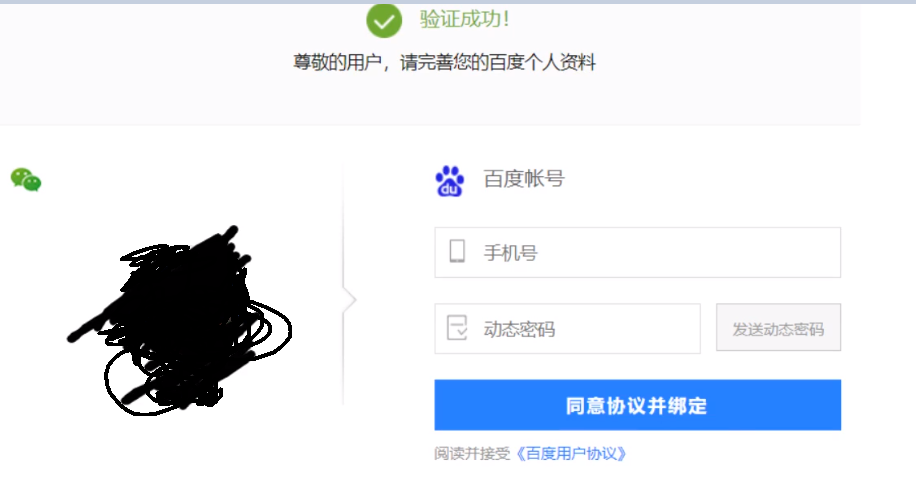
3、用户选择同意后,进入百度的流程。这时,百度会获取用户的微信身份信息,与百度自己的一个注册账号进行绑定。绑定完成之后,就会用这个绑定后的账号完成自己的登录流程。
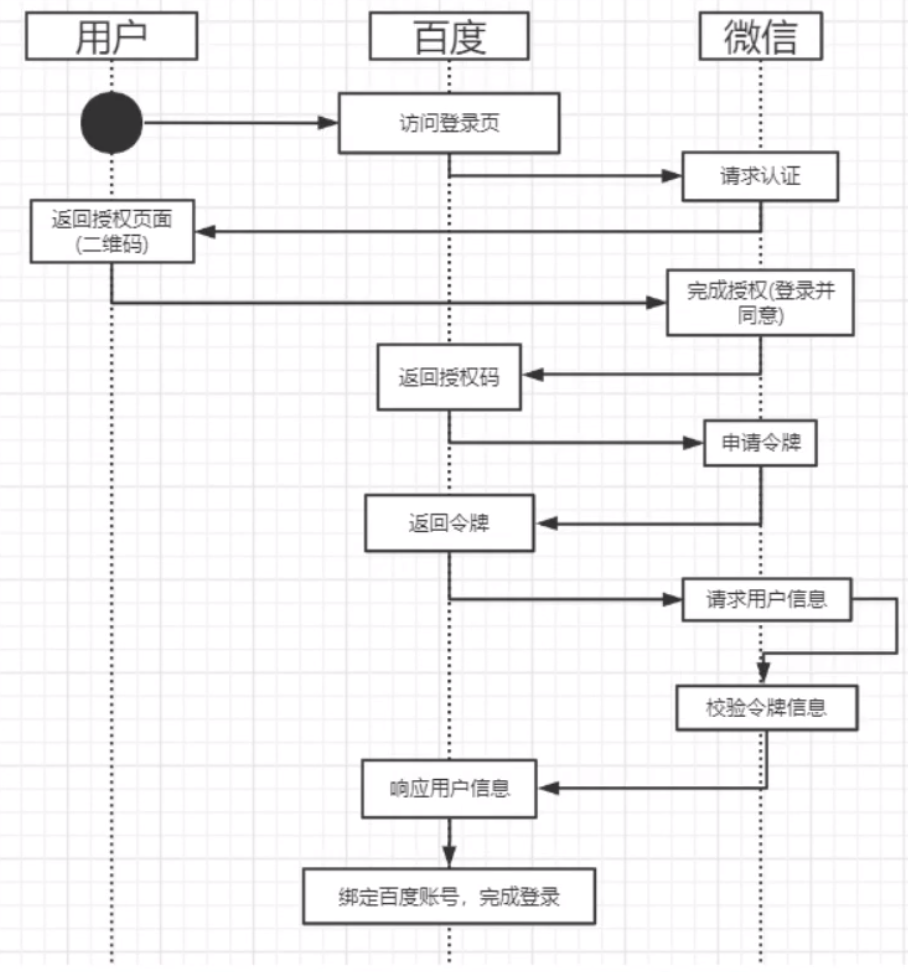
以上这个过程,实际上就是一个典型的 OAuth2.0的认证流程。在这个登录认证的过程中,实际上是只有用户和百度之间有资源访问的关系,而微信就是作为一个独立的第三方,使用用户在微信里的身份信息,来对用户的身份进行了一次担保认证。认证完成后,百度就可以获取到用户的微信身份信息,进入自己的后续流程,与百度内部的一个用户信息完成绑定及登录。整个流程大致是这样

整个过程,最重要的问题就是如何让用户、百度和微信这三方实现权限认证的共信。这其中涉及到许多的细节,而AOuth2.0协议就是用来定义这个过程中,各方的行为标准。
OAuth2.0协议
OAuth2.0协议包含了一下几个角色:
1、客户端——如浏览器、微信客户端
本身不存储资源,需要通过资源拥有者的授权去请求资源服务器服务器的资源。
2、资源拥有者——用户(拥有微信账号)
通常是用户,也可以是应用程序,即该资源的拥有者
3、授权服务器(也称为认证服务器)——示例中的微信
用于服务提供者对资源拥有的身份进行认证,对访问资源进行授权,认证成功后会给客户端发令牌(access_toke),作为客户端访问资源服务的凭证。
4、资源服务器——示例中的微信和百度
存储资源的服务器。本示例中,微信通过OAuth协议让百度可以获取到自己存储的用户信息,而百度则通过OAuth协议,让用户可以访问自己的受保护的资源。
这其中有几个重要的概念:
clientDetails(client id):客户信息。代表百度在微信中的唯一索引。在微信中用 appid区分 userDetails
secret:秘钥。代表百度获取微信信息需要提供的一个加密字段。这跟微信采用的加密算法有关。
scope:授权作用域。代表百度可以获取到的微信的信息范围。例如登录范围的凭证无法获取用户信息范围的信息。
access_token:授权码。百度获取微信用户信息的凭证。微信中叫做接口调用凭证。
grant_type:授权类型。例如微信目前仅支持基于授权码的 authorization_code模式。而OAth2.0还可以有其他的授权方式,例如输入微信的用户名和密码的方式。
userDetails(user_id):授权用户标识。在示例中代表用户的微信号。在微信中用 openid区分
关于微信登录的功能介绍,可以查看微信的官方文档:微信开放文档 (qq.com)