s
battery-historian 使用方法
https://www.cnblogs.com/jiablogs/p/8891586.html
battery-historian
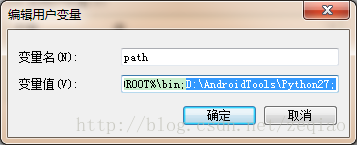
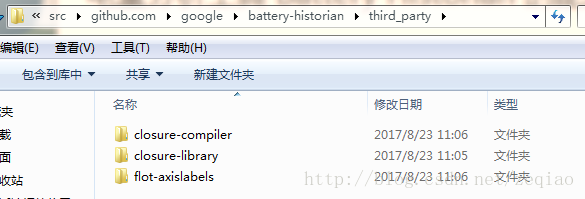
/opt/files/go/src/github.com/google/battery-historian
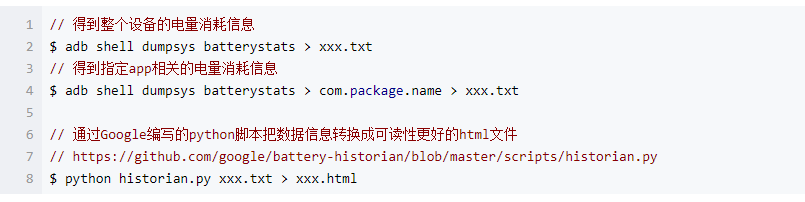
adb shell dumpsys batterystats --reset
重启设备命令:
adb reboot
获得详细的唤醒锁数据
adb shell dumpsys batterystats –enable full-wake-history 注意:由于记录所有唤醒锁数据会导致日志数量超过上限(50M),因此最好在分析具体应用时使用上述操作,并在完成后执行 adb shell dumpsys batterystats –disable full-wake-history,否则,导出的bugreport由于太大而无法解析。
工具使用方法:
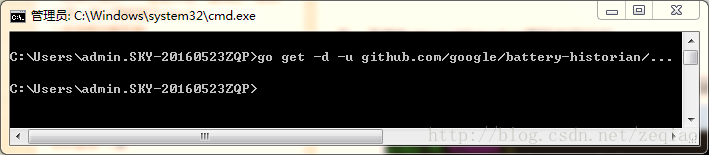
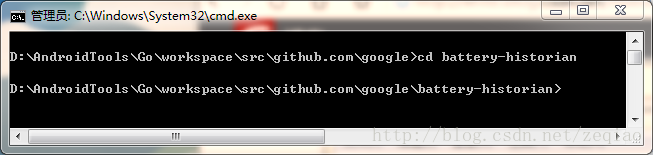
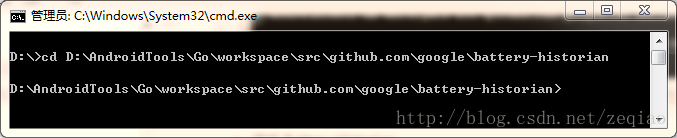
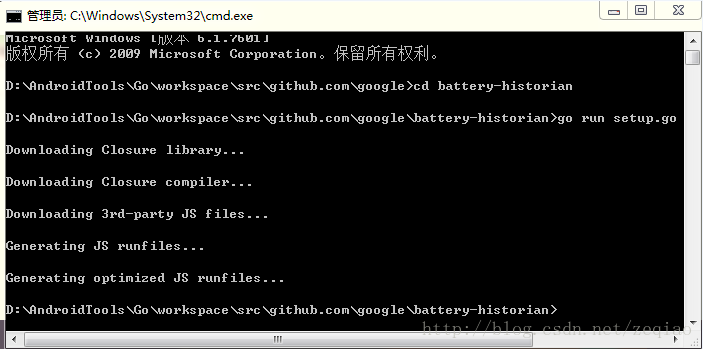
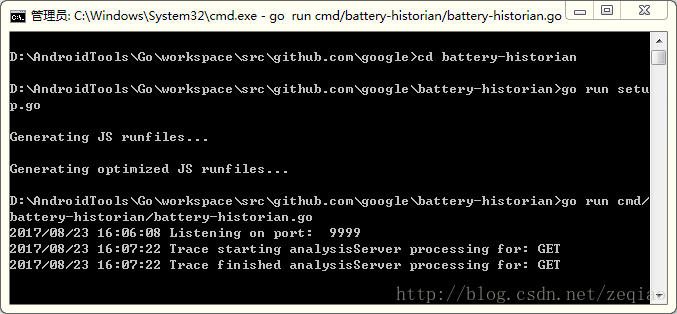
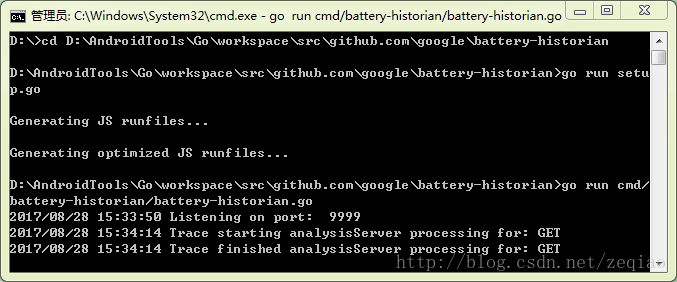
1.运行工具
cd c:/user/battery-historian(battery-historian放置的路径)
go run setup.go
go run cmd/battery-historian/battery-historian.go
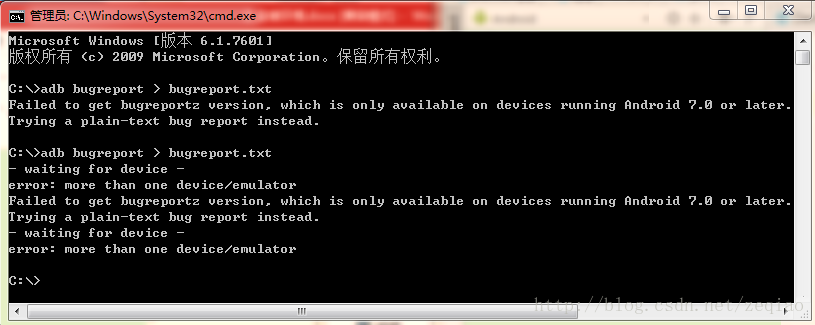
2.导出bugreport
adb bugreport>bugreport.txt(可新建文本文档,拖动到该位置)
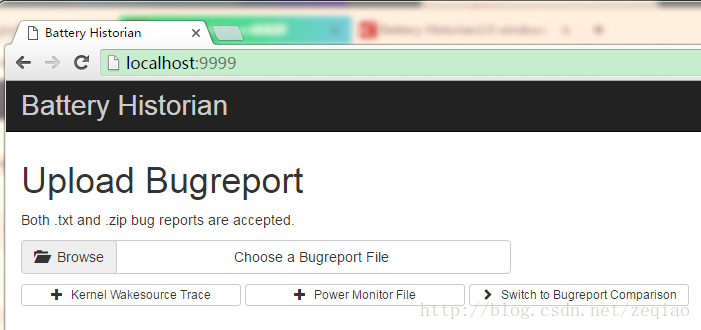
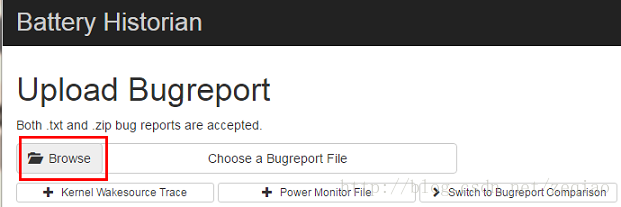
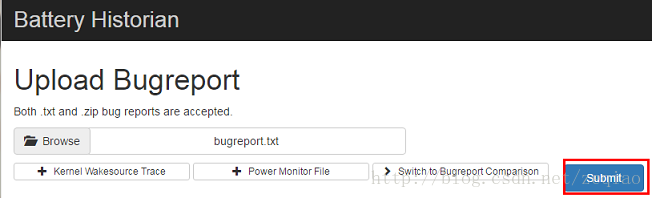
3.导入bugreport.txt
在google chrome中输入:http://localhost:9999,然后导入bugreport.txt
4.开始分析
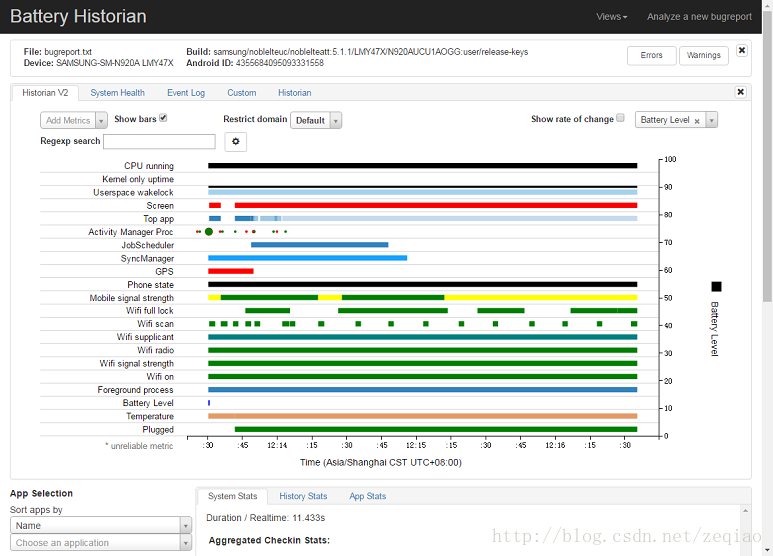
各个参数的意义:
CPU runing: cpu运行的状态
Kernel only uptime: 只有kernell运行?
Userspace wakelock: 用户空间申请的锁
Screen: 屏幕是否点亮
Top app: 当前在内存中的应用,按内存占用率排序
Activity Manager Proc: 活跃的用户进程
Crashes(logcat): 某个时间点出现crash的应用
Doze: 是否进入doze模式 Device
active: 和Doze相反
JobScheduler: 异步作业调度
SyncManager: 同步操作
Temp White List: 电量优化白名单
Phone call: 是否打电话
GPS: 是否使用GPS
Network connectivity: 网络连接状态(wifi、mobile是否连接)
Mobile signal strength: 移动信号强度(greatgoodmoderatepoor)
Wifi scan: 是否在扫描wifi信号
Wifi supplicant: 是否有wifi请求
Wifi radio: 是否正在通过wifi传输数据
Wifi signal strength: wifi信号强度
Wifi running: wifi组件是否在工作(未传输数据)
Wifi on: 同上
Audio: 音频子系统?
Camera: 相机是否在工作
Video:是否在播放视频
Foreground process: 前台进程
Package install: 是否在进行包安装
Package active: 包管理在工作
Battery level: 电池当前电量
Temperature: 电池温度
Plugged: 连接usb或者充电
Charging on: 在充电
Logcat misc: 是否在导出日志
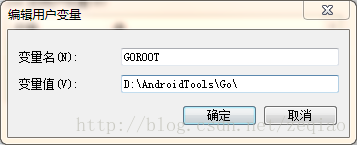
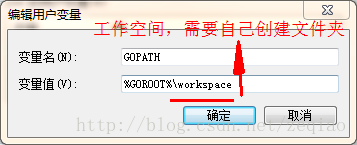
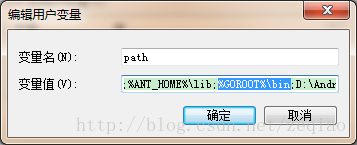
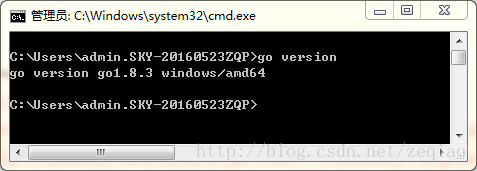
电量分析工具 Battery Historian 的配置及使用
https://www.cnblogs.com/yinrw/p/9621109.html
电量分析工具 Battery Historian 的配置及使用
end