This article will not cover how to set up Sparkle. I created a separate post on how to set it up. Scott also has some excellent videos about this already (Web Resources & Plugins).
To make it easier we will focus on deploying only Web resources in this article. The same approach can be used for Plugins as well.
You can find the demo project I use for this article as well as the yaml files of the pipelines on my GitHub.
I have created a video covering the same topic. You can find it on my YouTube channel and at the end of this article.
Idea
The idea is to automatically deploy all Web resources to our development environment whenever new code is pushed/merged to our development branch.
If you combine the things you will learn in this post with one of my previous posts, “Quality Gates for Check-Ins”, you can create a robust automated deployment.
Solution
To implement this, we will create two pipelines (1 build pipeline and one release pipeline).
- Create Webres artifact
- Deploy to Dev
Create Webres artifact
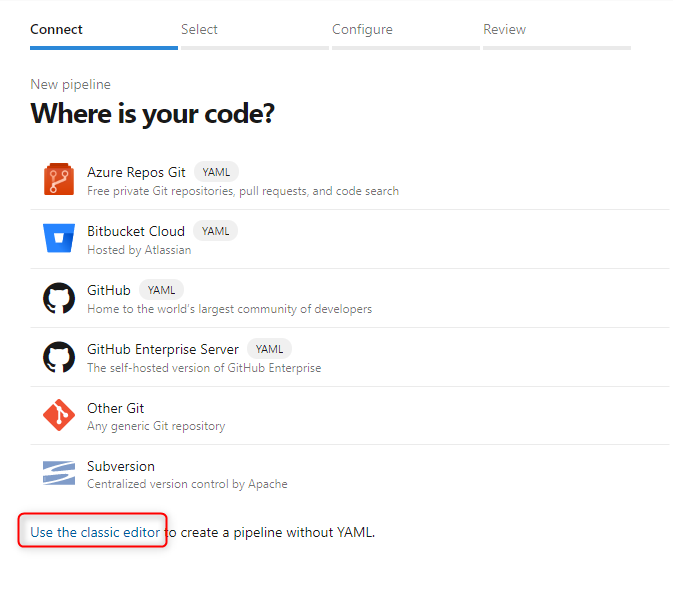
First, we create a build pipeline that will generate our Web resources as an Azure DevOps artifact. To do this we create an empty pipeline by opening “Pipelines” in the menu on the left and then press the “new pipeline” button. If you already have another pipeline it will be in the upper right corner otherwise it will be in the middle of the screen. In the next screen, you have to choose “use the classic editor”.
 Classic Editor
On the second screen, you can leave the defaults like they are.
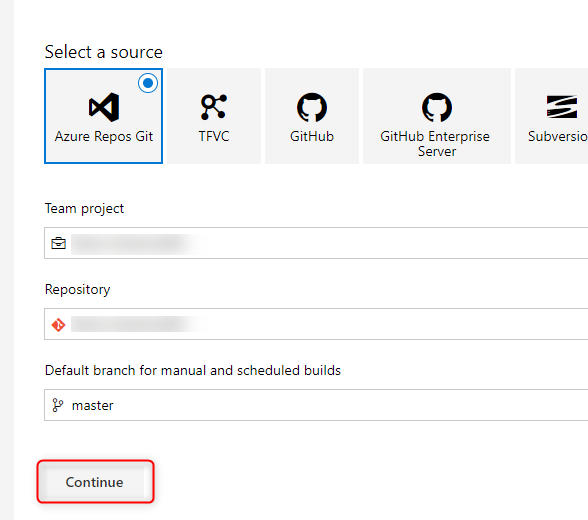 Select Source
On the third and last screen, you choose “empty Job” at the top of the page.
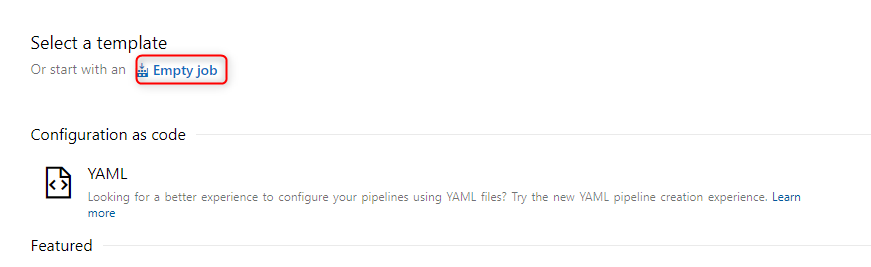 Empty Job
Add Steps
This pipeline will have 6 Steps.
Use NuGet
This Step will install NuGet on the Build Agent. This step can be used with the standard configuration.
 NuGet install
NuGet restore
This Step will restore all the NuGet packages. This step can be used with the standard configuration.
 NuGet restore
Build Solution
This Step will build the Solution. For our example, we will only build the Webresources solution. To achieve this, we will change “Solution” in the configuration to
The provided project will transform the written TypeScript on build to JavaScript.
 Build Step
 Config Build Step
Copy files
This Step will copy all our Web resources from the build folder to the destination/artifact folder.
As “Source” we take our build directory and there the “Webresources” folder.
As “Content” we take all the files in the html, css and js folders.
As “Target” we choose our Artifact staging directory.
 Add Copy files step
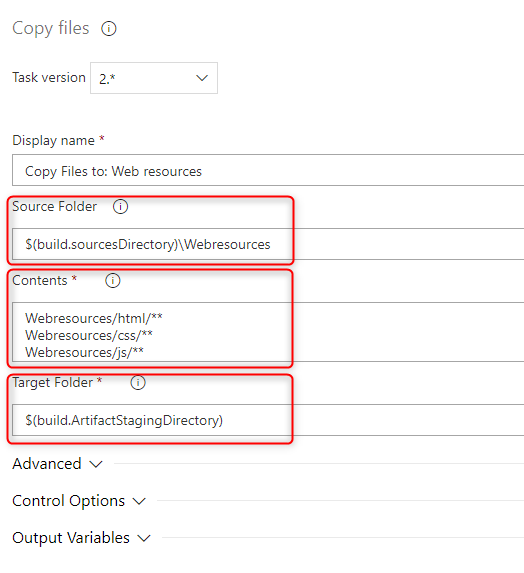 Configuration Copy files (Web resources)
Copy files: spkl
This Step will copy the spkl files from the build folder to the destination/artifact folder.
As “Source” we, again, take our build directory and there the “Webresources” folder.
As “Content” we take the release.bat and spkl.json file.
As “Target” we choose our Artifact staging directory.
Add Copy files step Configure Copy spkl files
Publish Pipeline Artifacts
This Step will publish the staging directory as a pipeline artifact. So that our Release pipeline can pick it up and deploy it to Development.
As the path we choose the Artifact Staging Directory
You can configure whatever name you would like to; you just need it in the next pipeline. For the demo, I will choose “drop”.
 Add Publish Pipeline Artifacts
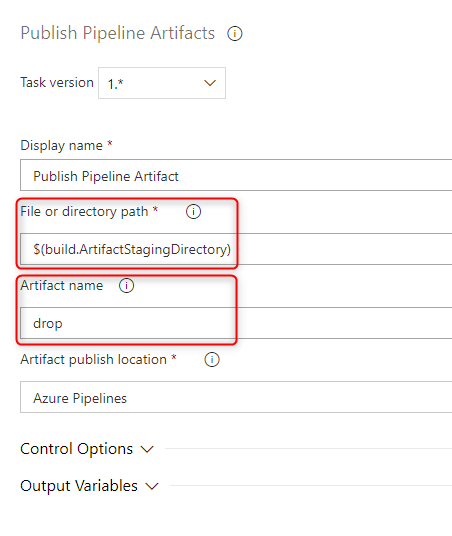 Configure Publish Pipeline Artifacts step
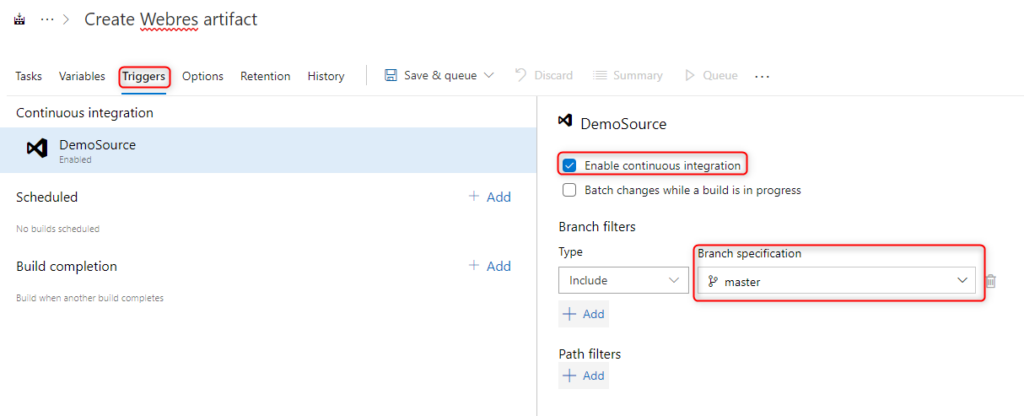
Trigger
Since we would like to run the pipeline automatically whenever we push or merge something to our development branch, we will add a trigger to the pipeline.
Change to the “Trigger” tab, check the checkbox “Enable continuous integration” and make sure you have selected the correct branch.
 Pipeline trigger
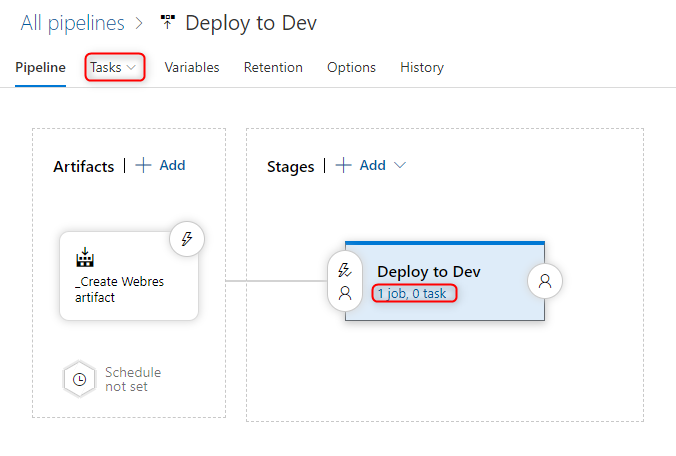
Deploy to Dev
The second pipeline we need is a release pipeline, which will deploy the web resources to development whenever the first pipeline was ready.
To do this we create an empty pipeline by opening “Releases” in the menu on the left and then press the “new pipeline” button. If you have another pipeline already it will be above the list of pipelines otherwise it will be in the middle of the screen. On the next screen, you choose “empty Job” at the top of the modal that appeared on the right side.
Add Artifact
Here we choose the artifact the pipeline should use. This will be the output of the first Pipeline.
In “Source Pipeline” you choose our first pipeline from the dropdown list. Everything else should be filled in correctly.
 Add artifact
Add Steps
This pipeline will have 3 Steps. To add those, you switch to the “Tasks” tab, either by directly clicking on it or by clicking on “1 job, 0 steps” underneath your stage.
 Switch to Steps/Tasks
Here you can add the following steps
Use NuGet
This Step will install NuGet on the Build Agent. This step can be used with the standard configuration.
NuGet installNuGet restore
With this step we will install the spkl nugget package. To achieve this we change the command to “custom” and write in the following command
NuGet restore/install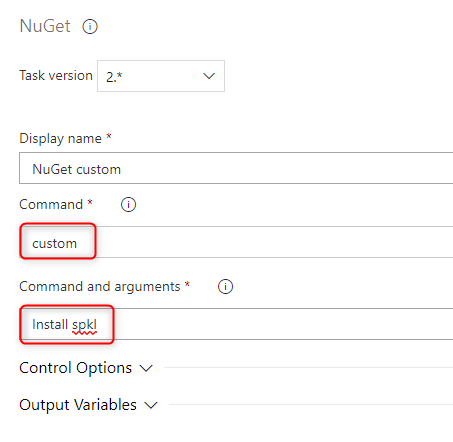 Configure NuGet
Batch Script
The last step will execute our release.bat. As the path we choose the folder of the Artifact, in there we have a folder which is the name of the artifact (we configured this in the last step of the first pipeline) (for this demo it is “drop”) and in there you can find the release.bat. For our demo the path looks like this
For the argument we choose the string below (including the quotation marks)
If you have worked with pipelines earlier, you will notice that this syntax shows that we use two variables. In the next section, we will configure those to our pipeline.

 Configure Batch Step
Add variables
The Pipeline does need two variables
- connection
- password
connection
This variable should contain the connection string to your org, without the password. It should look something like the following.
password
This variable will contain only the password of the user you are using. It is important to check the little lock so that DevOps knows that it contains a password. If this is checked DevOps will not show the content or write the content in logs.
 Variable configuration
Add trigger
The last bit that is missing is to add the trigger to the pipeline.
To activate a trigger we switch back to the “Pipeline” tab and press the small lightning button in the corner of the artifact.
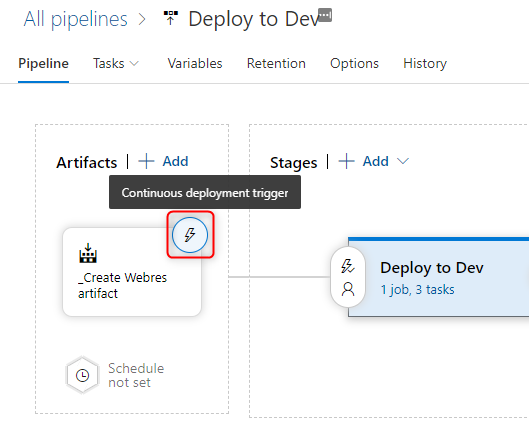 Open trigger configuration
Here we just have to activate the first checkbox.
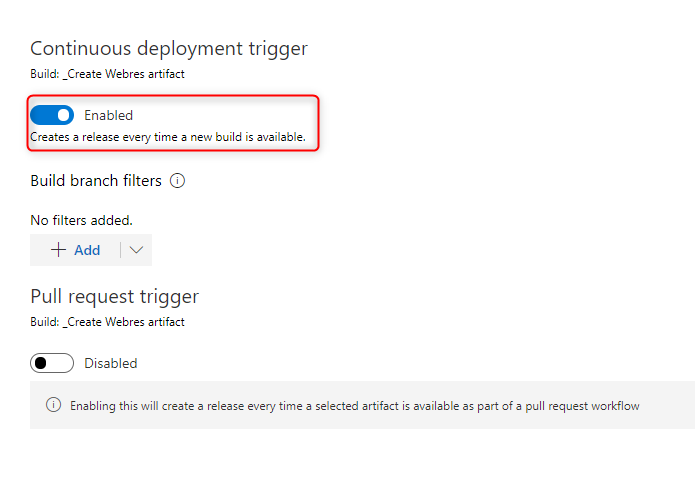 Activate pipeline trigger
Now the second pipeline will automatically trigger whenever the first pipeline is ready.