————————————————————————————————————————
|作者:wangkuifeng0118
|地址:http://blog.csdn.net/wangkuifeng0118/article/details/7028953
————————————————————————————————————————
Content Provider 属于Android应用程序的组件之一,作为应用程序之间唯一的共享数据的途径,Content Provider 主要的功能就是存储并检索数据以及向其他应用程序提供访问数据的借口。
Android 系统为一些常见的数据类型(如音乐、视频、图像、手机通信录联系人信息等)内置了一系列的 Content Provider, 这些都位于android.provider包下。持有特定的许可,可以在自己开发的应用程序中访问这些Content Provider。
让自己的数据和其他应用程序共享有两种方式:创建自己的Content Provier(即继承自ContentProvider的子类) 或者是将自己的数据添加到已有的Content Provider中去,后者需要保证现有的Content Provider和自己的数据类型相同且具有该 Content Provider的写入权限。对于Content Provider,最重要的就是数据模型(data model) 和 URI。
1.数据模型
Content Provider 将其存储的数据以数据表的形式提供给访问者,在数据表中每一行为一条记录,每一列为具有特定类型和意义的数据。每一条数据记录都包括一个 "_ID" 数值字段,改字段唯一标识一条数据。
2.URI
URI,每一个Content Provider 都对外提供一个能够唯一标识自己数据集(data set)的公开URI, 如果一个Content Provider管理多个数据集,其将会为每个数据集分配一个独立的URI。所有的Content Provider 的URI 都以"content://" 开头,其中"content:"是用来标识数据是由Content Provider管理的 schema。
下面通过继承Content Provier来写一个实例。
首先建立一个sqlite实例,具体细节见上一节sqlite实例,这里就只给出代码:
第一步建立一个ContentProviderDemo:
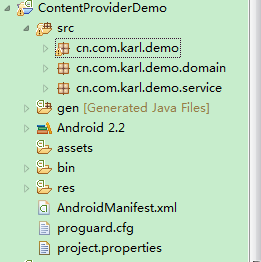
第二步建立DBOpenHelper类:
public class DBOpenHelper extends SQLiteOpenHelper {

	private static final String DATABASE_NAME = "person.db"; //数据库名称
	private static final int DATABASE_VERSION = 1;//数据库版本

	public DBOpenHelper(Context context) {
		super(context, DATABASE_NAME, null, DATABASE_VERSION);
		// TODO Auto-generated constructor stub
	}

	@Override
	public void onCreate(SQLiteDatabase db) {

		db.execSQL("CREATE TABLE person (_id integer primary key autoincrement, name varchar(20), age varchar(10))");
	}

	@Override
	public void onUpgrade(SQLiteDatabase db, int oldVersion, int newVersion) {
		// TODO Auto-generated method stub
		db.execSQL("DROP TABLE IF EXISTS person");
		onCreate(db);
	}

}
在上面创建了一个person表,
public class PersonService {

	  private DBOpenHelper dbOpenHelper;

	  public PersonService(Context context) {
		// TODO Auto-generated constructor stub
		  dbOpenHelper=new DBOpenHelper(context);
	}
	  public void save(Person person){
		  SQLiteDatabase db=dbOpenHelper.getWritableDatabase();
		  db.execSQL("insert into person(name,age) values(?,?)",new Object[]{person.getName(),person.getAge()});
	  }
	  public void delete(Integer _id){
		  SQLiteDatabase db=dbOpenHelper.getWritableDatabase();
		  db.execSQL("delete from person where _id=?",new Object[]{_id});
	  }
	  public Person find(Integer _id){
		  SQLiteDatabase db=dbOpenHelper.getReadableDatabase();
		  Cursor cursor=db.rawQuery("select * from person where _id=?", new String[]{_id.toString()});
		  if(cursor.moveToFirst()){
			    int id = cursor.getInt(cursor.getColumnIndex("_id"));
				String name = cursor.getString(cursor.getColumnIndex("name"));
				String age = cursor.getString(cursor.getColumnIndex("age"));
				Person person = new Person();
				person.set_id(id);
				person.setName(name);
				person.setAge(age);
				return person;
		  }
		  return null;
	  }
	  public List<Person> findAll(){
		  SQLiteDatabase db=dbOpenHelper.getReadableDatabase();
		  List<Person> persons = new ArrayList<Person>();
		  Cursor cursor=db.rawQuery("select * from person", null);
		  while(cursor.moveToNext()){
			  Person person=new Person();
			int id=cursor.getInt(cursor.getColumnIndex("_id"));
			String name=cursor.getString(cursor.getColumnIndex("name"));
			String age=cursor.getString(cursor.getColumnIndex("age"));
			person.set_id(id);
			person.setName(name);
			person.setAge(age);
			persons.add(person);
		  }
		  return persons;
	  }
}
实现person的增删改查,
public class Person {

	private Integer _id;
	private String name;
	private String age;

	public Integer get_id() {
		return _id;
	}
	public void set_id(Integer _id) {
		this._id = _id;
	}
	public String getName() {
		return name;
	}
	public void setName(String name) {
		this.name = name;
	}
	public String getAge() {
		return age;
	}
	public void setAge(String age) {
		this.age = age;
	}

}
OK!数据库已建好,接下来就是要实现ContentProvider来提供统一的访问接口:
public class PersonProvider extends ContentProvider {
	private DBOpenHelper dbOpenHelper;
	private static final UriMatcher MATCHER = new UriMatcher(
			UriMatcher.NO_MATCH);
	private static final int PERSONS = 1;
	private static final int PERSON = 2;
	static {
		MATCHER.addURI("cn.com.karl.personProvider", "person", PERSONS);
		MATCHER.addURI("cn.com.karl.personProvider", "person/#", PERSON);
	}

	@Override
	public boolean onCreate() {
		// TODO Auto-generated method stub
		this.dbOpenHelper = new DBOpenHelper(this.getContext());
		return false;
	}

	@Override
	public Cursor query(Uri uri, String[] projection, String selection,
			String[] selectionArgs, String sortOrder) {
		// TODO Auto-generated method stub
		SQLiteDatabase db = dbOpenHelper.getReadableDatabase();
		switch (MATCHER.match(uri)) {
		case PERSONS:
			return db.query("person", projection, selection, selectionArgs,
					null, null, sortOrder);

		case PERSON:
			long id = ContentUris.parseId(uri);
			String where = "_id=" + id;
			if (selection != null && !"".equals(selection)) {
				where = selection + " and " + where;
			}
			return db.query("person", projection, where, selectionArgs, null,
					null, sortOrder);

		default:
			throw new IllegalArgumentException("Unkwon Uri:" + uri.toString());
		}
	}

	//返回数据的MIME类型。
	@Override
	public String getType(Uri uri) {
		// TODO Auto-generated method stub
		switch (MATCHER.match(uri)) {
		case PERSONS:
			return "vnd.android.cursor.dir/person";

		case PERSON:
			return "vnd.android.cursor.item/person";

		default:
			throw new IllegalArgumentException("Unkwon Uri:" + uri.toString());
		}
	}

	// 插入person表中的所有记录 /person
	// 插入person表中指定id的记录 /person/10
	@Override
	public Uri insert(Uri uri, ContentValues values) {
		// TODO Auto-generated method stub
		SQLiteDatabase db = dbOpenHelper.getWritableDatabase();
		switch (MATCHER.match(uri)) {
		case PERSONS:
			// 特别说一下第二个参数是当name字段为空时,将自动插入一个NULL。
			long rowid = db.insert("person", "name", values);
			Uri insertUri = ContentUris.withAppendedId(uri, rowid);// 得到代表新增记录的Uri
			this.getContext().getContentResolver().notifyChange(uri, null);
			return insertUri;

		default:
			throw new IllegalArgumentException("Unkwon Uri:" + uri.toString());
		}
	}

	@Override
	public int delete(Uri uri, String selection, String[] selectionArgs) {
		// TODO Auto-generated method stub
		SQLiteDatabase db = dbOpenHelper.getWritableDatabase();
		int count = 0;
		switch (MATCHER.match(uri)) {
		case PERSONS:
			count = db.delete("person", selection, selectionArgs);
			return count;

		case PERSON:
			long id = ContentUris.parseId(uri);
			String where = "_id=" + id;
			if (selection != null && !"".equals(selection)) {
				where = selection + " and " + where;
			}
			count = db.delete("person", where, selectionArgs);
			return count;

		default:
			throw new IllegalArgumentException("Unkwon Uri:" + uri.toString());
		}
	}

	@Override
	public int update(Uri uri, ContentValues values, String selection,
			String[] selectionArgs) {
		// TODO Auto-generated method stub
		SQLiteDatabase db = dbOpenHelper.getWritableDatabase();
		int count = 0;
		switch (MATCHER.match(uri)) {
		case PERSONS:
			count = db.update("person", values, selection, selectionArgs);
			return count;
		case PERSON:
			long id = ContentUris.parseId(uri);
			String where = "_id=" + id;
			if (selection != null && !"".equals(selection)) {
				where = selection + " and " + where;
			}
			count = db.update("person", values, where, selectionArgs);
			return count;
		default:
			throw new IllegalArgumentException("Unkwon Uri:" + uri.toString());
		}
	}

}
最后不要忘记在manifest里注册
 <provider android:name=".PersonProvider"
         android:authorities="cn.com.karl.personProvider"/>
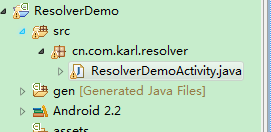
这样基本上就已经完成,让我们再写个项目访问一下,建立ResolverDemo项目:
为了展现效果,我们用了ListView,在res下建立item.xml
<?xml version="1.0" encoding="utf-8"?>
<LinearLayout
  xmlns:android="http://schemas.android.com/apk/res/android"
  android:orientation="horizontal"
  android:layout_width="fill_parent"
  android:layout_height="wrap_content">

	 <TextView
		  android:layout_width="80dip"
		  android:layout_height="wrap_content"
		  android:text="435"
		  android:id="@+id/id"
		  />

	 <TextView
		  android:layout_width="100dip"
		  android:layout_height="wrap_content"
		   android:text="liming"
		  android:id="@+id/name"
		  />

	 <TextView
		  android:layout_width="fill_parent"
		  android:layout_height="wrap_content"
		   android:text="45"
		  android:id="@+id/age"
		  />

</LinearLayout>
public class ResolverDemoActivity extends Activity {
    /** Called when the activity is first created. */
	private   SimpleCursorAdapter adapter;
	private ListView listView;
    @Override
    public void onCreate(Bundle savedInstanceState) {
        super.onCreate(savedInstanceState);
        setContentView(R.layout.main);

         listView=(ListView) this.findViewById(R.id.listView);
    	ContentResolver contentResolver = getContentResolver();
		Uri selectUri = Uri.parse("content://cn.com.karl.personProvider/person");
		Cursor cursor=contentResolver.query(selectUri, null, null, null, null);
		 adapter = new SimpleCursorAdapter(this, R.layout.item, cursor,
	        		new String[]{"_id", "name", "age"}, new int[]{R.id.id, R.id.name, R.id.age});
	        listView.setAdapter(adapter);
	        listView.setOnItemClickListener(new OnItemClickListener() {
				@Override
				public void onItemClick(AdapterView<?> parent, View view, int position, long id) {
					ListView lView = (ListView)parent;
					Cursor data = (Cursor)lView.getItemAtPosition(position);
					int _id = data.getInt(data.getColumnIndex("_id"));
					Toast.makeText(ResolverDemoActivity.this, _id+"", 1).show();
				}
			});

	        Button button = (Button) this.findViewById(R.id.insertbutton);
	        button.setOnClickListener(new View.OnClickListener() {
				@Override
				public void onClick(View v) {
					ContentResolver contentResolver = getContentResolver();
					Uri insertUri = Uri.parse("content://cn.com.karl.personProvider/person");
					ContentValues values = new ContentValues();
					values.put("name", "wangkuifeng");
					values.put("age", 23);
					Uri uri = contentResolver.insert(insertUri, values);
					Toast.makeText(ResolverDemoActivity.this, "添加完成", 1).show();
				}
			});
    }
}
用ContentResolver来访问,其实在使用Content Provider得到联系人信息这一节就已经用过这个类了,只是那一节是访问系统提供的ContentProvider,这一节是我们自己实现的ContentProvider。
其他参考:xiechengfa的http://xiechengfa.iteye.com/blog/1415829