好处:多个应用程序之间建立共同的服务机制,通过AIDL在不同应用程序之间达到数据的共享和数据相互操作,
本文包括: 1 、创建AIDL 服务端。2 、创建AIDL 客户端。 3、客户端调用服务端提供的服务接口。
1、创建AIDL 服务端。
在Android的src中新建IStudentService.aidl
package com.example.studentservice;
import com.example.studentservice.Student;;

interface IStudentService
{
    Map getMap(in String test_class,in Student student);
    Student getStudent();

}
Student 类是一个序列化的类,这里使用Parcelable 接口来序列化. Student 类代码如下:
package com.example.studentservice;

import android.os.Parcel;
import android.os.Parcelable;

public class Student implements Parcelable{
	private int age;
    private String name;

    public Student(Parcel source) {
		// TODO Auto-generated constructor stub
    	age = source.readInt();
    	name = source.readString();
	}

	public Student() {
		// TODO Auto-generated constructor stub
	}

	public int getAge() {
        return age;
    }

    public void setAge(int age) {
        this.age = age;
    }

    public String getName() {
        return name;
    }

    public void setName(String name) {
        this.name = name;
    }


    public static final Parcelable.Creator<Student> CREATOR = new Creator<Student>() {

		@Override
		public Student[] newArray(int size) {
			// TODO Auto-generated method stub
			return new Student[size];
		}

		@Override
		public Student createFromParcel(Parcel source) {
			// TODO Auto-generated method stub
			return new Student(source);
		}
	};

	@Override
	public int describeContents() {
		// TODO Auto-generated method stub
		return 0;
	}

	@Override
	public void writeToParcel(Parcel dest, int flags) {
		// TODO Auto-generated method stub
		dest.writeInt(age);
		dest.writeString(name);
	}


}
在这里必须注意如下三点:
1.在Student 类中必须有一个静态常量,常量名必须是CREATOR,而且CREATOR 常量的数据类型必须是 Parcelable.Creator
2.在writeToParcel 方法中需要将要序列化的值写入到 Parcel对象中。
3.编写完Student 为时,必须再新建一个Student.aidl 文件,此文件输入以下内容:
parcelable Student; 这里的书写是供上面我们说过的接口 *.aidl 文件导包时可以找到,并通过此文件找到Student类对象。
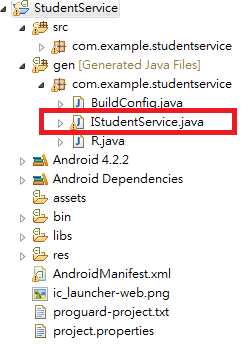
如果上面的步骤顺利通过的话,Android 将会自动在gen 目录下R文件的相同目录生成一个以*.aidl 文件命名的*.java 文件,如下图:
顺利生成成功后,我们再来编写一个AIDL 服务类,代码如下:
package com.example.studentservice;
import java.util.HashMap;
import java.util.Map;
import android.app.Service;
import android.content.Intent;
import android.os.IBinder;
import android.os.RemoteException;


public class StudentService extends Service{

	@Override
	public IBinder onBind(Intent intent) {
		// TODO Auto-generated method stub
		return new StudentServiceImple();
	}

	public class StudentServiceImple extends IStudentService.Stub {

		@Override
		public Student getStudent() throws RemoteException
		{
			Student student = new Student();
			student.setAge(25);
			student.setName("Zhang san");
			return student;
		}

		@Override
		public Map getMap(String test_class, Student student)
				throws RemoteException {
			// TODO Auto-generated method stub
			  Map<String, Object> map = new HashMap<String, Object>();
	            map.put("class", "06109091");
	            map.put("age", student.getAge());
	            map.put("name", student.getName());
	            return map;

		}
	}

}
如上代码,StudentService服务类有一个子类并继承自我们上面生成的*.java 文件重写其中我们在*.aidl 中声明的两个接口方法,实现了其功能。上面IBinder 必须返回此服务类的子类对象,否则客户端将无法获得服务对象。
最后,即然有服务的操作,那么就得在manifest文件中注册服务类,代码如下:
        <service android:name=".StudentService"  android:exported="true"  android:enabled="true"
            android:process=":remote">
            <intent-filter>
                <action android:name="com.example.studentservice.IStudentService"></action>
                </intent-filter>
        </service>
至此,服务端就己经开发完成了,下面接着开发客启端。
2、创建AIDL 客户端
同样是新建一个项目,这里要注意,需要将服务端生成成功后的gen 目录下的包复制过来,放到我们新建项目的src 文件夹下,如下图:

因为IServiceService 这个生成类,引用到了Student, 所以这里一并将Student也复制过来。
至此,客户端的创建己经完毕,下面我们就要利用创建的客户端去调用服务端的方法。
3、客户端调用服务端提供的服务接口
package com.example.studentclient;

import com.example.studentservice.IStudentService;

import android.os.Bundle;
import android.os.IBinder;
import android.os.RemoteException;
import android.app.Activity;
import android.app.AlertDialog;
import android.content.ComponentName;
import android.content.Context;
import android.content.Intent;
import android.content.ServiceConnection;
import android.view.Menu;
import android.view.View;
import android.view.View.OnClickListener;
import android.widget.Button;

public class MainActivity extends Activity {
	private Button btn1, btn2;
	private IStudentService stuService = null;
	private ServiceConnection serviceConnection = new ServiceConnection() {

		@Override
		public void onServiceDisconnected(ComponentName name) {
			// TODO Auto-generated method stub

		}

		@Override
		public void onServiceConnected(ComponentName name, IBinder service) {
			// TODO Auto-generated method stub
			stuService = IStudentService.Stub.asInterface(service);
		}
	};


	@Override
	protected void onCreate(Bundle savedInstanceState) {
		super.onCreate(savedInstanceState);
		setContentView(R.layout.activity_main);
		btn1 = (Button)findViewById(R.id.button1);
		btn2 = (Button)findViewById(R.id.button2);
		btn1.setOnClickListener(new OnClickListener() {

			@Override
			public void onClick(View v) {
				// TODO Auto-generated method stub
				bindService(new Intent("com.example.studentservice.IStudentService"),
						serviceConnection, Context.BIND_AUTO_CREATE);//;
			}
		});
		btn2.setOnClickListener(new OnClickListener() {

			@Override
			public void onClick(View v) {
				// TODO Auto-generated method stub
				StringBuilder sb = new StringBuilder();
	            try {
	            	if (stuService == null) {
	            		new AlertDialog.Builder(MainActivity.this).setTitle("Error")
	                    .setMessage("stuService is null").setPositiveButton(
	                            android.R.string.ok, null).show();

						return;
					}
	                sb.append("学生名称为:" + stuService.getStudent().getName() + "
");
	                sb.append("年龄为:" + stuService.getStudent().getAge() + "
");
	                sb.append("map 对象内容为如下:"
	                        + stuService.getMap("中国", stuService.getStudent())
	                                .toString());
	            } catch (RemoteException e) {
	                // TODO Auto-generated catch block
	                e.printStackTrace();
	            }
	            new AlertDialog.Builder(MainActivity.this).setTitle("调用外部服务")
	                    .setMessage(sb.toString()).setPositiveButton(
	                            android.R.string.ok, null).show();

			}
		});
	}

}
在ServiceConnetction里面对IMyService 进行初始化,即可操作该对象 ,该对象就可以得到我们所有要处理的数据。
小结:使用aidl 必须同时存在客户端和服务端,即客户端在本机上,服务端也在本机上,要使用客户端必须服务端事先在本机上注册过服务。
我自己写了源码,还不知道在博客园如何长传源码,如果你知道,请告之,谢谢!