-
1.linux-node2节点安装数据库
[root@linux-node2 ~]# yum install -y mariadb-server
[root@linux-node2 ~]# systemctl start mariadb
[root@linux-node2 ~]# netstat -tulnp |grep 3306
tcp        0      0 0.0.0.0:3306            0.0.0.0:*               LISTEN      41299/mysqld
-
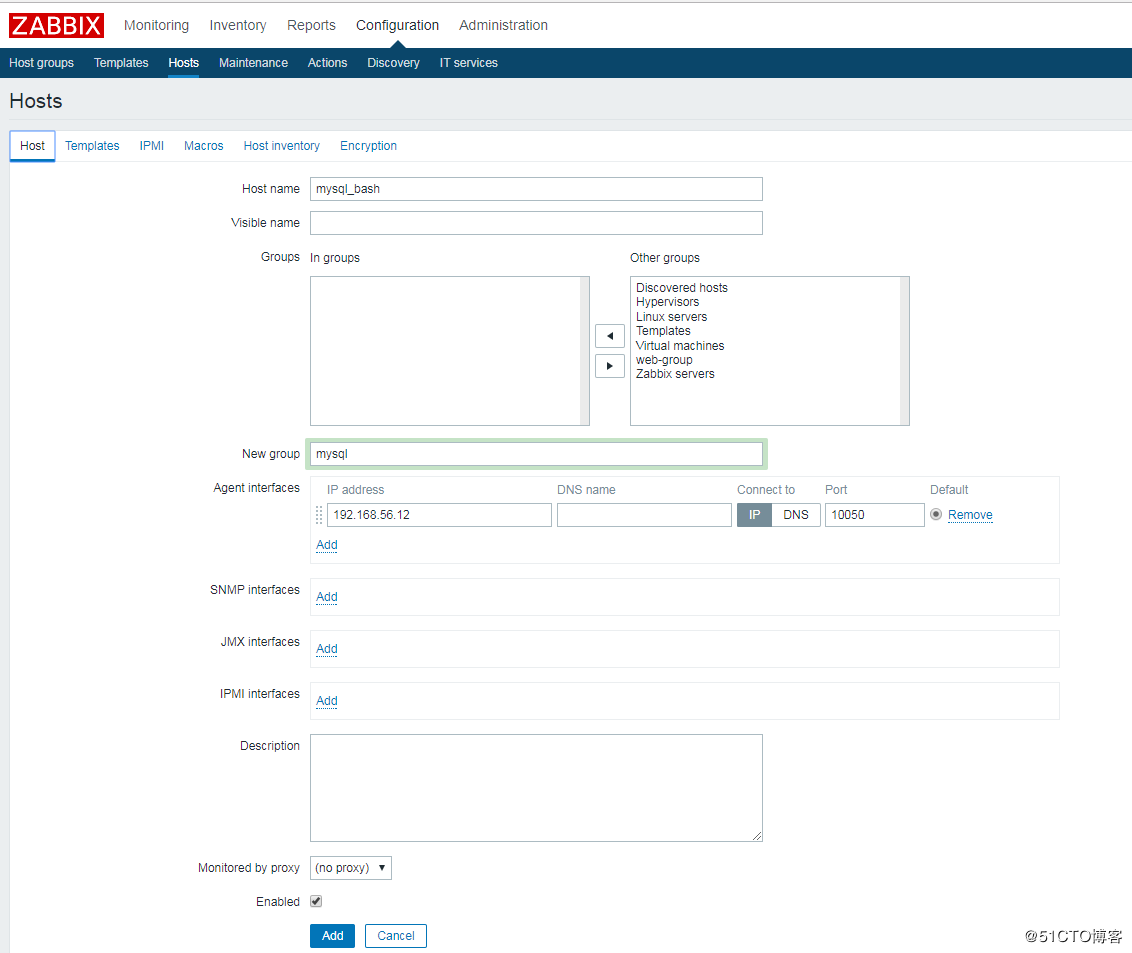
2.Zabbix添加数据库主机监控
被动模式对Hostname没要求,但主动模式必须与主机Hostname一致。
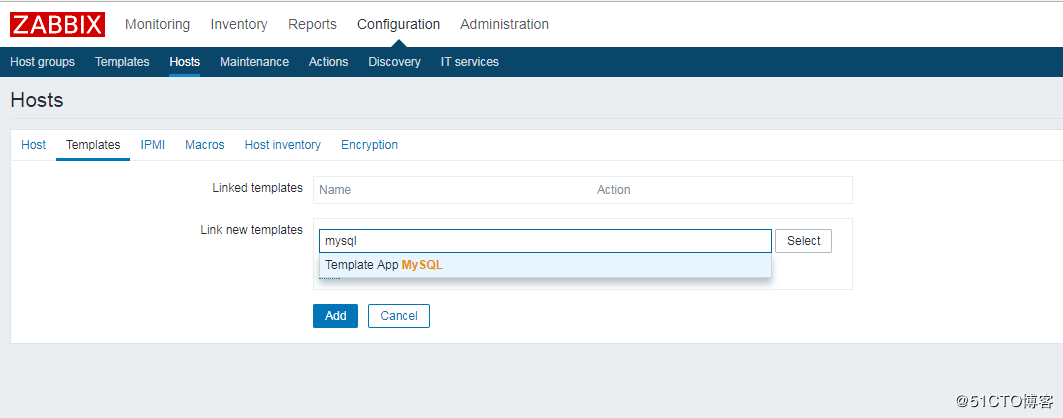
"Configuration"-->"Host"(填入主机信息)-->"Templates"(链接MySQL模板)
如图:
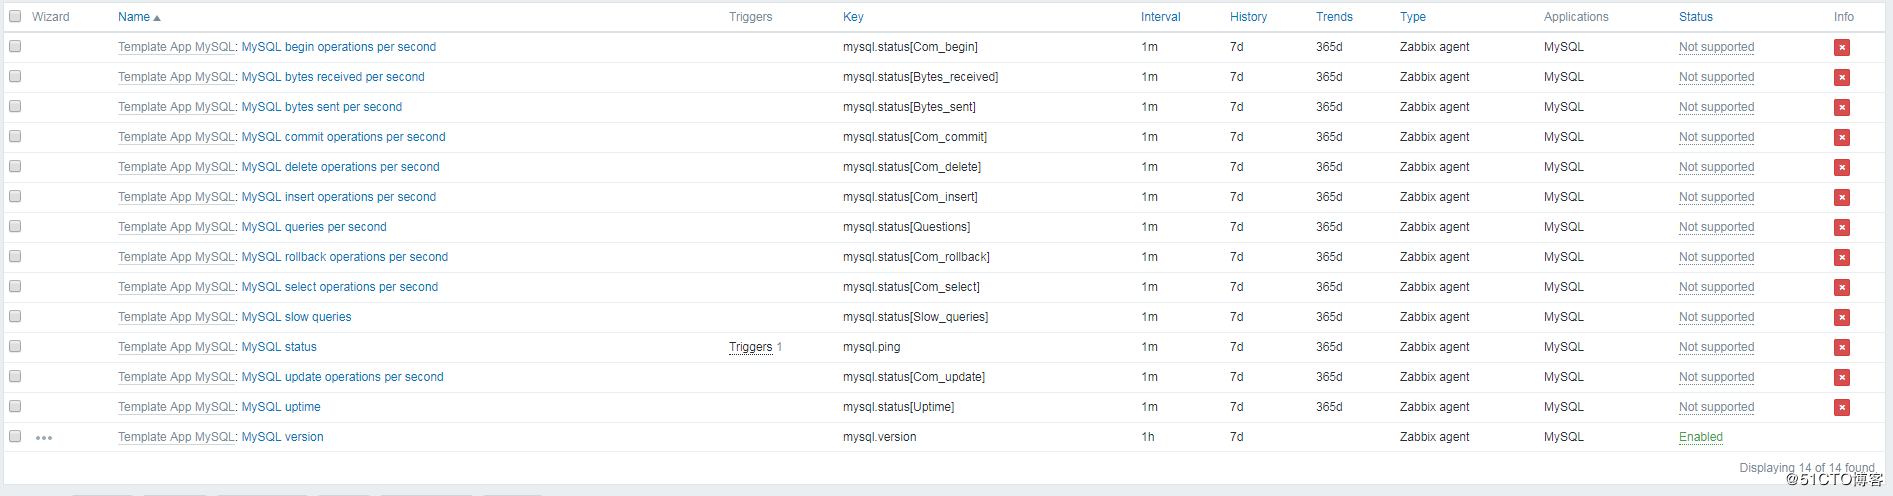
创建成功后,可以查看到MySQL相应的监控信息,数据库的增改删查,如图:


命令行进行查看获取的信息:
[root@linux-node1 ~]# zabbix_get -s linux-node2 -k mysql.status[Com_begin]
0
[root@linux-node1 ~]# zabbix_get -s linux-node2 -k mysql.status[Slow_queries]
0
数据库模板监控配置主要来自linux-node2节点:/etc/zabbix/zabbix_agentd.d/userparameter_mysql.conf 的配置
[root@linux-node2 ~]# vim /etc/zabbix/zabbix_agentd.d/userparameter_mysql.conf

# For all the following commands HOME should be set to the directory that has .my.cnf file with password information.

# Flexible parameter to grab global variables. On the frontend side, use keys like mysql.status[Com_insert].
# Key syntax is mysql.status[variable].
UserParameter=mysql.status[*],echo "show global status where Variable_name='$1';" | HOME=/var/lib/zabbix mysql -N | awk '{print $$2}'    #mysql的状态获取

# Flexible parameter to determine database or table size. On the frontend side, use keys like mysql.size[zabbix,history,data].
# Key syntax is mysql.size[<database>,<table>,<type>].
# Database may be a database name or "all". Default is "all".
# Table may be a table name or "all". Default is "all".
# Type may be "data", "index", "free" or "both". Both is a sum of data and index. Default is "both".
# Database is mandatory if a table is specified. Type may be specified always.
# Returns value in bytes.
# 'sum' on data_length or index_length alone needed when we are getting this information for whole database instead of a single table
UserParameter=mysql.size[*],bash -c 'echo "select sum($(case "$3" in both|"") echo "data_length+index_length";; data|index) echo "$3_length";; free) echo "data_free";; esac)) from information_schema.tables$([[ "$1" = "all" || ! "$1" ]] || echo " where table_schema="$1"")$([[ "$2" = "all" || ! "$2" ]] || echo "and table_name="$2"");" | HOME=/var/lib/zabbix mysql -N'

UserParameter=mysql.ping,HOME=/var/lib/zabbix mysqladmin ping | grep -c alive    #mysql的存活获取
UserParameter=mysql.version,mysql -V    #mysql的版本获取
- 3.带密码对MySQL监控
以上对数据库的监控,都是没有密码直接获取值,这是不合理的,那么需要如何添加密码进行获取监控数据呢?
(1)先对数据库进行授权和密码,通过zabbix用户进行获取数据,此处的授权由于试验,就授权了全部权限,正式生产时不能这样设置。

[root@linux-node2 ~]# mysql
Welcome to the MariaDB monitor.  Commands end with ; or g.
Your MariaDB connection id is 711
Server version: 5.5.56-MariaDB MariaDB Server

Copyright (c) 2000, 2017, Oracle, MariaDB Corporation Ab and others.

Type 'help;' or 'h' for help. Type 'c' to clear the current input statement.

MariaDB [(none)]> grant all on *.* to zabbix@localhost identified by "zabbix";
Query OK, 0 rows affected (0.00 sec)

MariaDB [(none)]> flush privileges;
Query OK, 0 rows affected (0.00 sec)

MariaDB [(none)]> quit;
Bye

(2)修改监控配置,添加用户名密码
[root@linux-node2 ~]# vim /etc/zabbix/zabbix_agentd.d/userparameter_mysql.conf

UserParameter=mysql.status[*],echo "show global status where Variable_name='$1';" | HOME=/var/lib/zabbix mysql -uzabbix -pzabbix -N | awk '{print $$2}'
UserParameter=mysql.size[*],bash -c 'echo "select sum($(case "$3" in both|"") echo "data_length+index_length";; data|index) echo "$3_length";; free) echo "data_free";; esac)) from information_schema.tables$([[ "$1" = "all" || ! "$1" ]] || echo " where table_schema="$1"")$([[ "$2" = "all" || ! "$2" ]] || echo "and table_name="$2"");" | HOME=/var/lib/zabbix mysql -N'
UserParameter=mysql.ping,HOME=/var/lib/zabbix mysqladmin ping -uzabbix -pzabbix | grep -c alive
UserParameter=mysql.version,mysql -V

[root@linux-node2 ~]# systemctl restart zabbix-agent
修改完毕后,我们可以看到在Item项都显示Not supported,如图:
此时修改一下zabbix对无效监控项的刷新时间,默认是600s,我们改为30s。修改完成后就会变成enabled
"Administration"-->"General"-->右上角选择"other"-->"Refresh unsupported items (in sec)"改为30
-
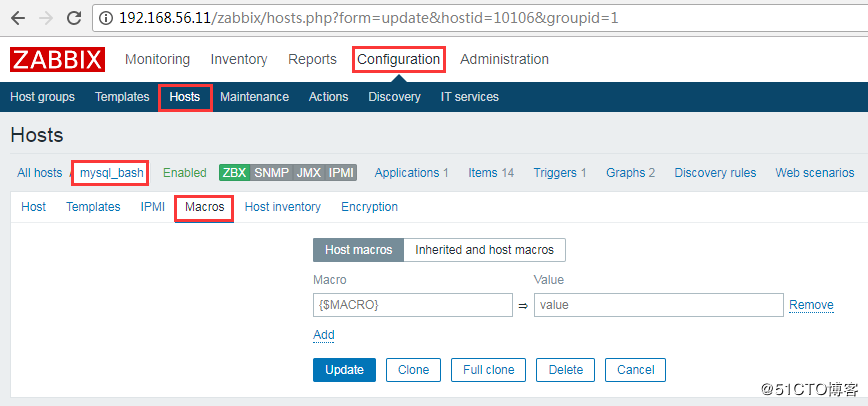
4.灵活使用宏变量(Macrros)进行传参配置用户名密码监控
如图:在主机中配置变量
(1)修改配置文件:
[root@linux-node2 ~]# vim /etc/zabbix/zabbix_agentd.d/userparameter_mysql.conf
UserParameter=mysql.status[*],echo "show global status where Variable_name='$3';" | HOME=/var/lib/zabbix mysql -u$1 -p$2 -N | awk '{print $$2}'
UserParameter=mysql.ping[*],HOME=/var/lib/zabbix mysqladmin -u$1 -p$2 ping| grep -c alive
[root@linux-node2 ~]# systemctl restart zabbix-agent

此时,如果未传入用户名密码访问是被拒绝的:
[root@linux-node1 ~]# zabbix_get -s linux-node2 -k mysql.status[Slow_queries]
Enter password: ERROR 1045 (28000): Access denied for user 'Slow_queries'@'localhost' (using password: YES)
[root@linux-node1 ~]# zabbix_get -s linux-node2 -k mysql.status[zabbix,zabbix,Slow_queries]
0

(2)修改模板,模板中的变量值可以不设置,因为在连接模板时进行修改变量,此时会自动覆盖在模板设置的变量值:
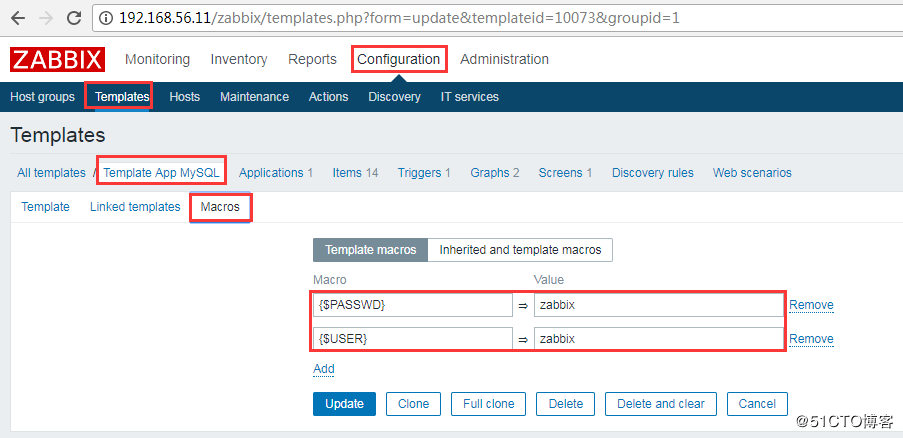
(3)修改模板中的Item:增加传参的变量{$USER},{PASSWD}
