本文介绍怎样在iOS客户端实现google oauth2的登录,并且通过asp.net mvc中的controller的api接口进行form验证。
首先,先了解下google oauth2的相关资料:
https://developers.google.com/accounts/docs/OAuth2
这里介绍了五种的登录方式分别有:
Web Server方式(在Web上进行),Client-side方式(运行在浏览器中的javascript),Installed方式(例如,Android, Windows, Mac OS, iOS, Blackberry等等),Devices方式(在游戏控制台,视频摄像机,打印机等等),Service Accounts方式(在云服务存储方面等等)
本文主要介绍在iOS客户端如果在UIWebView上进行Web Server方式的oauth2登录。
现在必须在google上注册一个账户,然后打开:https://code.google.com/apis/console/
在这里可以创建你的应用程序,例如:

然后需要创建一个ClientID,拖到底部有个创建按钮:

这里可以看到有3个选项,分别为Web application,Service account,Installed application,这里选择默认的Web application,完成client ID的创建。可以看到:
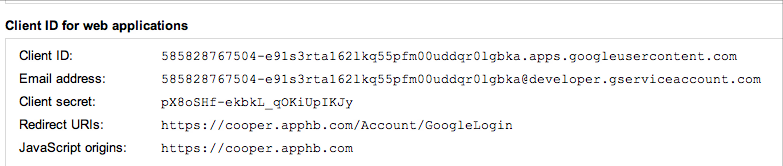
这里产生了Client ID以及Client secret,注意这两项对于google的oauth2认证十分重要。
接下来,asp.net的服务端,采用的是Form验证登录的方式:
MVC的Controller的API调用:
code作为google oauth2的登录界面返回的一个code编码,紧接着,通过client ID for web applications中的Redirect URIs,自动跳转到GoogleLogin接口,送到服务端,在服务端进行进行code验证,得到token的相关账号
//根据google回调获取对应google账号
private string GetGoogleGrantByCode(string code)
{
using (var wc = new WebClient())
{
wc.Headers.Add("Content-Type", "application/x-www-form-urlencoded");
//登录后根据code获取token
var data = string.Format("client_id={0}&client_secret={1}&redirect_uri={2}&code={3}&grant_type=authorization_code"
, this._googleClientId
, this._googleClientSecret
, HttpUtility.UrlEncode(this.GetGoogleRedirectUrl())
, code);
if (this._log.IsDebugEnabled)
this._log.Debug(data);
try
{
return Encoding.UTF8.GetString(wc.UploadData(this._googleOAuth2TokenUrl
, "POST"
, Encoding.UTF8.GetBytes(data)));
}
catch (WebException e)
{
if (e.Response == null)
throw e;
using (var reader = new StreamReader((e as WebException).Response.GetResponseStream()))
throw new Exception(reader.ReadToEnd());
}
}
}
其中,_googleClienId和_googleClientSecret就是刚才在google code console中产生的两项,GetGoogleRedirctUrl()取的也是google code console中设置的Redirect URIs;_googleOAuth2TokenUrl为https://accounts.google.com/o/oauth2/token
通过POST请求,如果顺利的话,就可以得到一些Token信息,其中包括accessToken,refreshToken以及过期的日期等等。通过accessToken以及userInfo的api接口,就可以得到当前google账户的email信息。
return _serializer.JsonDeserialize<IDictionary<string, string>>(
wc.DownloadString(this._googleOAuth2UserUrl + "?access_token=" + access_token))["email"];
其中_googleOAuth2UserUrl为https://www.googleapis.com/oauth2/v1/userinfo
接下来,我们看下iOS客户端怎样进行google oauth2登录,在http://code.google.com/p/gtm-oauth2/通过svn获取code source:
打开gtm-oauth2-read-only/source,把里面的相关的obj-c的文件拷贝出来,例如:
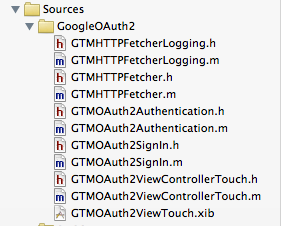
现在,就可以在你的应用程序中使用它了:
创建一个LoginViewController.h/m,并引用头文件:
#import "GTMOAuth2ViewControllerTouch.h"
界面如下:

点击"使用谷歌账号登录“按钮,进入google登录页面:
{
NSLog(@"进入google oauth登录页面");
[self signOut:nil];
NSString *scope = [[[SysConfig instance] keyValue] objectForKey:@"googleScope"];
NSString *keychainItemName = kKeychainItemName;
SEL finishedSel = @selector(viewController:finishedWithAuth:error:);
GTMOAuth2ViewControllerTouch *viewController;
viewController = [GTMOAuth2ViewControllerTouch controllerWithScope:scope
clientID:googleClientId
clientSecret:googleClientSecret
keychainItemName:keychainItemName
delegate:self
finishedSelector:finishedSel];
viewController.loginDelegate = self;
NSString *html = @"<html><body bgcolor=white><div align=center>正在进入google登录页面...</div></body></html>";
viewController.initialHTMLString = html;
[self.navigationController pushViewController:viewController animated:YES];
}
其中googleScope可以设置一个授权google api应用的范围,GTMOAuth2ViewControllerTouch
实际上,GTMOAuth2ViewControllerTouch进入一个拥有UIWebView的嵌套页面,initialHtmlString可进行UIWebView的初始化,并且通过UIWebViewDelegate的委托可以来获取相关的NSURLRequest的信息。接着,这里也要填写刚才对应的googleClientId以及googleClientSecret
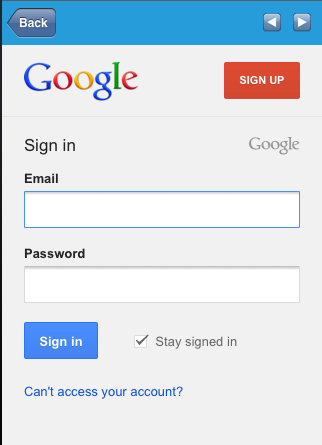
现在在这里填写你的google账号,点击"sign in",进入下一步;
另外,修改下GTMOAuth2SignIn.m里面的代码:
//return kOOBString;
return [[[SysConfig instance] keyValue] objectForKey:@"google_redirect_uri"];
}
从我的Config.plist文件中去读取google_redirect_uri
在parametersForWebRequest方法中进行调整:
@"code", @"response_type",
clientID, @"client_id",
@"joke", @"state",
@"true", @"mobi",
@"force",@"approval_prompt",
@"offline", @"access_type",
scope, @"scope", // scope may be nil
nil];
让paramsDict接受一个state为"joke"的参数,joke的目的是为了在第一次跳转中不对code进行处理,如果code被执行oauth2后,就已经失效。
对应的服务端API,在GoogleLogin加上:
{
if (state == "joke")
return Json(false, JsonRequestBehavior.AllowGet);
先返回方法,这样我就可以在GTMOAuth2ViewControllerTouch.m的webViewDidFinishLoad:方法中,获取到原先code的值:
[self notifyWithName:kGTMOAuth2WebViewStoppedLoading
webView:webView
kind:kGTMOAuth2WebViewFinished];
NSString *query = webView.request.URL.query;
NSArray *array = [query componentsSeparatedByString:@"&"];
if(array.count == 2)
{
[self popView];
[loginDelegate googleLoginFinish:array];
}
NSString *title = [webView stringByEvaluatingJavaScriptFromString:@"document.title"];
if ([title length] > 0) {
[signIn_ titleChanged:title];
} else {
#if DEBUG
// Verify that Javascript is enabled
NSString *result = [webView stringByEvaluatingJavaScriptFromString:@"1+1"];
NSAssert([result integerValue] == 2, @"GTMOAuth2: Javascript is required");
#endif
}
[signIn_ cookiesChanged:[NSHTTPCookieStorage sharedHTTPCookieStorage]];
[self updateUI];
这里用到一个loginDelegate的委托,会把当前的array返回给之前的LoginViewController中:
{
NSString *codeQuery = [array objectAtIndex:1];
NSArray *patams = [codeQuery componentsSeparatedByString:@"="];
NSString *code = [patams objectAtIndex:0];
if([code isEqualToString:@"code"])
{
self.HUD = [Tools process:@"登录中" view:self.view];
NSMutableDictionary *context = [NSMutableDictionary dictionary];
[context setObject:@"GOOGLELOGIN" forKey:REQUEST_TYPE];
NSString *anthCode = [patams objectAtIndex:1];
[AccountService googleLogin:@"" code:anthCode state:@"login" mobi:@"true" joke:@"false" context:context delegate:self];
}
}
AccountService的googleLogin就会去调用服务端的API了,并且完成回调:
{
NSDictionary *userInfo = [request userInfo];
NSString * requestType = [userInfo objectForKey:REQUEST_TYPE];
if([requestType isEqualToString:@"GOOGLELOGIN"])
{
if(request.responseStatusCode == 200)
{
NSArray* array = request.responseCookies;
NSLog(@"Cookies的数组个数: %d", array.count);
NSDictionary *dict = [NSHTTPCookie requestHeaderFieldsWithCookies:array];
NSHTTPCookie *cookie = [NSHTTPCookie cookieWithProperties:dict];
NSHTTPCookieStorage *sharedHTTPCookie = [NSHTTPCookieStorage sharedHTTPCookieStorage];
[sharedHTTPCookie setCookieAcceptPolicy:NSHTTPCookieAcceptPolicyAlways];
[sharedHTTPCookie setCookie:cookie];
NSString *username = [request.responseString stringByReplacingOccurrencesOfString:@"\"" withString:@""];
[[ConstantClass instance] setUsername:username];
[[ConstantClass instance] setLoginType:@"google"];
[ConstantClass saveToCache];
[self dismissModalViewControllerAnimated:NO];
[delegate loginFinish];
}
else
{
[Tools failed:self.HUD];
}
}
}
其中,本地存储了一份从服务端接收到Cookie存放在本地,已备刷新服务端的Form验证的过期。
服务端API最终调用代码:
{
if (state == "joke")
return Json(false, JsonRequestBehavior.AllowGet);
//根据google回调获取对应google账号
var grant = this.GetGoogleGrantByCode(code);
var dict = _serializer.JsonDeserialize<IDictionary<string, string>>(grant);
var email = this.GetGoogleAccount(dict["access_token"]);
this.SetLogin(email, grant);
return Json(email, JsonRequestBehavior.AllowGet);
}
这样就完成了整个google oauth2登录以及在服务端的Form认证。
