一、依赖文件安装
1.1 JDK
参见博文:http://www.cnblogs.com/liugh/p/6623530.html
二、文件准备
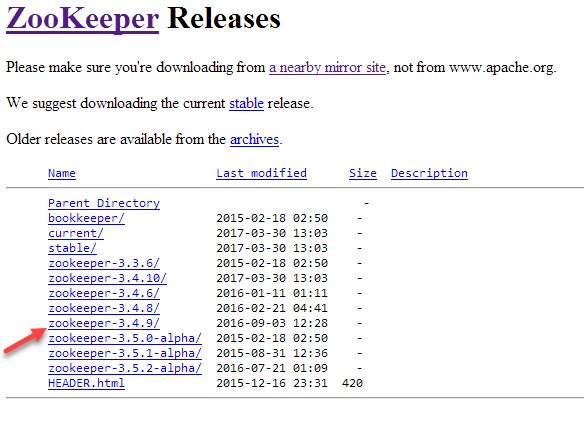
2.1 文件名称
zookeeper-3.4.9.tar.gz
2.2 下载地址
http://apache.fayea.com/zookeeper/
三、工具准备
3.1 Xshell
一个强大的安全终端模拟软件,它支持SSH1, SSH2, 以及Microsoft Windows 平台的TELNET 协议。
Xshell 通过互联网到远程主机的安全连接以及它创新性的设计和特色帮助用户在复杂的网络环境中享受他们的工作。
3.2 Xftp
一个基于 MS windows 平台的功能强大的SFTP、FTP 文件传输软件。
使用了 Xftp 以后,MS windows 用户能安全地在UNIX/Linux 和 Windows PC 之间传输文件。
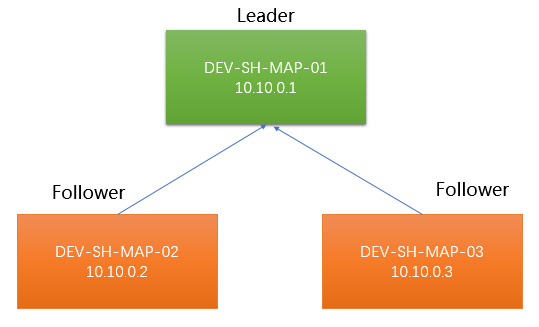
四、部署图
五、Zookeeper安装
以下操作,均使用root用户
5.1 通过Xftp将下载下来的Zookeeper安装文件上传到Leader及两个Follower的/usr目录下
5.2 通过Xshell连接到虚拟机,在Leader及两个Follower上,执行如下命令,解压文件:
# tar zxvf zookeeper-3.4.9.tar.gz
5.3 在Leader上,使用Vi编辑器,设置环境变量
# vi /etc/profile
在文件最后,添加如下内容:
#Zookeeper Env
export ZOOKEEPER_HOME=/usr/zookeeper-3.4.9
export PATH=$PATH:$ZOOKEEPER_HOME/bin
5.4 退出vi编辑器,使环境变量设置立即生效
# source /etc/profile
通过scp命令,将/etc/profile拷贝到两个Follower节点:
#scp /etc/profile root@DEV-SH-MAP-02:/etc
#scp /etc/profile root@DEV-SH-MAP-03:/etc
分别在两个Follower节点上执行# source /etc/profile使其立即生效
六、Zookeeper配置
以下操作均在Leader节点,配置完后,使用scp命令,将配置文件拷贝到两个Follower节点即可。
6.1 zoo.cfg配置文件
切换到/usr/zookeeper-3.4.9/conf/目录下
将zoo_sample.cfg重命名为zoo.cfg
#mv zoo_sample.cfg zoo.cfg
使用vi编辑器,打开zoo.cfg,主要设置数据文件夹、日志文件夹以及通信、选举配置,如下红字所示:
# The number of milliseconds of each tick
tickTime=2000
# The number of ticks that the initial
# synchronization phase can take
initLimit=10
# The number of ticks that can pass between
# sending a request and getting an acknowledgement
syncLimit=5
# the directory where the snapshot is stored.
# do not use /tmp for storage, /tmp here is just
# example sakes.
dataDir=/usr/zookeeper-3.4.9/data
dataLogDir=/usr/zookeeper-3.4.9/logs
# the port at which the clients will connect
clientPort=2181
# the maximum number of client connections.
# increase this if you need to handle more clients
#maxClientCnxns=60
#
# Be sure to read the maintenance section of the
# administrator guide before turning on autopurge.
#
# http://zookeeper.apache.org/doc/current/zookeeperAdmin.html#sc_maintenance
#
# The number of snapshots to retain in dataDir
#autopurge.snapRetainCount=3
# Purge task interval in hours
# Set to "0" to disable auto purge feature
#autopurge.purgeInterval=1
server.1=DEV-SH-MAP-01:2888:3888
server.2=DEV-SH-MAP-02:2888:3888
server.3=DEV-SH-MAP-03:2888:3888
其中:
1)server.1 中的“1”可以是其他的数字或字符, 用来标识服务器,这个标识要写到前面设置的目录文件夹下的myid文件里
2)2888为Leader服务端口,3888为选举时所用的端口
拷贝配置文件到两个Follower节点:
在Leader节点,执行如下命令:
# scp zoo.cfg root@DEV-SH-MAP-02:/usr/zookeeper-3.4.9/conf/
# scp zoo.cfg root@DEV-SH-MAP-03:/usr/zookeeper-3.4.9/conf/
6.2 myid文件
切换到/usr/zookeeper-3.4.9/data目录下
执行命令:echo "1" > myid
注:如果是在Follower上执行,需要执行命令:
echo "2" > myid
或
echo "3" > myid
这里的2和3就是前面配置文件中设置的数字
七、Zookeeper使用
7.1 启动Zookeeper集群
分别在Leader及两个Follower上执行命令:
zkServer.sh start
7.2 查看Zookeeper状态
执行如下命令:
zkServer.sh status
7.3 停止Zookeeper
zkServer.sh stop
7.4 重启Zookeeper
zkServer.sh restart