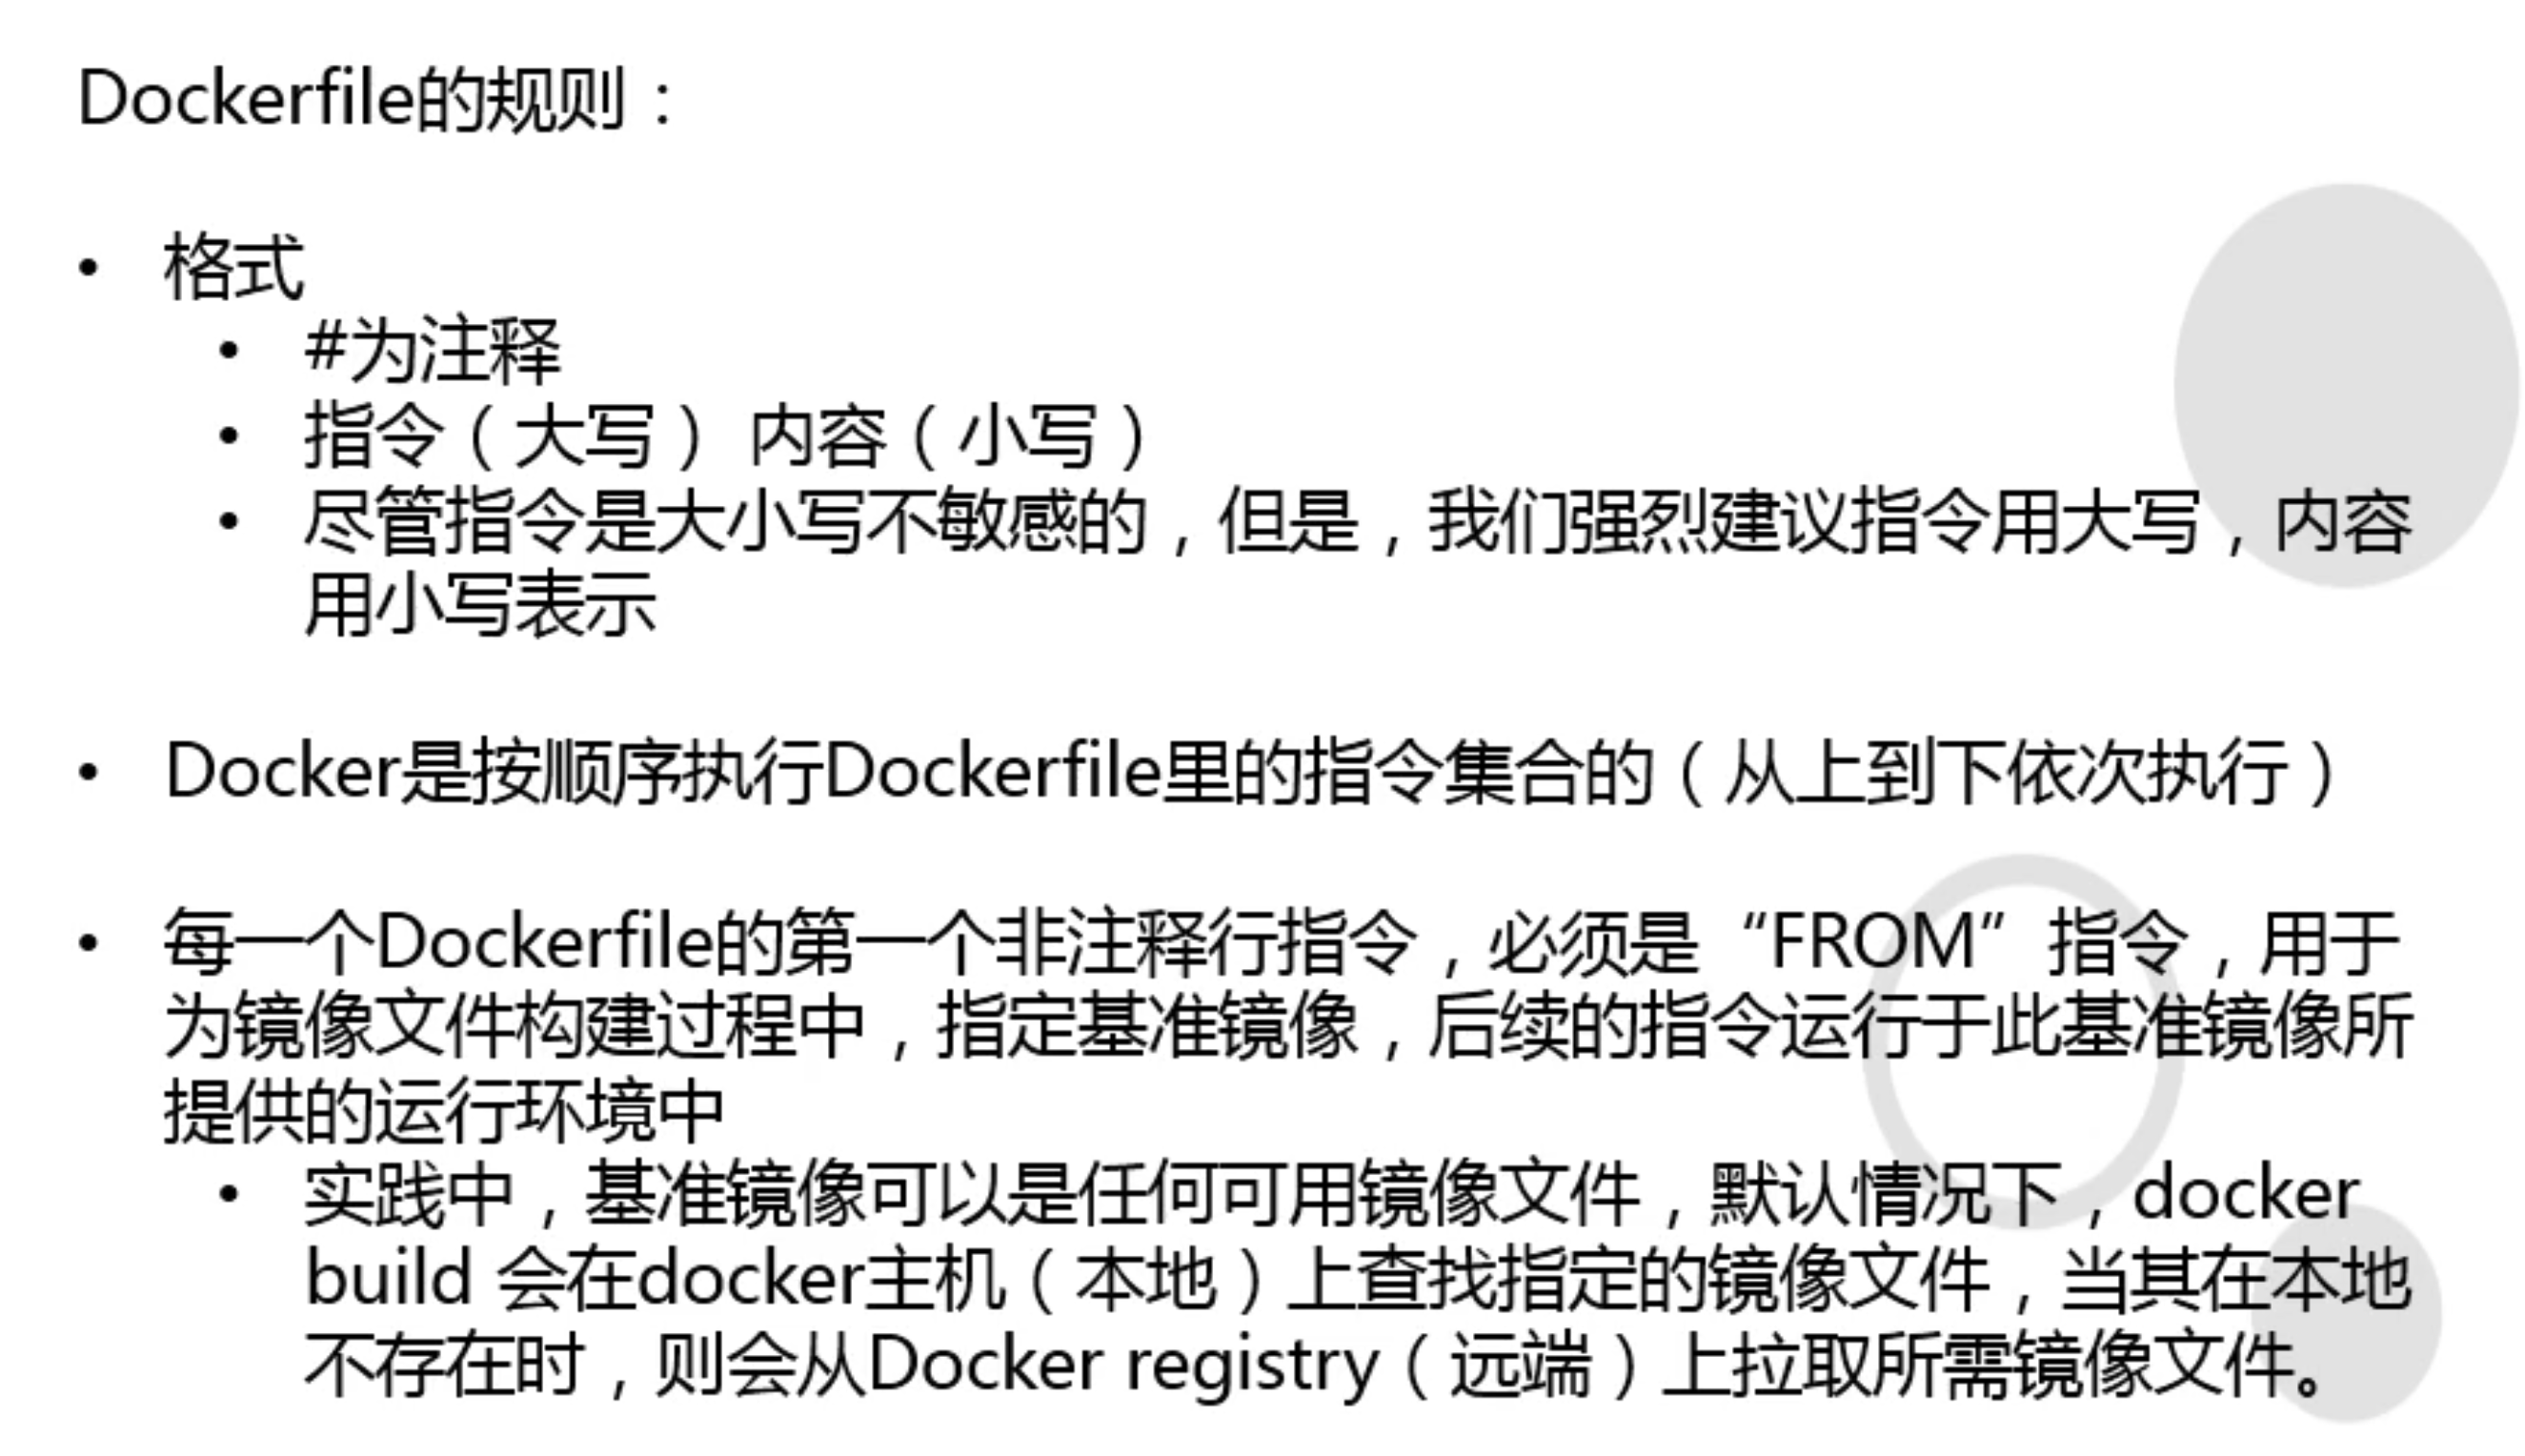
dockerfile
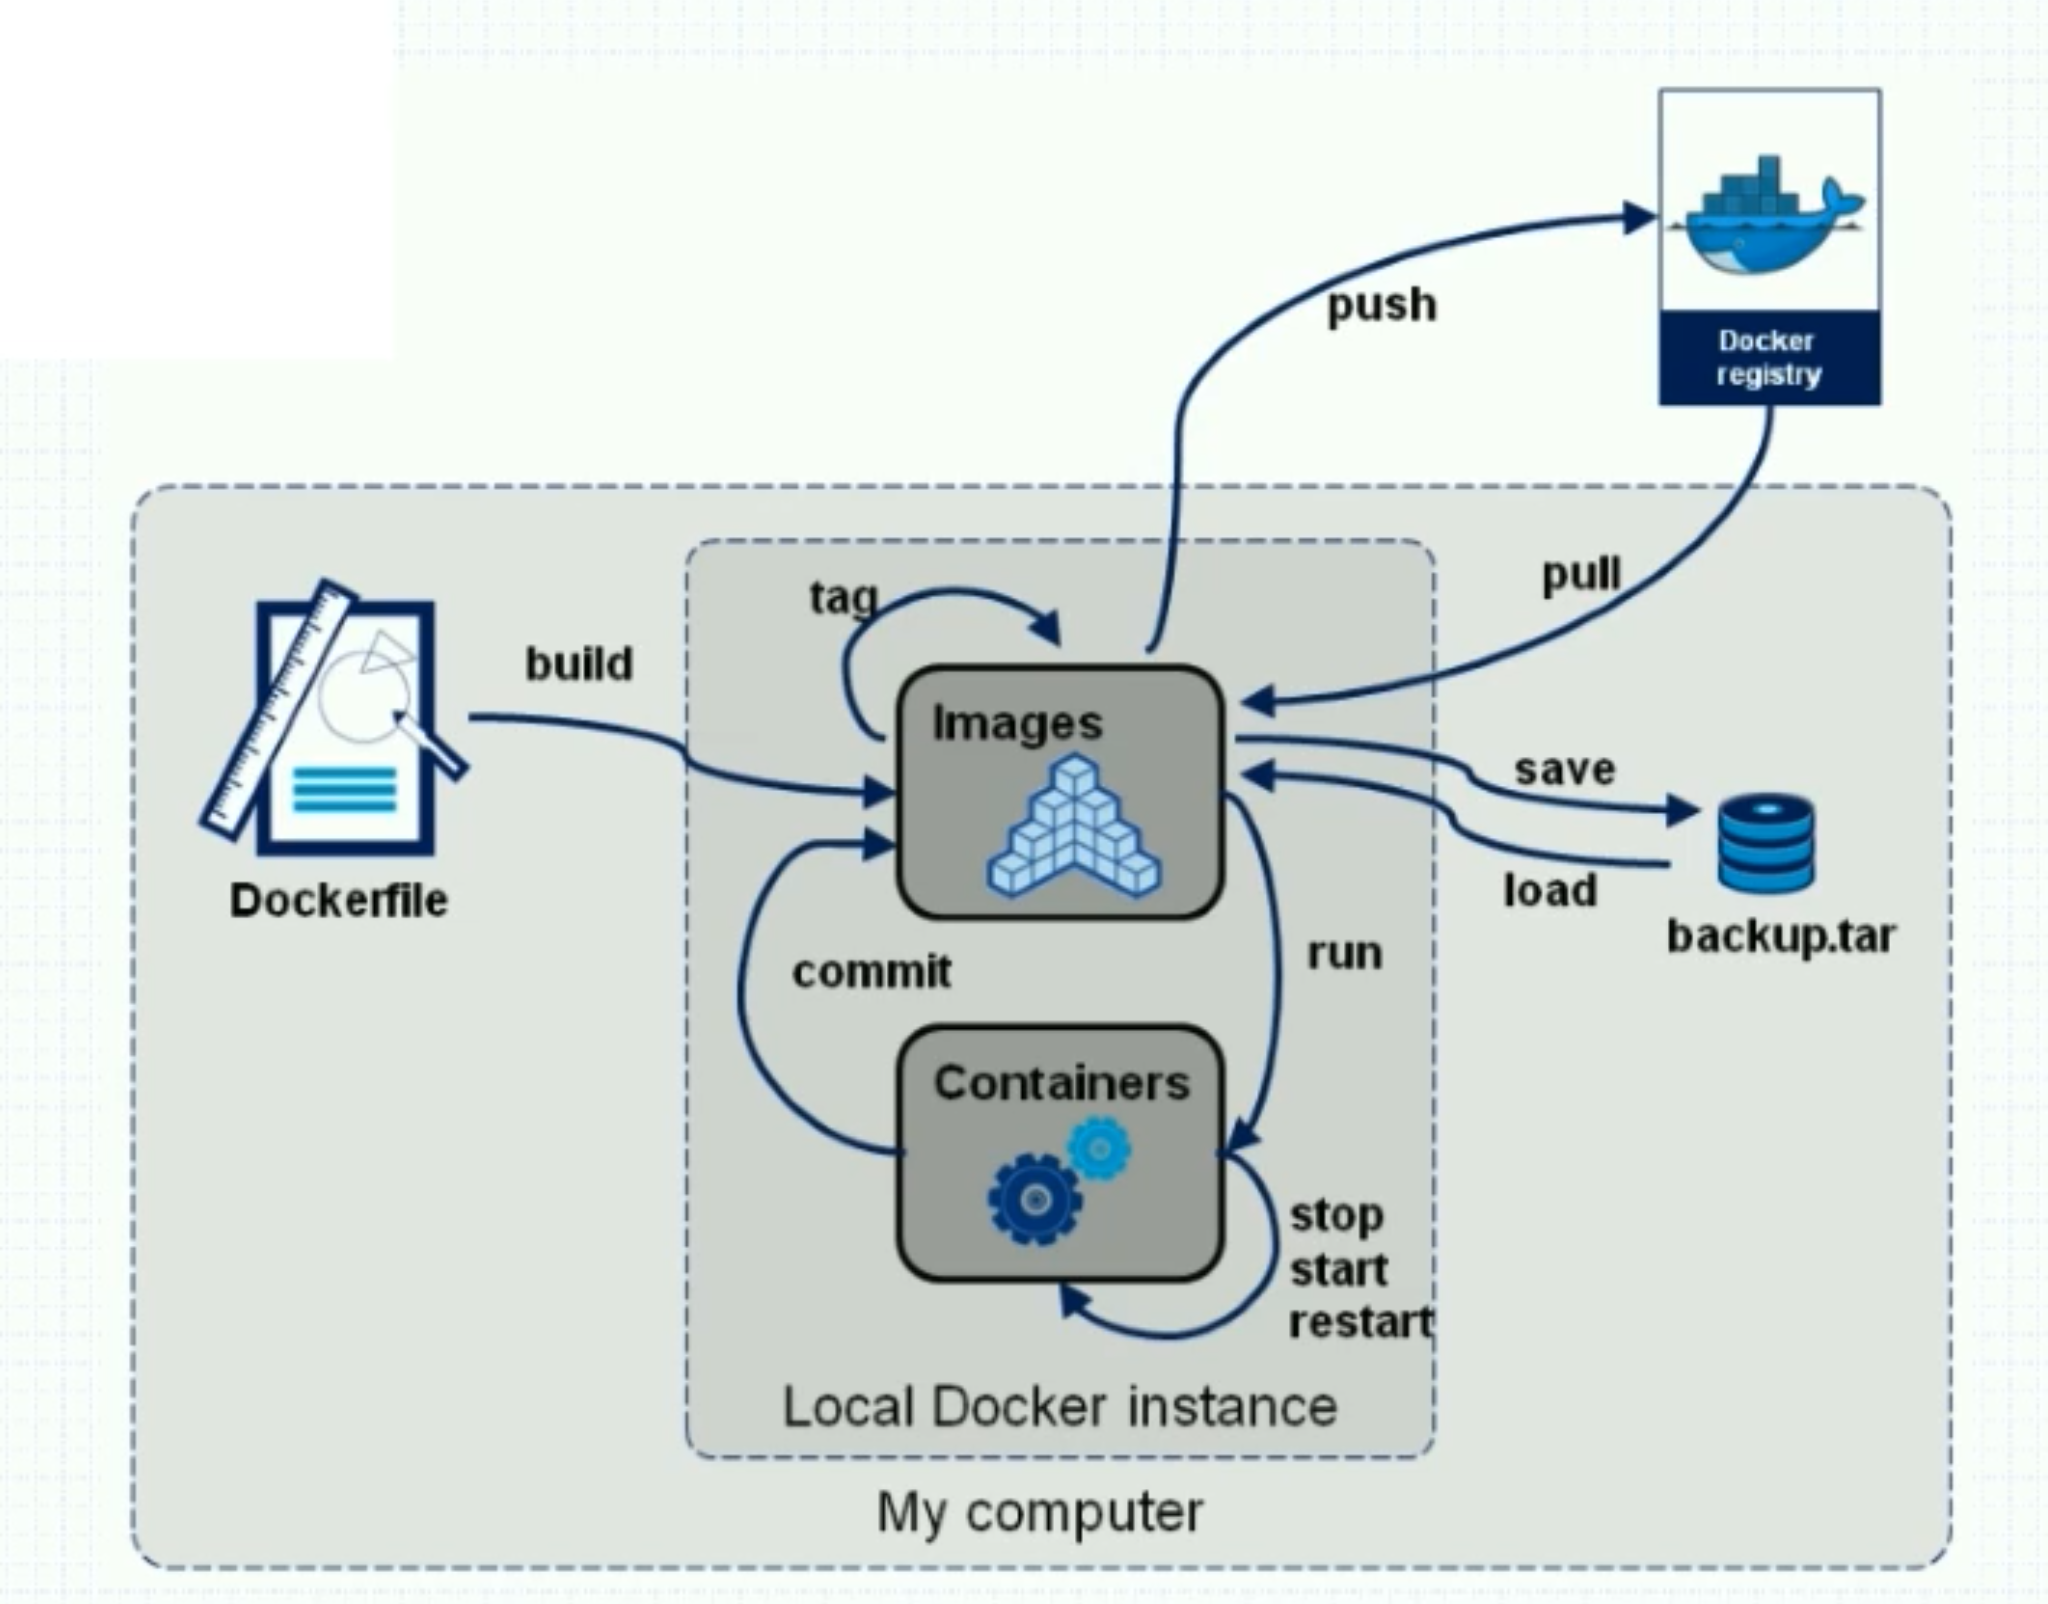
90%是通过build构建镜像,10%是通过docker commit完成的。
4组Dockerfile核心指令
- USER/WORKER指令
- ADD/EXPOSE指令
- RUN/ENV指令
- CMD/ENTRYPOINT指令
构建前准备
[root@huan docker]# mkdir -p /data/dockerfile
[root@huan docker]# cd /data/dockerfile
[root@huan dockerfile]# docker tag 4037a5562b03 xxxxxxxxxxxx/nginx:v1.12.2
[root@huan docker]# docker push xxxxxxxxxxxx/nginx:v1.12.2
开始构建
[root@huan docker]# vim /data/dockerfile/Dockerfile

FROM xxxxxxxxxxxx/nginx:v1.12.2
USER nginx
# WORKDIR就想cd命令
WORKDIR /usr/share/nginx/html

[root@huan dockerfile]# docker build . -t docker.io/xxxxxxxxxxxx/nginx:v1.12.2_with_user_workdir
Sending build context to Docker daemon  2.048kB
Step 1/3 : FROM xxxxxxxxxxxx/nginx:v1.12.2
 ---> 4037a5562b03
Step 2/3 : USER nginx
 ---> Running in d141007045cc
Removing intermediate container d141007045cc
 ---> 0ecb5bb8bfa4
Step 3/3 : WORKDIR /usr/share/nginx/html
 ---> Running in 64f1374d6481
Removing intermediate container 64f1374d6481
 ---> 2966191d1c27
Successfully built 2966191d1c27
Successfully tagged xxxxxxxxxxxx/nginx:v1.12.2_with_user_workdir
查看镜像
[root@huan dockerfile]# docker images
REPOSITORY           TAG                         IMAGE ID            CREATED              SIZE
xxxxxxxxxxxx/nginx   v1.12.2_with_user_workdir   2966191d1c27        About a minute ago   108MB
运行容器
[root@huan dockerfile]# docker run --rm -ti --name nginx123 xxxxxxxxxxxx/nginx:v1.12.2_with_user_workdir /bin/bash
nginx@b576d00b5914:/usr/share/nginx/html$ whoami
nginx
nginx@b576d00b5914:/usr/share/nginx/html$
ADD/EXPOSE指令
- Dockerfile
add指令范围更广一些,可以接受tar包和url
expose指令指定哪个端口可以暴露出来
/data/dockerfile/Dockerfile
FROM stanleyws/nginx:v1.12.2
ADD index.html /usr/share/nginx/html/index.html
EXPOSE 80
ADD是把宿主机的文件固化到docker镜像中
[root@huan dockerfile]# cp /root/html/index.html .
[root@huan dockerfile]# docker build . -t xxxxxxxxxxxx/nginx:v1.12.2_with_index_expose
Sending build context to Docker daemon   5.12kB
Step 1/3 : FROM lllllliuhuan/nginx:v1.12.2
 ---> 4037a5562b03
Step 2/3 : ADD index.html /usr/share/nginx/html/index.html
 ---> 9dc55bdac6f4
Step 3/3 : EXPOSE 80
 ---> Running in 8737825b1f39
Removing intermediate container 8737825b1f39
 ---> ad8ba743c3a6
Successfully built ad8ba743c3a6
Successfully tagged xxxxxxxxxxxx/nginx:v1.12.2_with_index_expose
运行起来
[root@huan dockerfile]# docker run --rm -it --name nginx123 -P xxxxxxxxxxxx/nginx:v1.12.2_with_index_expose /bin/bash
root@e83efecbc5fd:/# whoami
root
root@e83efecbc5fd:/# pwd
/
root@e83efecbc5fd:/# nginx -g "daemon off;"
在宿主机上查看端口
[root@huan ~]# netstat -luntp
Active Internet connections (only servers)
Proto Recv-Q Send-Q Local Address           Foreign Address         State       PID/Program name
tcp        0      0 0.0.0.0:22              0.0.0.0:*               LISTEN      1238/sshd
tcp6       0      0 :::3000                 :::*                    LISTEN      19941/./grafana-ser
tcp6       0      0 :::32769                :::*                    LISTEN      13603/docker-proxy
32769是随机生成的端口,因为dockerfile显式指定的expose 80端口,所以不用指定容器里面是什么端口,通过上面-P参数就在宿主机上起了一个随机的端口,把80代理出来了。
所以发现,EXPOSE需要配合-P使用才生效,如果是-p,则就是手动指定端口了。

RUN/ENV指令
/data/docker/Dockerfile
FROM centos:7
ENV VER 9.11.4
RUN yum install bind-$VER -y
ENV是环境变量,VER是变量名(key),既可以在Dockerfile使用,也可以在docker容器中使用
RUN是在构建镜像的时候,可以执行一些可执行的命令
[root@huan dockerfile]# docker build . -t xxxxxxxxxxxx/bind:v9.11.4_with_env_run

  ..................
Running transaction check
Running transaction test
Transaction test succeeded
Running transaction
  Installing : GeoIP-1.5.0-14.el7.x86_64                                   1/17
  Installing : 32:bind-libs-lite-9.11.4-16.P2.el7_8.6.x86_64               2/17
  Installing : libselinux-utils-2.5-15.el7.x86_64                          3/17
  Installing : policycoreutils-2.5-34.el7.x86_64                           4/17
  Installing : selinux-policy-3.13.1-266.el7_8.1.noarch                    5/17
  Installing : 32:bind-libs-9.11.4-16.P2.el7_8.6.x86_64                    6/17
  Installing : setools-libs-3.3.8-4.el7.x86_64                             7/17
  Installing : audit-libs-python-2.8.5-4.el7.x86_64                        8/17
  Installing : libcgroup-0.41-21.el7.x86_64                                9/17
  Installing : checkpolicy-2.5-8.el7.x86_64                               10/17
  Installing : python-IPy-0.75-6.el7.noarch                               11/17
  Installing : libselinux-python-2.5-15.el7.x86_64                        12/17
  Installing : libsemanage-python-2.5-14.el7.x86_64                       13/17
  Installing : policycoreutils-python-2.5-34.el7.x86_64                   14/17
  Installing : selinux-policy-minimum-3.13.1-266.el7_8.1.noarch           15/17
  ..................
  Complete!
Removing intermediate container 53f9330c5796
 ---> 2dcf9c91944b
Successfully built 2dcf9c91944b
Successfully tagged xxxxxxxxxxxx/bind:v9.11.4_with_env_run
可以看到在构建镜像的时候,帮我们把这个软件安装进去,并且封装成镜像,固化到只读层。
启动容器
[root@huan dockerfile]# docker run -it --rm xxxxxxxxxxxx/bind:v9.11.4_with_env_run /bin/bash
[root@d6da764079ca /]# cat /etc/redhat-release
CentOS Linux release 7.8.2003 (Core)
[root@d6da764079ca /]# printenv
HOSTNAME=d6da764079ca
TERM=xterm
LS_COLORS=rs=0:di=01;34:ln=01;36:mh=00:pi=40;33:so=01;35:do=01;35:bd=40;33;01:cd=40;33;01:or=40;31;01:mi=01;05;37;41:su=37;41:sg=30;43:ca=30;41:tw=30;42:ow=34;42:st=37;44:ex=01;32:*.tar=01;31:*.tgz=01;31:*.arc=01;31:*.arj=01;31:*.taz=01;31:*.lha=01;31:*.lz4=01;31:*.lzh=01;31:*.lzma=01;31:*.tlz=01;31:*.txz=01;31:*.tzo=01;31:*.t7z=01;31:*.zip=01;31:*.z=01;31:*.Z=01;31:*.dz=01;31:*.gz=01;31:*.lrz=01;31:*.lz=01;31:*.lzo=01;31:*.xz=01;31:*.bz2=01;31:*.bz=01;31:*.tbz=01;31:*.tbz2=01;31:*.tz=01;31:*.deb=01;31:*.rpm=01;31:*.jar=01;31:*.war=01;31:*.ear=01;31:*.sar=01;31:*.rar=01;31:*.alz=01;31:*.ace=01;31:*.zoo=01;31:*.cpio=01;31:*.7z=01;31:*.rz=01;31:*.cab=01;31:*.jpg=01;35:*.jpeg=01;35:*.gif=01;35:*.bmp=01;35:*.pbm=01;35:*.pgm=01;35:*.ppm=01;35:*.tga=01;35:*.xbm=01;35:*.xpm=01;35:*.tif=01;35:*.tiff=01;35:*.png=01;35:*.svg=01;35:*.svgz=01;35:*.mng=01;35:*.pcx=01;35:*.mov=01;35:*.mpg=01;35:*.mpeg=01;35:*.m2v=01;35:*.mkv=01;35:*.webm=01;35:*.ogm=01;35:*.mp4=01;35:*.m4v=01;35:*.mp4v=01;35:*.vob=01;35:*.qt=01;35:*.nuv=01;35:*.wmv=01;35:*.asf=01;35:*.rm=01;35:*.rmvb=01;35:*.flc=01;35:*.avi=01;35:*.fli=01;35:*.flv=01;35:*.gl=01;35:*.dl=01;35:*.xcf=01;35:*.xwd=01;35:*.yuv=01;35:*.cgm=01;35:*.emf=01;35:*.axv=01;35:*.anx=01;35:*.ogv=01;35:*.ogx=01;35:*.aac=01;36:*.au=01;36:*.flac=01;36:*.mid=01;36:*.midi=01;36:*.mka=01;36:*.mp3=01;36:*.mpc=01;36:*.ogg=01;36:*.ra=01;36:*.wav=01;36:*.axa=01;36:*.oga=01;36:*.spx=01;36:*.xspf=01;36:
PATH=/usr/local/sbin:/usr/local/bin:/usr/sbin:/usr/bin:/sbin:/bin
PWD=/
SHLVL=1
HOME=/root
VER=9.11.4
_=/usr/bin/printenv
可以看到VER=9.11.4也在,所以这个环境变量Dockerfile和容器中都可以使用。
查看bind
[root@d6da764079ca /]# rpm -qa bind
bind-9.11.4-16.P2.el7_8.6.x86_64
CMD指令
cmd是要启动这个容器了,需要执行什么指令。
/data/dockerfile/Dockerfile
FROM centos:7
RUN yum install httpd -y
CMD ["httpd","-D","FOREGROUND"]
构建
[root@huan dockerfile]# docker build . -t xxxxxxxxxxxx/httpd:latest
[root@huan dockerfile]# docker images
REPOSITORY           TAG                         IMAGE ID            CREATED             SIZE
xxxxxxxxxxxx/httpd   latest                      1e46070e127f        46 seconds ago      323MB
xxxxxxxxxxxx/bind    v9.11.4_with_env_run        2dcf9c91944b        18 minutes ago      316MB
启动
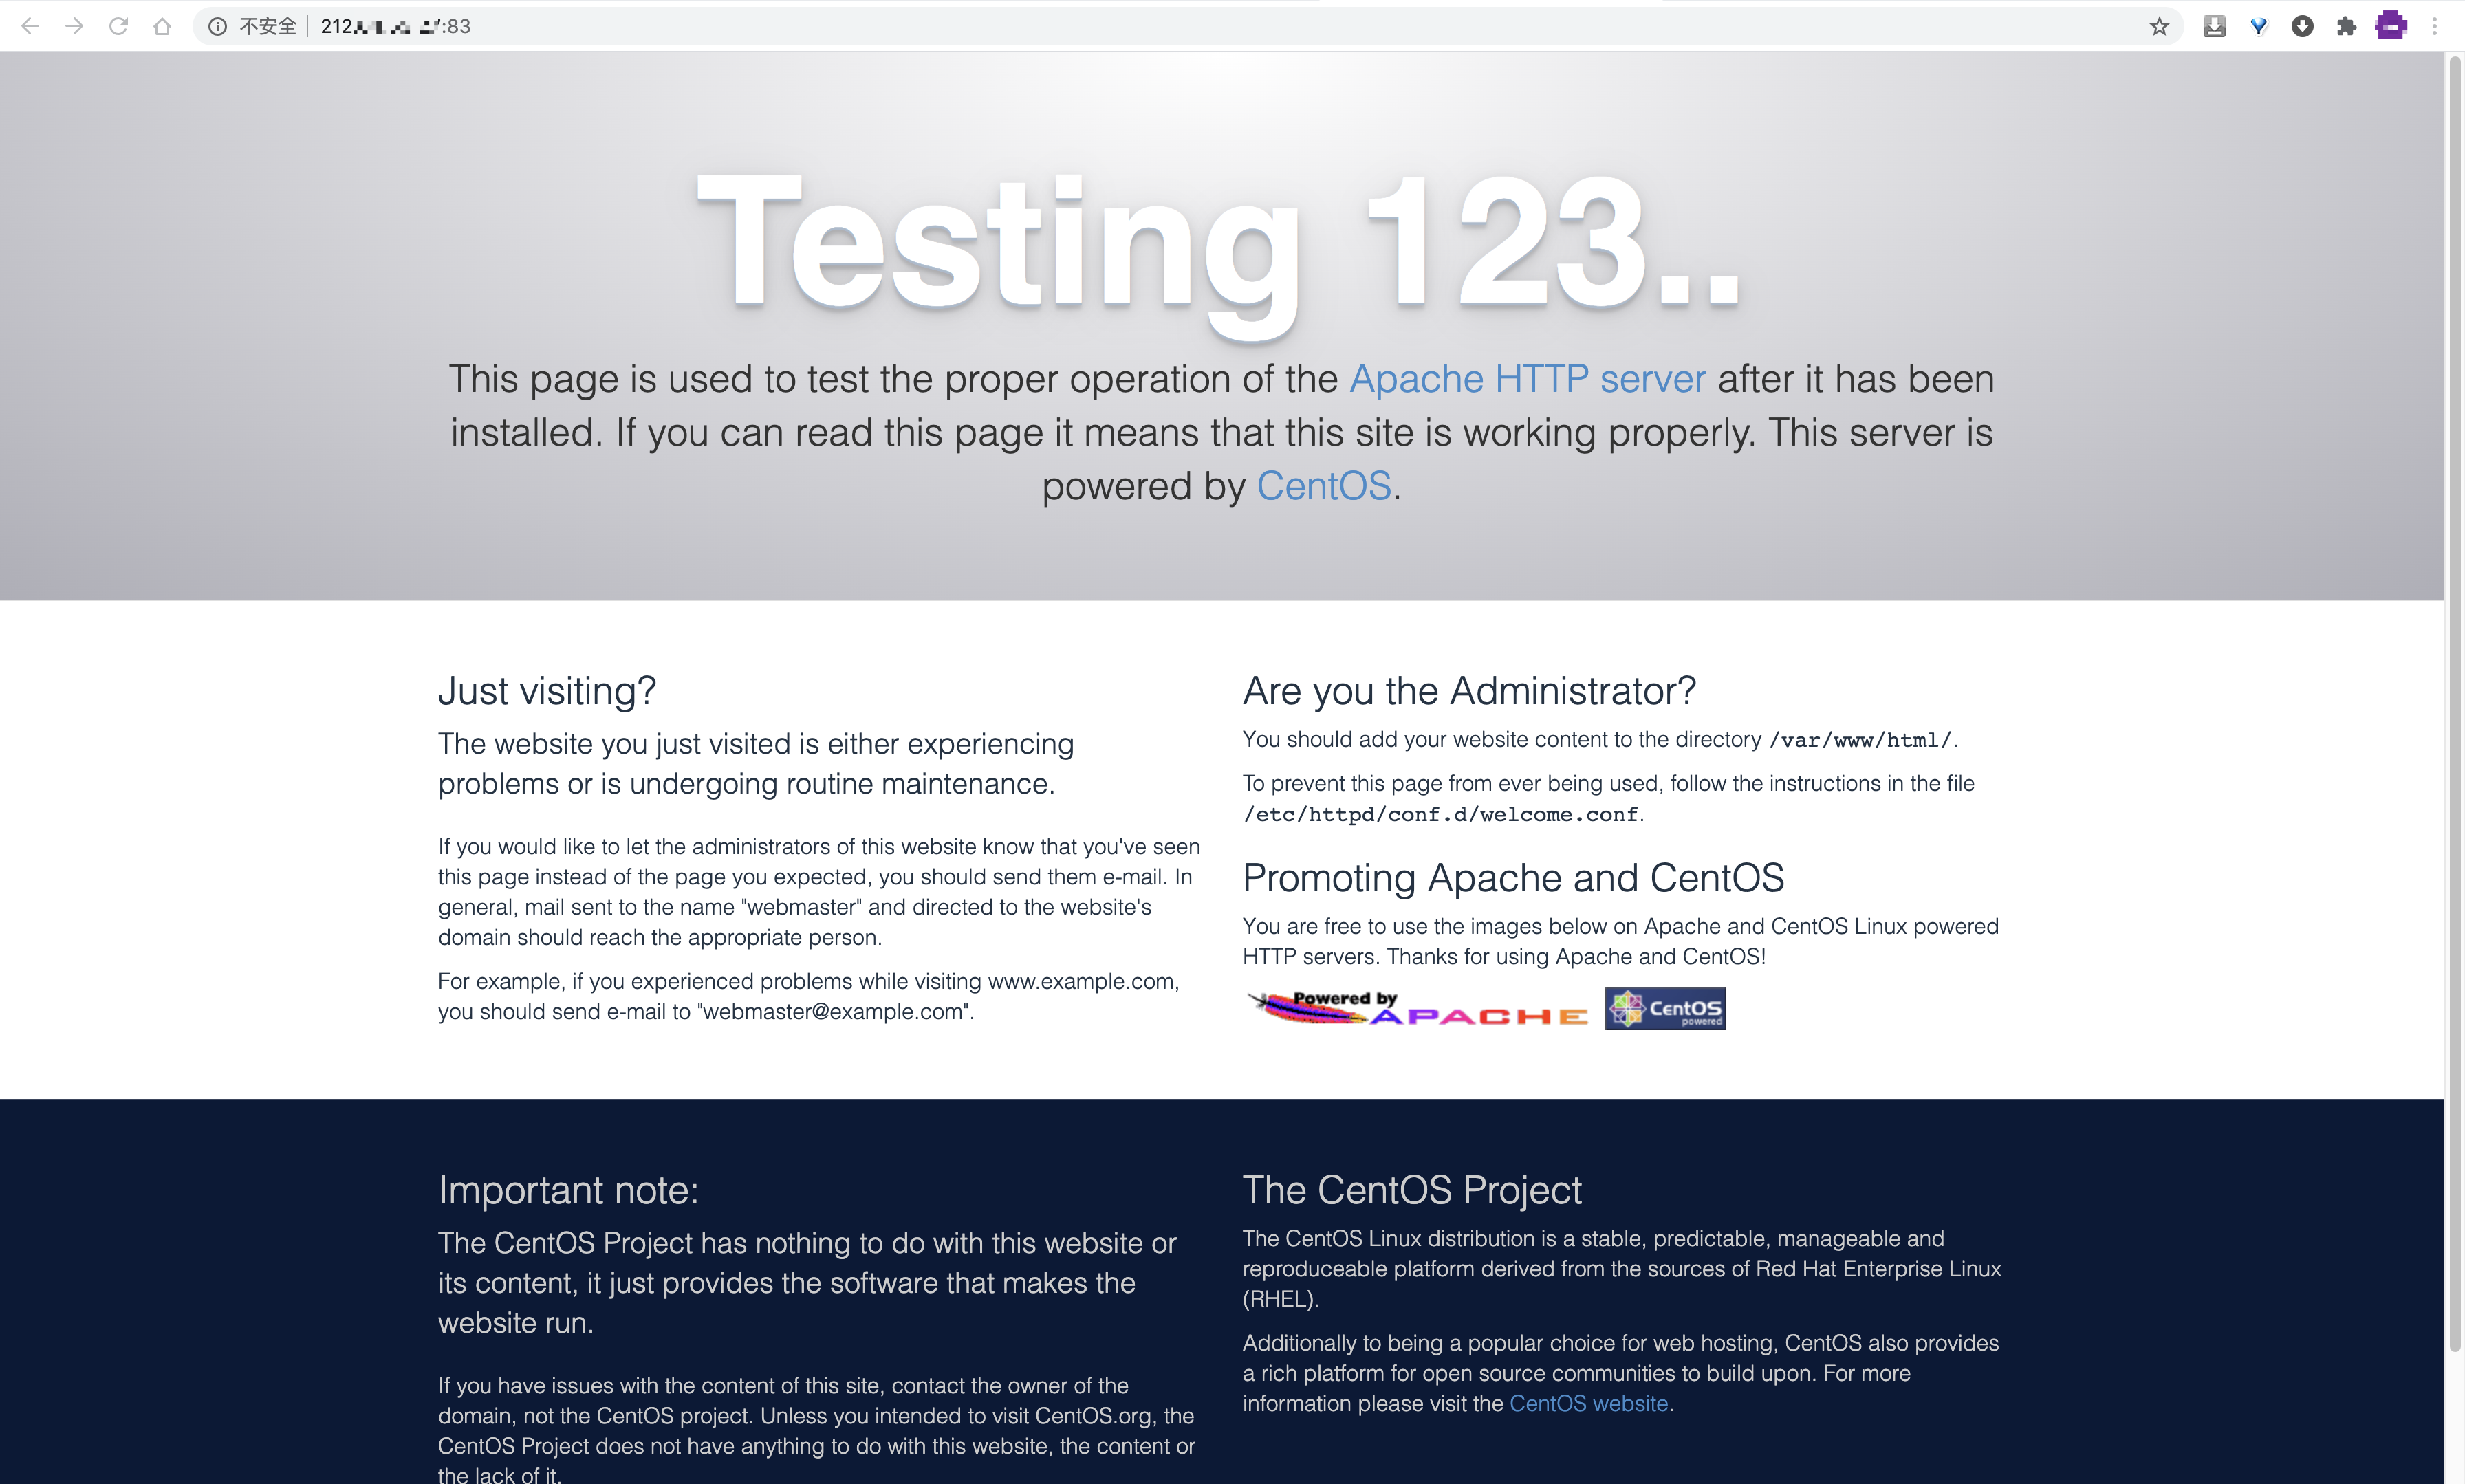
[root@huan dockerfile]# docker run -d --rm --name myhttpd -p83:80 xxxxxxxxxxxx/httpd:latest
a31400b2511b820414a6b32a6711b7ec515ea0996c404c7d01aa05e0a5985728
[root@huan dockerfile]# docker ps
CONTAINER ID        IMAGE                       COMMAND                  CREATED             STATUS              PORTS                NAMES
a31400b2511b        xxxxxxxxxxxx/httpd:latest   "httpd -D FOREGROUND"    12 seconds ago      Up 10 seconds       0.0.0.0:83->80/tcp   myhttpd
查看
ENTRYPOINT指令
FROM centos:7
ADD entrypoint.sh /entrypoint.sh
RUN yum install epel-release -q -y && yum install nginx -y
ENTRYPOINT /entrypoint.sh
如果在构建中提示如下:
http://ftp.jaist.ac.jp/pub/Linux/Fedora/epel/7/x86_64/repodata/e8864296ed2e580ba2b551f59535b5ae17e7e5c14a7337e78ef1e1808a39fd8f-updateinfo.xml.bz2: [Errno 14] HTTP Error 404 - Not Found
Trying other mirror.
To address this issue please refer to the below wiki article

https://wiki.centos.org/yum-errors

If above article doesn't help to resolve this issue please use https://bugs.centos.org/.
可以修改Dockerfile如下
FROM centos:7
ADD entrypoint.sh /entrypoint.sh
RUN yum clean all
RUN yum makecache
RUN yum update
RUN yum install epel-release -q -y && yum install nginx -y
ENTRYPOINT /entrypoint.sh
查看
[root@huan dockerfile]# docker images | grep mynginx
lllllliuhuan/nginx   mynginx                     9be5675f2453        35 minutes ago      707MB
运行
[root@huan dockerfile]# docker run --rm -p84:80 lllllliuhuan/nginx:mynginx
结果发现hang住了,另起一个终端查看
[root@huan ~]# netstat -luntp | grep 84
tcp6       0      0 :::84                   :::*                    LISTEN      25624/docker-proxy

[root@huan ~]# docker ps
CONTAINER ID        IMAGE                        COMMAND                  CREATED              STATUS              PORTS                NAMES
bfd038ce680f        lllllliuhuan/nginx:mynginx   "/bin/sh -c /entrypo…"   About a minute ago   Up About a minute   0.0.0.0:84->80/tcp   objective_dijkstra
查看页面

接下来取消这个forbidden
[root@huan ~]# docker exec -it bfd038ce680f /bin/bash
[root@bfd038ce680f /]# cat /entrypoint.sh
#!/bin/bash

/sbin/nginx -g "daemon off;"

[root@bfd038ce680f /]# ls -l entrypoint.sh
-rwxr-xr-x 1 root root 43 Aug 16 04:50 entrypoint.sh
dockerfile
FROM lllllliuhuan/nginx:v1.12.2
USER root
ENV WWW /usr/share/nginx/html
ENV CONF /etc/nginx/conf.d
RUN /bin/cp /usr/share/zoneinfo/Asia/Shanghai /etc/localtime &&
    echo 'Asia/Shanghai' >/etc/timezone
WORKDIR $WWW
ADD index.html $WWW/index.html
ADD demo.od.com.conf $CONF/demo.od.com.conf
EXPOSE 80
CMD ["nginx","-g","daemon off;"]
补充:在生产上,dockerfile一般都比较短小精悍。
demo.od.com.conf
server {
   listen 80;
   server_name demo.od.com;
   root /usr/share/nginx/html;
}
构建
[root@huan dockerfile]# docker build . -t lllllliuhuan/nginx:baidu
运行并查看
[root@huan ~]# docker ps
CONTAINER ID        IMAGE                       COMMAND                  CREATED             STATUS              PORTS                   NAMES
f1214dac96be        lllllliuhuan/nginx:baidu    "nginx -g 'daemon of…"   25 seconds ago      Up 25 seconds       0.0.0.0:32770->80/tcp   vibrant_volhard