接上一篇:IdentityServer4实现OAuth2.0四种模式之隐藏模式
授权码模式隐藏码模式最大不同是授权码模式不直接返回token,而是先返回一个授权码,然后再根据这个授权码去请求token。这比隐藏模式更为安全。从应用场景上来区分的话,隐藏模式适应于全前端的应用,授权码模式适用于有后端的应用,因为客户端根据授权码去请求token时是需要把客户端密码转进来的,为了避免客户端密码被暴露,所以请求token这个过程需要放在后台。
一,服务端配置
1,添加客户端
新建一个支持授权码模式的客户端,请求token时需要客户端密码,所以需要设置clientSecret。登录成功后重定向地址依然用之前建立的HTML页面。
 new Client()
                {
                    //客户端Id
                     ClientId="apiClientCode",
                     ClientName="ApiClient for Code",
                     //客户端密码
                     ClientSecrets={new Secret("apiSecret".Sha256()) },
                     //客户端授权类型,Code:授权码模式
                     AllowedGrantTypes=GrantTypes.Code,
                     //允许登录后重定向的地址列表,可以有多个
                    RedirectUris = {"https://localhost:5002/auth.html"},
                     //允许访问的资源
                     AllowedScopes={
                        "secretapi"
                    }
                }
二,MVC客户端配置
- 由于和隐藏模式返回token用瞄点的方式不同,授权码是url参数化传递过来的。所以修改一下需要修改一下HTML代码,使其可以显示出参数化的授权码。
<!DOCTYPE html>
<html>
<head>
    <meta charset="utf-8" />
    <title></title>
    <script type="text/javascript">
        var content = "";
        window.onload = function () {
            var url = window.location.href;

            var array = url.split("#");
            if (array.length > 1) {
                content = array[1];
            }
            var search = window.location.search;
            if (search) {
                search = search.substr(1);
                var paras = search.split("&");
                paras.forEach(element => {
                    content += element;
                    content+=";"
                });
            }
            document.getElementById("content").innerHTML = content;
        }
    </script>
</head>
<body>
    <div id="content"></div>
</body>
</html>
三,获取授权码
根据OAuth2.0协议,传递以下参数,传递地址还是参数IdentityServer4的Discover说明中的authorization_endpoint节点值http://localhost:5000/connect/authorize
client_id:客户端Id
redirect_uri=重定向Url,用户登录成功后跳回此地址
response_type=code,固定值,表示获取授权码
scope=secretapi,此token需要访问的api
拼接url:http://localhost:5000/connect/authorize?client_id=apiClientCode&redirect_uri=https://localhost:5002/auth.html&response_type=code&scope=secretapi
在浏览器中访问此url,会跳转到用户登录界面,用之前创建的用户apiUser和密码登录后浏览器会自动跳转回设置的重定向Url

可以看到已经取到了code。
四,访问被保护的API
1,通过后台访问
 public async Task<IActionResult> GetData(string type,string userName,string password,string code)
        {
            type = type ?? "client";
            var client = new HttpClient();
            var disco = await client.GetDiscoveryDocumentAsync("http://localhost:5000");
            if (disco.IsError)
                return new JsonResult(new { err=disco.Error});
            TokenResponse token = null;
            switch (type)
            {
                case "client":
                    token = await client.RequestClientCredentialsTokenAsync(new ClientCredentialsTokenRequest()
                    {
                        //获取Token的地址
                        Address = disco.TokenEndpoint,
                        //客户端Id
                        ClientId = "apiClientCd",
                        //客户端密码
                        ClientSecret = "apiSecret",
                        //要访问的api资源
                        Scope = "secretapi"
                    });
                    break;
                case "password":
                    token = await client.RequestPasswordTokenAsync(new PasswordTokenRequest()
                    {
                        //获取Token的地址
                        Address = disco.TokenEndpoint,
                        //客户端Id
                        ClientId = "apiClientPassword",
                        //客户端密码
                        ClientSecret = "apiSecret",
                        //要访问的api资源
                        Scope = "secretapi",
                        UserName =userName,
                        Password = password
                    });
                    break;
                case "code":
                    token = await client.RequestAuthorizationCodeTokenAsync(new AuthorizationCodeTokenRequest()
                    {
                        Address = disco.TokenEndpoint,
                        ClientId = "apiClientCode",
                        //客户端密码
                        ClientSecret = "apiSecret",
                        Code = code,
                        RedirectUri = "https://localhost:5002/auth.html"
                    });
                    break;
            }
            if (token.IsError)
                return new JsonResult(new { err = token.Error });
            client.SetBearerToken(token.AccessToken);
            string data = await client.GetStringAsync("https://localhost:5001/api/identity");
            JArray json = JArray.Parse(data);
            return new JsonResult(json);
        }
直接访问:https://localhost:5002/home/getdata?type=code&code=93516f5af0c644c13228a66954d6c892816d358704536b6ca4e6623f6b00dee0

2,通过原生Http请求访问
根据OAuth2.0协议,传以下参数,地址则是之前在客户端模式和密码模式获取token时用到的地址,可以在identityServer4的discover文档中找到。
client_id:客户端Id
client_secret:客户端密码
grant_type:authorization_code,固定值
redirect_uri=重定向Url,用户登录成功后跳回此地址
code:获取到的授权码
scope=secretapi,此token需要访问的api
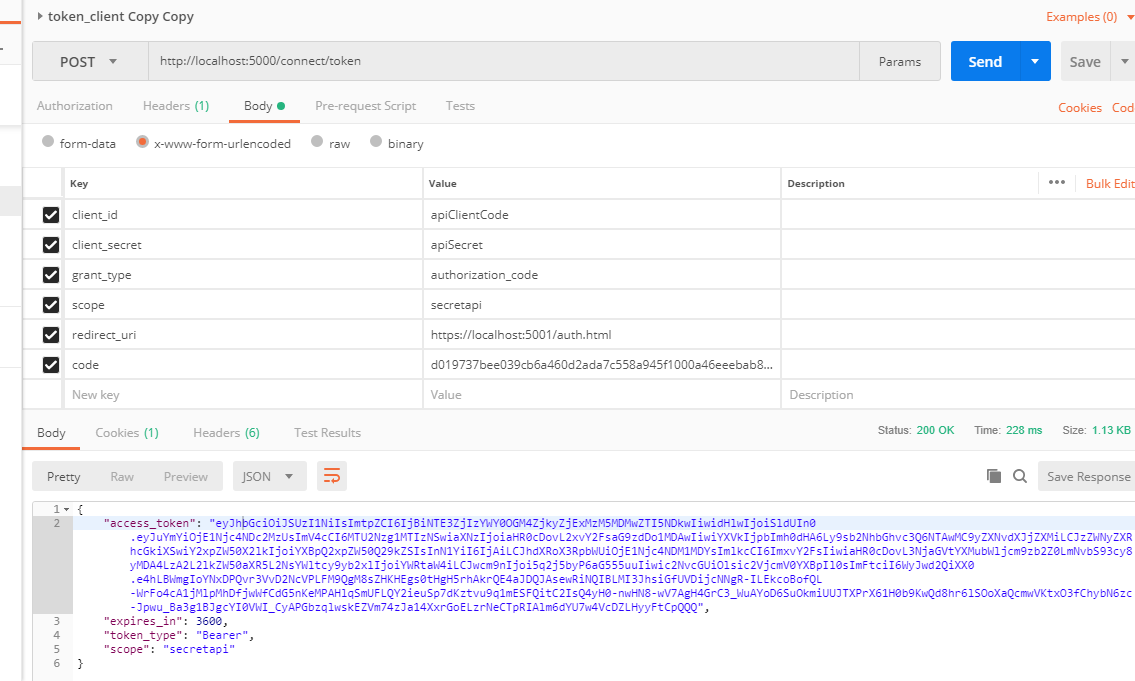
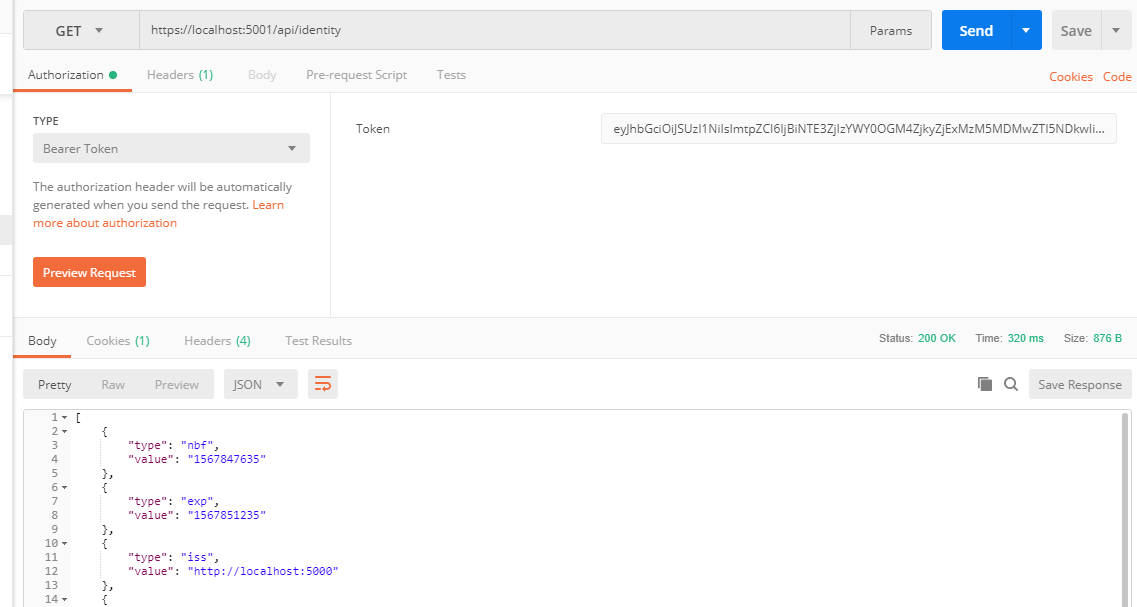
获取到token就可以访问api了。
四种模式讲完,IdentityServer.Config.GetIdentityResouce还没用上呢!因为这四种模式只涉及到IdentityServer4的OAuth2.0特性,OpenId部分还没有涉及,请看下一篇
。