对于Spring MVC的DispatcherServlet配置方式,传统的是基于XML方式的,也就是官方说明的XML-based,如下:
<servlet>
   <servlet-name>dispatcher</servlet-name>
   <servlet-class>
     org.springframework.web.servlet.DispatcherServlet
   </servlet-class>
   <init-param>
     <param-name>contextConfigLocation</param-name>
     <param-value>/WEB-INF/spring/dispatcher-config.xml</param-value>
   </init-param>
   <load-on-startup>1</load-on-startup>
 </servlet>

 <servlet-mapping>
   <servlet-name>dispatcher</servlet-name>
   <url-pattern>/</url-pattern>
 </servlet-mapping>
但是Spring文档建议我们采用code-based这种方式,当然,核心就是实现WebApplicationInitializer这个接口,查看这个接口的源码,里面也非常简单,只有一个方法,传入的参数是ServletContext:
void onStartup(ServletContext servletContext) throws ServletException;
下面是一个小例子:
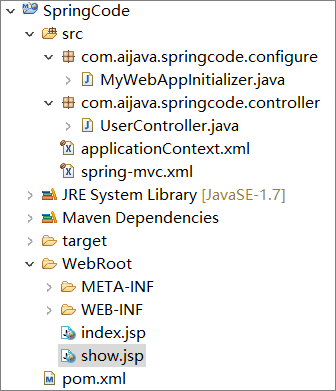
1.项目结构:
2.MyWebAppInitializer.java
public class MyWebAppInitializer implements WebApplicationInitializer{

    public void onStartup(ServletContext servletContext) throws ServletException {
        XmlWebApplicationContext appContext = new XmlWebApplicationContext();
        appContext.setConfigLocation("classpath:spring-mvc.xml");
        ServletRegistration.Dynamic dispatcher = servletContext.addServlet("dispatcher", new DispatcherServlet(appContext));
        dispatcher.setLoadOnStartup(1);
        dispatcher.addMapping("/");
    }

}
3.UserController.java
@Controller
public class UserController {

    @RequestMapping("/show")
    public String show(){
        return "show";
    }
}
4.spring-mvc.xml
<?xml version="1.0" encoding="GBK"?>
<beans xmlns="http://www.springframework.org/schema/beans"
    xmlns:xsi="http://www.w3.org/2001/XMLSchema-instance"
    xmlns:p="http://www.springframework.org/schema/p"
    xmlns:aop="http://www.springframework.org/schema/aop"
    xmlns:tx="http://www.springframework.org/schema/tx"
    xmlns:cache="http://www.springframework.org/schema/cache"
    xmlns:context="http://www.springframework.org/schema/context"
    xmlns:mvc="http://www.springframework.org/schema/mvc"
    xmlns:jpa="http://www.springframework.org/schema/data/jpa"
    xsi:schemaLocation="http://www.springframework.org/schema/aop http://www.springframework.org/schema/aop/spring-aop-3.1.xsd
        http://www.springframework.org/schema/mvc http://www.springframework.org/schema/mvc/spring-mvc-4.1.xsd
        http://www.springframework.org/schema/beans http://www.springframework.org/schema/beans/spring-beans-3.1.xsd
        http://www.springframework.org/schema/data/jpa http://www.springframework.org/schema/data/jpa/spring-jpa-1.3.xsd
        http://www.springframework.org/schema/cache http://www.springframework.org/schema/cache/spring-cache-4.1.xsd
        http://www.springframework.org/schema/tx http://www.springframework.org/schema/tx/spring-tx-3.1.xsd
        http://www.springframework.org/schema/context http://www.springframework.org/schema/context/spring-context-4.1.xsd">

    <context:component-scan base-package="com.aijava.springcode"/>

    <mvc:annotation-driven />

    <!--配置视图解析器-->
    <bean class="org.springframework.web.servlet.view.InternalResourceViewResolver">
        <property name="prefix" value="/"/>
        <property name="suffix" value=".jsp"/>
    </bean>

</beans>
5.show.jsp
简单的一句打印:
<body>
    show page;
</body>
6.启动Tomcat后输入url后发现是会出现结果的,code-based是成功的!