一、Scrapy安装(Windows)。
- 需要到https://www.lfd.uci.edu/~gohlke/pythonlibs/下载Twisted手动安装。
- pip install pywin32.
- pip install scrapy.
在CMD下执行以下命令验证是否安装完成。
- scrapy startproject myjob
- cd myjob
- scrapy genspider baidu www.baidu.com
- scrapy crawl baidu
没有报错说明安装成功。
二、开始一个project
scrapy startproject zhihu
查看相应目录,在pycharm打开。
setting.py
# 默认为True,这个规则可能会影响爬取,先改成False
ROBOTSTXT_OBEY = False

# 把Headers打开
DEFAULT_REQUEST_HEADERS = {
  'Accept': 'text/html,application/xhtml+xml,application/xml;q=0.9,*/*;q=0.8',
  'Accept-Language': 'en',
  'User-Agent':'Mozilla/5.0 (Windows NT 10.0; WOW64) AppleWebKit/537.36 (KHTML, like Gecko) Chrome/63.0.3239.132 Safari/537.36',
}
items.py
# -*- coding: utf-8 -*-

# Define here the models for your scraped items
#
# See documentation in:
# https://doc.scrapy.org/en/latest/topics/items.html

from scrapy import Item, Field

class UsersItem(Item):
    answer_count = Field()
    articles_count = Field()
    avatar_url = Field()
    avatar_url_template = Field()
    badge = Field()
    follower_count = Field()
    gender = Field()
    headline = Field()
    id = Field()
    is_advertiser = Field()
    is_followed = Field()
    is_following = Field()
    is_org = Field()
    name = Field()
    type = Field()
    url = Field()
    url_token = Field()
    user_type = Field()
zhihu.py
# -*- coding: utf-8 -*-
from scrapy import Spider, Request
import json
import re
from ..items import UsersItem
f = open('F:zhihu.txt', 'w', encoding='utf-8')

class UserinfoSpider(Spider):
    name = 'zhihu'
    allowed_domains = ['www.zhihu.com']
    start_urls = ['http://www.zhihu.com/']
    start_user = 'kaifulee'
    user_url = 'https://www.zhihu.com/api/v4/members/{user}?include={include}'
    user_query = 'allow_message,is_followed,is_following,is_org,is_blocking,employments,answer_count,follower_count,articles_count,gender,badge[?(type=best_answerer)].topics'
    follow_url = 'https://www.zhihu.com/api/v4/members/{user}/followees?include={include}&offset={offset}&limit={limit}'
    follow_query = 'data[*].answer_count,articles_count,gender,follower_count,is_followed,is_following,badge[?(type=best_answerer)].topics'

    def start_requests(self):
        # 起始用戶頁,關注頁
        # url = 'https://www.zhihu.com/api/v4/members/kaifulee/followees?include=data%5B*%5D.answer_count%2Carticles_count%2Cgender%2Cfollower_count%2Cis_followed%2Cis_following%2Cbadge%5B%3F(type%3Dbest_answerer)%5D.topics&offset=0&limit=20'
        yield Request(self.user_url.format(user=self.start_user, include=self.user_query),
                      callback=self.user_parse)
        yield Request(self.follow_url.format(user=self.start_user, include=self.follow_query, offset=0, limit=20),
                      callback=self.follow_parse)

    def user_parse(self, response):
        result = json.loads(response.text)
        # 獲取用戶信息
        item = UsersItem()
        for field in item.fields:
            if field in result.keys():
                item[field] = result.get(field)
        yield item
        yield Request(self.follow_url.format(user=result.get('url_token'), include=self.follow_query, limit=20, offset=0),
                      callback=self.follow_parse)

    def follow_parse(self, response):
        results = json.loads(response.text)
        # 獲取用戶url_token參數傳入用戶頁中進行迭代
        if 'data' in results.keys():
            # 這裏作為驗證把用戶名保存到txt文檔中
            for result in results.get('data'):
                print(result['name'])
                f.writelines(result['name']+' | ')
                yield Request(self.user_url.format(user=result.get('url_token'), include=self.user_query),
                              self.user_parse)
        # 用戶關注列表頁翻頁迭代
        if 'paging' in results.keys() and results.get('paging').get('is_end') == False:
            next_page = results.get('paging').get('next')
            num_re = re.compile(r'members/(.*?)/.*?offset=(d+)').search(next_page)
            # 可能是知乎為了防止爬蟲程序,這裏獲得的下一頁url不能訪問,所以就用正則抓取url_token和offset值,傳入url中實現翻頁
            print('get url token {} offset {}'.format(num_re.group(1), num_re.group(2)))
            user = num_re.group(1)
            offset = num_re.group(2)
            next_page_url = self.follow_url.format(user=user, include=self.follow_query, limit=20, offset=offset)
            print('next_page_url={}'.format(next_page_url))
            yield Request(next_page_url, self.follow_parse)
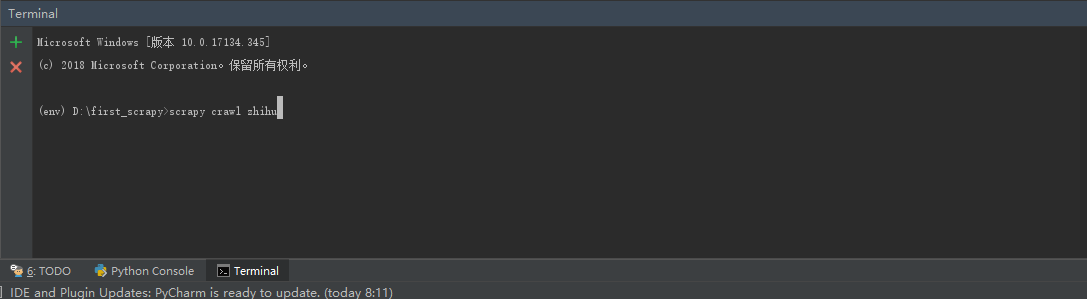
直接在pycharm上的terminal运行
打开zhihu.txt看到确实有抓到很多用户,而且没有使用代理试跑了半小时也没有被知乎弹验证码阻止。

三、同时爬取粉丝页并传入Mongodb
前面是从我关注的人页面爬url_token,当然也可以同时从关注我的人页面爬url_token,只需要在followees的url下面加一个followers的url,include都是一样的不用改,再加一个follower_pase函数就好了。
# -*- coding: utf-8 -*-
from scrapy import Spider, Request
import json
import re
from ..items import UsersItemclass UserinfoSpider(Spider):
    name = 'zhihu'
    allowed_domains = ['www.zhihu.com']
    start_urls = ['http://www.zhihu.com/']
    start_user = 'kaifulee'
    # 用户信息url
    user_url = 'https://www.zhihu.com/api/v4/members/{user}?include={include}'
    user_query = 'allow_message,is_followed,is_following,is_org,is_blocking,employments,answer_count,follower_count,articles_count,gender,badge[?(type=best_answerer)].topics'
    # 他关注的人url
    follow_url = 'https://www.zhihu.com/api/v4/members/{user}/followees?include={include}&offset={offset}&limit={limit}'
    # 关注他的人url
    follower_url = 'https://www.zhihu.com/api/v4/members/{user}/followers?include={include}&offset={offset}&limit={limit}'
    follow_query = 'data[*].answer_count,articles_count,gender,follower_count,is_followed,is_following,badge[?(type=best_answerer)].topics'


    def start_requests(self):
        # 起始用戶頁,關注頁
        # url = 'https://www.zhihu.com/api/v4/members/kaifulee/followees?include=data%5B*%5D.answer_count%2Carticles_count%2Cgender%2Cfollower_count%2Cis_followed%2Cis_following%2Cbadge%5B%3F(type%3Dbest_answerer)%5D.topics&offset=0&limit=20'
        yield Request(self.user_url.format(user=self.start_user, include=self.user_query),
                      callback=self.user_parse)
        yield Request(self.follow_url.format(user=self.start_user, include=self.follow_query, offset=0, limit=20),
                      callback=self.follow_parse)
        yield Request(self.follower_url.format(user=self.start_user, include=self.follow_query, offset=0, limit=20),
                      callback=self.follower_parse)

    def user_parse(self, response):
        result = json.loads(response.text)
        # 獲取用戶信息
        item = UsersItem()
        for field in item.fields:
            if field in result.keys():
                item[field] = result.get(field)
        yield item
        yield Request(self.follow_url.format(user=result.get('url_token'), include=self.follow_query, limit=20, offset=0),
                      callback=self.follow_parse)
        yield Request(self.follower_url.format(user=result.get('url_token'), include=self.follow_query, limit=20, offset=0),
                      callback=self.follower_parse)

    def follow_parse(self, response):
        results = json.loads(response.text)
        # 獲取用戶url_token參數傳入用戶頁中進行迭代
        if 'data' in results.keys():
            # 這裏作為驗證把用戶名保存到txt文檔中
            for result in results.get('data'):
                print(result['name'])yield Request(self.user_url.format(user=result.get('url_token'), include=self.user_query),
                              self.user_parse)
        # 用戶關注列表頁翻頁迭代
        if 'paging' in results.keys() and results.get('paging').get('is_end') == False:
            next_page = results.get('paging').get('next')
            num_re = re.compile(r'members/(.*?)/.*?offset=(d+)').search(next_page)
            # 可能是知乎為了防止爬蟲程序,這裏獲得的下一頁url不能訪問,所以就用正則抓取url_token和offset值,傳入url中實現翻頁
            print('get url token {} offset {}'.format(num_re.group(1), num_re.group(2)))
            user = num_re.group(1)
            offset = num_re.group(2)
            next_page_url = self.follow_url.format(user=user, include=self.follow_query, limit=20, offset=offset)
            print('next_page_url={}'.format(next_page_url))
            yield Request(next_page_url, self.follow_parse)

    def follower_parse(self, response):
        results = json.loads(response.text)
        # 獲取用戶url_token參數傳入用戶頁中進行迭代
        if 'data' in results.keys():
            # 這裏作為驗證把用戶名保存到txt文檔中
            for result in results.get('data'):
                print(result['name'])
                f.writelines(result['name']+' | ')
                yield Request(self.user_url.format(user=result.get('url_token'), include=self.user_query),
                              self.user_parse)
        # 用戶關注列表頁翻頁迭代
        if 'paging' in results.keys() and results.get('paging').get('is_end') == False:
            next_page = results.get('paging').get('next')
            num_re = re.compile(r'members/(.*?)/.*?offset=(d+)').search(next_page)
            # 可能是知乎為了防止爬蟲程序,這裏獲得的下一頁url不能訪問,所以就用正則抓取url_token和offset值,傳入url中實現翻頁
            print('get url token {} offset {}'.format(num_re.group(1), num_re.group(2)))
            user = num_re.group(1)
            offset = num_re.group(2)
            next_page_url = self.follower_url.format(user=user, include=self.follow_query, limit=20, offset=offset)
            print('next_page_url={}'.format(next_page_url))
            yield Request(next_page_url, self.follower_parse)
把结果保存到Mongdb中,从scrapy官方文档中copy Mongodb的Demo,直接用就好了,就是写入数据库的代码要改一下,在存入前去重。
官方文档https://doc.scrapy.org/en/latest/topics/item-pipeline.html
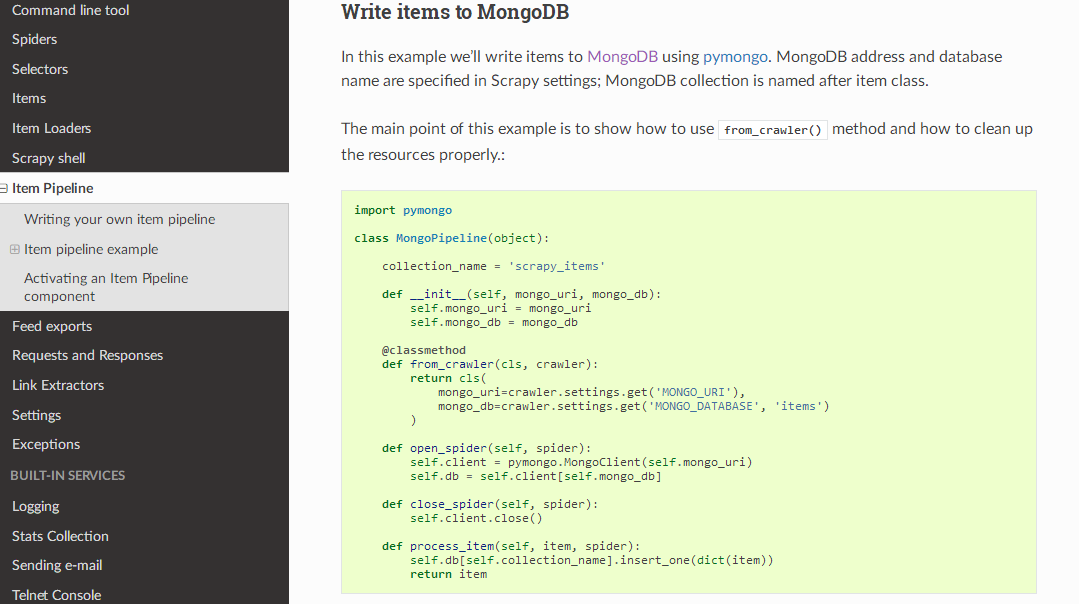
pipelines.py
import pymongo

class MongoPipeline(object):

    collection_name = 'scrapy_items'

    def __init__(self, mongo_uri, mongo_db):
        self.mongo_uri = mongo_uri
        self.mongo_db = mongo_db

    @classmethod
    def from_crawler(cls, crawler):
        return cls(
            mongo_uri=crawler.settings.get('MONGO_URI'),
            mongo_db=crawler.settings.get('MONGO_DATABASE', 'items')
        )

    def open_spider(self, spider):
        self.client = pymongo.MongoClient(self.mongo_uri)
        self.db = self.client[self.mongo_db]

    def close_spider(self, spider):
        self.client.close()

    def process_item(self, item, spider):
        self.db['users'].update({'url_token': item['url_token']}, {'$set': item}, True)
        return item
settings.py把pipelines打开,并加上Mongodb的配置
ITEM_PIPELINES = {
   'first_scrapy.pipelines.MongoPipeline': 300,
}


MONGO_URI = 'localhost'
MONGO_DATABASE = 'zhihu'
为什么Mongodb用的是这两个变量名?因为MongoPipline里面写的是从setting里面拿这两个变量,所以必须是这两个变量名,如果要更改需要连pipelines里面的名字一起改。
    @classmethod
    def from_crawler(cls, crawler):
        return cls(
            mongo_uri=crawler.settings.get('MONGO_URI'),
            mongo_db=crawler.settings.get('MONGO_DATABASE', 'items')
        )
Mongodb上的结果
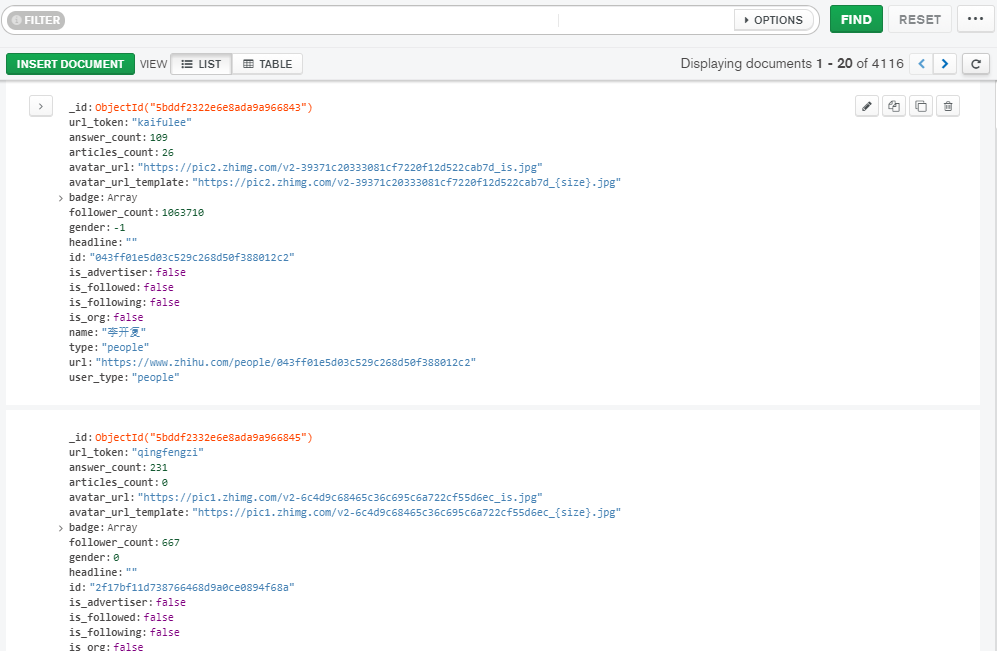
我在一个地方没用代理验证了半小时,抓到了2w多条数据都没有出现验证码,在另一个地方用代理爬了4000多条数据就出现验证码的问题了,验证码问题可以用Flask维护的动态代理池来解决。