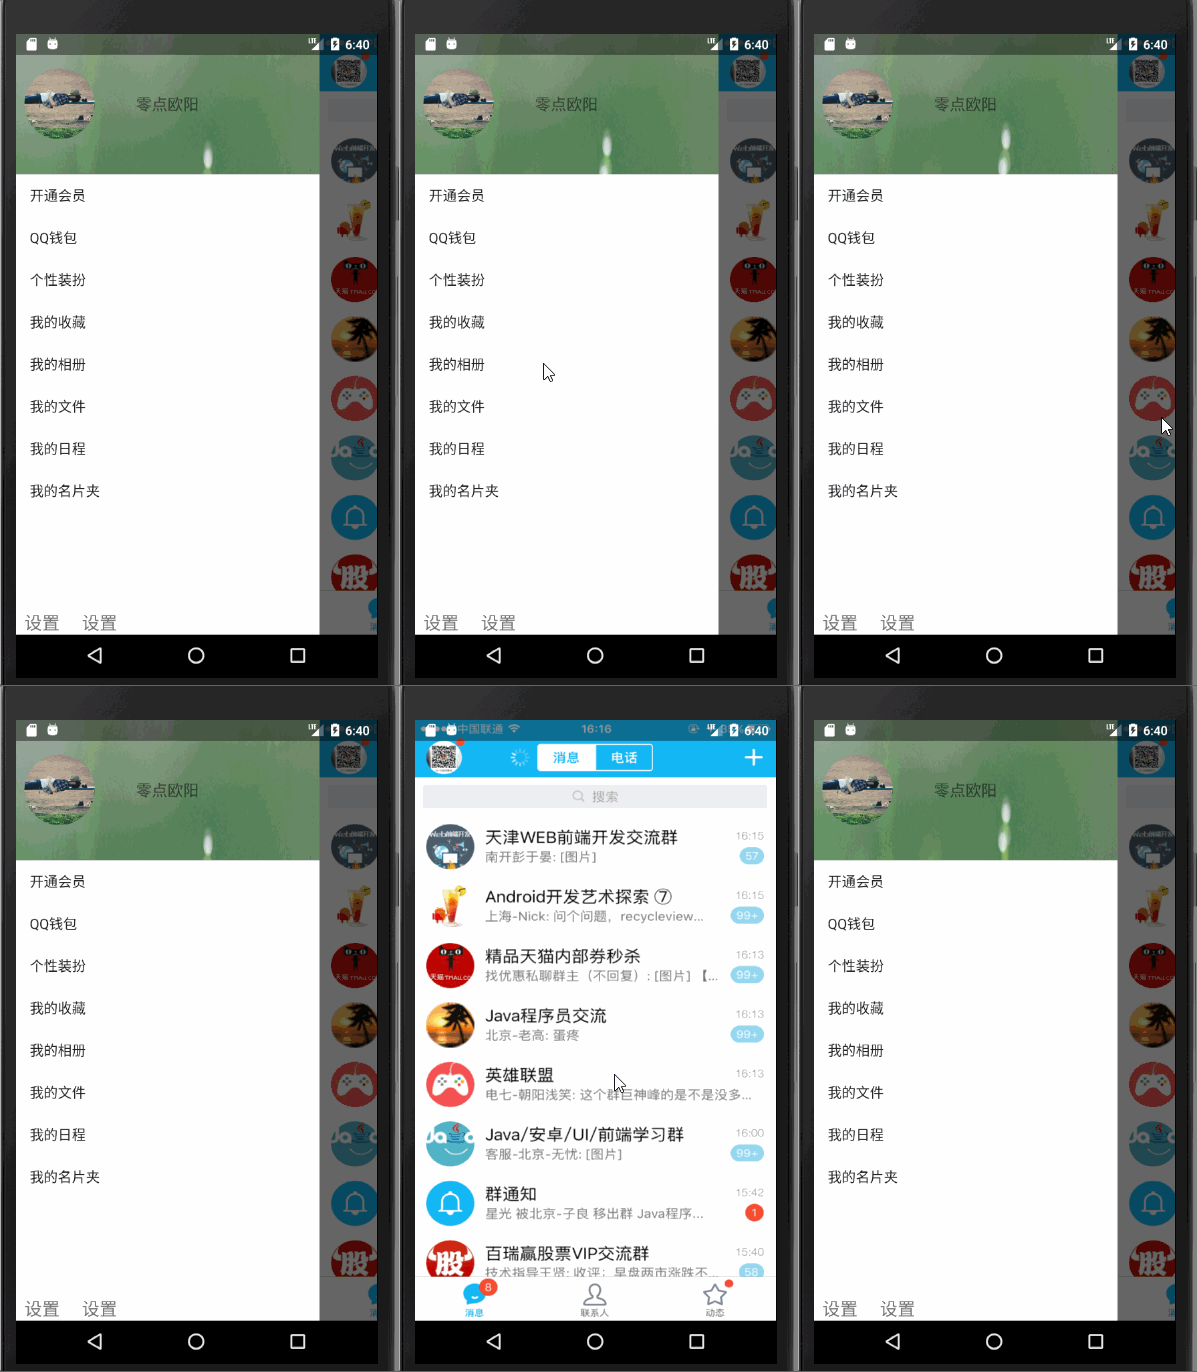
源码DEMO地址:https://github.com/applelili/ImitationQQ

实现说明:
通过自定义布局实现:
SlidingLayout继承于 HorizontalScrollView
/**
* Created by Administrator on 2017/3/29.
*/
public class SlidingLayout extends HorizontalScrollView{
/** 左侧右边间距 */
private float rightPadding;
/** 左侧菜单的宽度 */
private int leftWidth;
private ViewGroup leftView;
private ViewGroup contentView;
private final Context context;
private boolean isOpenMeun = true;
private ImageView shadowView;
public SlidingLayout(Context context) {
this(context,null);
}
public SlidingLayout(Context context, AttributeSet attrs) {
this(context, attrs,0);
}
public SlidingLayout(Context context, AttributeSet attrs, int defStyleAttr) {
super(context, attrs, defStyleAttr);
this.context = context;
//获取自定义的属性
TypedArray typedArray=context.obtainStyledAttributes(attrs,R.styleable.SlidingLayout);
rightPadding=typedArray.getDimension(R.styleable.SlidingLayout_rightPadding,80);
//计算左侧菜单的宽度
leftWidth = (int) (getScreenWidth() - rightPadding + 0.5f);
}
//获取屏幕的宽度
private float getScreenWidth() {
return getResources().getDisplayMetrics().widthPixels;
}
@Override /** 布局解析完毕的时候 */
protected void onFinishInflate() {
super.onFinishInflate();
ViewGroup container= (ViewGroup) getChildAt(0);
if(container.getChildCount() > 2){
throw new IllegalStateException("SlidingLayout中只能放两个子View");
}
//获取左侧菜单view
leftView = (ViewGroup) container.getChildAt(0);
//获取主布局的Viwe
contentView = (ViewGroup) container.getChildAt(1);
//设置子view 的宽度
leftView.getLayoutParams().width = leftWidth;
contentView.getLayoutParams().width = (int) getScreenWidth();
//移除父布局
container.removeView(contentView);
FrameLayout frameLayout=new FrameLayout(context);
frameLayout.setLayoutParams(new ViewGroup.LayoutParams(ViewGroup.LayoutParams.MATCH_PARENT,ViewGroup.LayoutParams.MATCH_PARENT));
frameLayout.addView(contentView);
//添加阴影
shadowView = new ImageView(context);
shadowView.setBackgroundColor(Color.parseColor("#99000000"));
frameLayout.addView(shadowView);
container.addView(frameLayout);
}
/**
* 该方法在滑动的时候会不断的调用
* @param l : left
* @param t
* @param oldl
* @param oldt
*/
@Override
protected void onScrollChanged(int l, int t, int oldl, int oldt) {
super.onScrollChanged(l, t, oldl, oldt);
float x=l*0.8f;//偏移量
leftView.setTranslationX(x);//平移
float color = 1 - l * 1.0f / leftWidth;
shadowView.setAlpha(color);
}
@Override
public boolean onTouchEvent(MotionEvent ev) {
switch (ev.getAction()) {
case MotionEvent.ACTION_UP://手指抬起的时候判断是否关闭
int currentX = getScrollX();
if (isOpenMeun) {
if (currentX >= leftWidth / 2) {
closeMeun();
} else {
openMeun();
}
//点击关闭
float x = ev.getX();
if (x > leftWidth) {
closeMeun();
}
return true;
} else {//关闭状态
if (currentX < leftWidth / 2) {
openMeun();
} else {
closeMeun();
}
return true;
}
}
return super.onTouchEvent(ev);
}
/** 关闭菜单 */
public void closeMeun(){
isOpenMeun = false;
smoothScrollTo(leftWidth,0);// 250ms
}
/** 打开菜单 */
public void openMeun(){
isOpenMeun = true;
smoothScrollTo(0,0);
}
}
====attrs属性文件========
<?xml version="1.0" encoding="utf-8"?>
<resources>
<declare-styleable name="SlidingLayout">
    <attr name="rightPadding" format="dimension"/>
</declare-styleable>
</resources>
===========布局方面-========
<?xml version="1.0" encoding="utf-8"?>
<com.example.myqq.SlidingLayout
    xmlns:android="http://schemas.android.com/apk/res/android"
    xmlns:app="http://schemas.android.com/apk/res-auto"
    xmlns:tools="http://schemas.android.com/tools"
    android:layout_width="match_parent"
    android:layout_height="match_parent"
    app:rightPadding="65dp"
    tools:context="com.example.myqq.MainActivity">


    <LinearLayout
        android:layout_width="match_parent"
        android:layout_height="match_parent"
        android:orientation="horizontal">

        <include layout="@layout/left_main" />

        <include layout="@layout/right_main" />


    </LinearLayout>


</com.example.myqq.SlidingLayout>
=============activity=======
package com.example.myqq;

import android.animation.ObjectAnimator;
import android.annotation.TargetApi;
import android.support.v7.app.AppCompatActivity;
import android.os.Bundle;
import android.view.WindowManager;
import android.widget.ArrayAdapter;
import android.widget.ImageView;
import android.widget.ListView;

public class MainActivity extends AppCompatActivity {
    private String strings[] = {"开通会员", "QQ钱包", "个性装扮", "我的收藏", "我的相册", "我的文件", "我的日程", "我的名片夹"};
    @Override
    protected void onCreate(Bundle savedInstanceState) {
        super.onCreate(savedInstanceState);
        setState();
        setContentView(R.layout.activity_main);
        ListView listView= (ListView) findViewById(R.id.list_left);
        listView.setDividerHeight(0);
        listView.setAdapter(new ArrayAdapter<>(this,android.R.layout.simple_list_item_1,strings));

        ImageView bgimg1= (ImageView) findViewById(R.id.bgimg);
        float currentY=bgimg1.getTranslationY();
        ObjectAnimator animator = ObjectAnimator.ofFloat(bgimg1, "translationY", currentY, -100, -40, currentY);
        animator.setDuration(5000);
        animator.setRepeatCount(ObjectAnimator.INFINITE);
        animator.start();

    }
    @TargetApi(20)
    private void setState() {
        WindowManager.LayoutParams params=new WindowManager.LayoutParams();
        params.flags=WindowManager.LayoutParams.FLAG_TRANSLUCENT_STATUS;
        getWindow().setAttributes(params);

    }
}