1. 前言
最近为Taffy自动化测试框架写了个页面,主要实现了用例管理、执行,测试报告查看管理、发送邮件及配置等功能。
本页面适用所有基于taffy/nose框架编写的自动化测试脚本,或基于unittest等其他单元测试框架编写的自动化测试脚本亦可(只需进行小小的改动)。
2. 实现细节
页面使用Python Flask +Bootstrap开发,还有部分JS。
2.1 安装相关lib
pip install flask
pip install flask-bootstrap
pip install flask-wtf
pip install nose
pip install nose-html-reporting
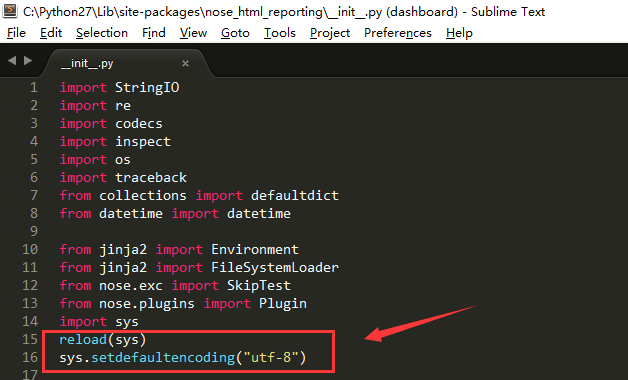
其中nose-html-reporting是nose框架生成html报告插件,需要修改__init__.py编码方式为utf-8 (示例路径为C:Python27Libsite-packages
ose_html_reporting\__init__.py),在文件最上方import中添加
reload(sys)
sys.setdefaultencoding("utf-8")
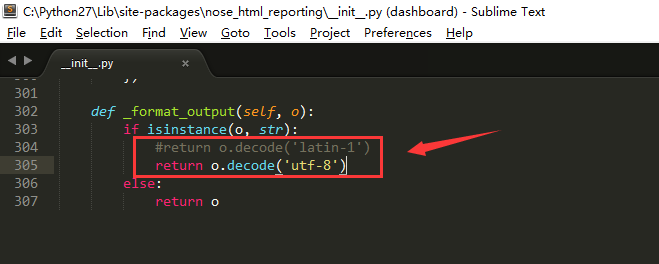
在文件最下方_format_output方法中修改return o.decode('latin-1')为return o.decode('utf-8')
2.2 下载Bootstrap
1) 从官网http://v3.bootcss.com/,下载最新Bootstrap版本
2) 这里我们从http://v3.bootcss.com/getting-started/#examples中选取了dashboard模版(http://v3.bootcss.com/examples/dashboard/)
3) 解压下载的bootstrap-3.3.7.zip,其中dashboard模板目录为bootstrap-3.3.7docsexamplesdashboard
2.3 Taffy_Web项目基本结构
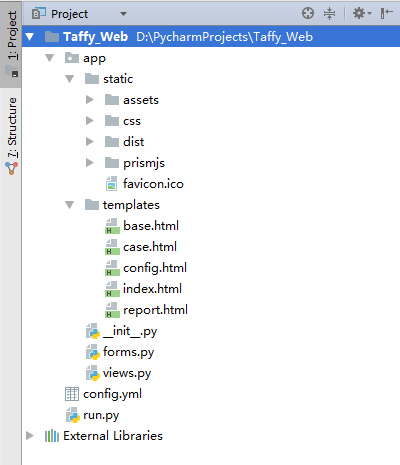
1) app文件夹存放的有static静态文件,templates模版文件 (Bootstrap dashboard模版及css等文件就分别放在这2个目录下)
2) forms.py为表单文件,这里主要是配置文件用到
3) views.py为视图文件,主要存放视图函数
4) config.yml是配置文件
5) run.py是启动文件,使用python run.py即可启动整个项目
2.4 核心代码讲解
我们以核心的运行测试用例为例,详细讲解下整体的实现思路。
2.4.1 “运行测试”按钮通过onclick绑定了一个runCase()的js方法
<button type="button" id="run-case" class="btn btn-success" onclick="runCase()">运行测试</button>
2.4.2 runCase() js方法
实现思路如下:
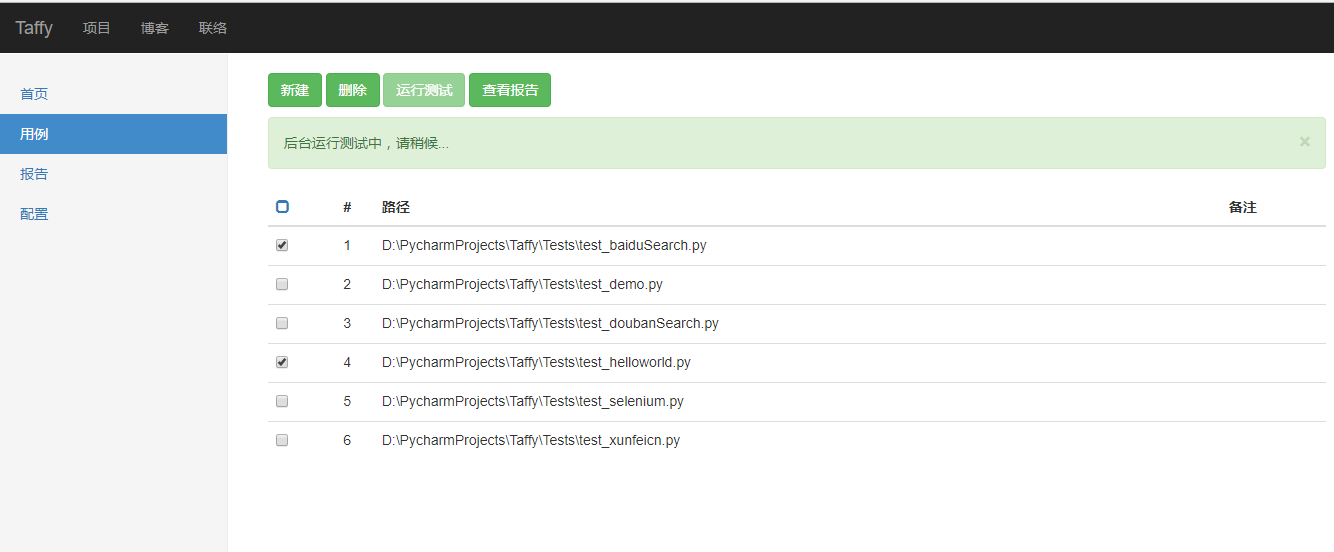
1) 首先调用getSelect()方法获取当前选中的测试用例,未选中任何用例时会弹出警告消息
2) 通过Http Post方法调用views.py中定义的runcCase视图函数(传入参数为选中文件列表)
3) 最后根据返回结果判断测试执行成功或失败
function runCase() {
    var params = {};
    var selects=getSelect();
    var button=$("#run-case");

    if(selects == "") {
        alertMessage('未选中任何文件!','warning');
        }
    else {
        button.attr("disabled", true);
        params["caseFiles"]=selects;
        alertMessage("后台运行测试中,请稍候...");
        $.post("/runCase",params,function(result){
            if (result['desc']=='0' || result['desc']) {
                alertMessage('测试运行完成,返回码:<strong>'+result['desc']+'</strong>.	<a href="report" class="alert-link">点击查看报告!</a>');
                //刷新用例列表
                getCase();}
            else {
               alertMessage(result['desc'],'danger');}
            button.removeAttr("disabled");
        });
    }
}
2.4.3 views.py中定义的runcCase视图函数
实现思路如下:
1) 首先从Post请求参数中获取需要运行的caseFiles列表,进行格式化处理(文件包含在双引号“”中,且以空格分隔)
2) 读取配置文件,生成测试报告路径及名称
3) 拼接生成nosetests运行测试用例并导出测试报告命令,使用os.system()运行
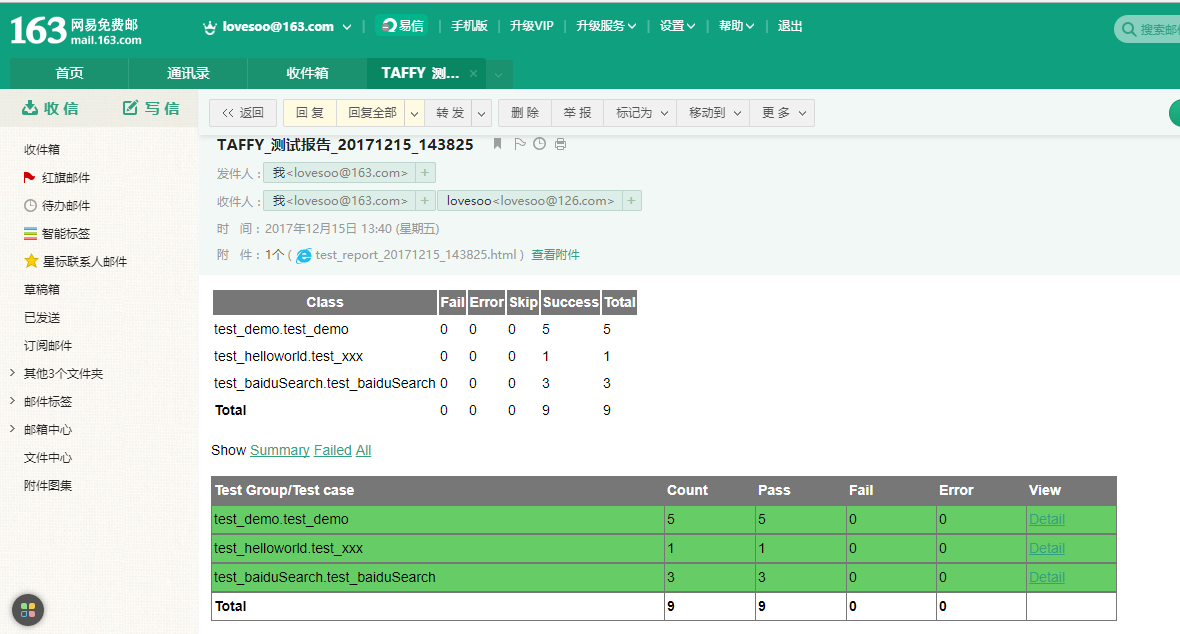
4) 最后判断配置项是否需要测试完成自动发送报告邮件,调用封装好的sendReportMail()方法
@app.route("/runCase", methods=["GET", "POST"])
def runCase():
    if request.method == "POST":
        # 获取数组参数
        caseFiles = request.form.getlist("caseFiles[]")
        result = {}
        try:
            caseFiles = ' '.join(map(lambda i: '"' + i + '"', caseFiles)).encode('gbk')
            config = yaml.load(file(CONFIG_FILE, 'r'))
            # Taffy路径
            taffy_dir = config['taffy_dir']
            # 测试报告名称
            report_name = config['report_name'] + '_{0}.html'.format(dt.now().strftime('%Y%m%d_%H%M%S'))
            # 先判断文件夹是否存在,不存在则新建
            reportDir = os.path.join(taffy_dir, 'Results')
            if not os.path.exists(reportDir):
                os.makedirs(reportDir)
            # 测试报告路径
            report_file = os.path.join(reportDir, report_name)
            command = 'nosetests -v {0}  --with-html --html-report="{1}"'.format(caseFiles, report_file.encode('gbk'))
            result['desc'] = os.system(command)

            # 判断是否自动发送结果邮件
            if config['auto_send']:
                result = sendReportMail(report_file)
        except Exception as e:
            result['exception'] = u'用例运行失败:{0}'.format(e)
        return jsonify(result)
3. 成果展示
3.1 示例视频
我录制一个简短的操作示例视频:http://v.youku.com/v_show/id_XMzIzMzg5MDcwNA==.html
3.2 示例图片
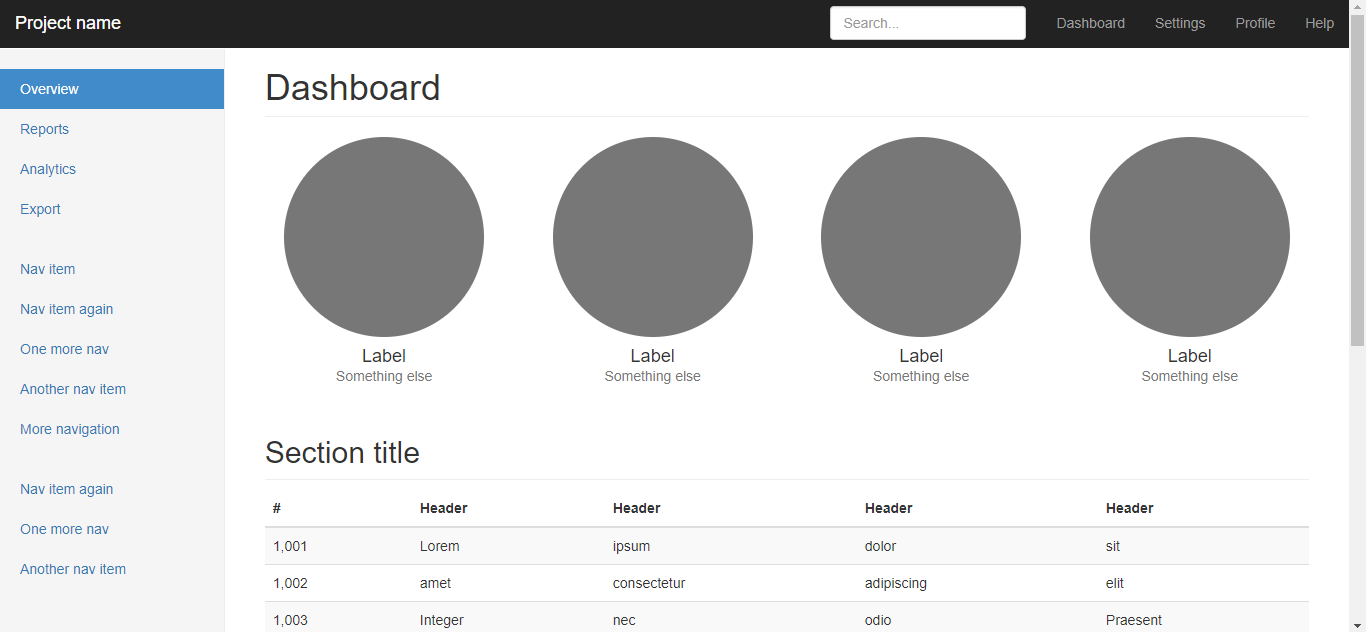
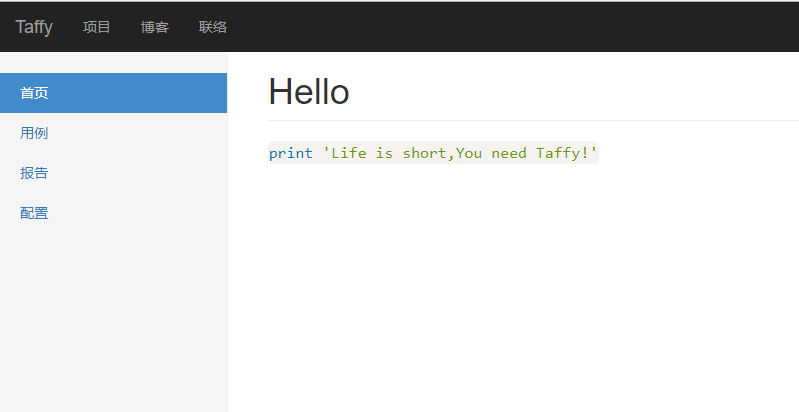
3.2.1 首页
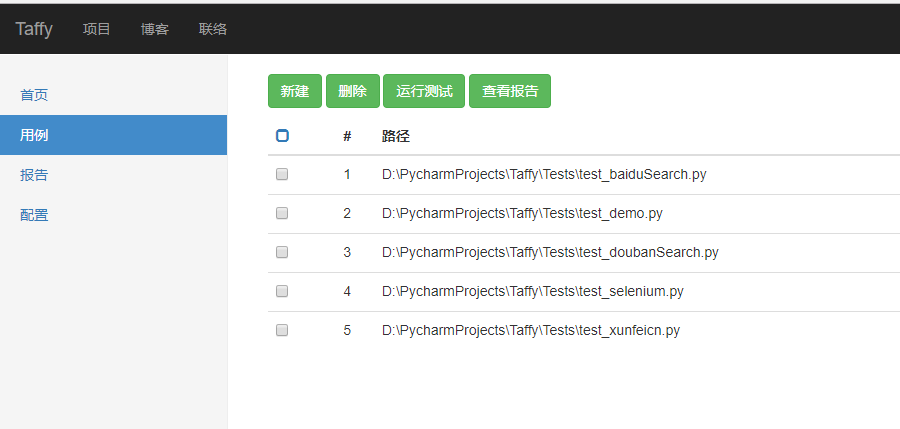
3.2.2 用例
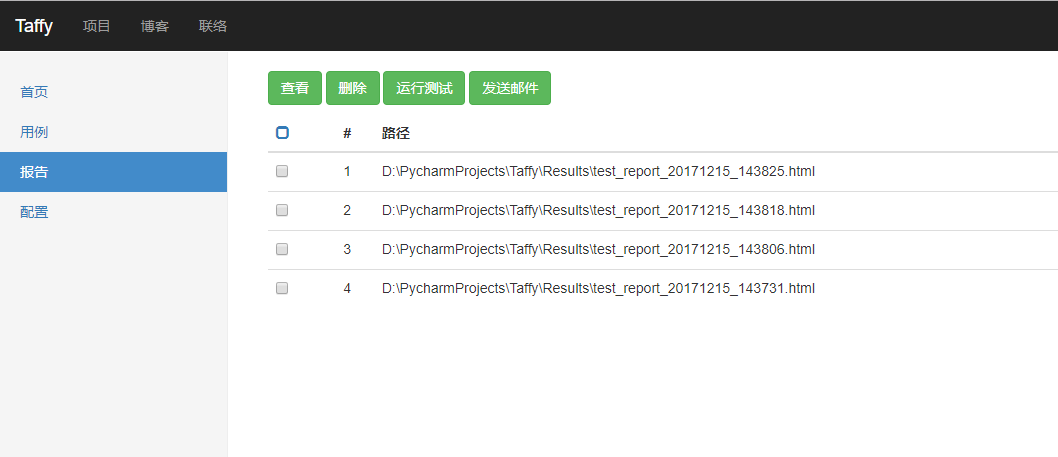
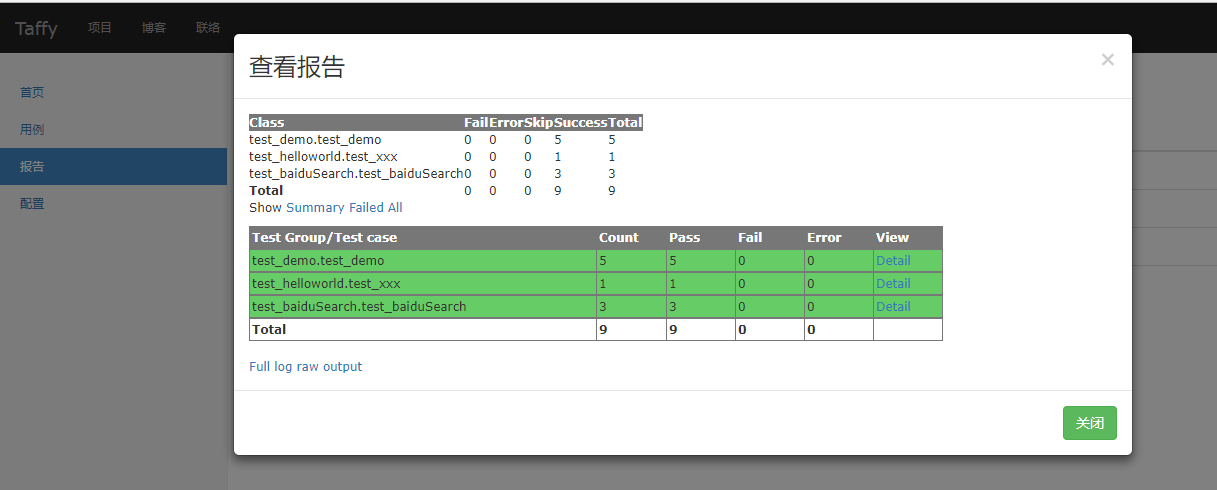
3.2.3 报告
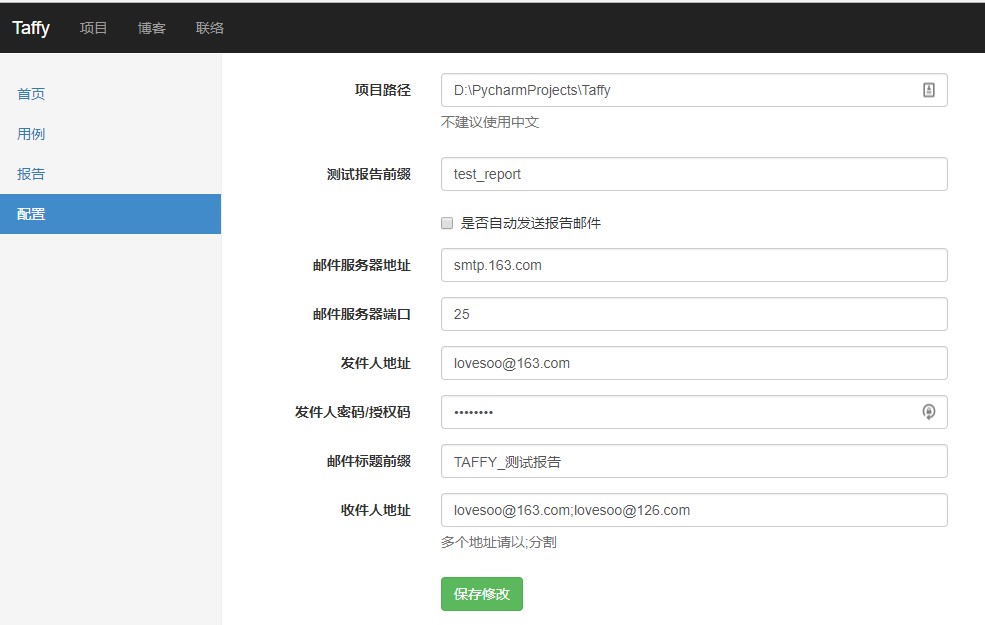
3.2.4 配置
4. 源码下载
5. 参考资料
1) PDF 《FlaskWeb开发:基于Python的Web应用开发实战》
2) Bootstrap: http://v3.bootcss.com/
3) Bootstrap教程:http://www.runoob.com/bootstrap/bootstrap-tutorial.html
4) Bootstrap手册:http://www.jqhtml.com/bootstraps-syntaxhigh/index.html
5) JS教程:http://www.w3school.com.cn/b.asp
6) 代码高亮插件:http://prismjs.com/
7) WTForms文档:http://pythonhosted.org/Flask-Bootstrap/forms.html
8) Flask-WTF文档:http://docs.jinkan.org/docs/flask-wtf/quickstart.html