一、添加依赖
<!--SpringBoot使用Swagger2构建API文档的依赖-->
        <dependency>
            <groupId>io.springfox</groupId>
            <artifactId>springfox-swagger2</artifactId>
            <version>2.7.0</version>
        </dependency>

        <dependency>
            <groupId>io.springfox</groupId>
            <artifactId>springfox-swagger-ui</artifactId>
            <version>2.7.0</version>
        </dependency>
二、创建Swagger2配置类
package com.offcn.config;

import org.springframework.context.annotation.Configuration;
import springfox.documentation.builders.ApiInfoBuilder;
import springfox.documentation.builders.PathSelectors;
import springfox.documentation.builders.RequestHandlerSelectors;
import springfox.documentation.service.ApiInfo;
import springfox.documentation.spi.DocumentationType;
import springfox.documentation.spring.web.plugins.Docket;
import springfox.documentation.swagger2.annotations.EnableSwagger2;

@Configuration//表示该类为一个配置类,相当于spring中的xml配置文件
@EnableSwagger2 //开启在线文档
public class SwaggerConfig {

    //1.声明 api 文档的属性
    private ApiInfo apiInfo() {
        return new ApiInfoBuilder()
                .title("Spring Boot中使用Swagger2构建RESTful APIs")
                .description("优就业")
                .termsOfServiceUrl("http://www.ujiuye.com/")
                .contact("小刘同学")
                .version("1.0")
                .build();
    }

    //配置核心配置信息
    public Docket createRestApi() {
        return new Docket(DocumentationType.SWAGGER_2)
                .apiInfo(apiInfo())
                .select()
                .apis(RequestHandlerSelectors.basePackage("com.offcn.controller"))
                .paths(PathSelectors.any())
                .build();
    }


}
三、修改Controller 增加文档注释
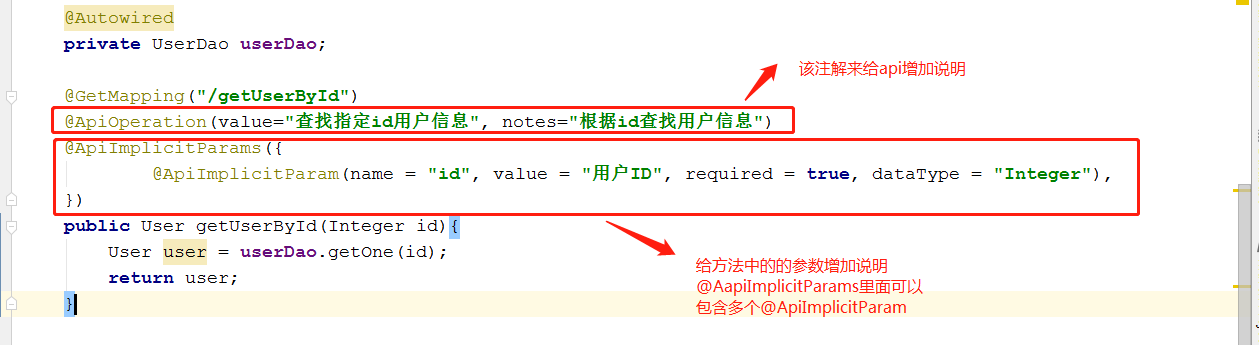
通过@ApiOperation注解来给API增加说明
通过@ApiImplicitParams@ApiImplicitParam注解来给参数增加说明
 1 package com.offcn.controller;
 2
 3 import com.offcn.dao.UserDao;
 4 import com.offcn.entity.User;
 5 import io.swagger.annotations.ApiImplicitParam;
 6 import io.swagger.annotations.ApiImplicitParams;
 7 import io.swagger.annotations.ApiOperation;
 8 import org.springframework.beans.factory.annotation.Autowired;
 9 import org.springframework.web.bind.annotation.DeleteMapping;
10 import org.springframework.web.bind.annotation.GetMapping;
11 import org.springframework.web.bind.annotation.RequestMapping;
12 import org.springframework.web.bind.annotation.RestController;
13
14 @RequestMapping("/rest")
15 @RestController
16 public class RestFulController {
17
18     @Autowired
19     private UserDao userDao;
20
21     @GetMapping("/getUserById")
22     @ApiOperation(value="查找指定id用户信息", notes="根据id查找用户信息")
23     @ApiImplicitParams({
24             @ApiImplicitParam(name = "id", value = "用户ID", required = true, dataType = "Integer"),
25     })
26     public User getUserById(Integer id){
27         User user = userDao.getOne(id);
28         return user;
29     }
30
31     @DeleteMapping("/del")
32     @ApiOperation(value="删除指定id用户信息", notes="根据id删除用户信息")
33     @ApiImplicitParams({
34             @ApiImplicitParam(name = "id", value = "用户ID", required = true, dataType = "Integer"),
35     })
36     public String delUserById(Integer id){
37         userDao.deleteById(id);
38         return "success";
39     }
40 }
四、查看Swagger2文档
重启项目
访问:
http://localhost:8080/swagger-ui.html
