百度大脑:
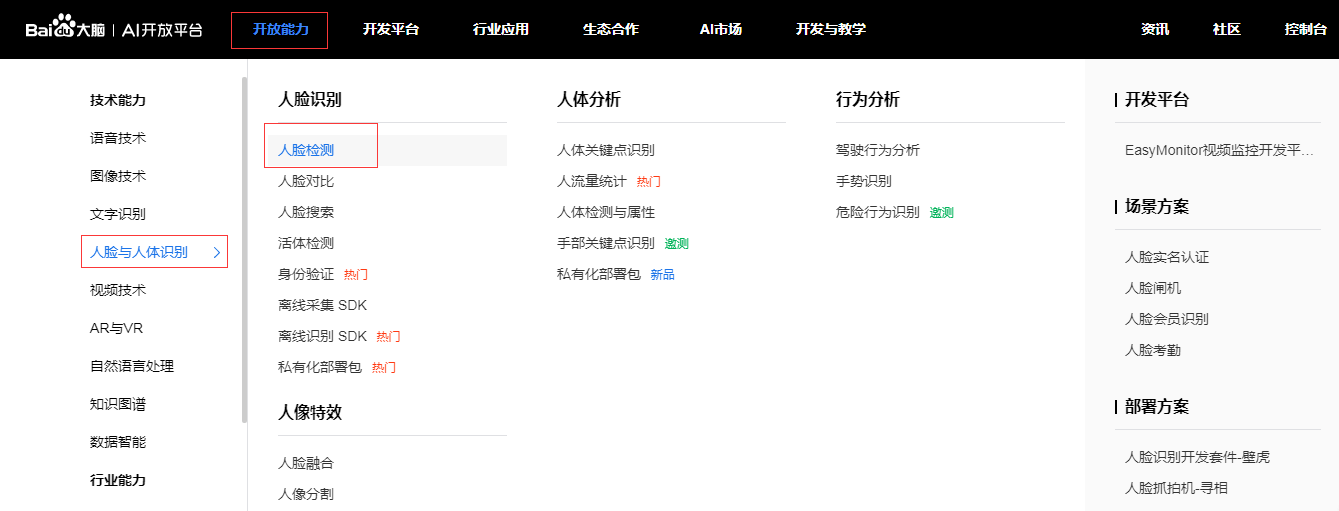
如下图,百度开放了许多人工智能接口可以使用,先注册一个百度大脑账户
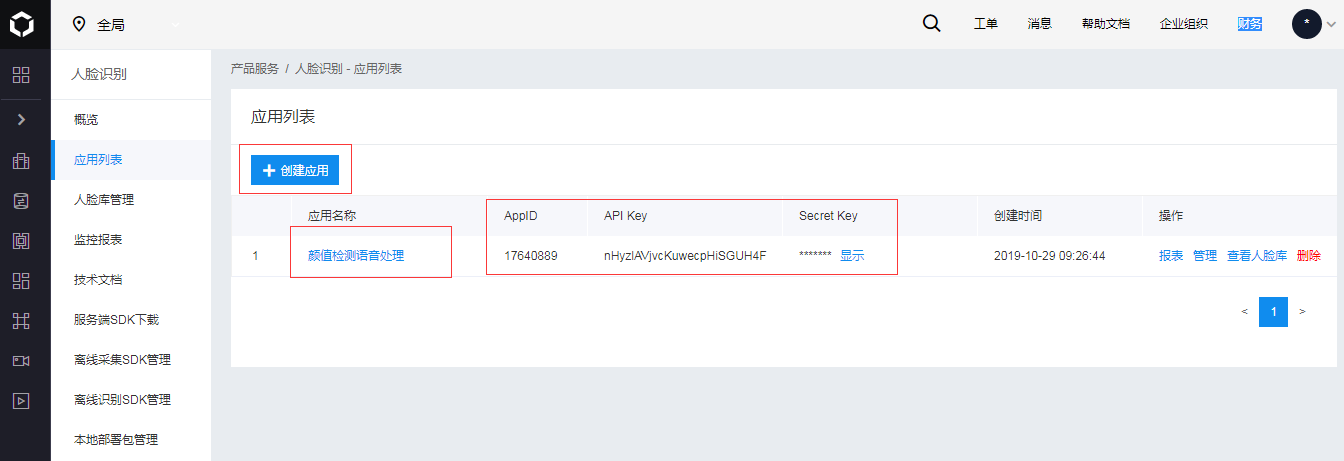
点击创建应用,选择需要的功能,如人脸识别,语音识别等
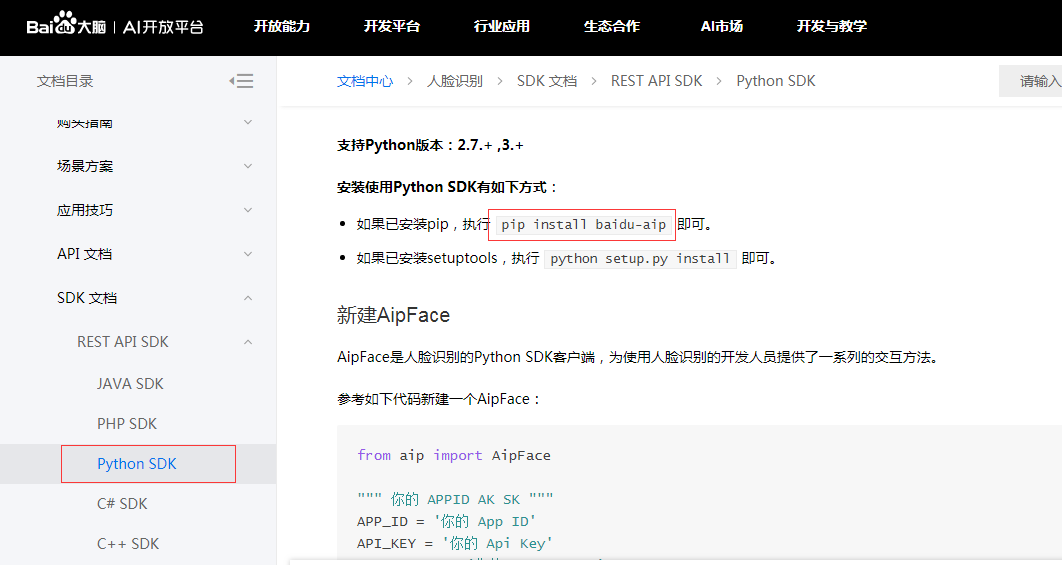
点击查看文档,可以查看功能对应语言的方法,参数。首先在CMD命令下输入pip install baidu-aip安装百度大脑库
颜值测试接口功能实现:
 测试图片
测试图片![]()
运行结果:年龄21,颜值78.65,性别女性
from aip import AipFace        #百度大脑库中导入脸部分析的库
import base64              #用于图片base64转换

""" 你的 APPID AK SK """
APP_ID = '17640889'           #导入百度创建应用所给的ID,如这篇随笔第二幅图给出
API_KEY = 'nHyzlAVjvcKuwecpHiSGUH4F'
SECRET_KEY = 'pcZC7p53Img09Q2WnGaq6cUlS3QKOHGk'

client = AipFace(APP_ID, API_KEY, SECRET_KEY)    #为访问做签名验证

# image = "取决于image_type参数,传入BASE64字符串或URL字符串或FACE_TOKEN字符串"

imageType = "BASE64"

option = {'face_field': 'age,gender,beauty'}


def get_file_content(file_path):
    """获取文件内容"""
    with open(file_path, 'rb') as fr:
        content = base64.b64encode(fr.read())    #把图片转换成base64格式,百度要求格式
        return content.decode('utf8')  # 把二进制编译


# print(get_file_content(r'C:UsersAdministratorDesktop12321.jpeg'))

def face_score(file_path):
    """脸部识别分数"""
    result = client.detect(get_file_content(file_path), imageType, option)    #百度给出的方法,参考百度大脑文档
    print(result)              #所得为字典型数据
    age = result['result']['face_list'][0]['age']
    beauty = result['result']['face_list'][0]['beauty']
    gender = result['result']['face_list'][0]['gender']['type']

    return age, beauty, gender


print(face_score('CX.jpg'))
颜值测试窗口功能实现:
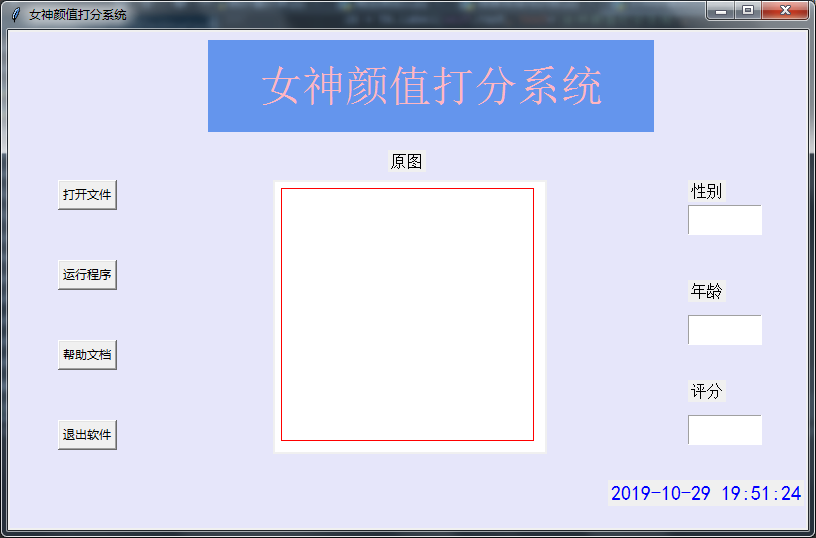
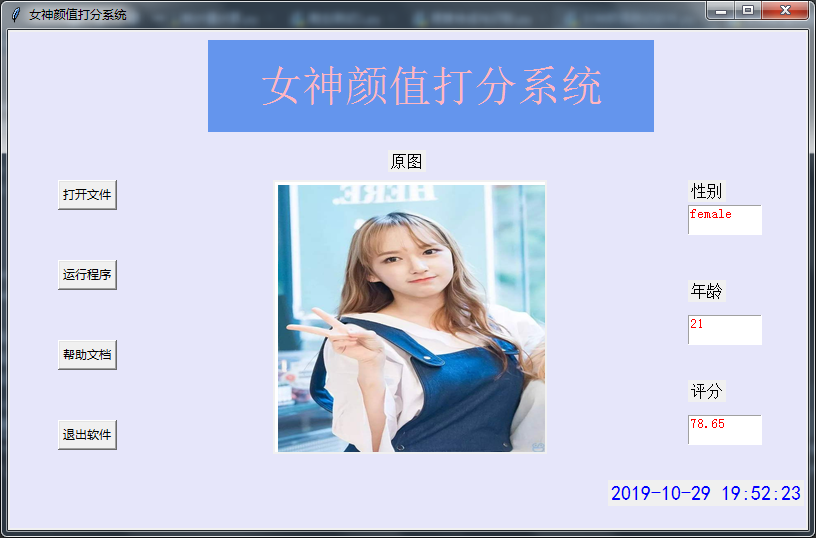
#!/usr/bin/env python
# -*- coding:utf-8 -*-
"""
pip install pillow
pip install baidu-aip
pip install tkinter
"""
import PIL
import time
import base64
import tkinter as tk
from PIL import Image
from PIL import ImageTk
from aip import AipFace
from tkinter.filedialog import askopenfilename

# 配置百度aip参数
APP_ID = '17640889'
API_KEY = 'nHyzlAVjvcKuwecpHiSGUH4F'
SECRET_KEY = 'pcZC7p53Img09Q2WnGaq6cUlS3QKOHGk'
a_face = AipFace(APP_ID, API_KEY, SECRET_KEY)
image_type = 'BASE64'

options = {'face_field': 'age,gender,beauty'}


def get_file_content(file_path):
    """获取文件内容"""
    with open(file_path, 'rb') as fr:
        content = base64.b64encode(fr.read())

        return content.decode('utf8')


def face_score(file_path):
    """脸部识别分数"""
    result = a_face.detect(get_file_content(file_path), image_type, options)
    print(result)
    age = result['result']['face_list'][0]['age']
    beauty = result['result']['face_list'][0]['beauty']
    gender = result['result']['face_list'][0]['gender']['type']

    return age, beauty, gender


class ScoreSystem():
    """打分系统类"""
    root = tk.Tk()

    # 修改程序框的大小
    root.geometry('800x500')

    # 添加程序框标题
    root.title('女神颜值打分系统')

    # 修改背景色
    canvas = tk.Canvas(root,
                       width=800,  # 指定Canvas组件的宽度
                       height=500,  # 指定Canvas组件的高度
                       bg='#E6E6FA')  # 指定Canvas组件的背景色
    canvas.pack()

    def start_interface(self):
        """主运行函数"""
        self.title()
        self.time_component()

        # 打开本地文件
        tk.Button(self.root, text='打开文件', command=self.show_original_pic).place(x=50, y=150)
        # 进行颜值评分
        tk.Button(self.root, text='运行程序', command=self.open_files2).place(x=50, y=230)
        # 显示帮助文档
        tk.Button(self.root, text='帮助文档', command=self.show_help).place(x=50, y=310)
        # 退出系统
        tk.Button(self.root, text='退出软件', command=self.quit).place(x=50, y=390)
        # 显示图框标题
        tk.Label(self.root, text='原图', font=10).place(x=380, y=120)
        # 修改图片大小
        self.label_img_original = tk.Label(self.root)
        # 设置显示图框背景
        self.cv_orinial = tk.Canvas(self.root, bg='white', width=270, height=270)
        # 设置显示图框边框
        self.cv_orinial.create_rectangle(8, 8, 260, 260, width=1, outline='red')
        # 设置位置
        self.cv_orinial.place(x=265, y=150)
        # 显示图片位置
        self.label_img_original.place(x=265, y=150)

        # 设置评分标签
        tk.Label(self.root, text='性别', font=10).place(x=680, y=150)
        self.text1 = tk.Text(self.root, width=10, height=2)
        tk.Label(self.root, text='年龄', font=10).place(x=680, y=250)
        self.text2 = tk.Text(self.root, width=10, height=2)
        tk.Label(self.root, text='评分', font=10).place(x=680, y=350)
        self.text3 = tk.Text(self.root, width=10, height=2)

        # 填装文字
        self.text1.place(x=680, y=175)
        self.text2.place(x=680, y=285)
        self.text3.place(x=680, y=385)

        # 开启循环
        self.root.mainloop()

    def show_original_pic(self):
        """放入文件"""
        self.path_ = askopenfilename(title='选择文件')
        # 处理文件
        img = Image.open(fr'{self.path_}')
        img = img.resize((270, 270), PIL.Image.ANTIALIAS)  # 调整图片大小至270*270
        # 生成tkinter图片对象
        img_png_original = ImageTk.PhotoImage(img)
        # 设置图片对象
        self.label_img_original.config(image=img_png_original)
        self.label_img_original.image = img_png_original
        self.cv_orinial.create_image(5, 5, anchor='nw', image=img_png_original)

    def open_files2(self):
        # 获取百度API接口获得的年龄、分数、性别
        age, score, gender = face_score(self.path_)

        # 清楚text文本框内容并进行插入
        self.text1.delete(1.0, tk.END)
        self.text1.tag_config('red', foreground='RED')
        self.text1.insert(tk.END, gender, 'red')

        self.text2.delete(1.0, tk.END)
        self.text2.tag_config('red', foreground='RED')
        self.text2.insert(tk.END, age, 'red')

        self.text3.delete(1.0, tk.END)
        self.text3.tag_config('red', foreground='RED')
        self.text3.insert(tk.END, score, 'red')

    def show_help(self):
        """显示帮助"""
        pass

    def quit(self):
        """退出"""
        self.root.quit()

    def get_time(self, lb):
        """获取时间"""
        time_str = time.strftime("%Y-%m-%d %H:%M:%S")  # 获取当前的时间并转化为字符串
        lb.configure(text=time_str)  # 重新设置标签文本
        self.root.after(1000, self.get_time, lb)  # 每隔1s调用函数 get_time自身获取时间

    def time_component(self):
        """时间组件"""
        lb = tk.Label(self.root, text='', fg='blue', font=("黑体", 15))
        lb.place(relx=0.75, rely=0.90)
        self.get_time(lb)

    def title(self):
        """标题设计"""
        lb = tk.Label(self.root, text='女神颜值打分系统',
                      bg='#6495ED',
                      fg='lightpink', font=('华文新魏', 32),
                      width=20,
                      height=2,
                      # relief=tk.SUNKEN
                      )
        lb.place(x=200, y=10)


score_system = ScoreSystem()
score_system.start_interface()
语音合成:
 合成的语音
合成的语音
from aip import AipSpeech
#from ffmpy3 import FFmpeg

""" 你的 APPID AK SK """
APP_ID = '17640889'
API_KEY = 'nHyzlAVjvcKuwecpHiSGUH4F'
SECRET_KEY = 'pcZC7p53Img09Q2WnGaq6cUlS3QKOHGk'

client = AipSpeech(APP_ID, API_KEY, SECRET_KEY)


"""语音合成"""
result  = client.synthesis('中国,是以华夏文明为源泉、中华文化为基础,并以汉族为主体民族的多民族国家', 'zh', 1, {
    'vol': 10,
    'per' :0,
})

# 识别正确返回语音二进制 错误则返回dict 参照下面错误码
if not isinstance(result, dict):
    with open('auido.mp3', 'wb') as f:
        f.write(result)
音频文件转码(百度识音要求格式)
下载ffmpeg,并加入到环境变量中
cmd命令行中输入:ffmpeg -y -i auido.mp3 -acodec pcm_s16le -f s16le -ac 1 -ar 16000 audio.pcm
成功生成audio.pcm的文件
语音识别:
 事先准备文件
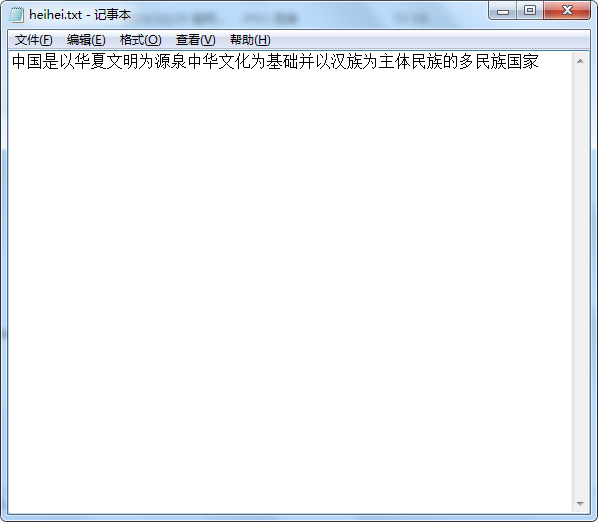 生成记事本及内容
from aip import AipSpeech
#from ffmpy3 import FFmpeg

""" 你的 APPID AK SK """
APP_ID = '17640889'
API_KEY = 'nHyzlAVjvcKuwecpHiSGUH4F'
SECRET_KEY = 'pcZC7p53Img09Q2WnGaq6cUlS3QKOHGk'

client = AipSpeech(APP_ID, API_KEY, SECRET_KEY)


"""语音识别"""
# 读取文件
def get_file_content(filePath):
    with open(filePath, 'rb') as fp:
        return fp.read()

# 识别本地文件
res=client.asr(get_file_content('audio.pcm'), 'pcm', 16000, {       #识别pcm文件
    'dev_pid': 1536,
})
print(res)
print(res['result'][0])         #控制台显示识别出的文字内容

f1 = open('heihei.txt','w')      #把识别内容写入heihei.txt文件
f1.write(res['result'][0])
f1.close()