Windows 10
Ubuntu 18.04.1 LTS on VirtualBox
---
用了很久的git了,以为很懂git,直到想要去——搭建一个git服务器!这是个错误的说法!
Git 与常用的版本控制工具 CVS, Subversion 等不同,它采用了分布式版本库的方式,不必服务器端软件支持。git是分布式的系统!在分布式系统中,任何一个有repository(仓库)的地方都可以 视为服务器。
示例:
主机S建立了 repo1(仓库);
主机A、主机B 从 主机S clone 了仓库 repo1;
但是,主机B 也可以不从 主机S clone,而是从 主机A clone,此时,主机B 对 本地repo1 的修改 会被提交到 主机A 的 repo1。
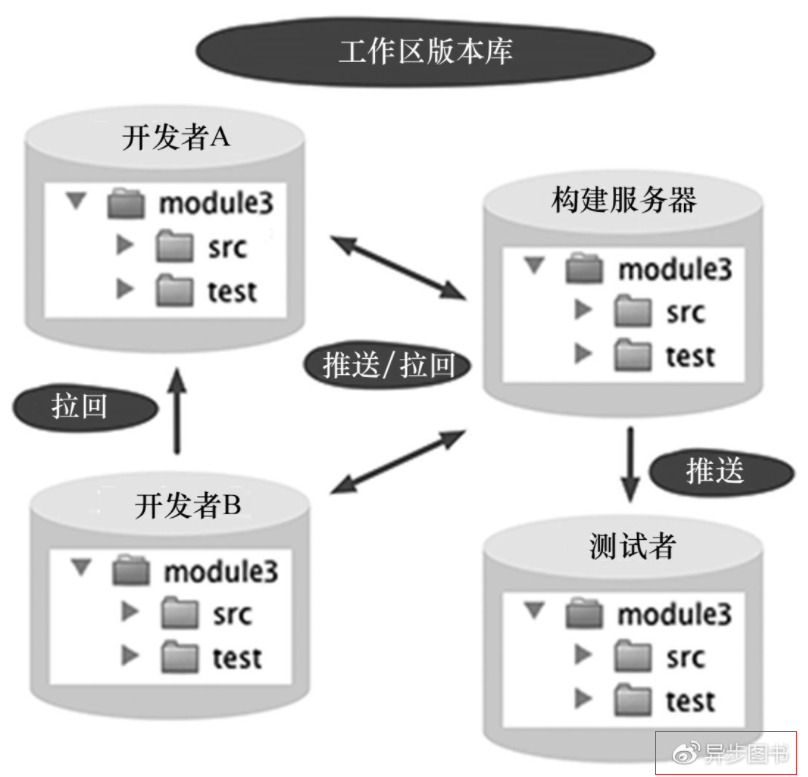
注:来自其它网站的图。
因此,使用git,首先就要建立repository。
目录
1、安装Git
2、建立新的repository
3、克隆(clone)repository
4、提交代码(add、commit、push)
4.1、提交到 nobare 仓库(push会失败)
4.2、提交到 yesbare 仓库
Ubuntu上安装:
$ sudo apt-get install git安装完成,可以使用下面的命令(大写的 L) 查看 git的相关文件分布在哪里:
$ dpkg -L git执行结果1
/.
/etc
/etc/bash_completion.d
/etc/bash_completion.d/git-prompt
/usr
/usr/bin
/usr/bin/git
/usr/bin/git-shell
/usr/bin/git-upload-pack
/usr/lib
/usr/lib/git-core
/usr/lib/git-core/git
/usr/lib/git-core/git-add--interactive
Windows安装:
打开 https://git-scm.com/ ,下载最新版本:
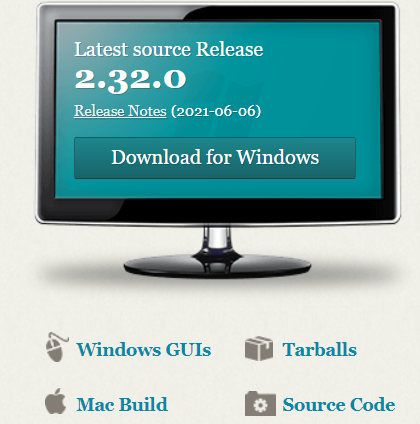
下载得到 Git-2.32.0.2-64-bit.exe,双击即开始安装——配置挺多的。
安装完毕,即可使用 git命令:
git-Ubuntu输出
$ git
usage: git [--version] [--help] [-C <path>] [-c <name>=<value>]
           [--exec-path[=<path>]] [--html-path] [--man-path] [--info-path]
           [-p | --paginate | --no-pager] [--no-replace-objects] [--bare]
           [--git-dir=<path>] [--work-tree=<path>] [--namespace=<name>]
           <command> [<args>]

These are common Git commands used in various situations:

start a working area (see also: git help tutorial)
   clone      Clone a repository into a new directory
   init       Create an empty Git repository or reinitialize an existing one

work on the current change (see also: git help everyday)
   add        Add file contents to the index
   mv         Move or rename a file, a directory, or a symlink
   reset      Reset current HEAD to the specified state
   rm         Remove files from the working tree and from the index

examine the history and state (see also: git help revisions)
   bisect     Use binary search to find the commit that introduced a bug
   grep       Print lines matching a pattern
   log        Show commit logs
   show       Show various types of objects
   status     Show the working tree status

grow, mark and tweak your common history
   branch     List, create, or delete branches
   checkout   Switch branches or restore working tree files
   commit     Record changes to the repository
   diff       Show changes between commits, commit and working tree, etc
   merge      Join two or more development histories together
   rebase     Reapply commits on top of another base tip
   tag        Create, list, delete or verify a tag object signed with GPG

collaborate (see also: git help workflows)
   fetch      Download objects and refs from another repository
   pull       Fetch from and integrate with another repository or a local branch
   push       Update remote refs along with associated objects

'git help -a' and 'git help -g' list available subcommands and some
concept guides. See 'git help <command>' or 'git help <concept>'
to read about a specific subcommand or concept.
Windows上执行git命令可以得到相同的,上面展示的都是一些常用命令,执行最后一段提到的 git help -a 命令(Windows、Ubuntu上效果不同),可以看到更多命令。
安装后续1:请看 参考文档7
在Ubuntu中,建立git用户组、git用户(及密码);
在git用户的家目录 /home/git/ 下建立 .ssh 及其下的 authorized_keys 文件(注意权限设置):
/home/git/.ssh/authorized_keysauthorized_keys 文件用来保存 访问Ubuntu主机上 repository的 公钥——下一节介绍。
安装后续2:确保安装了 openssh-server
sudo apt-get install openssh-server$ dpkg -s openssh-server
Package: openssh-server
Status: install ok installed
Priority: optional
Section: net
Installed-Size: 877
...略...安装后,可以认为 git服务器 搭建好了,只不过,此时没有任何repository。
安装后,端口22处于监听状态(第一行,第二行为 从Ubuntu过来的一个链接):

建立一个空文件夹(非必须);
使用git init命令建立仓库;
不过,git init命令 有一个 --bare 选项,有它没它差别很大,主要的一个差别是——没有它的时候,clone了repository,提交时失败。
# git help init 中的 --bare
--bare
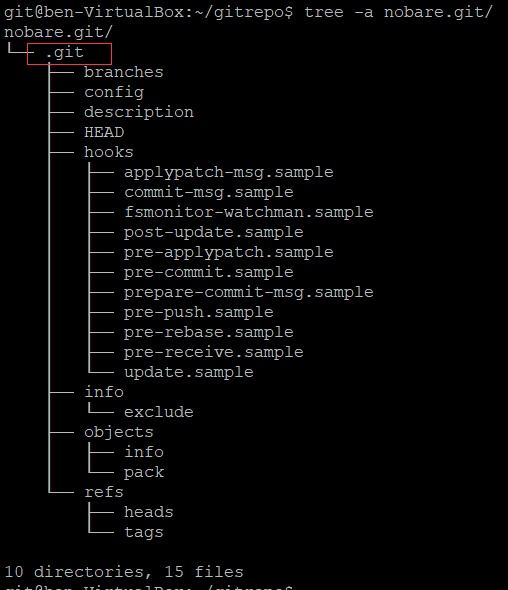
Create a bare repository. If GIT_DIR environment is not set, it is set to the current working directory.下面建立了 nobare.git、yesbare.git 两个仓库:前者没有 --bare 选项。
nobare.git 下 有一个 .git 目录,然后才是 其它目录,而 yesbare.git 下直接就是 具体目录。

nobare.git 的 config等文件:
# 文件config
nobare.git/.git$ cat config
[core]
        repositoryformatversion = 0
        filemode = true
        bare = false
        logallrefupdates = true

# 文件HEAD
nobare.git/.git$ cat HEAD
ref: refs/heads/master
yesbare.git 的 config等文件:
# 文件config
yesbare.git$ cat config
[core]
        repositoryformatversion = 0
        filemode = true
        bare = true

# 文件 HEAD
yesbare.git$ cat HEAD
ref: refs/heads/master
config文件存在差别。
准备工作:在Windows主机上生成公钥、私钥
>ssh-keygen -t rsa -C "email@your.com"执行后,在用户的家目录下生成.ssh及其下文件:
2021/07/26  22:14             2,602 id_rsa
2021/07/26  22:14               571 id_rsa.pub
其中,id_rsa.pub 为公钥,后面执行 clone时,会把它 拷贝到 仓库所在用户的 .ssh/authorized_keys.pub 文件中。

准备就绪,开始执行clone:
在Windows上打开命令行工具,进入一个存放 repository 的文件夹;
执行下面的命令:
# mylinux 为 hosts中配置的 域名,指向 仓库所在Ubuntu主机——IP经常变化所以才配置hosts
# 下面执行 clone时,公钥已经存在 仓库的服务器上了
>git clone git@mylinux:/home/git/gitrepo/nobare.git
Cloning into 'nobare'...
git@mylinux's password:
warning: You appear to have cloned an empty repository.

# 多了个nobare目录——末尾没有 .git
>dir
2021/07/27  21:43    <DIR>          nobare

# 进入 .git目录执行
>dir
...

obare.git 的目录

2021/07/27  21:43               285 config
2021/07/27  21:43                73 description
2021/07/27  21:43                23 HEAD
2021/07/27  21:43    <DIR>          hooks
2021/07/27  21:43    <DIR>          info
2021/07/27  21:43    <DIR>          objects
2021/07/27  21:43    <DIR>          refs
               3 个文件            381 字节

# 查看config的内容
nobare.git>type config
[core]
        repositoryformatversion = 0
        filemode = false
        bare = false
        logallrefupdates = true
        ignorecase = true
[remote "origin"]
        url = git@mylinux:/home/git/gitrepo/nobare.git
        fetch = +refs/heads/*:refs/remotes/origin/*
[branch "master"]
        remote = origin
        merge = refs/heads/master
yesbare.git操作同上:
C:UsersMigit>git clone git@mylinux:/home/git/gitrepo/yesbare.git
Cloning into 'yesbare'...
git@mylinux's password:
warning: You appear to have cloned an empty repository.

C:UsersMigityesbare>dir /A
...略...
 C:UsersMigityesbare 的目录

2021/07/27  21:51    <DIR>          .
2021/07/27  21:51    <DIR>          ..
2021/07/27  21:51    <DIR>          .git
               0 个文件              0 字节

yesbare.git>dir /A
...略...
 C:UsersMigityesbare.git 的目录

2021/07/27  21:51    <DIR>          .
2021/07/27  21:51    <DIR>          ..
2021/07/27  21:51               286 config
2021/07/27  21:51                73 description
2021/07/27  21:51                23 HEAD
2021/07/27  21:51    <DIR>          hooks
2021/07/27  21:51    <DIR>          info
2021/07/27  21:51    <DIR>          objects
2021/07/27  21:51    <DIR>          refs
               3 个文件            382 字节

yesbare.git>cat config
[core]
        repositoryformatversion = 0
        filemode = false
        bare = false
        logallrefupdates = true
        ignorecase = true
[remote "origin"]
        url = git@mylinux:/home/git/gitrepo/yesbare.git
        fetch = +refs/heads/*:refs/remotes/origin/*
[branch "master"]
        remote = origin
        merge = refs/heads/master
注意,两个从库的config类似,其中core的配置没有不同。
nobare 目录下建立文件 abc.txt,执行 add、commit、push 三步:

push失败。
解决方法:修改 Ubuntu仓库的配置,添加下面的内容
[receive]
	denyCurrentBranch = ignore
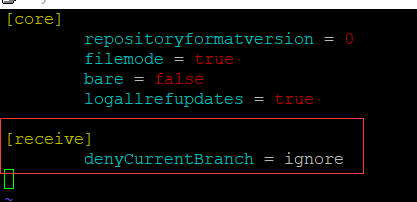
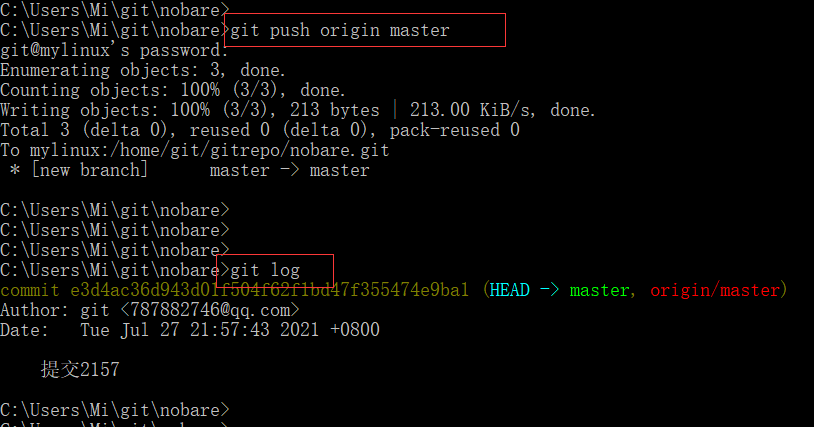
再次push,执行成功,git log也可以看到内容了:
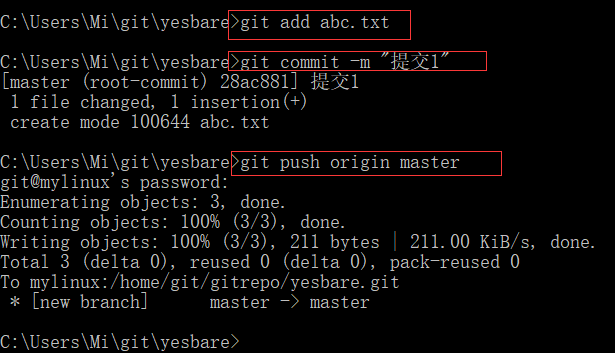
步骤同上,但不会发生push失败的情况。
后记:
博文虽然写完了,整个过程记录好了,开始,疑问还是有不少的,还需研究才是。
1、git教程
3、连接git提示 Connection refused的解决办法
4、"remote:error:refusing to update checked out branch:refs/heads/master"的解决办法
5、图解Git
有时候打不开。
8、