SOFARPC源码解析系列:
6.源码分析---和dubbo相比SOFARPC是如何实现负载均衡的?
8.源码分析---从设计模式中看SOFARPC中的EventBus?
10.源码分析---SOFARPC内置链路追踪SOFATRACER是怎么做的?
在SOFARPC中实际上支持的序列化比较少,只有Hessian、JSON、Protobuf这三种,但是有时候自己就是比较喜欢折腾,不喜欢用内置的,想要自己定义,那么只要搞定这篇文章你应该能为SOFARPC手动写一个序列化的实现了。下面的源码分析我们以client方的代码进行分析。
注册
在SOFARPC中,首先会先将序列化器注册CustomSerializerManager中,然后才能使用自己定义的序列化方式。所以我们先从注册开始说起。
注册的流程:
DefaultConsumerBootstrap#refer->
AbstractCluster#init->
AbstractCluster#updateAllProviders->
AllConnectConeectionHolder#updateAllProviders->
AllConnectConeectionHolder#addNode->
AllConnectConeectionHolder#initClientRunnable->
ClientTransportFactory#getClientTransport->
NotReusableClientTransportHolder#getClientTransport->
BoltClientTransport#static->
SofaRpcSerializationRegister#registerCustomSerializer
DefaultConsumerBootstrap的refer我就不多说了,不清楚的可以去看看这篇2. 源码分析—SOFARPC客户端服务引用。在refer里面会调用cluster#init,在这个init方法里面会初始化连接管理器,然后调用updateAllProviders初始化服务端连接。
我们进入到AbstractCluster#updateAllProviders中:
public void updateAllProviders(List<ProviderGroup> providerGroups) {
    //获取所有的服务组
    List<ProviderGroup> oldProviderGroups = new ArrayList<ProviderGroup>(addressHolder.getProviderGroups());
    int count = 0;
    if (providerGroups != null) {
        for (ProviderGroup providerGroup : providerGroups) {
            //检验providerGroup
            checkProviderInfo(providerGroup);
            count += providerGroup.size();
        }
    }
    //如果没有检测到provider,那么就打印日志,关闭连接
    if (count == 0) {
        Collection<ProviderInfo> currentProviderList = currentProviderList();
        addressHolder.updateAllProviders(providerGroups);
        if (CommonUtils.isNotEmpty(currentProviderList)) {
            if (LOGGER.isWarnEnabled(consumerConfig.getAppName())) {
                LOGGER.warnWithApp(consumerConfig.getAppName(), "Provider list is emptied, may be all " +
                        "providers has been closed, or this consumer has been add to blacklist");
                closeTransports();
            }
        }
    } else {
        //根据传入的provider来分组
        addressHolder.updateAllProviders(providerGroups);
        //
        connectionHolder.updateAllProviders(providerGroups);
    }
    if (EventBus.isEnable(ProviderInfoUpdateAllEvent.class)) {
        ProviderInfoUpdateAllEvent event = new ProviderInfoUpdateAllEvent(consumerConfig, oldProviderGroups,
                providerGroups);
        EventBus.post(event);
    }
}
接着会调用AllConnectConnectionHolder#updateAllProviders,这个方法非常的简单,我就不贴源码了,updateProviders其实就是检查一下如果有新的provider那么调用addNode新建立连接,如果老的provider现在已经失效了,那么调用removeNode剔除。
AllConnectConnectionHolder#addNode建立连接
protected void addNode(List<ProviderInfo> providerInfoList) {

    //first update last all providers
    lastAddresses.addAll(providerInfoList);

    final String interfaceId = consumerConfig.getInterfaceId();
    int providerSize = providerInfoList.size();
    String appName = consumerConfig.getAppName();
    if (LOGGER.isInfoEnabled(appName)) {
        LOGGER.infoWithApp(appName, "Add provider of {}, size is : {}", interfaceId, providerSize);
    }
    if (providerSize > 0) {
        // 多线程建立连接
        int threads = Math.min(10, providerSize); // 最大10个
        final CountDownLatch latch = new CountDownLatch(providerSize);
        //建立一个固定大小的线程池,用来负责异步建立连接
        ThreadPoolExecutor initPool = new ThreadPoolExecutor(threads, threads,
            0L, TimeUnit.MILLISECONDS,
            new LinkedBlockingQueue<Runnable>(providerInfoList.size()),
            new NamedThreadFactory("CLI-CONN-" + interfaceId, true));
        int connectTimeout = consumerConfig.getConnectTimeout();
        for (final ProviderInfo providerInfo : providerInfoList) {
            initClientRunnable(initPool, latch, providerInfo);
        }

        try {
            int totalTimeout = ((providerSize % threads == 0) ? (providerSize / threads) : ((providerSize /
                    threads) + 1)) * connectTimeout + 500;
            latch.await(totalTimeout, TimeUnit.MILLISECONDS); // 一直等到子线程都结束
        } catch (InterruptedException e) {
            LOGGER.errorWithApp(appName, "Exception when add provider", e);
        } finally {
            initPool.shutdown(); // 关闭线程池
        }
    }
}
这个方法里面使用了一个线程数最大为10的线程池去建立连接,其中还使用了CountDownLatch,所以线程池在建立线程的时候其实主线程要等子线程全部跑完才能往下继续。
AllConnectConnectionHolder#initClientRunnable
protected void initClientRunnable(ThreadPoolExecutor initPool, final CountDownLatch latch,
                                  final ProviderInfo providerInfo) {
    //把provider封装成ClientTransportConfig
    final ClientTransportConfig config = providerToClientConfig(providerInfo);
    initPool.execute(new Runnable() {
        @Override
        public void run() {
            ClientTransport transport = ClientTransportFactory.getClientTransport(config);
            if (consumerConfig.isLazy()) {
                uninitializedConnections.put(providerInfo, transport);
                latch.countDown();
            } else {
                try {
                    initClientTransport(consumerConfig.getInterfaceId(), providerInfo, transport);
                } finally {
                    latch.countDown(); // 连上或者抛异常
                }
            }
        }
    });
}
initClientRunnable方法会使用线程池来建立长连接。当然我们不是分析连接建立的,所以我们进入到ClientTransportFactory看是怎么注册序列化器的。
在initClientRunnable里面的run方法里,会调用ClientTransportFactory#getClientTransport,最后会来到NotReusableClientTransportHolder 的getClientTransport
public ClientTransport getClientTransport(ClientTransportConfig config) {

    ClientTransport transport = allTransports.get(config);
    if (transport == null) {
        transport = ExtensionLoaderFactory.getExtensionLoader(ClientTransport.class)
            .getExtension(config.getContainer(),
                new Class[] { ClientTransportConfig.class },
                new Object[] { config });
        ClientTransport old = allTransports.putIfAbsent(config, transport); // 保存唯一长连接
        if (old != null) {
            if (LOGGER.isWarnEnabled()) {
                LOGGER.warn("Multiple threads init ClientTransport with same ClientTransportConfig!");
            }
            transport.destroy(); //如果同时有人插入,则使用第一个
            transport = old;
        }
    }
    return transport;
}
getClientTransport方法会通过SPI根据使用的协议初始化BoltClientTransport。
初始化BoltClientTransport的时候会调用到里面的静态代码块:
static {
    RPC_CLIENT.init();
    //注册序列化器
    SofaRpcSerializationRegister.registerCustomSerializer();
}
然后调SofaRpcSerializationRegister#registerCustomSerializer进行序列化器注册。
SofaRpcSerializationRegister
private static final SofaRpcSerialization RPC_SERIALIZATION = new SofaRpcSerialization();

public static void registerCustomSerializer() {
    // 注册序列化器到bolt
    if (CustomSerializerManager.getCustomSerializer(SofaRequest.class.getName()) == null) {
        CustomSerializerManager.registerCustomSerializer(SofaRequest.class.getName(),
            RPC_SERIALIZATION);
    }
    if (CustomSerializerManager.getCustomSerializer(SofaResponse.class.getName()) == null) {
        CustomSerializerManager.registerCustomSerializer(SofaResponse.class.getName(),
            RPC_SERIALIZATION);
    }
}
SofaRpcSerializationRegister方法里会将SofaRpcSerialization注册到CustomSerializerManager中。
client请求编码
客户端在向服务端发送request请求的时候会通过调用RpcCommand#serialize
public void serialize() throws SerializationException {
    this.serializeClazz();
    this.serializeHeader(this.invokeContext);
    this.serializeContent(this.invokeContext);
}
在serialize方法里会调用子类RpcRequestCommand先序列化请求头,再序列化请求的内容。
RpcRequestCommand#serializeHeader
public void serializeHeader(InvokeContext invokeContext) throws SerializationException {
    if (this.getCustomSerializer() != null) {
        try {
				//获取序列化器
            this.getCustomSerializer().serializeHeader(this, invokeContext);
        } catch (SerializationException e) {
            throw e;
        } catch (Exception e) {
            throw new SerializationException(
                "Exception caught when serialize header of rpc request command!", e);
        }
    }
}
这里会调用getCustomSerializer获取序列化器,然后调用serializeHeader进行请求头的序列化。
RpcRequestCommand#getCustomSerializer
public CustomSerializer getCustomSerializer() {
    if (this.customSerializer != null) {
        return customSerializer;
    }
		//从CustomSerializerManager里获取序列化器
    if (this.requestClass != null) {
        this.customSerializer = CustomSerializerManager.getCustomSerializer(this.requestClass);
    }
    if (this.customSerializer == null) {
        this.customSerializer = CustomSerializerManager.getCustomSerializer(this.getCmdCode());
    }
    return this.customSerializer;
}
getCustomSerializer方法就是从我们在注册的时候用到的CustomSerializerManager里头获取到我们注册的序列化器;这里我们的request请求放入的序列化器是SofaRpcSerialization。
然后会调用SofaRpcSerialization#serializeHeader序列化请求头:
public <Request extends RequestCommand> boolean serializeHeader(Request request, InvokeContext invokeContext)
    throws SerializationException {
    if (request instanceof RpcRequestCommand) {
			//记录当前时间
        RpcInternalContext.getContext().getStopWatch().tick();

        RpcRequestCommand requestCommand = (RpcRequestCommand) request;
        Object requestObject = requestCommand.getRequestObject();
        String service = getTargetServiceName(requestObject);
        if (StringUtils.isNotEmpty(service)) {
            Map<String, String> header = new HashMap<String, String>(16);
				//将请求元信息都放入header map中
            header.put(RemotingConstants.HEAD_SERVICE, service);
            putRequestMetadataToHeader(requestObject, header);
			//调用SimpleMapSerializer进行序列化
    	  requestCommand.setHeader(mapSerializer.encode(header));
        }
        return true;
    }
    return false;
}
这个方法其实主要做了两件事:
- 将request元信息设置到header map里面 (元信息例如:对方服务名,对方的方法名,对应的appName,协议信息等)
- 将header map调用SimpleMapSerializer进行序列化
SimpleMapSerializer#encode
public byte[] encode(Map<String, String> map) throws SerializationException {
    if (map == null || map.isEmpty()) {
        return null;
    }
    UnsafeByteArrayOutputStream out = new UnsafeByteArrayOutputStream(64);
    try {
        for (Map.Entry<String, String> entry : map.entrySet()) {
            writeString(out, entry.getKey());
            writeString(out, entry.getValue());
        }
        return out.toByteArray();
    } catch (IOException ex) {
        throw new SerializationException(ex.getMessage(), ex);
    }
}


protected void writeString(OutputStream out, String str) throws IOException {
    if (str == null) {
        writeInt(out, -1);
    } else if (str.isEmpty()) {
        writeInt(out, 0);
    } else {
		   //获取str字符串的字节数组
        byte[] bs = StringSerializer.encode(str);
			//先写入字符串的长度
        writeInt(out, bs.length);
			//再写入数据
        out.write(bs);
    }
}
SimpleMapSerializer里面就只是做了简单的序列化的操作。
写到OutputStream里面的数据的格式都是:数据长度+数据内容+数据长度+数据内容。。。。
回到RpcCommand#serialize,序列化完请求头之后会序列化请求体,最后会调用到
SofaRpcSerialization#serializeContent
public <Request extends RequestCommand> boolean serializeContent(Request request, InvokeContext invokeContext)
    throws SerializationException {
    if (request instanceof RpcRequestCommand) {
        RpcRequestCommand requestCommand = (RpcRequestCommand) request;
        Object requestObject = requestCommand.getRequestObject();
        //获取序列化方式
        byte serializerCode = requestCommand.getSerializer();
        try {
            Map<String, String> header = (Map<String, String>) requestCommand.getRequestHeader();
            if (header == null) {
                header = new HashMap<String, String>();
            }
            //设置是否泛化调用
            putKV(header, RemotingConstants.HEAD_GENERIC_TYPE,
                (String) invokeContext.get(RemotingConstants.HEAD_GENERIC_TYPE));
            //获取序列化具体实现
            Serializer rpcSerializer = com.alipay.sofa.rpc.codec.SerializerFactory
                .getSerializer(serializerCode);
            //编码
            AbstractByteBuf byteBuf = rpcSerializer.encode(requestObject, header);
            request.setContent(byteBuf.array());
            return true;
        } catch (Exception ex) {
            throw new SerializationException(ex.getMessage(), ex);
        } finally {
            //统计客户端记录序列化请求的耗时和
            recordSerializeRequest(requestCommand, invokeContext);
        }
    }
    return false;
}
这个方法主要是负责调用相应的序列化方式,这里我假设使用的是默认的序列化方式Hessian进行序列化,那么会调用SofaHessianSerializer进行序列化。
SofaHessianSerializer#encode
public AbstractByteBuf encode(Object object, Map<String, String> context) {
    //CustomHessianSerializerManager在创建SofaHessianSerializer时候就会设置
    CustomHessianSerializer serializer = CustomHessianSerializerManager.getSerializer(object.getClass());
    if (serializer != null) {
        //调用SofaRequestHessianSerializer的encodeObject方法
        return serializer.encodeObject(object, context);
    } else {
        UnsafeByteArrayOutputStream byteArray = new UnsafeByteArrayOutputStream();
        Hessian2Output output = new Hessian2Output(byteArray);
        try {
            output.setSerializerFactory(serializerFactory);
            output.writeObject(object);
            output.close();
            return new ByteStreamWrapperByteBuf(byteArray);
        } catch (Exception e) {
            throw buildSerializeError(e.getMessage(), e);
        }

    }
}
这个方法会调用CustomHessianSerializerManager返回一个SofaRequestHessianSerializer实例,然后调用encodeObject方法进行序列化。
SofaRequestHessianSerializer#encodeObject
public AbstractByteBuf encodeObject(SofaRequest sofaRequest, Map<String, String> context) {
    try {
        UnsafeByteArrayOutputStream outputStream = new UnsafeByteArrayOutputStream();
        Hessian2Output output = new Hessian2Output(outputStream);

        // 根据SerializeType信息决定序列化器
        boolean genericSerialize = context != null &&
            isGenericRequest(context.get(RemotingConstants.HEAD_GENERIC_TYPE));
        if (genericSerialize) {
            output.setSerializerFactory(genericSerializerFactory);
        } else {
            output.setSerializerFactory(serializerFactory);
        }

        output.writeObject(sofaRequest);
        final Object[] args = sofaRequest.getMethodArgs();
        if (args != null) {
            for (Object arg : args) {
                output.writeObject(arg);
            }
        }
        output.close();

        return new ByteStreamWrapperByteBuf(outputStream);
    } catch (IOException e) {
        throw buildSerializeError(e.getMessage(), e);
    }
}
到这里client的请求编码已经全部分析完毕了。
下面我们来分析client的response解码;
client响应解码
解码的代码和编码的代码一样,也是从RpcCommand开始:
public void deserialize() throws DeserializationException {
    this.deserializeClazz();
    this.deserializeHeader(this.invokeContext);
    this.deserializeContent(this.invokeContext);
}
deserializeHeader和请求编码的实现差不多,这里就不分析了,下面我们来看看deserializeContent。
public <Response extends ResponseCommand> boolean deserializeContent(Response response, InvokeContext invokeContext)
    throws DeserializationException {
    if (response instanceof RpcResponseCommand) {
        RpcResponseCommand responseCommand = (RpcResponseCommand) response;
        //获取序列化器
        byte serializer = response.getSerializer();
        byte[] content = responseCommand.getContent();
        if (content == null || content.length == 0) {
            return false;
        }
        try {
            Object sofaResponse = ClassUtils.forName(responseCommand.getResponseClass()).newInstance();

            Map<String, String> header = (Map<String, String>) responseCommand.getResponseHeader();
            if (header == null) {
                header = new HashMap<String, String>();
            }
            putKV(header, RemotingConstants.HEAD_TARGET_SERVICE,
                (String) invokeContext.get(RemotingConstants.HEAD_TARGET_SERVICE));
            putKV(header, RemotingConstants.HEAD_METHOD_NAME,
                (String) invokeContext.get(RemotingConstants.HEAD_METHOD_NAME));
            putKV(header, RemotingConstants.HEAD_GENERIC_TYPE,
                (String) invokeContext.get(RemotingConstants.HEAD_GENERIC_TYPE));

            Serializer rpcSerializer = com.alipay.sofa.rpc.codec.SerializerFactory.getSerializer(serializer);
            //反序列化到sofaResponse中
            rpcSerializer.decode(new ByteArrayWrapperByteBuf(responseCommand.getContent()), sofaResponse, header);

            responseCommand.setResponseObject(sofaResponse);
            return true;
        } catch (Exception ex) {
            throw new DeserializationException(ex.getMessage(), ex);
        } finally {
            recordDeserializeResponse(responseCommand, invokeContext);
        }
    }

    return false;
}
这个方法里面会获取SofaHessianSerializer进行反序列化,然后将反序列化的内容放入到sofaResponse中。
自己写一个序列化
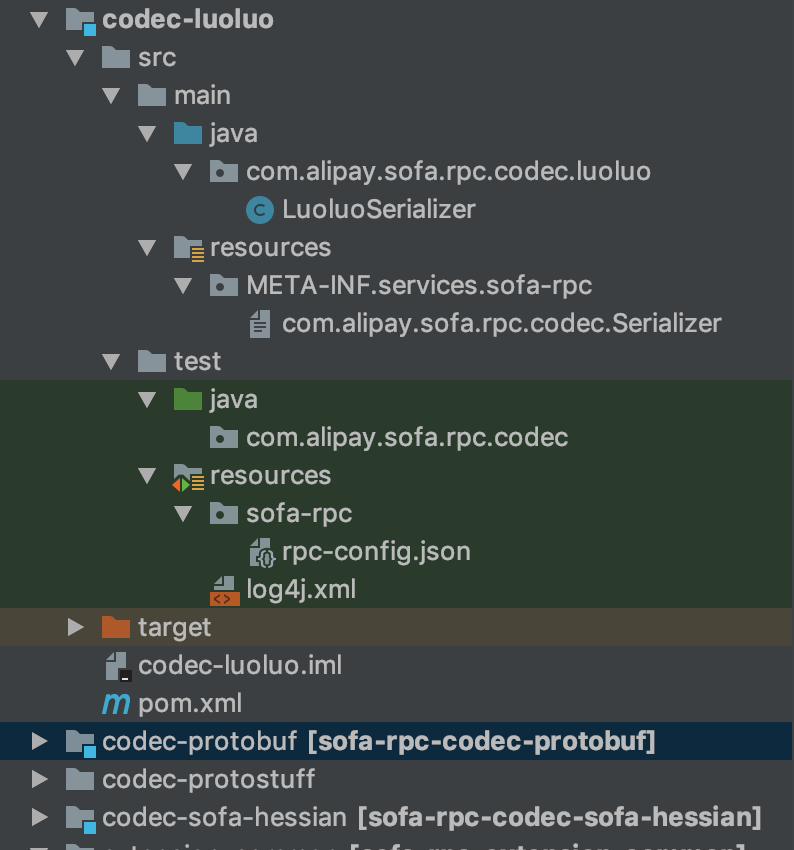
首先我们在SOFARPC的代码里面写一个子模块:
新建好子模块后配置一下maven:
在all模块的pom文件里加入模块的配置
<dependency>
    <groupId>com.alipay.sofa</groupId>
    <artifactId>sofa-rpc-codec-luoluo</artifactId>
    <version>${sofa.rpc.version}</version>
</dependency>

。。。
<include>com.alipay.sofa:sofa-rpc-codec-luoluo</include>
。。。
首先我们为了让SOFARPC能够通过SPI来找到我们添加的序列化器,那么我们在META-INF.services.fofa-rpc中添加一个文件用来表示我们所添加的Serializer的位置:
luoluo=com.alipay.sofa.rpc.codec.luoluo.LuoluoSerializer
然后我们实现自己的Serializer,我这里随意取了一个名字叫LuoluoSerializer。LuoluoSerializer需要继承AbstractSerializer,并添加上@Extension注解,并设置好value和code,我这里设置value为luoluo,code=99,序列化方式使用的是fastjson;
@Extension(value = "luoluo", code = 99)
public class LuoluoSerializer extends AbstractSerializer {
		@Override
		public AbstractByteBuf encode(Object object, Map<String, String> context) throws SofaRpcException {
		    return null;
		}
		@Override
		public Object decode(AbstractByteBuf data, Class clazz, Map<String, String> context) throws SofaRpcException {
		    return null;
		}
		@Override
		public void decode(AbstractByteBuf data, Object template, Map<String, String> context) throws SofaRpcException {

		}
}
默认的情况我们需要实现三个方法用来序列化和反序列化。
首先我们来实现一下序列化接口:
public AbstractByteBuf encode(Object object, Map<String, String> context) throws SofaRpcException {
    if (object == null) {
        throw buildSerializeError("Unsupported null message!");
    } else if (object instanceof SofaRequest) {
        return encodeSofaRequest((SofaRequest) object, context);
    } else if (object instanceof SofaResponse) {
        return encodeSofaResponse((SofaResponse) object, context);
    } else {
        throw buildSerializeError("Unsupported null message!");
    }
}
因为编码分为两种,一种是请求编码,一种是响应编码,所以我们分两种情况强转一下分别调用encodeSofaRequest和encodeSofaResponse。
encodeSofaRequest
private AbstractByteBuf encodeSofaRequest(SofaRequest sofaRequest, Map<String, String> context) {

    Object[] args = sofaRequest.getMethodArgs();
    if (args.length > 1) {
        throw buildSerializeError("luoluo only support one parameter!");
    }
		//用fastjson序列化第一个参数
    return new ByteArrayWrapperByteBuf(JSON.toJSONBytes(args[0]));
}
请求编码的时候因为发送请求只需要把要请求的方法的参数传到服务端就好了,所以我们这里只序列化传给服务端的参数就好了,为了简化我这里只序列化了一个参数。
encodeSofaResponse
private AbstractByteBuf encodeSofaResponse(SofaResponse sofaResponse, Map<String, String> context) {
    Object appResponse = sofaResponse.getAppResponse();
		//用fastjson反序列化响应的内容
    return new ByteArrayWrapperByteBuf(JSON.toJSONBytes(appResponse));
}
encodeSofaResponse是服务端进行调用的,只需要序列化服务端响应的数据就好了,所以直接用fastjson序列化即可,如果需要加密等需求也可以在序列化的时候加上。
然后到解码部分:
public void decode(AbstractByteBuf data, Object template, Map<String, String> context) throws SofaRpcException {
    if (template == null) {
        throw buildDeserializeError("template is null!");
    } else if (template instanceof SofaRequest) {
        decodeSofaRequest(data, (SofaRequest) template, context);
    } else if (template instanceof SofaResponse) {
        decodeSofaResponse(data, (SofaResponse) template, context);
    } else {
        throw buildDeserializeError("Only support decode from SofaRequest and SofaResponse template");
    }
}
和编码的时候一样的,需要对Request和Response做不同的处理。
我们先看一下客户端是怎么进行解码的:
decodeSofaResponse
private void decodeSofaResponse(AbstractByteBuf data, SofaResponse sofaResponse, Map<String, String> head) {
    if (!head.isEmpty()) {
        sofaResponse.setResponseProps(head);
    }
    //获取接口名
    String targetService = head.remove(RemotingConstants.HEAD_TARGET_SERVICE);
    //获取接口被调用的方法名
    String methodName = head.remove(RemotingConstants.HEAD_METHOD_NAME);
    // 读取接口里的方法参数和返回值
    String interfaceClass = ConfigUniqueNameGenerator.getInterfaceName(targetService);
    Class clazz = ClassUtils.forName(interfaceClass, true);

    //找到我们要调用的接口的方法
    Method pbMethod = null;
    Method[] methods = clazz.getMethods();
    for (Method method : methods) {
        if (methodName.equals(method.getName())) {
            pbMethod = method;
            break;
        }
    }
    //获取到对应方法的返回类型
    Class returnType = pbMethod.getReturnType();
    //根据参数类型转成对象;
    Object pbReq = JSON.parseObject(data.array(), returnType);
    sofaResponse.setAppResponse(pbReq);
}
客户端这边的解码就是通过反射获取到接口的返回类型,然后通过fastjson把字节数组转化成对象,放入到AppResponse中。
decodeSofaRequest
private void decodeSofaRequest(AbstractByteBuf data, SofaRequest sofaRequest, Map<String, String> head) {
    if (head == null) {
        throw buildDeserializeError("head is null!");
    }
    // 解析request信息
    String targetService = head.remove(RemotingConstants.HEAD_TARGET_SERVICE);
    if (targetService != null) {
        sofaRequest.setTargetServiceUniqueName(targetService);
        String interfaceName = ConfigUniqueNameGenerator.getInterfaceName(targetService);
        //设置接口信息
        sofaRequest.setInterfaceName(interfaceName);
    } else {
        throw buildDeserializeError("HEAD_TARGET_SERVICE is null");
    }

    String methodName = head.remove(RemotingConstants.HEAD_METHOD_NAME);
    if (methodName != null) {
        //设置方法
        sofaRequest.setMethodName(methodName);
    } else {
        throw buildDeserializeError("HEAD_METHOD_NAME is null");
    }
    String targetApp = head.remove(RemotingConstants.HEAD_TARGET_APP);
    if (targetApp != null) {
        //设置appName
        sofaRequest.setTargetAppName(targetApp);
    }

    for (Map.Entry<String, String> entry : head.entrySet()) {
        sofaRequest.addRequestProp(entry.getKey(), entry.getValue());
    }

    // 这里还需要把需要解码的对象类型获取到
    String interfaceClass = ConfigUniqueNameGenerator.getInterfaceName(targetService);
    Class clazz = ClassUtils.forName(interfaceClass, true);

    //找到我们要调用的接口的方法
    Method pbMethod = null;
    Method[] methods = clazz.getMethods();
    for (Method method : methods) {
        if (methodName.equals(method.getName())) {
            pbMethod = method;
            break;
        }
    }
    //获取到对应方法的参数类型
    Class[] parameterTypes = pbMethod.getParameterTypes();
    Class parameterClazz = parameterTypes[0];
    //根据参数类型转成对象;
    Object pbReq = JSON.parseObject(data.array(), parameterClazz);

    sofaRequest.setMethodArgs(new Object[] { pbReq });
    sofaRequest.setMethodArgSigs(new String[] { parameterClazz.getName() });
}
服务端部分的解码首先是获取请求的方法和接口名,然后通过反射获取被调用接口的方法的参数类型,通过fastjson把字节数组转换成对象,然后把参数类型放入到MethodArgSigs,传入的具体参数放入到MethodArgs中。
在上面我们已经把一个Serializer写完了,接下来做框架的配置:
首先我们需要在BoltClientProxyInvokerer的parseSerializeType方法中设置一个serializeType
protected Byte parseSerializeType(String serialization) {
    Byte serializeType;
    if (SERIALIZE_HESSIAN.equals(serialization)
        || SERIALIZE_HESSIAN2.equals(serialization)) {
        serializeType = RemotingConstants.SERIALIZE_CODE_HESSIAN;
    } else if (SERIALIZE_PROTOBUF.equals(serialization)) {
        serializeType = RemotingConstants.SERIALIZE_CODE_PROTOBUF;
    } else if (SERIALIZE_JAVA.equals(serialization)) {
        serializeType = RemotingConstants.SERIALIZE_CODE_JAVA;
    }else if ("luoluo".equals(serialization)) {
        serializeType = 99;
    }  else {
        serializeType = super.parseSerializeType(serialization);
    }
    return serializeType;
}
相应的代码已经加入到了GitHub - devYun/sofa-rpc at comments-myself中,有需要的可以自己查看
我的博客即将同步至腾讯云+社区,邀请大家一同入驻:https://cloud.tencent.com/developer/support-plan?invite_code=egxubzslftq1