一、安装配置lvm2
安装LVM包:
# yum install -y lvm2
启动LVM元数据服务,并将其配置为在系统启动时启动:
# systemctl enable lvm2-lvmetad.service
# systemctl start lvm2-lvmetad.service
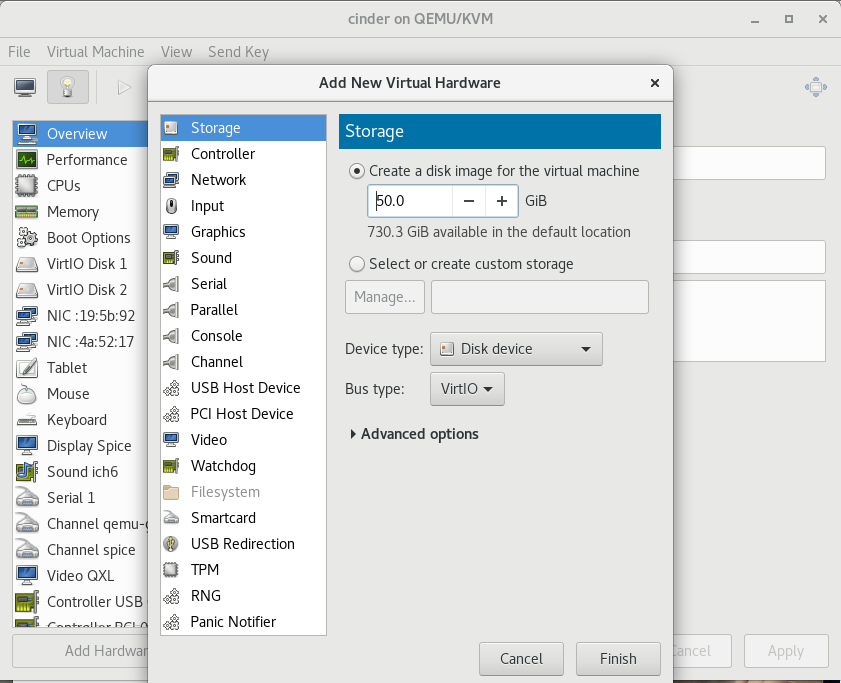
cinder添加一块磁盘:
查看:

使用第二块磁盘/dev/vdb 创建一个pv:
# pvcreate /dev/vdb
创建LVM卷组cinder-volmes:
注:块存储服务在此卷组中创建逻辑卷
# vgcreate cinder-volumes /dev/vdb
编辑lvm配置文件:
# vim /etc/lvm/lvm.conf
devices {
filter = [ "a/vdb/", "r/.*/"] #lvm可以扫描发现vdb,其他的分区都reject
二、安装配置cinder volume
安装openstack-cinder和targetcli:
# yum install openstack-cinder targetcli python-keystone -y
编辑/etc/cinder/cinder.conf:
# vim /etc/cinder/cinder.conf
[database]
connection = mysql+pymysql://cinder:cinder123@10.10.11.11/cinder
[DEFAULT]
transport_url = rabbit://openstack:openstack123@10.10.11.11
auth_strategy = keystone
my_ip = 10.10.11.14
enabled_backends = lvm
glance_api_servers = http://10.10.11.11:9292
[keystone_authtoken]
auth_uri = http://10.10.11.11:5000
auth_url = http://10.10.11.11:35357
memcached_servers = 10.10.11.11:11211
auth_type = password
project_domain_name = default
user_domain_name = default
project_name = service
username = cinder
password = cinder
[lvm]
volume_driver = cinder.volume.drivers.lvm.LVMVolumeDriver
volume_group = cinder-volumes
iscsi_protocol = iscsi
iscsi_helper = lioadm
[oslo_concurrency]
lock_path = /var/lib/cinder/tmp
开启服务
启动块存储卷服务,包括它的依赖项,并配置它们在系统启动时启动:
# systemctl enable openstack-cinder-volume.service target.service
# systemctl start openstack-cinder-volume.service target.service
# systemctl status openstack-cinder-volume.service target.service
三、校验操作(控制节点)
# source admin-openrc
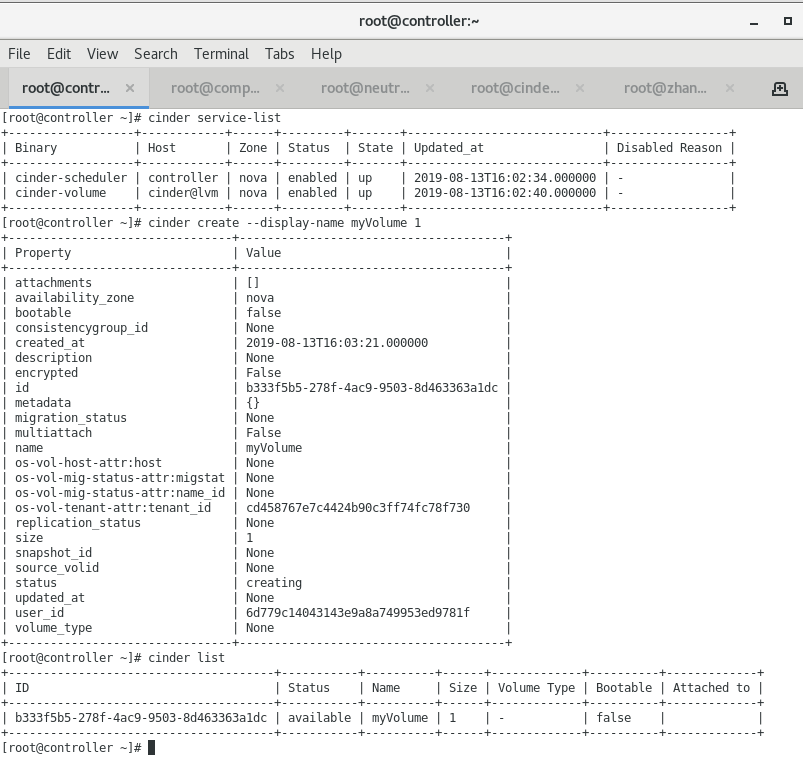
列出服务组件以验证每个流程的成功启动:
# cinder service-list
创建一个1G的卷,并查看其状态:
# cinder create --display-name myVolume 1
# cinder list
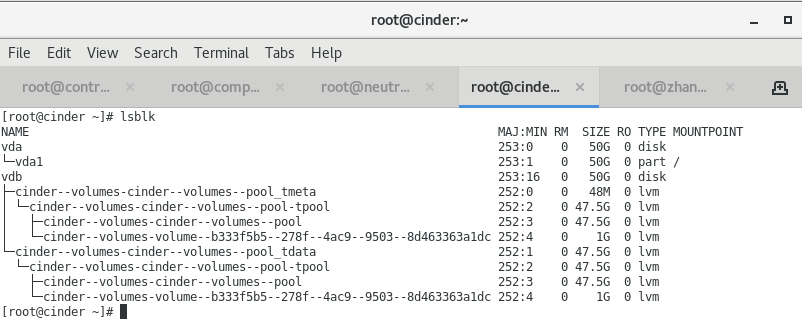
cinder节点查看:

当你的才华配不上你的野心的时候,就静下来学习吧。