原文地址:http://www.latexstudio.net/archives/9788.html
摘要: 本文比较系统地介绍了在Ubuntu下的TeXLive的安装与配置测试过程,建议使用Ubuntu的重度LaTeX用户可以看看该文章,另外,文章中也解决了乌班图安装TeXLive并更新问题。 TeXLive在CTAN最新版本下载地址
https://www.tug.org/texlive/acquire-iso.html
该页面下有texlive最新版本ISO种子问题下载链接。
https://www.tug.org/texlive/files/texlive2016.iso.torrent
TeXLive在国内下载源很多,现仅以清华大学和阿里云为例。
https://mirrors.tuna.tsinghua.edu.cn/#
找到常用发行版 iso 和应用工具安装包直接下载,点击应用软件,TeXLive2016下载链接如下
https://mirrors.tuna.tsinghua.edu.cn/CTAN/systems/texlive/Images/texlive2016-20160523.iso
阿里云下载链接:
http://mirrors.aliyun.com/CTAN/systems/texlive/Images/
选择对应版本下载即可。 下载可以使用wget下载,也可以在Windows上面将ISO文件复制到系统目录。 下载完成就可以挂载ISO镜像。 CTAN官方网站ISO挂载教程如下。
mount -t iso9660 -o ro,loop,noauto /yourISOFileDictory/texlive.iso /mnt
笔者挂载记录如下:
dell@DELL-Server:~$ sudo mount -o loop texlive2016.iso /mnt/
mount: /home/dell/texlive2016.iso is already mounted
dell@DELL-Server:~$ ls /mnt/
archive      install-tl               LICENSE.CTAN  readme-html.dir    release-texlive.txt  tlpkg
autorun.inf  install-tl-advanced.bat  LICENSE.TL    readme-txt.dir     source               tl-tray-menu.exe
index.html   install-tl-windows.bat   README        README.usergroups  texlive-doc
dell@DELL-Server:~$
安装命令
dell@DELL-Server:~$ cd /mnt/
dell@DELL-Server:/mnt$ sudo ./install-tl --gui
该命令可以在图形化界面下安装。
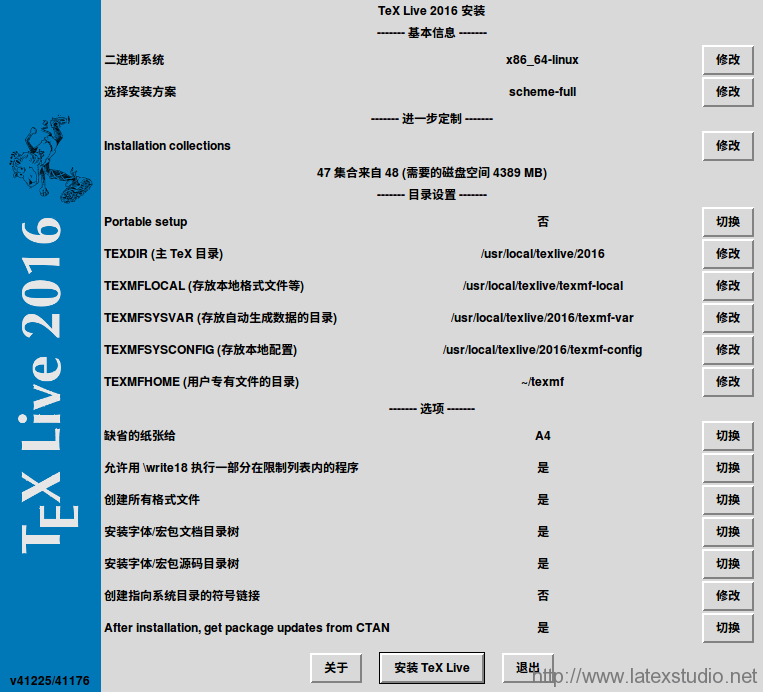
安装过程和完成截图如下。
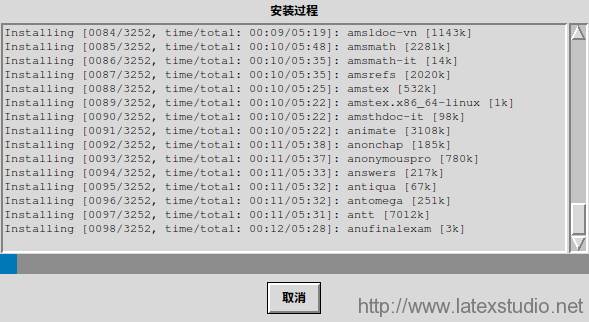
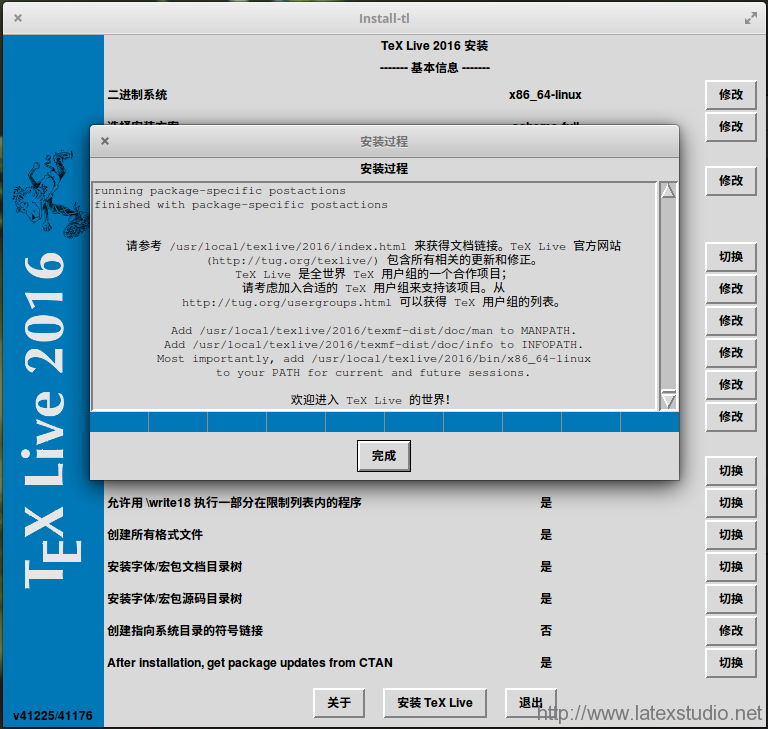
安装界面有很多安装选项,无特殊要求直接点击安装texlive,等待安装过程完成。 完成安装后,卸载镜像。
sudo umount /mnt
也可以将ISO解压后复制到Linux系统。复制文件方法这里不再赘述。 增加环境变量。
# TeX Live 2016
#命令可以直接复制运行,每次运行一条命令
export TeXLiveMANPATH=/urs/local/texlive/2016/texmf-dist/doc/man
export TeXLiveINFOPATH=/usr/local/texlive/2016/texmf-dist/doc/info
#64位系统
export TeXLivePATH=/usr/local/texlive/2016/bin/x86_64-linux
具体安装路径请以安装时选择目录为准。 本机运行结果如下:
dell@DELL-Server:~$ export TeXLiveMANPATH=/urs/local/texlive/2016/texmf-dist/doc/man
dell@DELL-Server:~$ export TeXLiveINFOPATH=/usr/local/texlive/2016/texmf-dist/doc/info
dell@DELL-Server:~$ export TeXLivePATH=/usr/local/texlive/2016/bin/x86_64-linux
dell@DELL-Server:~$ echo $TeXLiveMANPATH
/urs/local/texlive/2016/texmf-dist/doc/man
dell@DELL-Server:~$ echo $TeXLiveINFOPATH
/usr/local/texlive/2016/texmf-dist/doc/info
dell@DELL-Server:~$ echo $TeXLivePATH
/usr/local/texlive/2016/bin/x86_64-linux
dell@DELL-Server:~$
建议安装前将Windows字体复制到Linux,复制字体方法和复制ISO解压后文件方法一样,等待字体安装完成后再安装texlive。 在Linux系统字体目录下创建winfonts文件夹(可选项),前提是已复制字体到Linux主机。
#创建Windows字体文件目录,目录名称可自定义
dell@DELL-Server:~$ sudo mkdir /usr/share/fonts/WindowsFonts
#查看目录
dell@DELL-Server:~$ ls /usr/share/fonts/
cmap  opentype  truetype  type1  WindowsFonts  X11
复制字体到winfonts文件夹。
dell@DELL-Server:~$ sudo cp /home/dell/Fonts/* /usr/share/fonts/WindowsFonts/
#查看字体复制情况
dell@DELL-Server:~$ ls /usr/share/fonts/WindowsFonts/
安装字体命令。
dell@DELL-Server:mkfontscale
dell@DELL-Server:mkfontdir
dell@DELL-Server:sudo fc-cache -fv
dell@DELL-Server:~$ sudo fc-cache -fsv
/usr/share/fonts: caching, new cache contents: 0 fonts, 6 dirs
/usr/share/fonts/WindowsFonts: caching, new cache contents: 1188 fonts, 0 dirs
/usr/share/fonts/X11: caching, new cache contents: 0 fonts, 4 dirs
/usr/share/fonts/X11/Type1: caching, new cache contents: 8 fonts, 0 dirs
/usr/share/fonts/X11/encodings: caching, new cache contents: 0 fonts, 1 dirs
/usr/share/fonts/X11/encodings/large: caching, new cache contents: 0 fonts, 0 dirs
/usr/share/fonts/X11/misc: caching, new cache contents: 59 fonts, 0 dirs
/usr/share/fonts/X11/util: caching, new cache contents: 0 fonts, 0 dirs
/usr/share/fonts/cmap: caching, new cache contents: 0 fonts, 5 dirs
/usr/share/fonts/cmap/adobe-cns1: caching, new cache contents: 0 fonts, 0 dirs
/usr/share/fonts/cmap/adobe-gb1: caching, new cache contents: 0 fonts, 0 dirs
/usr/share/fonts/cmap/adobe-japan1: caching, new cache contents: 0 fonts, 0 dirs
/usr/share/fonts/cmap/adobe-japan2: caching, new cache contents: 0 fonts, 0 dirs
/usr/share/fonts/cmap/adobe-korea1: caching, new cache contents: 0 fonts, 0 dirs
/usr/share/fonts/opentype: caching, new cache contents: 0 fonts, 5 dirs
/usr/share/fonts/opentype/mondulkiri: caching, new cache contents: 8 fonts, 0 dirs
/usr/share/fonts/opentype/noto: caching, new cache contents: 36 fonts, 0 dirs
/usr/share/fonts/opentype/opendyslexic: caching, new cache contents: 9 fonts, 0 dirs
/usr/share/fonts/opentype/stix: caching, new cache contents: 29 fonts, 0 dirs
/usr/share/fonts/opentype/stix-word: caching, new cache contents: 5 fonts, 0 dirs
/usr/share/fonts/truetype: caching, new cache contents: 2 fonts, 38 dirs
/usr/share/fonts/truetype/abyssinica: caching, new cache contents: 1 fonts, 0 dirs
/usr/share/fonts/truetype/ancient-scripts: caching, new cache contents: 1 fonts, 0 dirs
/usr/share/fonts/truetype/arphic: caching, new cache contents: 8 fonts, 0 dirs
/usr/share/fonts/truetype/capture-it-elementary: caching, new cache contents: 2 fonts, 0 dirs
/usr/share/fonts/truetype/croscore: caching, new cache contents: 12 fonts, 0 dirs
/usr/share/fonts/truetype/daniel-elementary: caching, new cache contents: 3 fonts, 0 dirs
/usr/share/fonts/truetype/dejavu: caching, new cache contents: 21 fonts, 0 dirs
/usr/share/fonts/truetype/fonts-guru-extra: caching, new cache contents: 1 fonts, 0 dirs
/usr/share/fonts/truetype/freefont: caching, new cache contents: 12 fonts, 0 dirs
/usr/share/fonts/truetype/hvd-bodedo-elementary: caching, new cache contents: 1 fonts, 0 dirs
/usr/share/fonts/truetype/jenna-sue-elementary: caching, new cache contents: 1 fonts, 0 dirs
/usr/share/fonts/truetype/kacst: caching, new cache contents: 15 fonts, 0 dirs
/usr/share/fonts/truetype/kacst-one: caching, new cache contents: 2 fonts, 0 dirs
/usr/share/fonts/truetype/lao: caching, new cache contents: 1 fonts, 0 dirs
/usr/share/fonts/truetype/lato: caching, new cache contents: 18 fonts, 0 dirs
/usr/share/fonts/truetype/liberation: caching, new cache contents: 16 fonts, 0 dirs
/usr/share/fonts/truetype/limelight-elementary: caching, new cache contents: 1 fonts, 0 dirs
/usr/share/fonts/truetype/lobster-elementary: caching, new cache contents: 1 fonts, 0 dirs
/usr/share/fonts/truetype/lohit-punjabi: caching, new cache contents: 1 fonts, 0 dirs
/usr/share/fonts/truetype/nanum: caching, new cache contents: 8 fonts, 0 dirs
/usr/share/fonts/truetype/noto: caching, new cache contents: 175 fonts, 0 dirs
/usr/share/fonts/truetype/open-sans-elementary: caching, new cache contents: 10 fonts, 0 dirs
/usr/share/fonts/truetype/openoffice: caching, new cache contents: 1 fonts, 0 dirs
/usr/share/fonts/truetype/operating-instructions-elementary: caching, new cache contents: 1 fonts, 0 dirs
/usr/share/fonts/truetype/padauk: caching, new cache contents: 4 fonts, 0 dirs
/usr/share/fonts/truetype/plainblack-elementary: caching, new cache contents: 6 fonts, 0 dirs
/usr/share/fonts/truetype/raleway-elementary: caching, new cache contents: 9 fonts, 0 dirs
/usr/share/fonts/truetype/redacted-elementary: caching, new cache contents: 3 fonts, 0 dirs
/usr/share/fonts/truetype/roboto: caching, new cache contents: 0 fonts, 1 dirs
/usr/share/fonts/truetype/roboto/hinted: caching, new cache contents: 18 fonts, 0 dirs
/usr/share/fonts/truetype/roboto-mono-elementary: caching, new cache contents: 10 fonts, 0 dirs
/usr/share/fonts/truetype/sinhala: caching, new cache contents: 1 fonts, 0 dirs
/usr/share/fonts/truetype/takao-gothic: caching, new cache contents: 3 fonts, 0 dirs
/usr/share/fonts/truetype/takao-mincho: caching, new cache contents: 3 fonts, 0 dirs
/usr/share/fonts/truetype/tibetan-machine: caching, new cache contents: 1 fonts, 0 dirs
/usr/share/fonts/truetype/tlwg: caching, new cache contents: 58 fonts, 0 dirs
/usr/share/fonts/truetype/ttf-khmeros-core: caching, new cache contents: 2 fonts, 0 dirs
/usr/share/fonts/truetype/ubuntu-font-family: caching, new cache contents: 13 fonts, 0 dirs
/usr/share/fonts/truetype/unfonts-core: caching, new cache contents: 12 fonts, 0 dirs
/usr/share/fonts/type1: caching, new cache contents: 0 fonts, 1 dirs
/usr/share/fonts/type1/gsfonts: caching, new cache contents: 35 fonts, 0 dirs
/usr/local/share/fonts: caching, new cache contents: 0 fonts, 0 dirs
Re-scanning /usr/share/fonts: caching, new cache contents: 0 fonts, 6 dirs
Re-scanning /usr/share/fonts/X11: caching, new cache contents: 0 fonts, 4 dirs
Re-scanning /usr/share/fonts/X11/encodings: caching, new cache contents: 0 fonts, 1 dirs
Re-scanning /usr/share/fonts/cmap: caching, new cache contents: 0 fonts, 5 dirs
Re-scanning /usr/share/fonts/opentype: caching, new cache contents: 0 fonts, 5 dirs
Re-scanning /usr/share/fonts/truetype: caching, new cache contents: 2 fonts, 38 dirs
Re-scanning /usr/share/fonts/truetype/roboto: caching, new cache contents: 0 fonts, 1 dirs
Re-scanning /usr/share/fonts/type1: caching, new cache contents: 0 fonts, 1 dirs
/var/cache/fontconfig: cleaning cache directory
fc-cache: succeeded
dell@DELL-Server:~$
Ubuntu网络安装TeXLive比较简单,只需要执行一条命令并等待安装完成。 首先要安装基础依赖软件。
sudo apt-get install libdigest-perl-md5-perl perl-tk
sudo apt install texlive-full
但该方法安装存在一个弊端,即不能更新宏包(包括所有Debian和Ubuntu发行版本)。 当我们执行命令
tlmgr update -all
我们可以使用 时会有报错。报错信息如下:
jiangjuan@OptiPlex-390:~$ tlmgr update --all
(running on Debian, switching to user mode!)
cannot setup TLPDB in /home/jiangjuan/texmf at /usr/bin/tlmgr line 5604.
其他tlmgr命令也无效。所以我们需要其他方法安装TeXLive。下文将加以介绍。 所有宏包均是打包时老版本,部分软件包会在Ubuntu 安装源发布后更新,本方法可以解决安装源太旧问题。 首先,执行命令:
sudo apt install git
安装git客户端,克隆代码到本地。git完成后如下图。 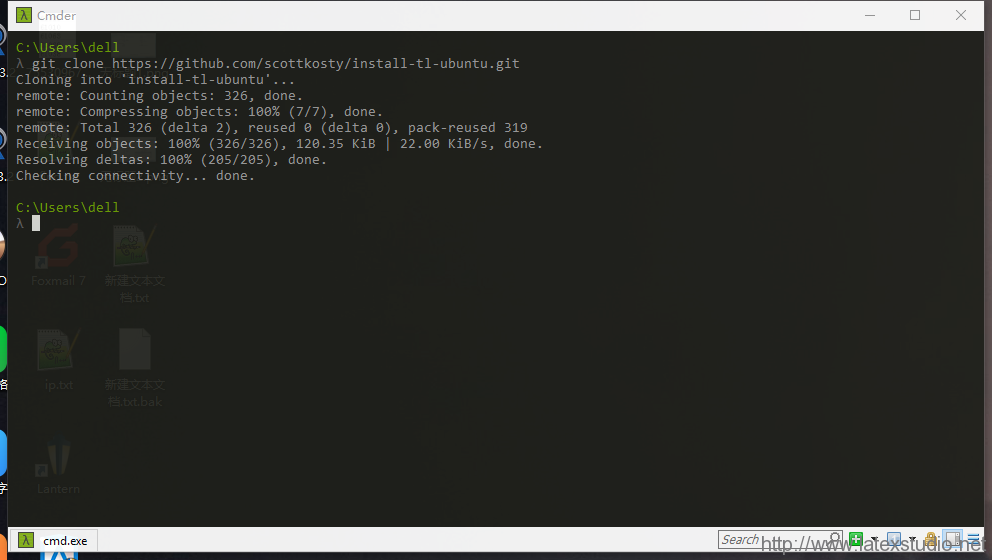 install-tl-ubuntuGitHub地址。 https://github.com/scottkosty/install-tl-ubuntu . 下面是重要环节,git 同步 install-tl-ubuntu代码,并安装。代码如下:
git clone https://github.com/scottkosty/install-tl-ubuntu.git

cd cd install-tl-ubuntu

chmod +x ./install-tl-ubuntu

sudo ./install-tl-ubuntu
等待程序自动选择安装源并自动安装,大功告成。 提示:该方法需要全网络极为稳定,否则可能会出现断线重新安装。 安装完成后,检查安装情况,可以执行命令。
xelatex -version
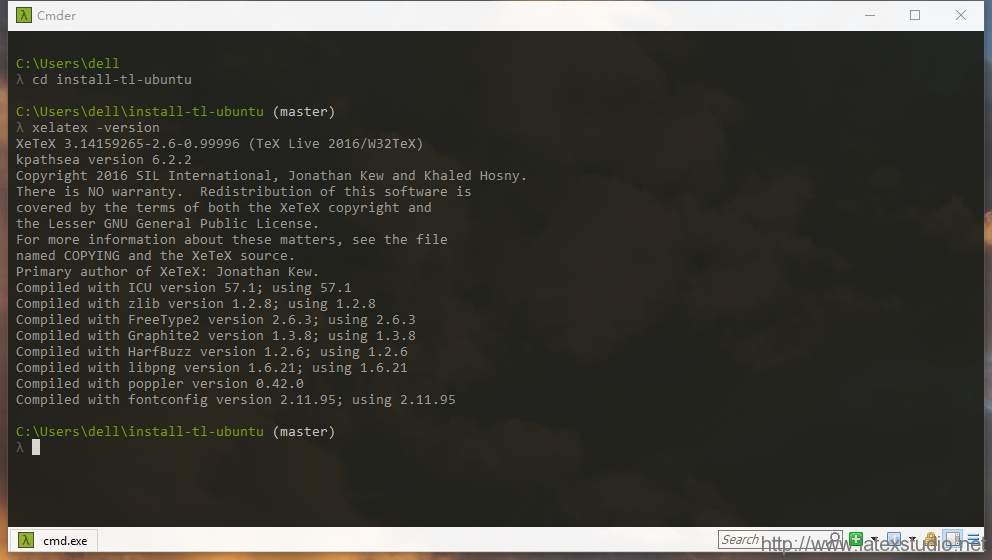 程序安装完成后,开始菜单会增加一个选项--TeXLive Package Manager,通过该软件可以完成宏包更新和管理等操作。 图片是在Windows 环境下面执行结果,可能与Ubuntu执行结果略有差异。 示例代码如下,
documentclass{book}
usepackage{amsmath}
usepackage{ctex}
%usepackage{ctex}%(PDF)LaTeX编译方式请选择此行,注释上一行代码
egin{document}
你好,中国。

勾股定律
$$a^2+b^2=c^2$$

Happy TeXing.
end{document}
将代码保存至/home/dell/文档/tex/Hello目录下,该目录是笔者电脑目录,可根据实际情况选择保存目录。
/home/dell/文档/tex/Hello/hello.tex
编译文件,
#切换到tex源文件目录
cd /home/dell/文档/Hello/
#xelatex命令编译文件,可选其他选项
xelatex hello.tex
等待编译完成。