- 预备工具
- 1 ffmpeg:
- 链接:https://pan.baidu.com/s/1jonSAa_TG2XuaJEy3iTmHg
- 密码:w6hk
- 下载完后找到该文件夹下的bin目录,点进去 复制路径 添加环境变量 (重要)
- 2 baidu-aip:
- pip3 install baidu-aip
- 3 http://ai.baidu.com/ 注册百度账号
- 流程:
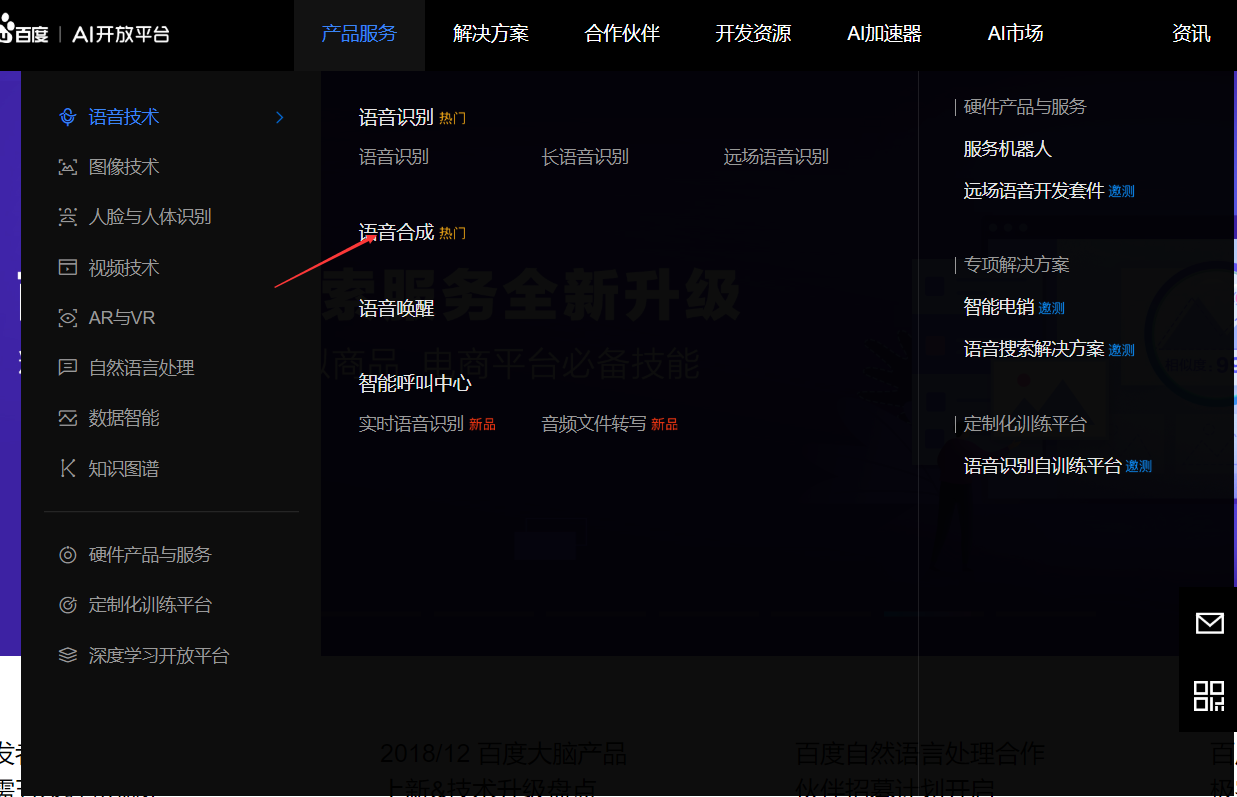
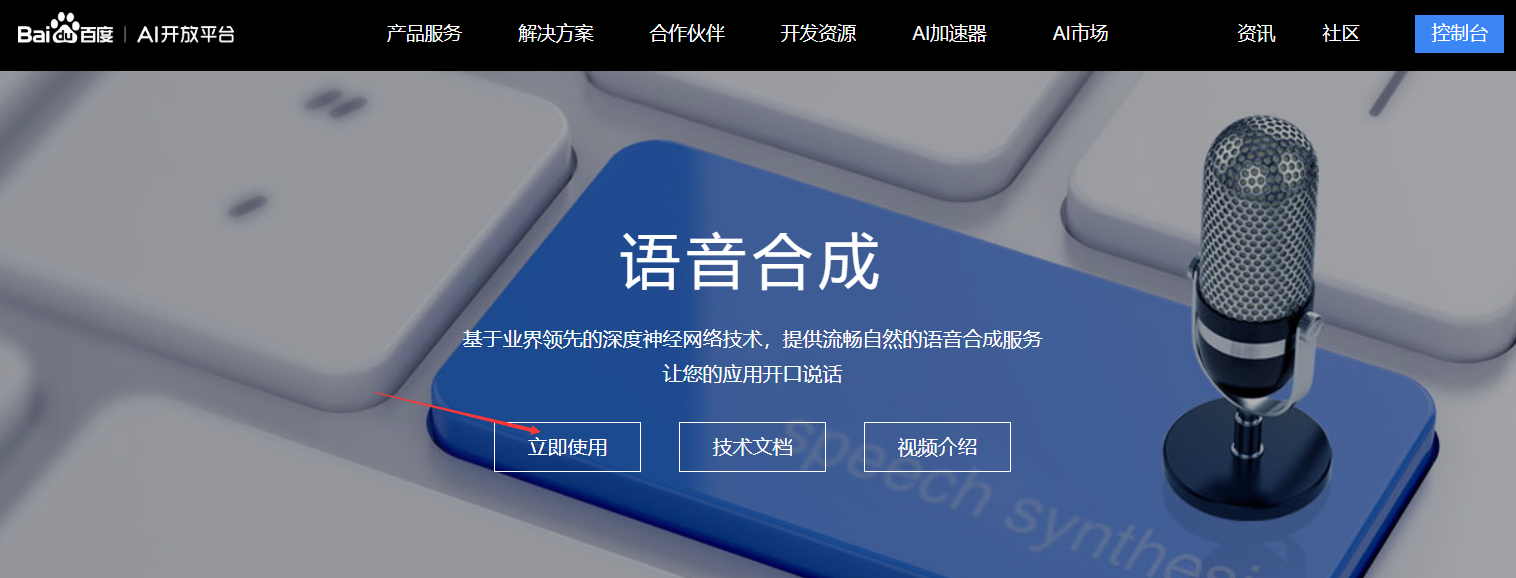
- 注册完毕后
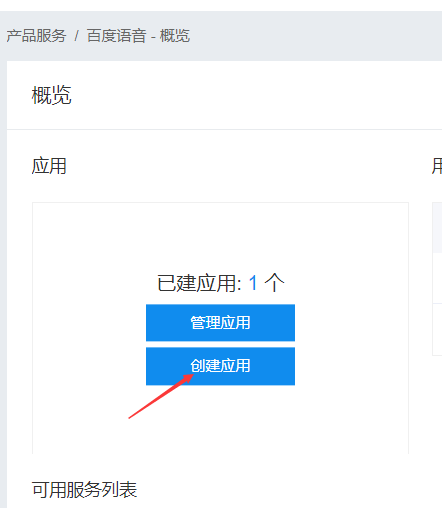
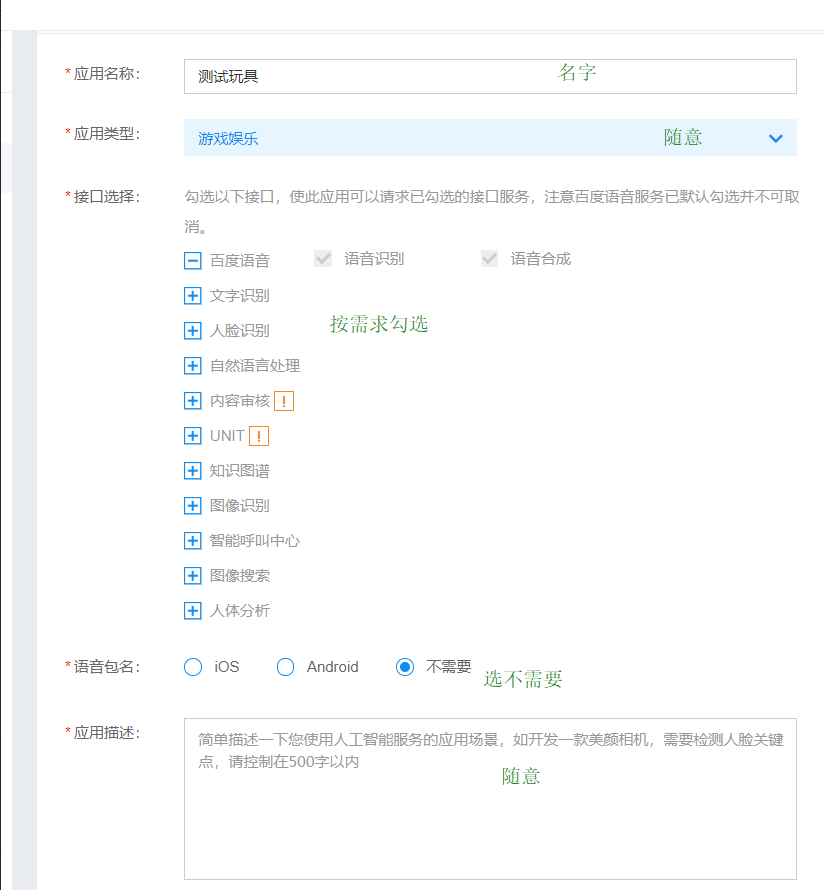

创建完毕,开始上代码
- 1 简单合成一个语音


from aip import AipSpeech

""" 你的 APPID AK SK """
APP_ID = '15421003'
API_KEY = 'qUO1XGx6YQGmiowHnKo1G2RF'
SECRET_KEY = '1mEG1AO1WeNGoBME4bctD4tbZVIKZdUL'

client = AipSpeech(APP_ID, API_KEY, SECRET_KEY) # AipSpeech 是百度语音的客户端 认证成功之后,客户端将被开启,这里的client 就是已经开启的百度语音的客户端了

result  = client.synthesis('你好', 'zh', 1, {
    'vol': 5, # 音量,取值0-15,默认为5中音量
    'spd' : 8, # 语速,取值0-9,默认为5中语速
    'pit': 7, # 音调,取值0-9,默认为5中语调
    'per':3 # 发音人选择, 0为女声,1为男声,3为情感合成-度逍遥,4为情感合成-度丫丫,默认为普通女
})

# 识别正确返回语音二进制 错误则返回dict 参照下面错误码
if not isinstance(result, dict):
    with open('auido.mp3', 'wb') as f:
        f.write(result)
- 若请求错误,服务器将返回的JSON文本包含以下参数:
- error_code:错误码。
- error_msg:错误描述信息,帮助理解和解决发生的错误。
- 然后试听redio.mp3
- 2 语音识别
- 首先先确认一下ffmpeg环境变量是否配置成功
- 打开cmd
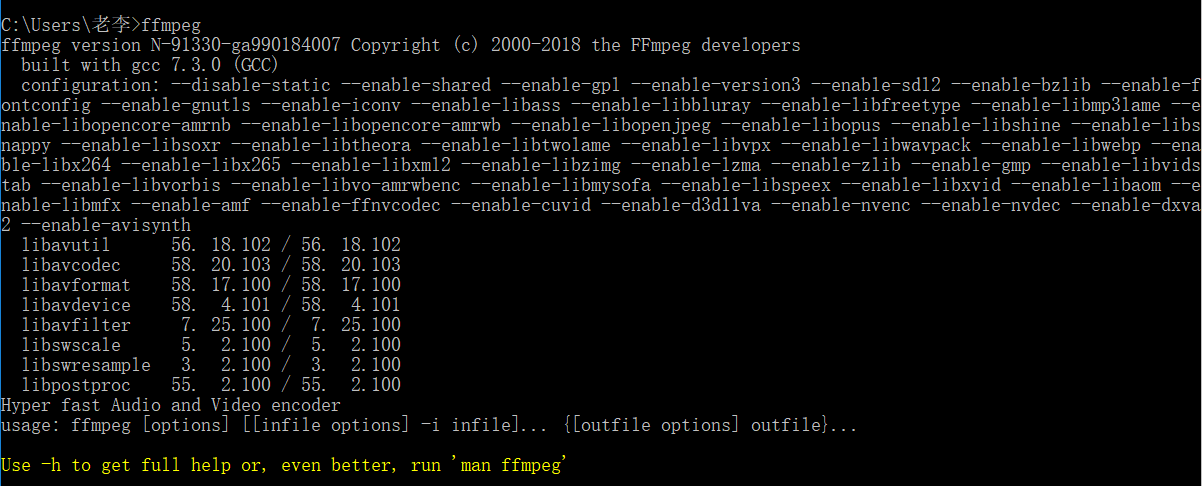
- 此时为打开成功
- 这个工具可以将wav wma mp3 等音频文件转换为 pcm 无压缩音频文件
做一个测试,首先要打开windows的录音机,录制一段音频(说普通话)

现在假设录制的音频文件的名字为 audio.wav 放置在 D:jamelee

然后我们用命令行对这个 audio.wav 进行pcm格式的转换然后得到 audio.pcm

命令是 : ffmpeg -y  -i audio.wav  -acodec pcm_s16le -f s16le -ac 1 -ar 16000 audio.pcm
- 然后打开目录就会看到pcm文件了
- 进入正题 上代码
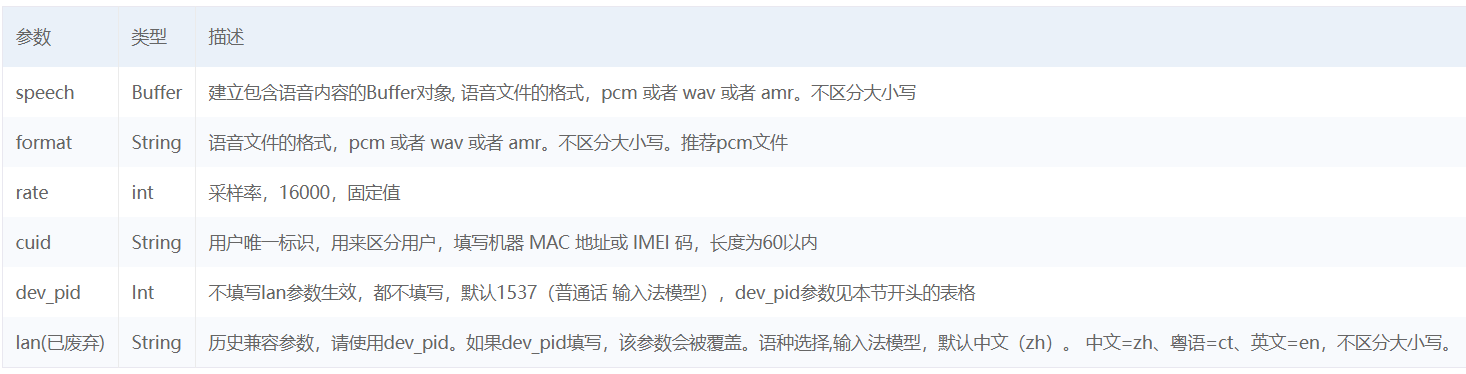
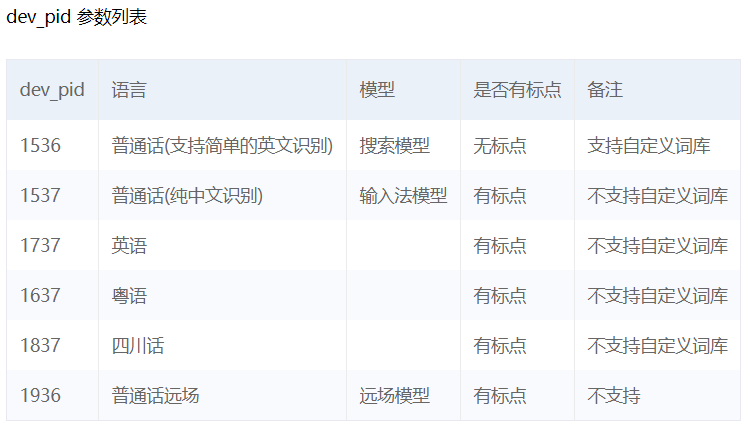
from aip import AipSpeech
import os
""" 你的 APPID AK SK """
APP_ID = '15421003'
API_KEY = 'qUO1XGx6YQGmiowHnKo1G2RF'
SECRET_KEY = '1mEG1AO1WeNGoBME4bctD4tbZVIKZdUL'

client = AipSpeech(APP_ID, API_KEY, SECRET_KEY)


def get_file_content(filePath):
    os.system(f"ffmpeg -y  -i {filePath} -acodec pcm_s16le -f s16le -ac 1 -ar 16000 {filePath}.pcm") # 直接在python中执行cmd命令
    with open(f"{filePath}.pcm", 'rb') as fp:
        return fp.read()

# 识别本地文件
res  = client.asr(get_file_content('Recording.wma'), 'pcm', 16000, {
    'dev_pid': 1536, # 下面查看参数
})

print(res)
- 语音识别+语音合成+ 自动播放
from aip import AipSpeech
import time,os

""" 你的 APPID AK SK """
APP_ID = '15420336'
API_KEY = 'VwSGcqqwsCl282LGKnFwHDIA'
SECRET_KEY = 'h4oL6Y9yRuvmD0oSdQGQZchNcix4TF5P'

client = AipSpeech(APP_ID, API_KEY, SECRET_KEY)

# 读取文件
def get_file_content(filePath):
    os.system(f"ffmpeg -y  -i {filePath} -acodec pcm_s16le -f s16le -ac 1 -ar 16000 {filePath}.pcm")
    with open(f"{filePath}.pcm", 'rb') as fp:
        return fp.read()

def audio2text(filepath):
    # 识别本地文件
    res = client.asr(get_file_content(filepath), 'pcm', 16000, {
        'dev_pid': 1536,
    })

    print(res.get("result")[0])

    return res.get("result")[0]

def text2audio(text):
    filename = f"{time.time()}.mp3"
    result = client.synthesis(text, 'zh', 1, {
        'vol': 5,
        "spd": 3,
        "pit": 7,
        "per": 4
    })

    # 识别正确返回语音二进制 错误则返回dict 参照下面错误码
    if not isinstance(result, dict):
        with open(filename, 'wb') as f:
            f.write(result)

    return filename


text = audio2text("njsmmz.m4a")
filename = text2audio(text)

os.system(filename) # 自动弹出播放器
- 3 自然语言处理
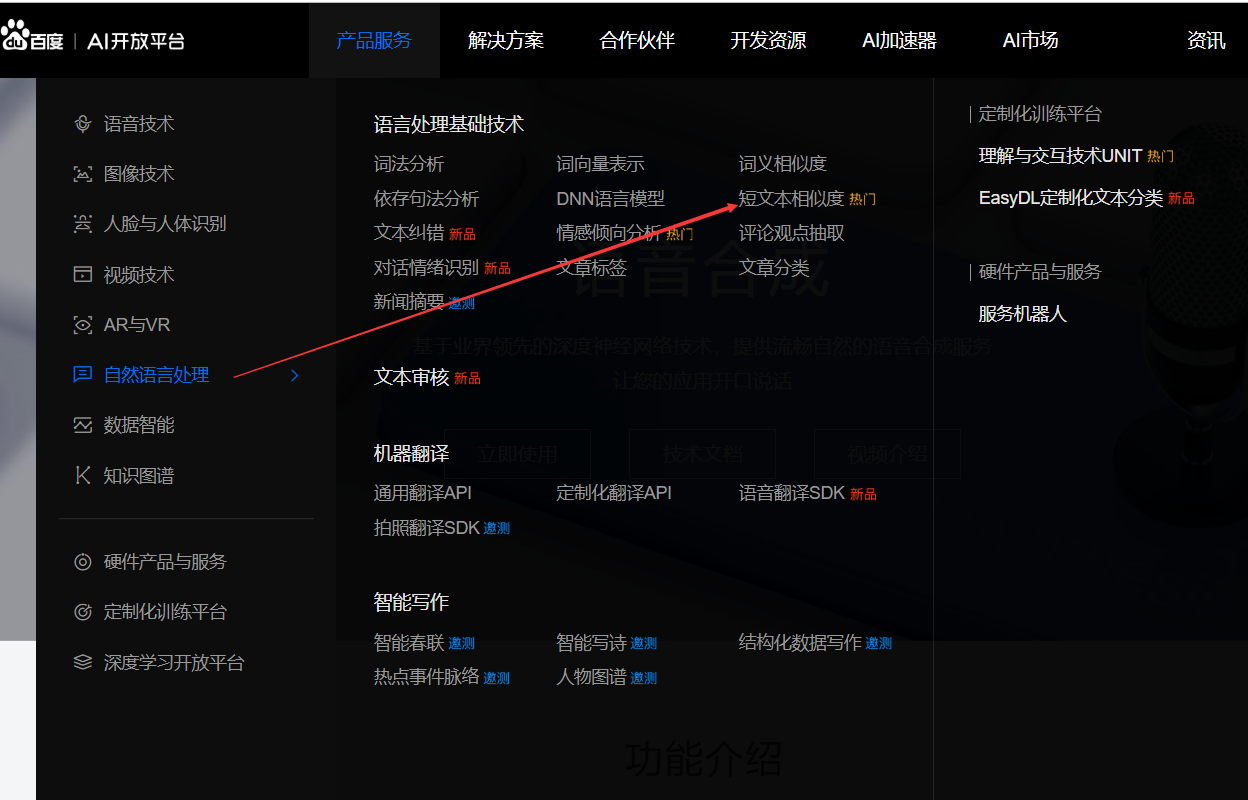
- 使用说明
from aip import AipNlp # 发生变化

""" 你的 APPID AK SK """
APP_ID = '你的 App ID'
API_KEY = '你的 Api Key'
SECRET_KEY = '你的 Secret Key'

client = AipNlp(APP_ID, API_KEY, SECRET_KEY) # 注意 与上面不同
text = "你叫什么名字"

""" 调用词法分析 """
client.lexer(text);
- 最终智能玩具
bd_ai.py
from aip import AipSpeech,AipNlp
import os
import time
import time

APP_ID = '15421003'
API_KEY = 'qUO1XGx6YQGmiowHnKo1G2RF'
SECRET_KEY = '1mEG1AO1WeNGoBME4bctD4tbZVIKZdUL'

client = AipSpeech(APP_ID, API_KEY, SECRET_KEY)
nlp =  AipNlp(APP_ID, API_KEY, SECRET_KEY)
def get_file_content(filePath):
    os.system(f"ffmpeg -y  -i {filePath} -acodec pcm_s16le -f s16le -ac 1 -ar 16000 {filePath}.pcm")
    with open(f"{filePath}.pcm", 'rb') as fp:
        return fp.read()

def text2audio(text):
    filename = f"{time.time()}.mp3"
    result = client.synthesis(text, 'zh', 1, {
        'vol': 5,
        'spd': 3,
        'pit': 7,
        'per': 3
    })


    if not isinstance(result, dict):
        with open(filename, 'wb') as f:
            f.write(result)

    return filename

def audio2text(filepath):
    res = client.asr(get_file_content(filepath), 'pcm', 16000, {
        'dev_pid': 1536,
    })
    print(res.get("result")[0])

    return res.get("result")[0]

def to_tuling(text):
    import requests

    args = {
        "reqType": 0,
        "perception": {
            "inputText": {
                "text":text
            }
        },
        "userInfo": {
            "apiKey": "f14581d124214b3c95a7f9c4d2402f94",
            "userId": "1111"
        }
    }

    url = "http://openapi.tuling123.com/openapi/api/v2"

    res = requests.post(url, json=args)

    text = res.json().get("results")[0].get("values").get("text")

    return text
app.py
from flask import Flask,request,render_template,jsonify,send_file
from uuid import uuid4
import bd_ai
app = Flask(__name__)

@app.route("/")
def index():
    return render_template("index.html")


@app.route("/ai",methods=["POST"])
def ai():
    # 1.保存录音文件
    audio = request.files.get("record")
    filename = f"{uuid4()}.wav"
    audio.save(filename)
    # 2.将录音文件转换为PCM发送给百度进行语音识别
    q_text = bd_ai.audio2text(filename)
    # 3.将识别的问题交给图灵或自主处理获取答案
    a_text = bd_ai.to_tuling(q_text)
    # 4.将答案发送给百度语音合成,合成音频文件
    filename = bd_ai.text2audio(a_text)

    # 5.将音频文件发送给前端播放

    return jsonify({"filename":filename})


@app.route("/get_audio/<filename>")
def get_audio(filename):

    return send_file(filename)


if __name__ == '__main__':
    app.run("0.0.0.0",9527,debug=True)
index.html
<!DOCTYPE html>
<html lang="en">
<head>
    <meta charset="UTF-8">
    <title>Title</title>
</head>
<body>
<audio controls autoplay id="player"></audio>
<p>
    <button onclick="start_reco()" style="background-color: yellow">录制语音指令</button>
</p>
<p>
    <button onclick="stop_reco_audio()" style="background-color: blue">发送语音指令</button>
</p>
</body>
<!--<script type="application/javascript" src="/static/Recorder.js"></script>-->
<script type="application/javascript" src="https://cdn.bootcss.com/recorderjs/0.1.0/recorder.js"></script>
<script type="text/javascript" src="../static/jQuery3.1.1.js"></script>

<script type="text/javascript">
    var reco = null;
    var audio_context = new AudioContext();
    navigator.getUserMedia = (navigator.getUserMedia ||
        navigator.webkitGetUserMedia ||
        navigator.mozGetUserMedia ||
        navigator.msGetUserMedia);

    navigator.getUserMedia({audio: true}, create_stream, function (err) {
        console.log(err)
    });

    function create_stream(user_media) {
        var stream_input = audio_context.createMediaStreamSource(user_media);
        reco = new Recorder(stream_input);
    }

    function start_reco() {
        reco.record();
    }


    function stop_reco_audio() {
        reco.stop();
        send_audio();
        reco.clear();
    }


    function send_audio() {
        reco.exportWAV(function (wav_file) {
            var formdata = new FormData();
            formdata.append("record", wav_file);
            console.log(formdata);
            $.ajax({
                url: "http://192.168.13.129:9527/ai",
                type: 'post',
                processData: false,
                contentType: false,
                data: formdata,
                dataType: 'json',
                success: function (data) {
                    console.log(data);
                    document.getElementById("player").src ="http://192.168.13.129:9527/get_audio/" + data.filename
                }
            });

        })
    }

</script>
</html>