第二篇
前言
本篇是和GIF相关的一个UIImage的分类。主要提供了三个方法:
+ (UIImage *)sd_animatedGIFNamed:(NSString *)name----- 根据名称获取图片+ (UIImage *)sd_animatedGIFWithData:(NSData *)data----- 根据NSData获取图片- (UIImage *)sd_animatedImageByScalingAndCroppingToSize:(CGSize)size----- 修改图片到指定的尺寸
UIImage的size,scale属性
我们先不管图片的更高级的知识,我们简单的对size和scale这两个属性做一下介绍。
注意:如果要获取一个图片的尺寸,不是直接使用image.size,而是使用image.size*image.scale。当然,这是伪代码。原因就是我们在获取size的时候。使用的是Point坐标,而图片的尺寸是以像素为参照的。系统为我们处理了这两种坐标系的转换工作。
我们用一个例子来演示上边的内容:
UIImage *image = [UIImage imageNamed:@"photo_delete"];
NSLog(@"-----尺寸:(%f %f)", image.size.width, image.size.height);
打印结果为:
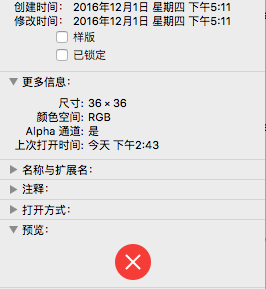
-----尺寸:(18.000000 18.000000)
可以看出来。使用size这个属性是不对的。该图片的实际尺寸为:
那我们修改下代码:
UIImage *image = [UIImage imageNamed:@"photo_delete"];
NSLog(@"-----尺寸:(%f %f)", image.size.width * image.scale, image.size.height * image.scale);
打印结果如下:
-----尺寸:(36.000000 36.000000)
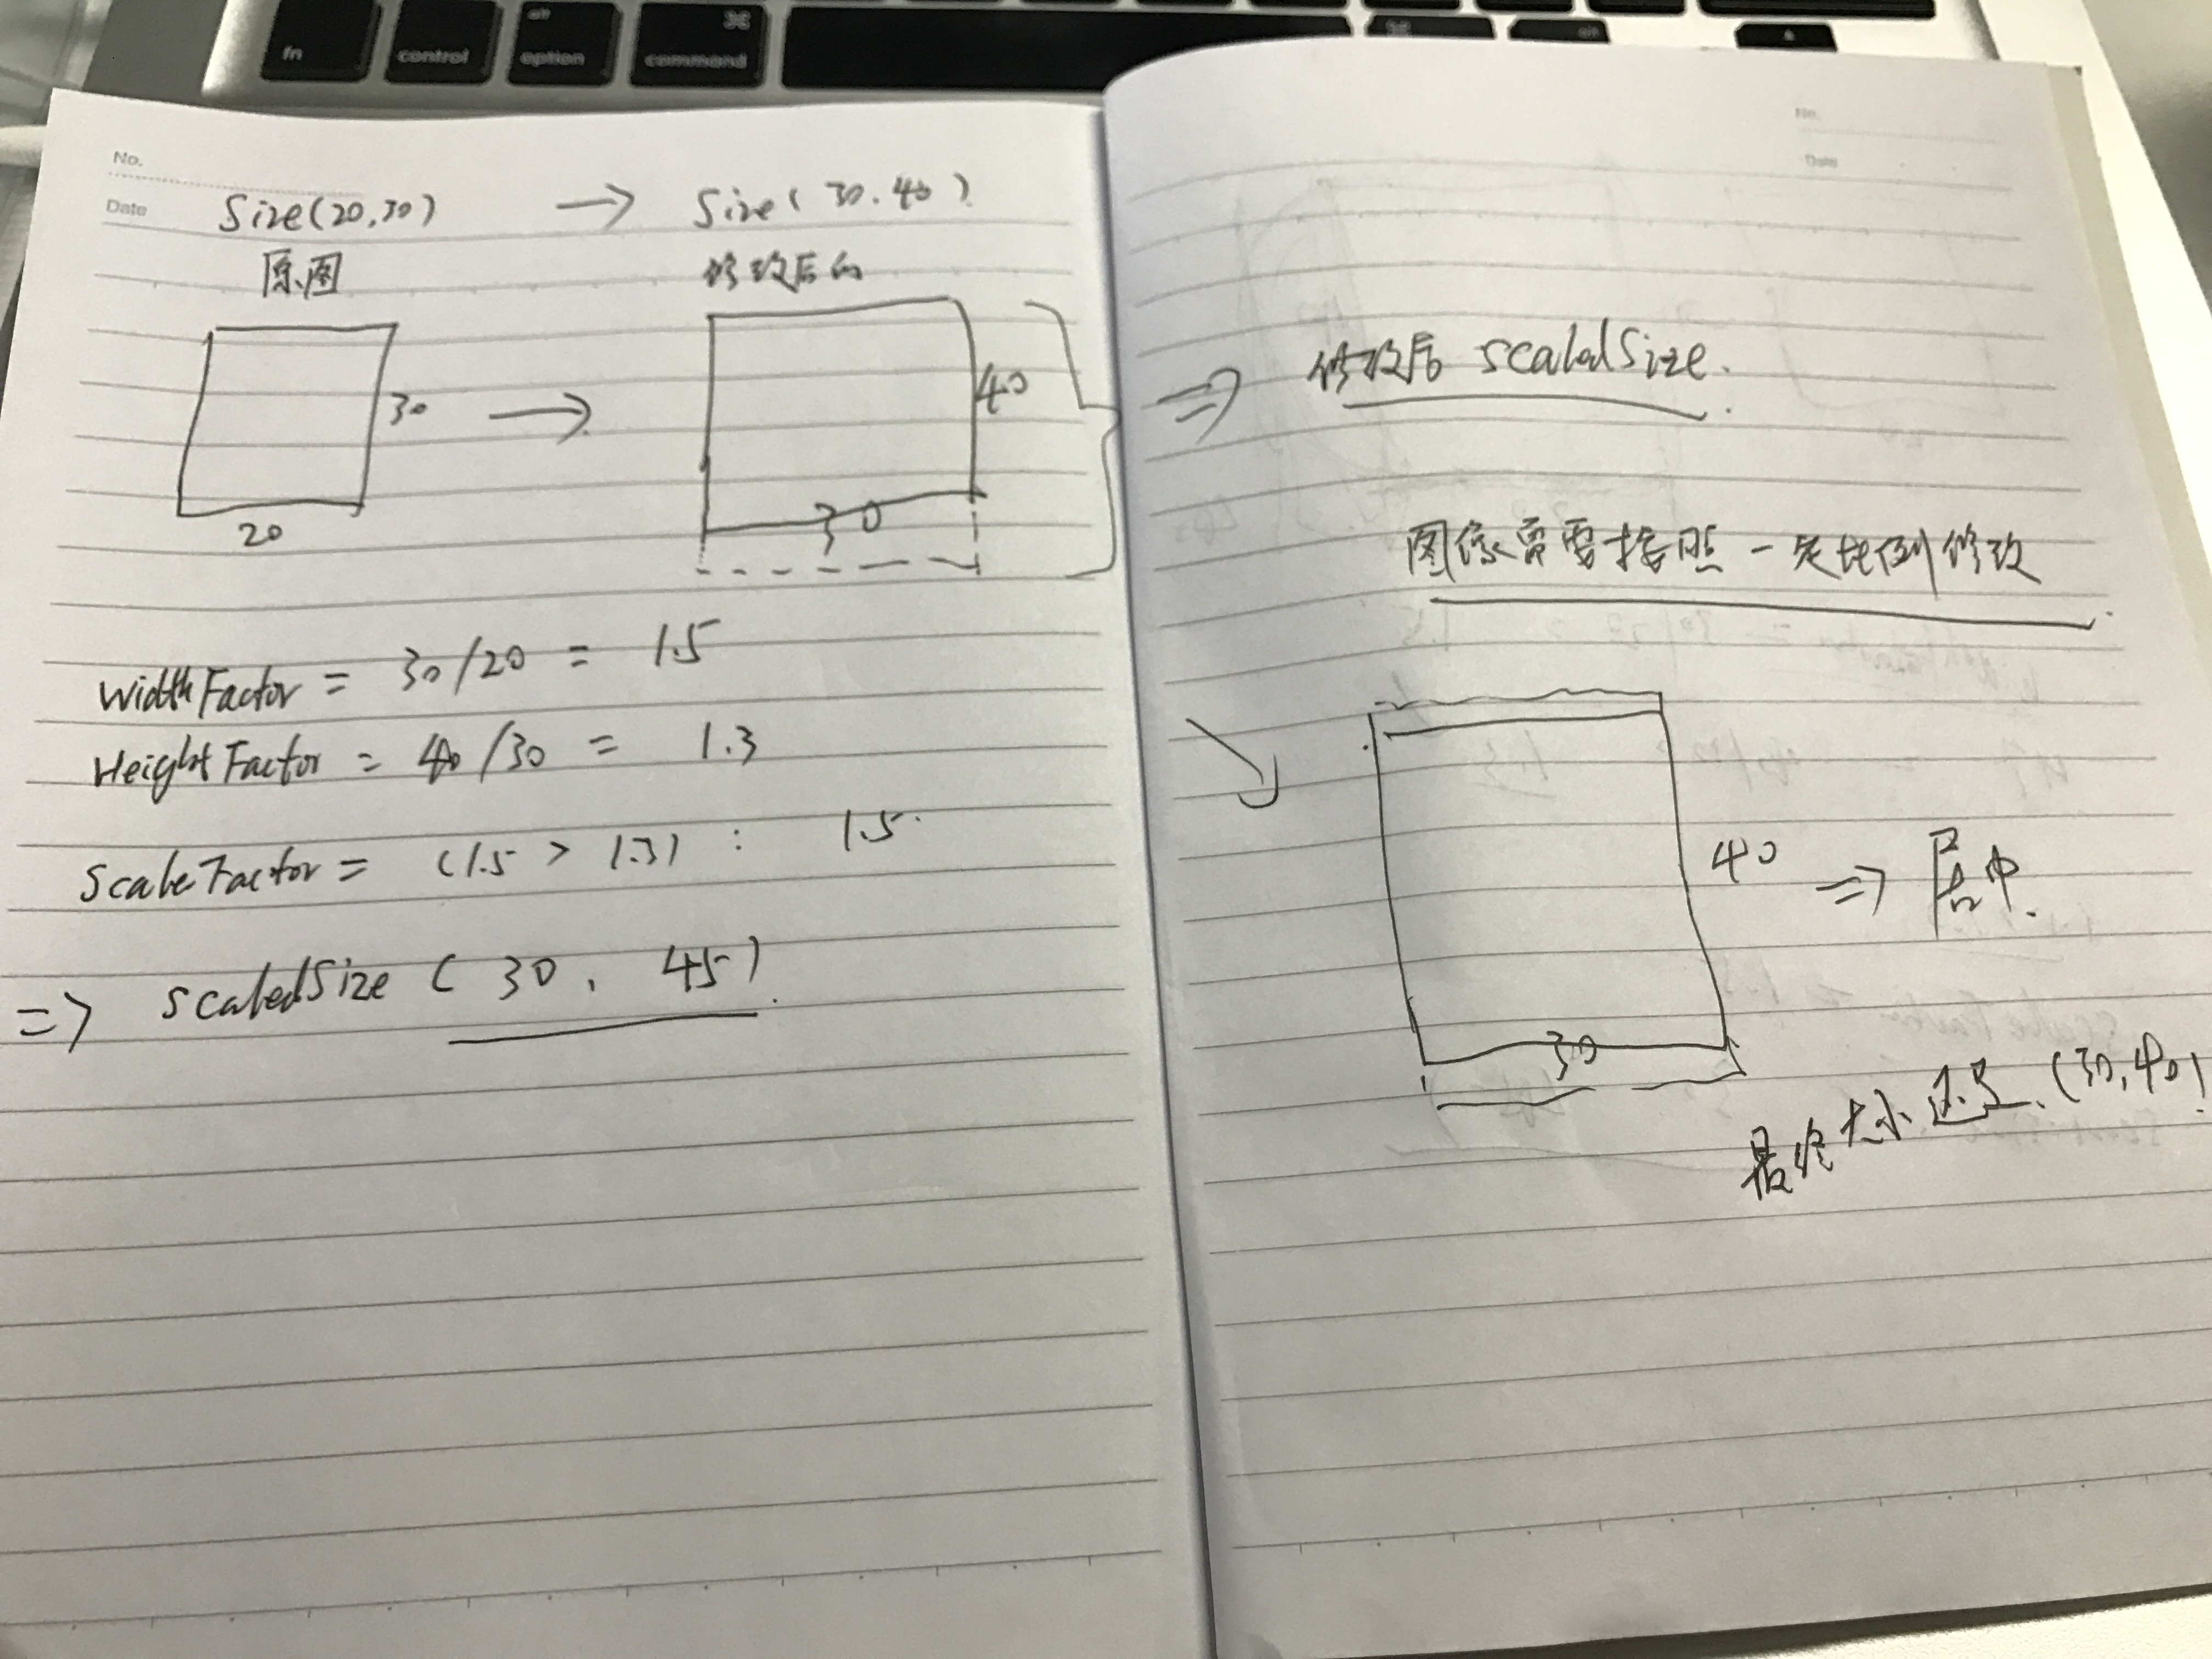
修改图片到指定的尺寸
- (UIImage *)sd_animatedImageByScalingAndCroppingToSize:(CGSize)size {
    if (CGSizeEqualToSize(self.size, size) || CGSizeEqualToSize(size, CGSizeZero)) {
        return self;
    }

    CGSize scaledSize = size;
    CGPoint thumbnailPoint = CGPointZero;

    CGFloat widthFactor = size.width / self.size.width;
    CGFloat heightFactor = size.height / self.size.height;
    CGFloat scaleFactor = (widthFactor > heightFactor) ? widthFactor : heightFactor;
    scaledSize.width = self.size.width * scaleFactor;
    scaledSize.height = self.size.height * scaleFactor;

    if (widthFactor > heightFactor) {
        thumbnailPoint.y = (size.height - scaledSize.height) * 0.5;
    }
    else if (widthFactor < heightFactor) {
        thumbnailPoint.x = (size.width - scaledSize.width) * 0.5;
    }

    NSMutableArray *scaledImages = [NSMutableArray array];

    for (UIImage *image in self.images) {
        UIGraphicsBeginImageContextWithOptions(size, NO, 0.0);

        [image drawInRect:CGRectMake(thumbnailPoint.x, thumbnailPoint.y, scaledSize.width, scaledSize.height)];
        UIImage *newImage = UIGraphicsGetImageFromCurrentImageContext();

        [scaledImages addObject:newImage];

        UIGraphicsEndImageContext();
    }

    return [UIImage animatedImageWithImages:scaledImages duration:self.duration];
}
上边的方法能够实现把图片的尺寸修剪为size,剪裁的前提是根据图片原来的比例。具体的实现,在这里就不举例说明了。和数学原理有点关系。
+ (float)sd_frameDurationAtIndex:(NSUInteger)index source:(CGImageSourceRef)source
一个Image Sources抽象出来了图片数据,通过raw memory buffer减轻开发人员对数据的处理。Image Sources包含不止一个图像,缩略图,各个图像的特征和图片文件。通过CGImageSource实现。可以这么说:
CGImageSourceRef就是对图像数据的一层封装。
+ (float)sd_frameDurationAtIndex:(NSUInteger)index source:(CGImageSourceRef)source {
    float frameDuration = 0.1f;
    CFDictionaryRef cfFrameProperties = CGImageSourceCopyPropertiesAtIndex(source, index, nil);
    NSDictionary *frameProperties = (__bridge NSDictionary *)cfFrameProperties;
    NSDictionary *gifProperties = frameProperties[(NSString *)kCGImagePropertyGIFDictionary];

    NSNumber *delayTimeUnclampedProp = gifProperties[(NSString *)kCGImagePropertyGIFUnclampedDelayTime];
    if (delayTimeUnclampedProp) {
        frameDuration = [delayTimeUnclampedProp floatValue];
    }
    else {

        NSNumber *delayTimeProp = gifProperties[(NSString *)kCGImagePropertyGIFDelayTime];
        if (delayTimeProp) {
            frameDuration = [delayTimeProp floatValue];
        }
    }

    // Many annoying ads specify a 0 duration to make an image flash as quickly as possible.
    // We follow Firefox's behavior and use a duration of 100 ms for any frames that specify
    // a duration of <= 10 ms. See <rdar://problem/7689300> and <http://webkit.org/b/36082>
    // for more information.

    if (frameDuration < 0.011f) {
        frameDuration = 0.100f;
    }

    CFRelease(cfFrameProperties);
    return frameDuration;
}
+ (UIImage *)sd_animatedGIFWithData:(NSData *)data
当我们由NSData => UIImage 的时候,我们应该考虑更多一点。如果NSData中不止一张图片,应该怎么办?
-
获取NSData中的图片数量
CGImageSourceRef source = CGImageSourceCreateWithData((__bridge CFDataRef)data, NULL); size_t count = CGImageSourceGetCount(source); -
如果图片数量小于或者等于1,直接转换
if (count <= 1) { animatedImage = [[UIImage alloc] initWithData:data]; } -
数量大于1的情况
- 取出每一个图片
- 计算总的duration
- 生成UIImage
代码如下:
+ (UIImage *)sd_animatedGIFWithData:(NSData *)data {
    if (!data) {
        return nil;
    }

    CGImageSourceRef source = CGImageSourceCreateWithData((__bridge CFDataRef)data, NULL);
    size_t count = CGImageSourceGetCount(source);

    UIImage *animatedImage;

    if (count <= 1) {
        animatedImage = [[UIImage alloc] initWithData:data];
    }
    else {
        NSMutableArray *images = [NSMutableArray array];

        NSTimeInterval duration = 0.0f;

        for (size_t i = 0; i < count; i++) {
            CGImageRef image = CGImageSourceCreateImageAtIndex(source, i, NULL);
            if (!image) {
                continue;
            }

            duration += [self sd_frameDurationAtIndex:i source:source];

            [images addObject:[UIImage imageWithCGImage:image scale:[UIScreen mainScreen].scale orientation:UIImageOrientationUp]];

            CGImageRelease(image);
        }

        if (!duration) {
            duration = (1.0f / 10.0f) * count;
        }

        animatedImage = [UIImage animatedImageWithImages:images duration:duration];
    }

    CFRelease(source);

    return animatedImage;
}
+ (UIImage *)sd_animatedGIFNamed:(NSString *)name
+ (UIImage *)sd_animatedGIFNamed:(NSString *)name {
    CGFloat scale = [UIScreen mainScreen].scale;

    if (scale > 1.0f) {
        NSString *retinaPath = [[NSBundle mainBundle] pathForResource:[name stringByAppendingString:@"@2x"] ofType:@"gif"];

        NSData *data = [NSData dataWithContentsOfFile:retinaPath];

        if (data) {
            return [UIImage sd_animatedGIFWithData:data];
        }

        NSString *path = [[NSBundle mainBundle] pathForResource:name ofType:@"gif"];

        data = [NSData dataWithContentsOfFile:path];

        if (data) {
            return [UIImage sd_animatedGIFWithData:data];
        }

        return [UIImage imageNamed:name];
    }
    else {
        NSString *path = [[NSBundle mainBundle] pathForResource:name ofType:@"gif"];

        NSData *data = [NSData dataWithContentsOfFile:path];

        if (data) {
            return [UIImage sd_animatedGIFWithData:data];
        }

        return [UIImage imageNamed:name];
    }
}
补充
在这里补充一点实现渐进式图片加载的步骤。
当图片从网络中获取的时候,可能由于过大,数据缓慢,这时候就需要渐进式加载图片来显示。主要通过CFData对象来实现:
- 创建一个CFData去添加image data
- 创建一个渐进式图片资源,通过 CGImageSourceCreateIncremental
- 获取图片数据到CFData中
- 调用CGImageSourceUpdateData函数,传递CFData和一个bool值,去描述这个数据是否包含全部图片数据或者只是部分数据。无论什么情况,这个data包含已经积累的全部图片文件
- 如果已经有足够的图片数据,可以通过函数绘制CGImageSourceCreateImageAtIndex部分图片,然后记得要Release掉它
- 检查是否已经有全部的图片数据通过使用CGImageSourceGetStatusAtIndex函数。如果图片是完整的,函数返回值为kCGImageStatusComplete。否则继续3,4步骤,直到获得全部数据
- Release掉渐进式增长的image source
总结
写到这里,我突然意识到,gif也算是一种无损的格式,本分类也只是给予UIImage支持GIF的能力,因此由这种思想,我联想到别的地方。当我们需要某种能力支持的时候,我们应该去观察底层,也就是数据层的规律。就比如图像数据,本质上还是一些二进制的数据,越往上,越被包装的简单易用,归根到底,写代码的根本就是处理数据。