Last time we saw how we could create an instance of our service by hosting it using some configuration in our app.config. We still need to have it exposed using metadata though. We'll do this by adding an endpoint that exposed this, using our WCF ABC again. This endpoint is called a MEX endpoint, from Metadata EXchange.
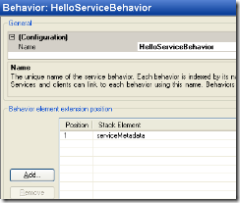
For this we don't have to create any code, just configuration again. Open the Service Configuration Editor again on our app.config. Open the folder "Advanced", then "Service Behaviors" and choose to add a new service behavior. We'll change the name NewBehavior to HelloServiceBehavior. Now click the Add button and select the 'ServiceMetadata' option.
Now we'll configure our new behavior in and endpoint. Select your service again in the tree. This is something you'll probably forget a lot in the future, but you'll have to bind the just configured behavior to your service. You should be able to select it from the list in the BehaviorConfiguration property on your service.
Now let's actually add our MEX endpoint. Select the "Endpoints" folder under our service and right-click it, then choose to add a new endpoint. Set the address to http://localhost:8080/HelloService/MEX/, select for binding the "mexHttpBinding" and for contract fill in "IMetadataExchange". Now save, exit the configuration editor and you should have the following configuration.
<?xml version="1.0" encoding="utf-8" ?>
<configuration>
<system.serviceModel>
<behaviors>
<serviceBehaviors>
<behavior name="HelloServiceBehavior">
<serviceMetadata />
</behavior>
</serviceBehaviors>
</behaviors>
<services>
<service behaviorConfiguration="HelloServiceBehavior" name="Classa.Wcf.Samples.Hello">
<endpoint address="http://localhost:8080/HelloService/" binding="basicHttpBinding"
bindingConfiguration="" contract="Classa.Wcf.Samples.IHello" />
<endpoint address="http://localhost:8080/HelloService/MEX/" binding="mexHttpBinding" bindingConfiguration=""
contract="IMetadataExchange" />
</service>
</services>
</system.serviceModel>
</configuration>
Run your service with F5. You'll notice no difference, but now you can create a proxy with the service util. Open the Visual Studio Command Prompt (in your start menu under Visual Studio 2005/Visual Studio Tools) and execute the following command:
svcutil.exe /o:client.cs /config:app.config http://localhost:8080/HelloService/MEX/
If you're interested, take a look at the generated files. Especially the generated app.config, which should contain an ABC reference to your service.