微博上有同学问我MyerSplash是如何实现那个很炫的图片点亮,然后移动到屏幕中央的效果。惭愧啊,我又不是作者哪里会知道。硬着头皮去GitHub拜读了高手的代码,自愧弗如,比我不知道高到哪里去了……这时我就面临一个艰难的抉择,要么就写个几十篇来分析一下MyerSplash(万一分析错了好丢人……),要么就说看不懂(貌似也很丢人……)。
幸亏我临机一动,决定山寨一个极简版,做一点微小的工作,顺便写一篇博客蹭点热度,给某软,给UWP续一秒……
首先要明确我们希望以少量的代码来模拟MyerSplash的部分效果,较少的代码分析起来更为易懂,所以各位同学就不要抱怨说这个是五毛钱特效……
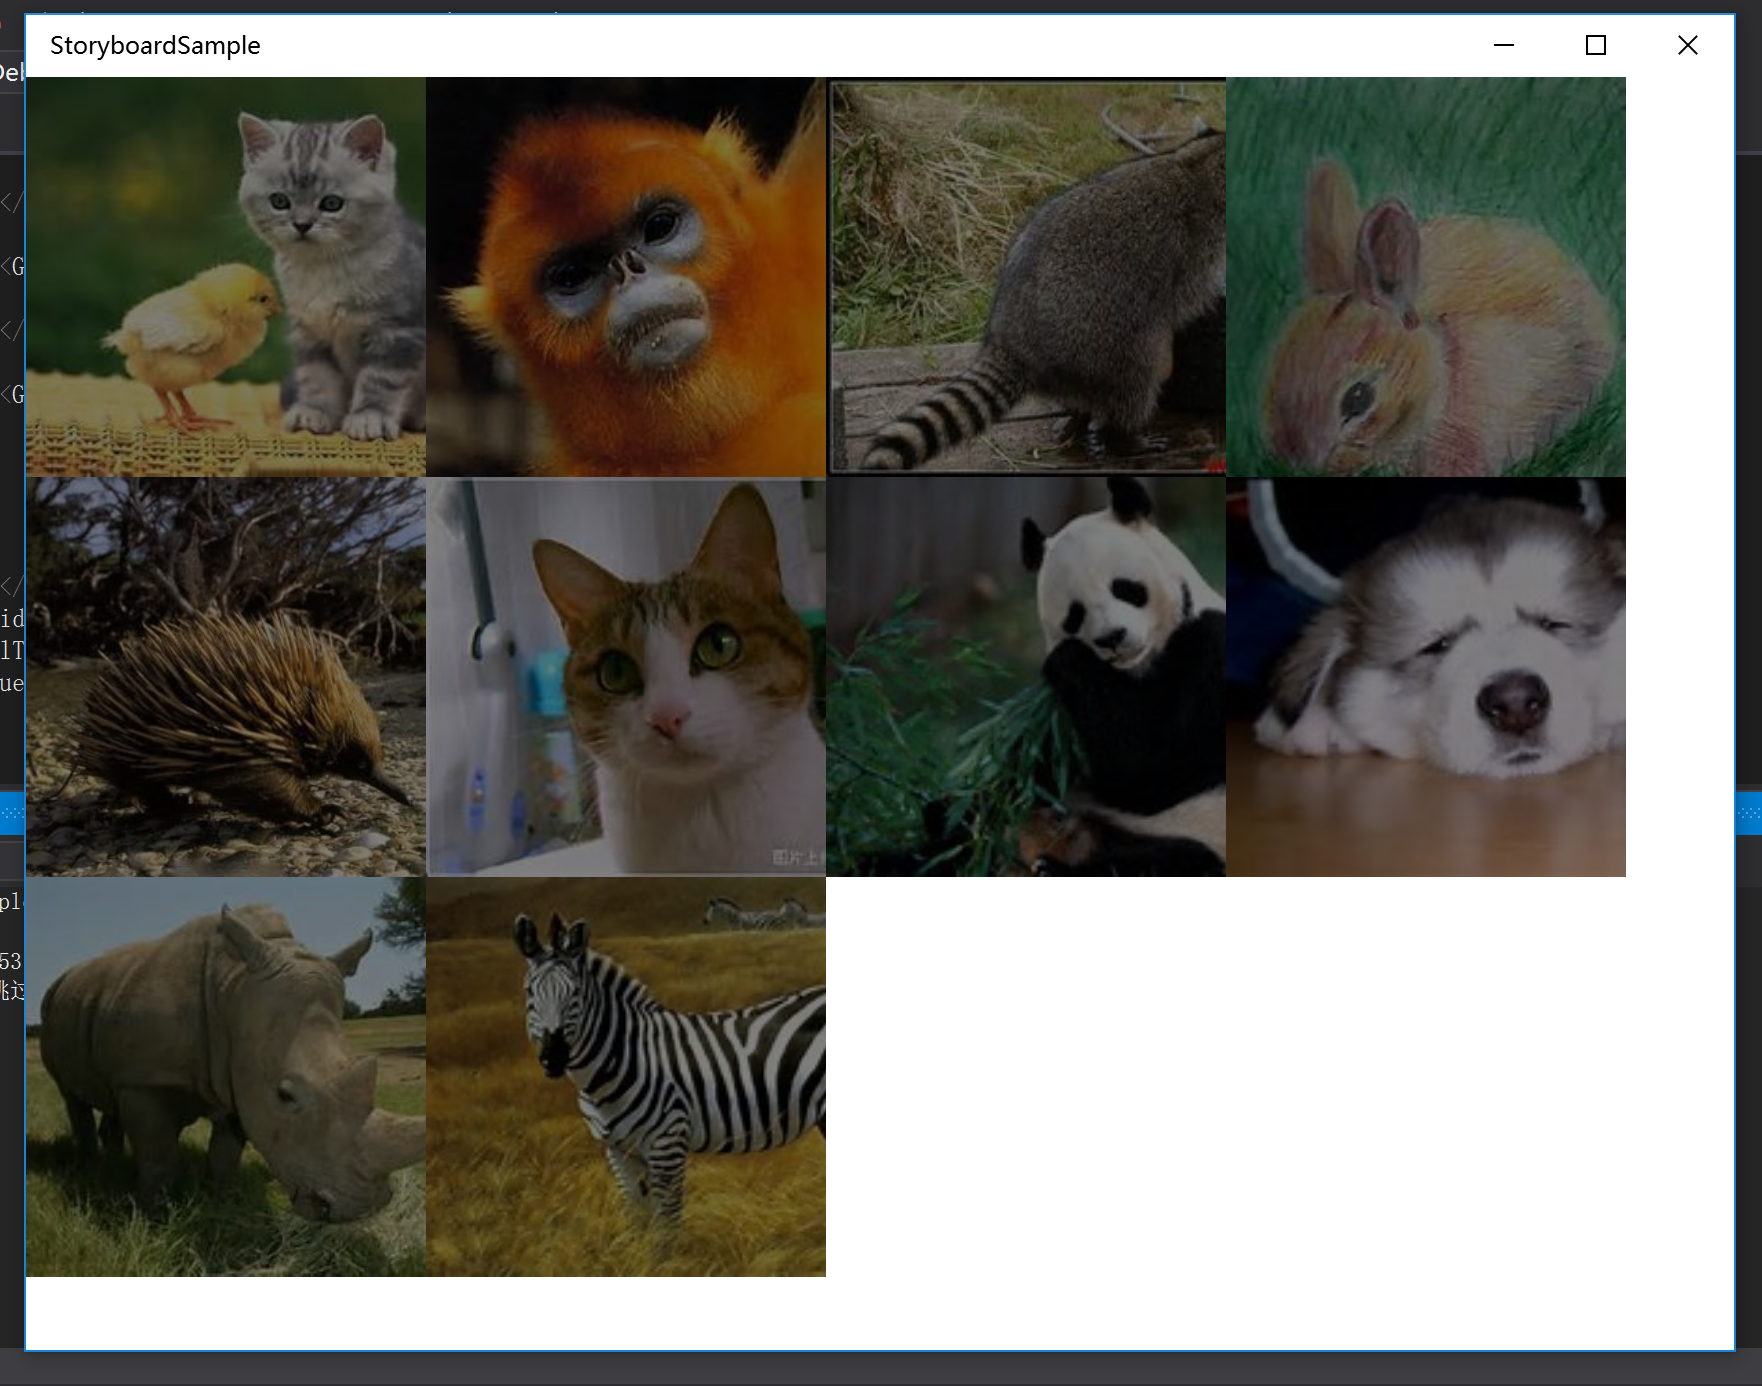
    <ListView ItemsSource="{Binding Photos,Mode=OneTime}" ItemContainerStyle="{StaticResource photoItemContainerStyle}">
        <ListView.ItemsPanel>
            <ItemsPanelTemplate>
                <ItemsWrapGrid Orientation="Horizontal"></ItemsWrapGrid>
            </ItemsPanelTemplate>
        </ListView.ItemsPanel>
        <ListView.ItemTemplate>
            <DataTemplate>
                <Image Source="{Binding ImageUri,Mode=OneTime}" Stretch="UniformToFill" IsTapEnabled="True" Tapped="Image_Tapped"></Image>
            </DataTemplate>
        </ListView.ItemTemplate>
    </ListView>
上面的XAML绘制了一个根据元素数量自动换行的列表,列表中的Item元素就是单纯的Image,同时Item元素响应一个Tapped事件(这个我们后面说)。
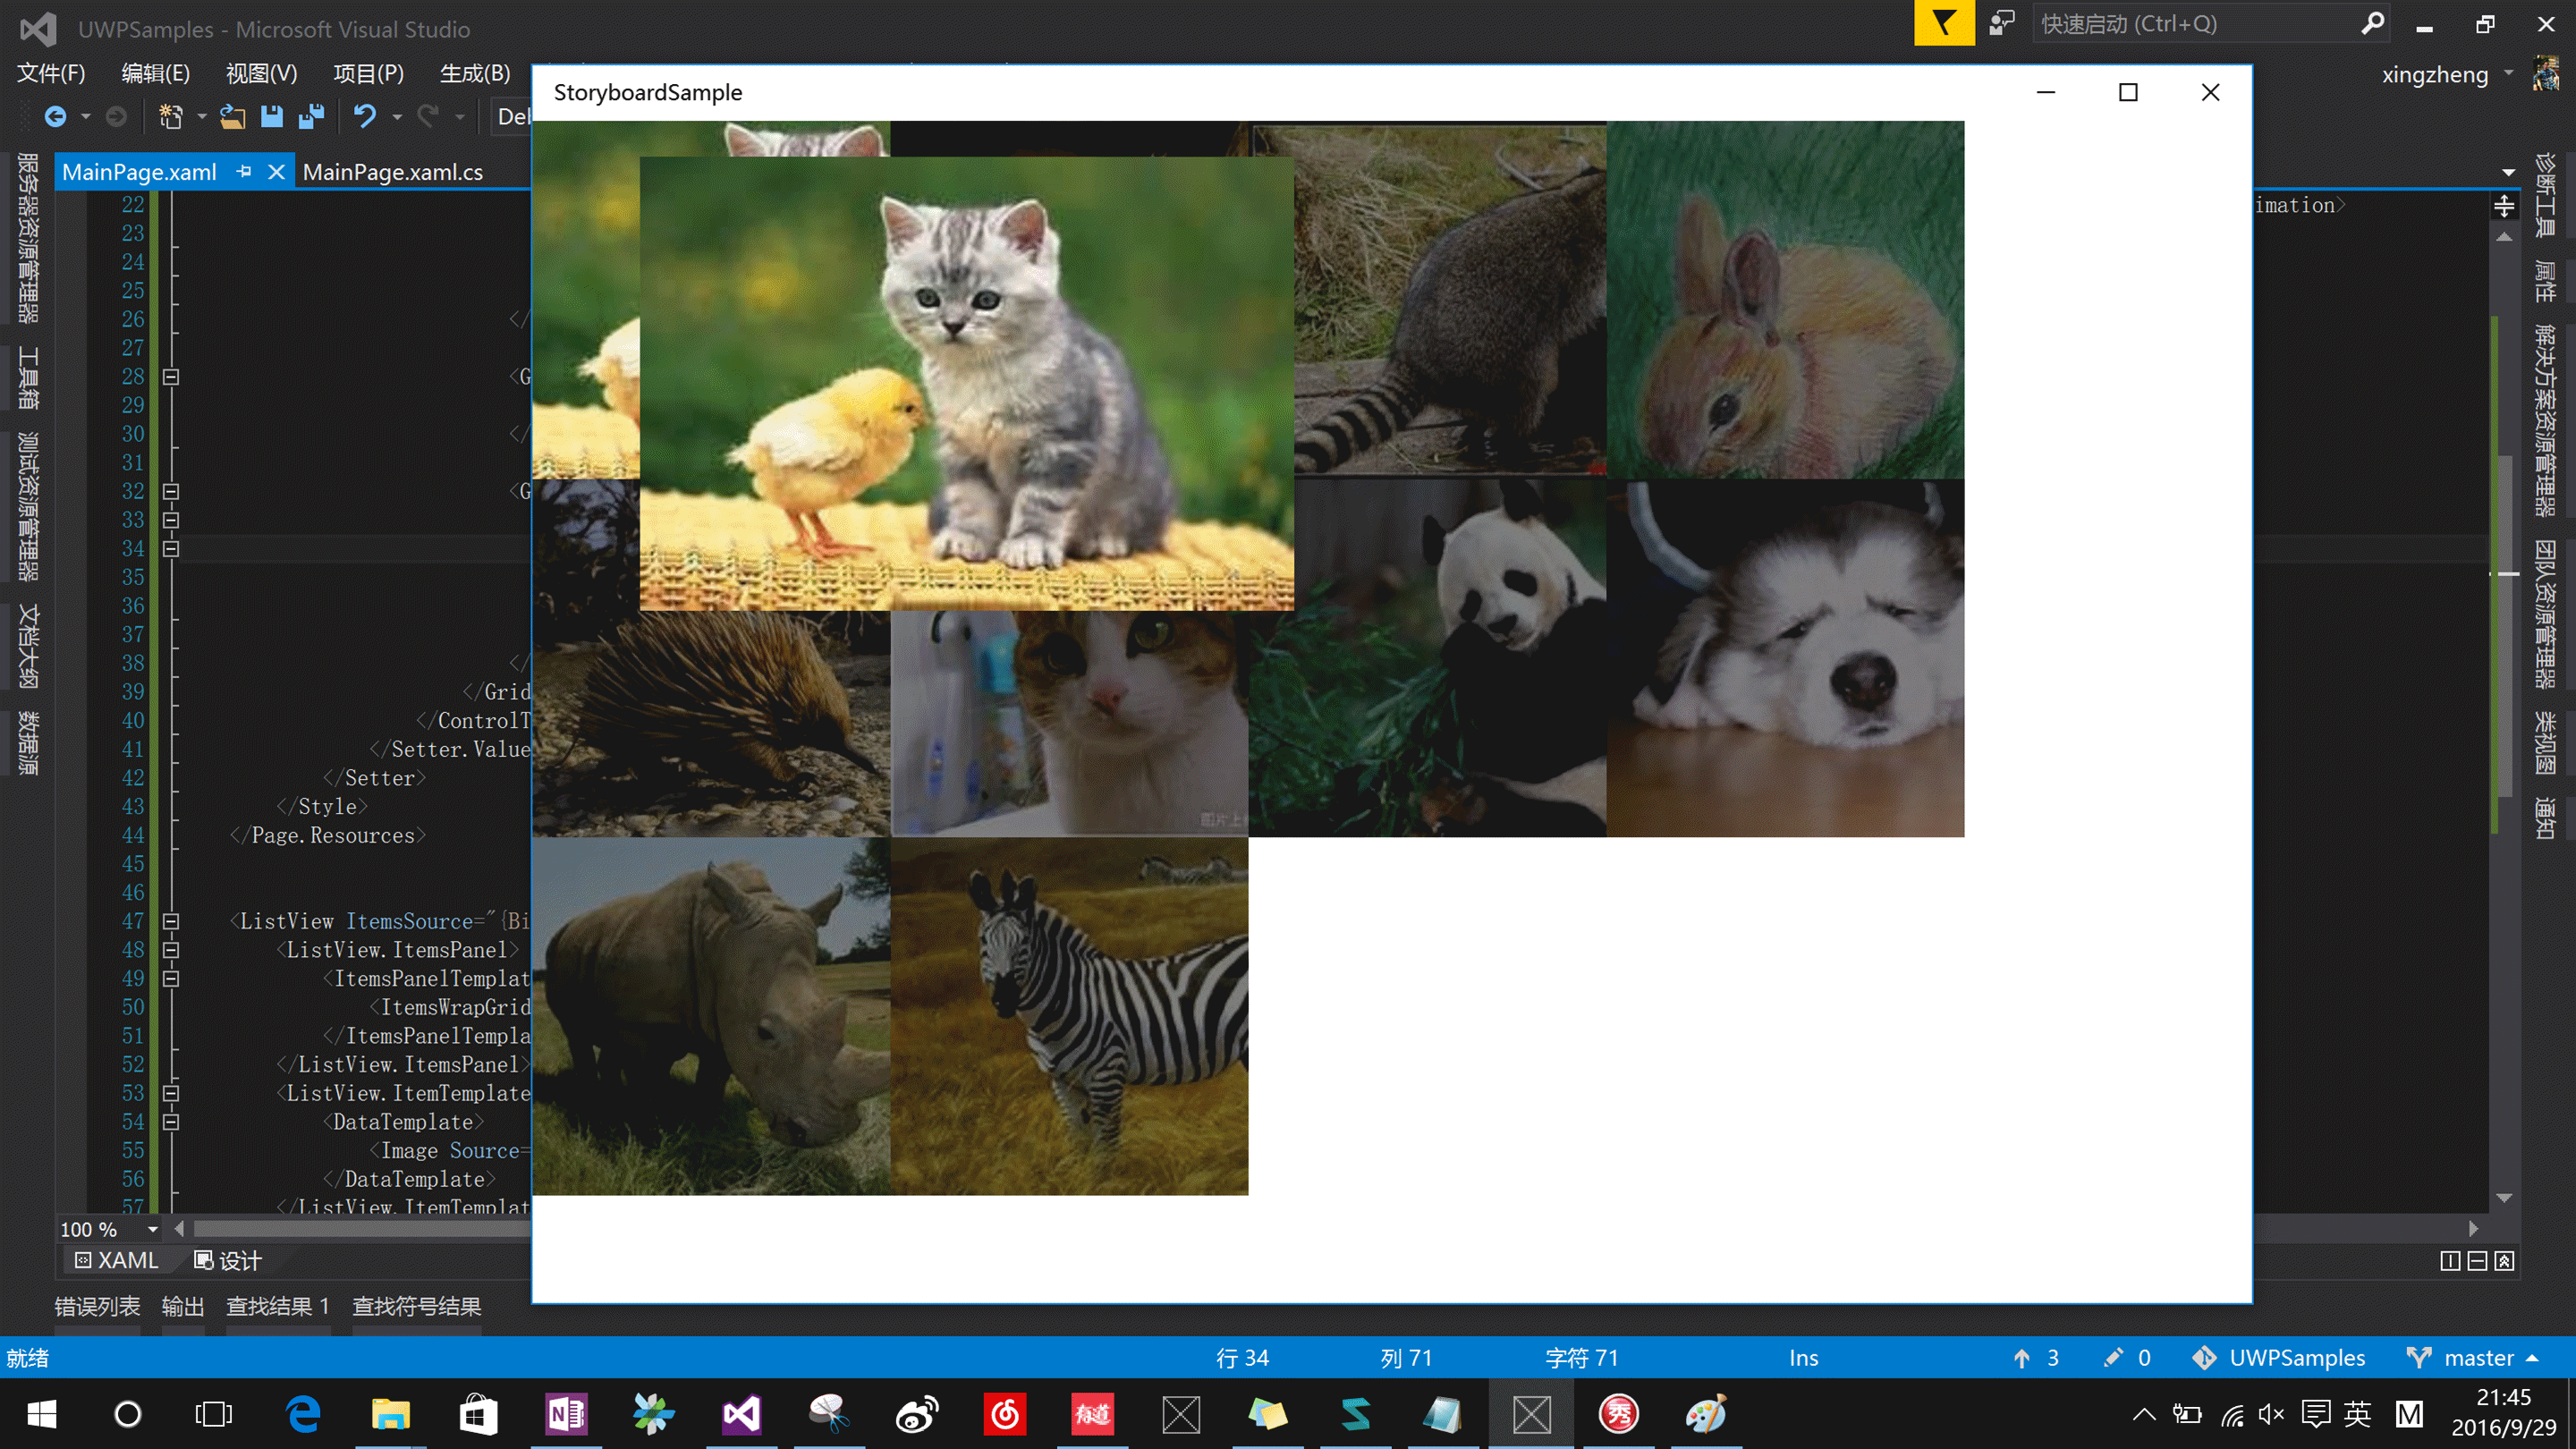
可以看到鼠标移动时,会有一个动画,0.5秒的渐变点亮同时图片放大的效果(生成的这个gif图比较渣,实际效果请运行代码)。这是通过自定义ItemContainerStyle并在其中添加VisualStateManager来实现的。
        <Style x:Key="photoItemContainerStyle" TargetType="ListViewItem">
            <Setter Property="Template">
                <Setter.Value>
                    <ControlTemplate>
                        <Grid>
                            <VisualStateManager.VisualStateGroups>
                                <VisualStateGroup x:Name="CommonStates">
                                    <VisualState x:Name="Normal" />
                                    <VisualState x:Name="PointerOver">
                                        <Storyboard>
                                            <DoubleAnimation Duration="0:0:0.5" From="0.5" To="1" Storyboard.TargetProperty="Opacity" Storyboard.TargetName="contentPhoto" ></DoubleAnimation>
                                            <DoubleAnimation Duration="0:0:0.5" From="1" To="1.2" Storyboard.TargetProperty="ScaleX" Storyboard.TargetName="scaleGrid" ></DoubleAnimation>
                                            <DoubleAnimation Duration="0:0:0.5" From="1" To="1.2" Storyboard.TargetProperty="ScaleY" Storyboard.TargetName="scaleGrid" ></DoubleAnimation>
                                        </Storyboard>
                                    </VisualState>
                                </VisualStateGroup>
                            </VisualStateManager.VisualStateGroups>

                            <Grid.Clip>
                                <RectangleGeometry Rect="0 0 200 200"/>
                            </Grid.Clip>

                            <Grid Background="Black">
                                <ContentPresenter x:Name="contentPhoto" Width="200" Height="200" Opacity="0.5">
                                    <ContentPresenter.RenderTransform>
                                        <ScaleTransform x:Name="scaleGrid" ScaleX="1.0" ScaleY="1.0" CenterX="100" CenterY="100"></ScaleTransform>
                                    </ContentPresenter.RenderTransform>
                                </ContentPresenter>
                            </Grid>
                        </Grid>
                    </ControlTemplate>
                </Setter.Value>
            </Setter>
在 <VisualState x:Name="PointerOver">这个状态我们通过Storyboard播放了三个Animation来改变图片的透明度,以及长宽。透明度从0.5变化至1时,图片不再透明,背景黑色Grid不再可见,模拟高亮效果。同时通过Clip将放大后图片的外缘裁剪仍保持原始大小。
貌似已经做的差不多了……至少你已经学会如何山寨照片墙了。接下来我们要做点不一样的,换一种方式来使用Storyboard和Animation,点击图片放大并移动到屏幕中央的功能,我打算通过C#代码实现(话说这部分有点坑,写得时候搞死我了……)
浮动显示的图片我们采用Popup来显示,通过给Popup添加Child,并通过storyboard和animation来改变Width,Height属性控制图片大小的变化。图片的位移则是将Popup的RenderTransform属性设置为TranslateTransform,然后改变X轴和Y轴坐标来实现。
这里需要注意Animation对象的EnableDependentAnimation属性,这个坑爹的属性是 Windows Runtime 8.1新增的,如果你发现自定义的Animation不能播放,又找不到任何错误,那就需要把这个属性值置为true。
        private void Image_Tapped(object sender, TappedRoutedEventArgs e)
        {
            popup.IsOpen = false;

            var tappedImage = e.OriginalSource as Image;
            var image = new Image { Source = tappedImage.Source };
            popup.Child = image;
            popup.IsOpen = true;

            //获取被点击图片相对MainPage的坐标
            var position = tappedImage.TransformToVisual(this).TransformPoint(new Point());
            //获取MainPage的中心坐标
            var xCenter = ActualWidth / 2 - 200 ;
            var yCenter = ActualHeight / 2 - 200;

            var storyBoard = new Storyboard();
            var extendAnimation = new DoubleAnimation { Duration = new Duration(TimeSpan.FromSeconds(0.5)), From = 200, To = 400, EnableDependentAnimation = true };
            Storyboard.SetTarget(extendAnimation, image);
            Storyboard.SetTargetProperty(extendAnimation, "Width");
            Storyboard.SetTargetProperty(extendAnimation, "Height");

            var xAnimation = new DoubleAnimation { Duration = new Duration(TimeSpan.FromSeconds(0.5)), From = position.X, To = xCenter, EnableDependentAnimation = true };
            Storyboard.SetTarget(xAnimation, popup);
            Storyboard.SetTargetProperty(xAnimation, "(UIElement.RenderTransform).(TranslateTransform.X)");

            var yAnimation = new DoubleAnimation { Duration = new Duration(TimeSpan.FromSeconds(0.5)), From = position.Y, To = yCenter, EnableDependentAnimation = true };
            Storyboard.SetTarget(yAnimation, popup);
            Storyboard.SetTargetProperty(yAnimation, "(UIElement.RenderTransform).(TranslateTransform.Y)");

            storyBoard.Children.Add(extendAnimation);
            storyBoard.Children.Add(xAnimation);
            storyBoard.Children.Add(yAnimation);

            storyBoard.Begin();
        }
补充下Popup的定义,记得要设置popup.RenderTransform = TranslateTransform(),默认可是null
    public sealed partial class MainPage : Page
    {
        public List<PhotoModel> Photos { get; set; }

        private Popup popup = new Popup();

        public MainPage()
        {
            this.InitializeComponent();
            Photos = CreatePhotos();
            this.DataContext = this;
            popup.RenderTransform = new TranslateTransform();
        }
总体就这么些了,大约100行左右的代码,直接拿去卖钱肯定是不行的。作为Demo演示给吃瓜群众,或者忽悠BOSS还是可以的。如果需要用到产品中,去GayHub下载代码自己改吧改吧,调调UI。
有问题新浪微博@楼上那个蜀黍,免费咨询,当然质量也是免费的程度……
GitHub:
https://github.com/manupstairs/UWPSamples/tree/master/UWPSamples/StoryboardSample