学习Android有一段时间了,虽然前段时间对软件测试有了一些了解,不过接触android的单元测试却是头一次。这几天在物流大赛上也用了不少时间,所以对于android的单元测试没有太深入的研究,所以先写个基本入门吧!
首先,我们来了解一下android的测试类的层次结构: 
可以看出android中的测试方法主要有AndroidTextCase和InstrumentationTextCase。在这篇文章中,我将介绍Instrumentation这种测试方法,那么什么是Instrumentation?
Instrumentation和Activity有点类似,只不过Activity是需要一个界面的,而Instrumentation并不是这样的,我们可以将它理解为一种没有图形界面的,具有启动能力的,用于监控其他类(用Target Package声明)的工具类。
下面通过一个简单的例子来讲解Instrumentation的基本测试方法。
1.首先建立一个Android project,类名为Sample,代码如下:
01 |
package com.hustophone.sample; |
03 |
import android.app.Activity; |
04 |
import android.os.Bundle; |
05 |
import android.view.View; |
06 |
import android.view.View.OnClickListener; |
07 |
import android.widget.Button; |
08 |
import android.widget.TextView; |
10 |
public class Sample extends Activity { |
11 |
private TextView myText = null; |
12 |
private Button button = null; |
15 |
public void onCreate(Bundle savedInstanceState) { |
16 |
super.onCreate(savedInstanceState); |
17 |
setContentView(R.layout.main); |
18 |
myText = (TextView) findViewById(R.id.text1); |
19 |
button = (Button) findViewById(R.id.button1); |
20 |
button.setOnClickListener(new OnClickListener() { |
22 |
public void onClick(View arg0) { |
23 |
myText.setText("Hello Android"); |
28 |
public int add(int i, int j) { |
这个程序的功能比较简单,点击按钮之后,TextView的内容由Hello变为Hello Android.同时,在这个类中,我还写了一个简单的add方法,没有被调用,仅供测试而已。
2. 在src文件夹中添加一个测试包,在测试包中添加一个测试类SampleTest 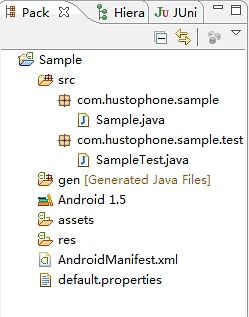
测试类的代码如下:
01 |
package com.hustophone.sample.test; |
03 |
import com.hustophone.sample.R; |
04 |
import com.hustophone.sample.Sample; |
05 |
import android.content.Intent; |
06 |
import android.os.SystemClock; |
07 |
import android.test.InstrumentationTestCase; |
08 |
import android.util.Log; |
09 |
import android.widget.Button; |
10 |
import android.widget.TextView; |
12 |
public class SampleTest extends InstrumentationTestCase { |
13 |
private Sample sample = null; |
14 |
private Button button = null; |
15 |
private TextView text = null; |
78 |
public void testAdd() throws Exception{ |
79 |
String tag = "testAdd"; |
80 |
Log.v(tag, "test the method"); |
81 |
int test = sample.add(1, 1); |
82 |
assertEquals(2, test); |
下面来简单讲解一下代码: setUp()和tearDown()都是受保护的方法,通过继承可以覆写这些方法。
在android Developer中有如下的解释 protected void setUp () Since: API Level 3 Sets up the fixture, for example, open a network connection. This method is called before a test is executed.
protected void tearDown () Since: API Level 3 Make sure all resources are cleaned up and garbage collected before moving on to the next test. Subclasses that override this method should make sure they call super.tearDown() at the end of the overriding method.
setUp ()用来初始设置,如启动一个Activity,初始化资源等。 tearDown ()则用来垃圾清理与资源回收。
在testActivity()这个测试方法中,我模拟了一个按钮点击事件,然后来判断程序是否按照预期的执行。在这里PerformClick这个方法继承了Runnable接口,通过新的线程来执行模拟事件,之所以这么做,是因为如果直接在UI线程中运行可能会阻滞UI线程。
2.要想正确地执行测试,还需要修改AndroidManifest.xml这个文件.
01 |
<?xml version="1.0" encoding="utf-8"?> |
02 |
<manifest xmlns:android="http://schemas.android.com/apk/res/android" |
03 |
package="com.hustophone.sample" android:versionCode="1" |
04 |
android:versionName="1.0"> |
05 |
<application android:icon="@drawable/icon" android:label="@string/app_name"> |
07 |
<uses-library android:name="android.test.runner" /> |
08 |
<activity android:name=".Sample" android:label="@string/app_name"> |
10 |
<action android:name="android.intent.action.MAIN" /> |
11 |
<category android:name="android.intent.category.LAUNCHER" /> |
16 |
<uses-sdk android:minSdkVersion="3" /> |
18 |
<instrumentation android:targetPackage="com.hustophone.sample" android:name="android.test.InstrumentationTestRunner" /> |
经过以上步骤,下面可以开始测试了。测试方法也有以下几种,下面介绍两个常用的方法:
(1) 用Eclipse集成的JUnit工具 在Eclipse中选择工程Sample,单击右键,在Run as子菜单选项中选择Android JUnit Test 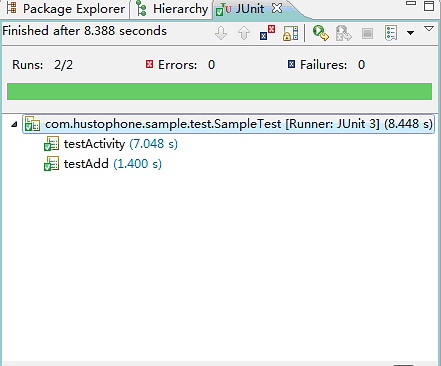
同时可以通过LogCat工具查看信息 
(2) 通过模拟器运行单元测试
点击模拟器界面的Dev Tools菜单 
再点击Instrumentation选项,进入Instrumentation菜单 
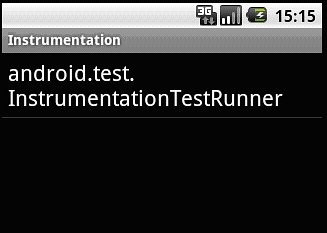
这里有一个InstrumentationTestRunner,它是测试的入口,点击这个选项,就可以自动运行我们的测试代码。以下为运行结果:
按钮点击前 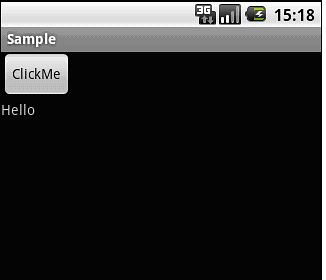
按钮点击后 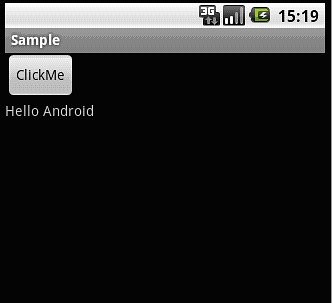
至此,一个简单的测试过程结束了。当然,android的测试内容还有很多,也有比较复杂的,我会在以后的学习过程中继续分享我的体会。好了,今天就到这里吧!


