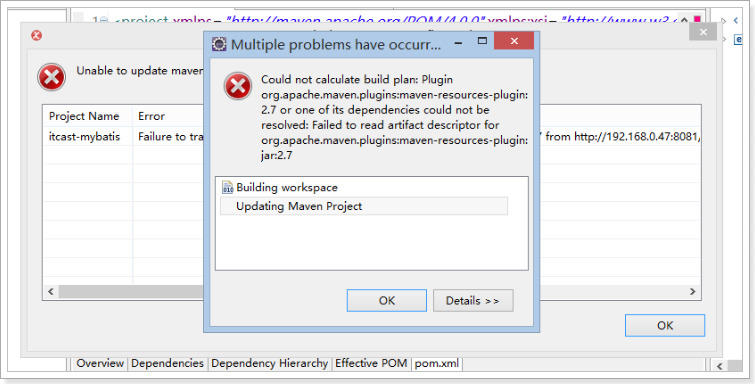
1. 问题

2. 原因
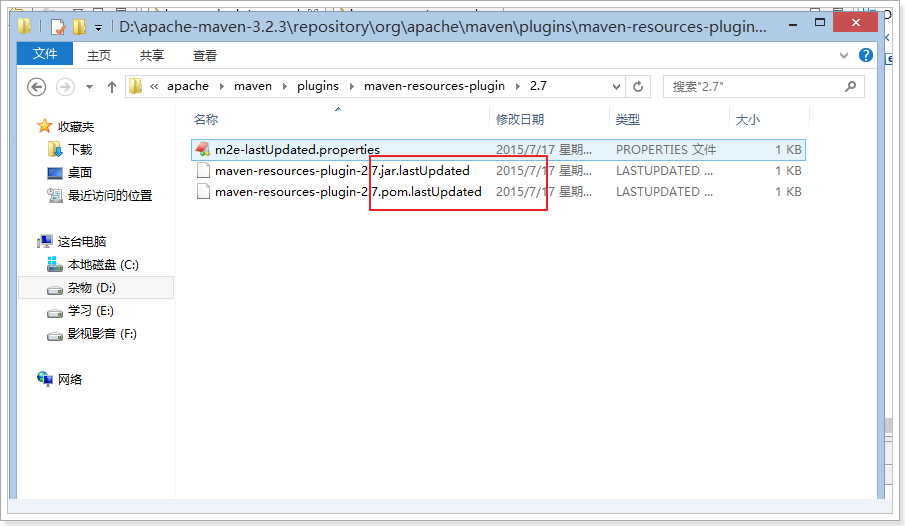
出现.lastUpdated结尾的文件的原因:由于网络原因没有将Maven的依赖下载完整,导致。
解决方案:
1、 删除所有以.lastUpdate结尾的文件
a) 1、切换到maven的本地仓库
b) 2、在当前目录打开cmd命令行
c) 3、执行命令:for /r %i in (*.lastUpdated) do del %i
2、 在项目上执行 Maven Update (Alt + F5)
3、 以上操作直到jar下载到本地仓库就ok
3. 如何避免该问题
1、 将课后资料中代码导入到你的Eclipse中,执行Maven Update(推荐)
2、 回到家里无法连接教室的私服?
a) 把私服地址注释掉,默认会通过网络去apache的远程的中央仓库下载
4. Maven pom文件打包相关
${basedir} maven变量代表当前目录
4.1.打包排除
<!--打包war包-->
<plugin>
<groupId>org.apache.maven.plugins</groupId>
<artifactId>maven-war-plugin</artifactId>
<version>2.5</version>
<configuration>
<warName>bg-platform-web</warName>
<packagingExcludes> //打包时排除,可以设定为*.*匹配,也可以指定单独文件
WEB-INF/classes/com/bagtree/push/**,
WEB-INF/classes/com/bagtree/send/**
</packagingExcludes>
</configuration>
<executions>
<execution>
<id>bg-platform-web</id> //需要jar和war同时打包需要指定
<phase>package</phase>
<goals>
<goal>war</goal>
</goals>
</execution>
</executions>
</plugin>
4.2.在war包中对需要的文件jar包打包
<plugin>

   <groupId>org.apache.maven.plugins</groupId>

   <artifactId>maven-antrun-plugin</artifactId>

   <executions>

      <execution>

         <id>pushPackage</id>

         <phase>run</phase>


         <configuration>

            <target name="push service">

               <!--<echo message="${basedir}" />-->


               <copy todir="${project.build.directory}/classes">

                  <fileset dir="${basedir}/src/main/webapp/WEB-INF/classes">

                     <include name="**/*" />

                  </fileset>

               </copy>


               <!-- 打整个程序运行包 -->

               <copy todir="${project.build.directory}/release/config">

               <fileset dir="${project.build.directory}/classes">

                  <include name="*.*"/>

                  <include name="mappers/*.xml"/>

               </fileset>

                </copy>

               <copy todir="${project.build.directory}/release/lib">

                  <fileset dir="${project.build.directory}/lib" />

               </copy>


               <pathconvert pathsep=" " property="mf.classpath">

                  <chainedmapper>

                     <flattenmapper />

                     <globmapper from="*" to="lib/*" />

                  </chainedmapper>

                  <path id="classpath">

                     <fileset dir="${project.build.directory}/release/lib">

                        <include name="**/*" />

                     </fileset>

                  </path>

               </pathconvert>

               <!--打包推送服务-->

               <jar

                     destfile="${project.build.directory}/release/bagtree-push-${project.version}.jar"

                     basedir="${project.build.directory}/classes">

                  <include name="com/bagtree/common/**"/>   //打包需要的文件

                  <include name="com/bagtree/push/**"/>

                  <include name="com/bagtree/sms/**"/>

                  <include name="com/bagtree/mapper/**"/>

                  <include name="com/bagtree/model/**"/>

                  <include name="com/bagtree/service/**"/>

                  <include name="com/bagtree/vo/**"/>


                  <manifest>

                     <attribute name="Built-By" value="${user.name}" />  //指定jar包main主函数的入口

                     <attribute name="Main-Class"

                              value="com.bagtree.push.Main" />

                     <attribute name="Class-Path" value="config/ . ${mf.classpath}" />

                  </manifest>

                  <metainf dir="${project.build.directory}/classes">

                     <include name="spring/*" />

                     <include name="mappers/*" />

                  </metainf>

               </jar>

               <!--启动sms线程-->

               <jar

                     destfile="${project.build.directory}/release/bagtree-start-${project.version}.jar"

                     basedir="${project.build.directory}/classes">

                  <include name="com/bagtree/common/**"/>   //打包需要的文件

                  <include name="com/bagtree/send/**"/>

                  <include name="com/bagtree/sms/**"/>

                  <include name="com/bagtree/mapper/**"/>

                  <include name="com/bagtree/model/**"/>

                  <include name="com/bagtree/service/**"/>

                  <include name="com/bagtree/vo/**"/>


                  <manifest>

                     <attribute name="Built-By" value="${user.name}" />  //指定jar包main主函数的入口

                     <attribute name="Main-Class"

                              value="com.bagtree.send.Main" />

                     <attribute name="Class-Path" value="config/ . ${mf.classpath}" />

                  </manifest>

                  <metainf dir="${project.build.directory}/classes">

                     <include name="spring/*" />

                     <include name="mappers/*" />

                  </metainf>

               </jar>

            </target>

         </configuration>

         <goals>

            <goal>run</goal>

         </goals>

      </execution>

   </executions>

</plugin>