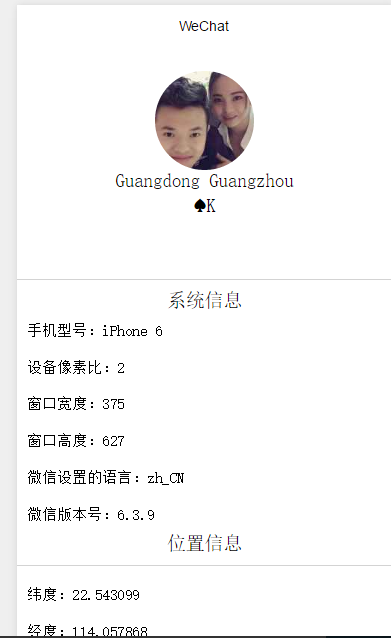
这一篇就废话少一点,直接上代码吧,三个接口都是微信提供的。
index.js
//index.js
//获取应用实例
var app = getApp()
Page({
  data:{
    userinfo : {},
    systemInfo:{},
    location :{}
  },
  onShow:function(){
    var that = this;
    // 获取用户资料
    wx.getUserInfo({
      success:function(res){
        that.setData({
          userinfo:res.userInfo
        });
      }
    });

    // 获取系统资料
    wx.getSystemInfo({
      success:function(res){
        that.setData({
          systemInfo : res
        });
      }
    });
    // 获取位置信息
    wx.getLocation({
      success:function(res){
        that.setData({
          location:res
        });
      }
    });
  }
})
index.wxml
  <view class="header">
    <image class="user-header" src="{{userinfo.avatarUrl}}"></image>
    <text  >{{userinfo.province}}  {{userinfo.city}}</text>
    <text >{{userinfo.nickName}}</text>
  </view>
  <view class="slice-line"></view>
  <view class="center">
    <text class="text">系统信息</text>
  </view>
  <view class="info-box">
    <text class="info-text">手机型号:{{systemInfo.model}}</text>
    <text class="info-text">设备像素比:{{systemInfo.pixelRatio}}</text>
    <text class="info-text">窗口宽度:{{systemInfo.windowWidth}}</text>
    <text class="info-text">窗口高度:{{systemInfo.windowHeight}}</text>
    <text class="info-text">微信设置的语言:{{systemInfo.language}}</text>
    <text class="info-text">微信版本号:{{systemInfo.version}}</text>
  </view>
  <view class="center">
    <text class="text">位置信息</text>
  </view>
  <view class="slice-line"></view>
  <view class="info-box">
    <text class="info-text">纬度:{{location.latitude}}</text>
    <text class="info-text">经度:{{location.longitude}}</text>
    <text class="info-text">速度:{{location.speed}}</text>
    <text class="info-text">位置精确度:{{location.accuracy}}</text>
  </view>
  <view style="margin-top:100rpx;100%;height:2rpx;"></view>
最后效果图

好了。文本介绍了三个接口的使用方式,具体怎么发挥,大家自行判断吧。