Android二维图形绘制
Android提供了一系列用于二维绘制的APIs,当绘制2D图形时,通常有两种选择:
1.在一个View对象中绘制。继承View类,在子类的 onDraw()方法中写入自己定义的绘制代码。
2.直接在画布(Canvas)上绘制。
Canvas是一个管理绘制操作的类。
Canvas的底层有一个Bitmap,你的绘制实际上是在这个位图对象上。
当你需要绘制某些东西的时候,你实际上需要四个基本组件:
1.一个Bitmap来存放像素。
2.一个Canvas来调用绘制函数,向位图中写入内容。
3.要绘制的基本图元,如矩形(Rect), 路径(Path), 位图(BitMap),或者文字等。
4.一个画笔(Paint),指定了绘制时所用的颜色和样式等。
程序实例:
这个程序实际是ApiDemos中FingerPaint程序的一小部分,实现了用户在控件中的自由绘制。
程序自定义的MyPaintView类继承了View类,用Path记录用户点击的轨迹,在onDraw()方法中将轨迹画出。当然这个程序中最重要的是各种触摸事件的处理。
其中invalidate()方法的作用是及时调用onDraw()方法进行绘制。
程序更新:2013/2/28
首先,纠正之前犯的一个错误,就是在自定义View的子类时,应该将其基类的三个构造函数全都覆写,并在其中调用基类构造函数后进行初始化。
之前的做法在整个布局中只有一个控件时没有问题,但是要使用xml布局文件则会出错,因为必要的构造方法没有提供,或没有在其中调用初始化方法。
其次,使用了布局文件进行布局,加入了一个TextView显示欢迎语句,底部加入Clear按钮可以进行画面清除。
关于画面清除我想到了两种方法:
1.重新生成位图对象;2.Bitmap类中有一个eraseColor函数,利用它把位图绘制为白色。
应该是第二种方法比较好吧,毕竟总是重新生成对象,应该会有一些内存清理方面的问题。
附上代码(2013/2/18版本):
自定义View:
 MyPaintView

package com.mengexample.hellofreepaint;

import android.content.Context;
import android.content.res.Resources;
import android.graphics.Bitmap;
import android.graphics.Canvas;
import android.graphics.Paint;
import android.graphics.Path;

import android.util.AttributeSet;
import android.view.MotionEvent;
import android.view.View;

public class MyPaintView extends View
{
    private Resources myResources;

    // 画笔,定义绘制属性
    private Paint myPaint;
    private Paint mBitmapPaint;

    // 绘制路径
    private Path myPath;

    // 画布及其底层位图
    private Bitmap myBitmap;
    private Canvas myCanvas;

    private float mX, mY;
    private static final float TOUCH_TOLERANCE = 4;

    // 记录宽度和高度
    private int mWidth;
    private int mHeight;

    public MyPaintView(Context context)
    {
        super(context);
        initialize();
    }

    public MyPaintView(Context context, AttributeSet attrs, int defStyle)
    {
        super(context, attrs, defStyle);
        initialize();
    }

    public MyPaintView(Context context, AttributeSet attrs)
    {
        super(context, attrs);
        initialize();
    }

    /**
     * 初始化工作
     */
    private void initialize()
    {
        // Get a reference to our resource table.
        myResources = getResources();

        // 绘制自由曲线用的画笔
        myPaint = new Paint();
        myPaint.setAntiAlias(true);
        myPaint.setDither(true);
        myPaint.setColor(myResources.getColor(R.color.purple_dark));
        myPaint.setStyle(Paint.Style.STROKE);
        myPaint.setStrokeJoin(Paint.Join.ROUND);
        myPaint.setStrokeCap(Paint.Cap.ROUND);
        myPaint.setStrokeWidth(12);

        myPath = new Path();

        mBitmapPaint = new Paint(Paint.DITHER_FLAG);

    }

    @Override
    protected void onSizeChanged(int w, int h, int oldw, int oldh)
    {
        super.onSizeChanged(w, h, oldw, oldh);
        mWidth = w;
        mHeight = h;
        myBitmap = Bitmap.createBitmap(w, h, Bitmap.Config.ARGB_8888);
        myCanvas = new Canvas(myBitmap);
    }

    @Override
    public boolean onTouchEvent(MotionEvent event)
    {
        float x = event.getX();
        float y = event.getY();

        switch (event.getAction())
        {
        case MotionEvent.ACTION_DOWN:
            touch_start(x, y);
            invalidate();
            break;
        case MotionEvent.ACTION_MOVE:
            touch_move(x, y);
            invalidate();
            break;
        case MotionEvent.ACTION_UP:
            touch_up();
            invalidate();
            break;
        }
        return true;
    }

    @Override
    protected void onDraw(Canvas canvas)
    {
        super.onDraw(canvas);

        // 背景颜色
        // canvas.drawColor(getResources().getColor(R.color.blue_dark));

        // 如果不调用这个方法,绘制结束后画布将清空
        canvas.drawBitmap(myBitmap, 0, 0, mBitmapPaint);

        // 绘制路径
        canvas.drawPath(myPath, myPaint);

    }

    private void touch_start(float x, float y)
    {
        myPath.reset();
        myPath.moveTo(x, y);
        mX = x;
        mY = y;
    }

    private void touch_move(float x, float y)
    {
        float dx = Math.abs(x - mX);
        float dy = Math.abs(y - mY);
        if (dx >= TOUCH_TOLERANCE || dy >= TOUCH_TOLERANCE)
        {
            myPath.quadTo(mX, mY, (x + mX) / 2, (y + mY) / 2);
            mX = x;
            mY = y;
        }
    }

    private void touch_up()
    {
        myPath.lineTo(mX, mY);
        // commit the path to our offscreen
        // 如果少了这一句,笔触抬起时myPath重置,那么绘制的线将消失
        myCanvas.drawPath(myPath, myPaint);
        // kill this so we don't double draw
        myPath.reset();
    }

    /**
     * 清除整个图像
     */
    public void clear()
    {
        // 清除方法1:重新生成位图
        // myBitmap = Bitmap
        // .createBitmap(mWidth, mHeight, Bitmap.Config.ARGB_8888);
        // myCanvas = new Canvas(myBitmap);

        // 清除方法2:将位图清除为白色
        myBitmap.eraseColor(myResources.getColor(R.color.white));

        // 两种清除方法都必须加上后面这两步:
        // 路径重置
        myPath.reset();
        // 刷新绘制
        invalidate();

    }

}
Activity:
Activity
package com.mengexample.hellofreepaint;

import android.os.Bundle;
import android.app.Activity;
import android.view.Menu;
import android.view.View;
import android.widget.Button;

public class PaintActivity extends Activity
{
    Button clearBtn;
    MyPaintView paintView;

    @Override
    public void onCreate(Bundle savedInstanceState)
    {
        super.onCreate(savedInstanceState);

        // 将自定义的控件类作为整个布局
        //setContentView(new MyPaintView(this));

        //使用布局文件
        setContentView(R.layout.activity_paint);

        paintView = (MyPaintView) findViewById(R.id.view_paint);

        clearBtn = (Button)findViewById(R.id.btn_clear);
        clearBtn.setOnClickListener(new View.OnClickListener()
        {

            @Override
            public void onClick(View v)
            {
                paintView.clear();

            }
        });
    }

    @Override
    public boolean onCreateOptionsMenu(Menu menu)
    {
        getMenuInflater().inflate(R.menu.activity_paint, menu);
        return true;
    }

}
布局文件:
activity_paint.xml
<LinearLayout xmlns:android="http://schemas.android.com/apk/res/android"
    xmlns:tools="http://schemas.android.com/tools"
    android:layout_width="match_parent"
    android:layout_height="match_parent"
    android:orientation="vertical" >

    <FrameLayout
        android:layout_width="fill_parent"
        android:layout_height="fill_parent"
        android:layout_weight="10" >

        <com.mengexample.hellofreepaint.MyPaintView
            android:id="@+id/view_paint"
            android:layout_width="fill_parent"
            android:layout_height="fill_parent" >
        </com.mengexample.hellofreepaint.MyPaintView>

        <TextView
            android:layout_width="fill_parent"
            android:layout_height="wrap_content"
            android:text="@string/text_welcome" />
    </FrameLayout>

    <Button
        android:id="@+id/btn_clear"
        android:layout_width="fill_parent"
        android:layout_height="wrap_content"
        android:layout_weight="2"
        android:text="@string/btn_clear" />

</LinearLayout>
附上一些颜色值,这里虽然没怎么用到,但以后可以复用:
colors.xml
<?xml version="1.0" encoding="utf-8"?>
<resources>

    <color name="red">#f00</color>
    <color name="green">#0f0</color>
    <color name="blue">#0000ff</color>
    <color name="black">#000</color>
    <color name="blue_light">#33b5e5</color>
    <color name="blue_dark">#0099cc</color>
    <color name="purple_light">#aa66cc</color>
    <color name="purple_dark">#9933cc</color>
    <color name="green_light">#99cc00</color>
    <color name="green_dark">#669900</color>
    <color name="yellow_light">#ffbb33</color>
    <color name="yellow_dark">#ff8800</color>
    <color name="red_light">#ff4444</color>
    <color name="red_dark">#cc0000</color>

</resources>
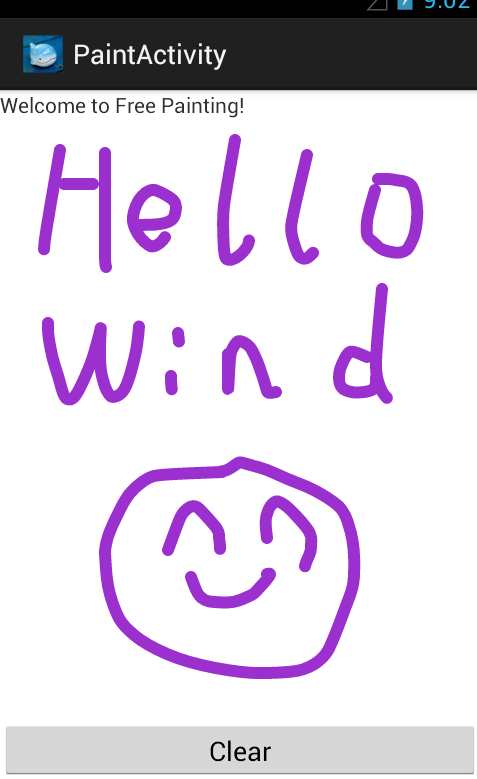
程序运行如图(我自己手写的Hello Wind,比较幼稚,哈~):
程序还可进一步改进,加入调色板、橡皮擦、清除、形状选择与绘制、线型选择等功能,变成一个完善的画图程序。
参考资料:
API DEMOS: FingerPaint
API Guides: Canvas and Drawables
http://developer.android.com/guide/topics/graphics/2d-graphics.html