本教程中,我们开始tessellation编程,共实现了2个程序,第一个tessellation程序,是对一个三角形进行细分操作,第二个程序是对一个四边形进行细分操作,两个程序coding差不多,我们先看第一个程序。
程序代码是在myTutorialD3D11_53的基础上改出来的,首先就是修改ModelClass,用来画一个三角形。代码主要的改动是Render函数中
// 设置体元语义,渲染三角形列表.
deviceContext->IASetPrimitiveTopology(D3D11_PRIMITIVE_TOPOLOGY_3_CONTROL_POINT_PATCHLIST);
以前我们选择的体元语义都是triangle list,在tessellation程序中,不一样了,现在我们的输入虽然还是一个三角形,但它当作patch处理,三个顶点即为patch的三个控制点。
建立新的TessShaderClass,用来渲染我们细分三角形,该类调用HS,DS shader文件是tess.hs,tess.ds, 上一篇教程中,我们还贴出这两个shader文件的代码。需要注意的是在其它的shader文件中,我们都要加上下面的代码,否则的话,其它物体的渲染可能会出错:
deviceContext->HSSetShader(NULL, NULL, 0);
deviceContext->DSSetShader(NULL, NULL, 0);
在GraphicsClass中渲染细分三角形的代码如下,注意为了更好的观察细分后的效果,我们使用线框渲染,而且tessllation 细分因子我们通过const buffer的形式传入到Hull shader中。
m_D3D->ChangeWireFrameMode(true);
m_Model->Render(m_D3D->GetDeviceContext());
// 用shader渲染
result = m_TessShader->Render(m_D3D->GetDeviceContext(), m_Model->GetIndexCount(), worldMatrix, viewMatrix, projectionMatrix, tessfactor);
if(!result)
{
return false;
}
m_D3D->ChangeWireFrameMode(false);
最后我们再贴一下HS和DS的shader 代码,看看这些代码到底做些什么?
在Hull shader中,我们会定义一个常量函数,这个函数是per patch的,对三角形而言,可以在其中分别定义3条边的tess factor,以及内部tess factor,这些值不同,细分的效果也不一样。在本程序中,我们设置四个tess factor都是一样的值,这个值由const buffer传入。
// Patch 常量函数,决定tessellation因子,每个patch执行一次,所以是per patch的,不是per 控制点的
ConstantOutputType ColorPatchConstantFunction(InputPatch<HullInputType, 3> inputPatch, uint patchId : SV_PrimitiveID)
{
ConstantOutputType output;
//设置三条边的细分因子
output.edges[0] = tessellationAmount;
output.edges[1] = tessellationAmount;
output.edges[2] = tessellationAmount;
//设置三角形内的细分因子
output.inside = tessellationAmount;
return output;
}
//注意输入控制点数量要和 IASetPrimitiveTopology()函数中一致
//本例子中,都为3 INPUT_PATCH_SIZE
下面的shader是per control point执行的,先看看一些函数之前的声明,domain,说的是我们现在细分是啥玩意?三角形,四边形或者线。partitioning决定TS阶段细分算法的选择,下一篇教程我们将尝试修改个参数看看到底对细分结果有什么影响。outputtopology表示细分后的输出语义是逆时针方向三角形,这些拓扑信息会被传输到PA block中去outputcontrolpoints表示输出控制点的数目,也是hull shader被调用的次数。patchconstantfunc指定当前HS中使用的常量函数。
[domain("tri")] //Triangle domain for our shader
[partitioning("integer")] //Partitioning type according to the GUI
[outputtopology("triangle_cw")] //Where the generated triangles should face
[outputcontrolpoints(3)] //Number of times this part of the hull shader will be called for each patch
[patchconstantfunc("ColorPatchConstantFunction")] //The constant hull shader function
HullOutputType ColorHullShader(InputPatch<HullInputType, 3> patch, uint pointId : SV_OutputControlPointID, uint patchId : SV_PrimitiveID)
{
HullOutputType output;
//设置控制点
output.position = patch[pointId].position;
// 输出颜色为输入颜色
output.color = patch[pointId].color;
return output;
}
下面是DS的shader代码:
//每个细分后的顶点调用一次
[domain("tri")]
PixelInputType ColorDomainShader(ConstantOutputType input, float3 uvwCoord : SV_DomainLocation, const OutputPatch<HullOutputType, 3> patch)
{
float3 vertexPosition;
PixelInputType output;
对三角形u, v, w表示细分点相对于三个控制点的u,v, w坐标,或者说是重心坐标,我们可以根据这三个值计算出细分点的位置,然后转化为世界坐标系中点,输出颜色也是用三个控制点的颜色根据u, v, w差值得到。
// Determine the position of the new vertex.
//Baricentric Interpolation to find each position the generated vertices
//基于重心坐标的顶点生成
vertexPosition = uvwCoord.x * patch[0].position + uvwCoord.y * patch[1].position + uvwCoord.z * patch[2].position;
// 计算新的顶点在世界坐标系中的位置
output.position = mul(float4(vertexPosition, 1.0f), worldMatrix);
output.position = mul(output.position, viewMatrix);
output.position = mul(output.position, projectionMatrix);
//新生成顶点颜色也为各个控制点颜色组合
output.color = uvwCoord.x * patch[0].color + uvwCoord.y * patch[1].color + uvwCoord.z * patch[2].color;
return output;
}
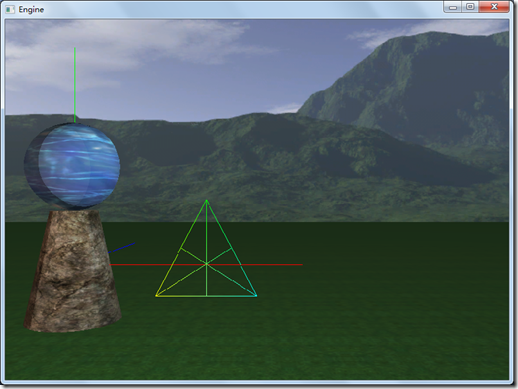
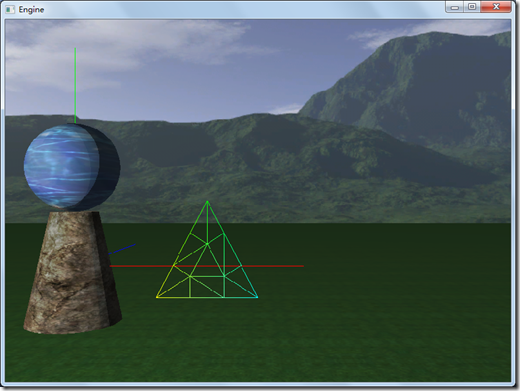
程序执行后的效果如下图所示。我们可以通过上下方向键来改变tess factor的值,从而观察不到不同细分效果。
完整的代码请参考:
工程文件myTutorialD3D11_54
代码下载:
https://files.cnblogs.com/mikewolf2002/d3d1150-58.zip
https://files.cnblogs.com/mikewolf2002/pictures.zip
第二个程序是四边形的细分,代码大致和三角形细分相同,需要注意的是它的shader代码,对于四边形,它的tess factor有6个,四条边外加两个内部tess factor
还有对于四边形,其实包括2个u,v坐标,分别表示对于2个控制点的中心坐标,最终细分点的位置是二次线性差值:
verticalPos1 = lerp(patch[0].position, patch[1].position,uvwCoord.x);
verticalPos2 = lerp(patch[2].position, patch[3].position,uvwCoord.x);
vertexPosition = lerp(verticalPos1,verticalPos2, uvwCoord.y);
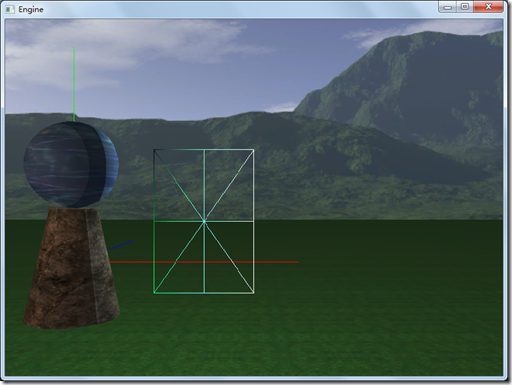
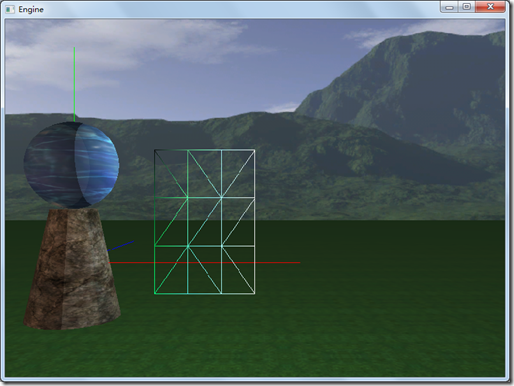
程序执行后的界面如下:
完整的代码请参考:
工程文件myTutorialD3D11_55
代码下载:


