1、死信交换机
说是死信队列,是因为RabbitMQ和其他中间件产品不一样
有交换机的概念和这个东西存在,别的产品只有队列一说
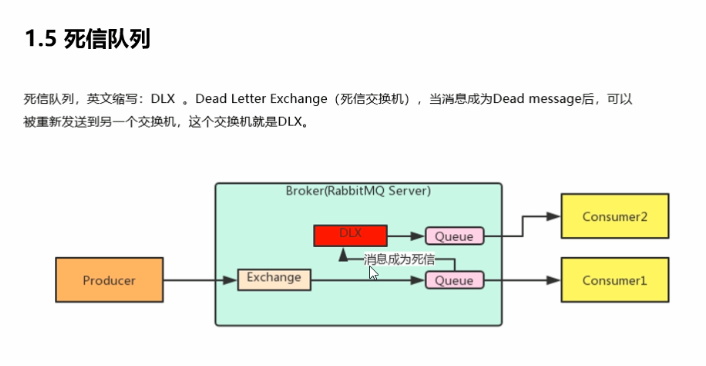
DeadLetterExchange
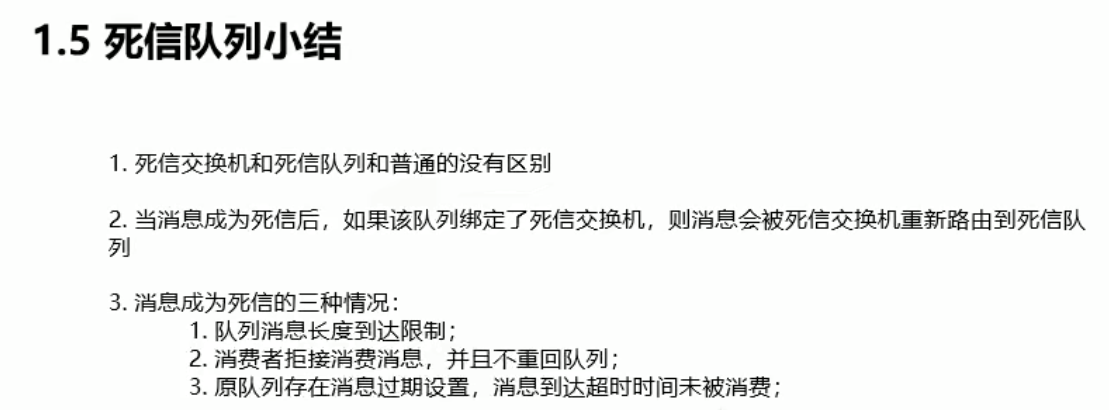
消息成为DeadMessage之后,被重新发往另一个交换机
接收DeadMessage的交换机就成为死信交换机
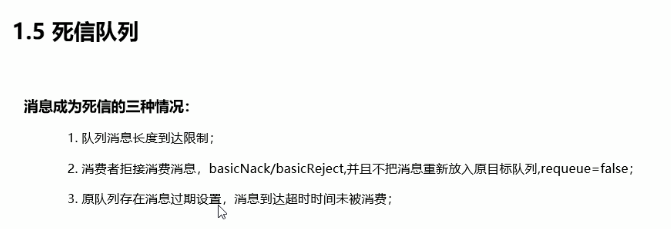
但是死信的条件还有其他情况:
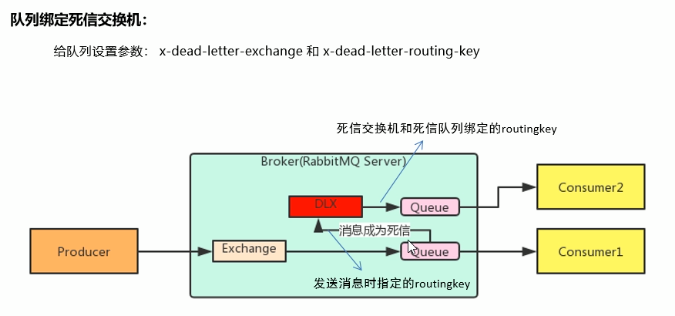
设置规则:
实现步骤:
1、设立一套正常的消息队列流程
2、设立一套死信交换机的消息队列流程
3、让正常的交换机和死信交换机绑定
Spring生产者服务的xml配置步骤:
<?xml version="1.0" encoding="UTF-8"?>
<beans xmlns="http://www.springframework.org/schema/beans"
       xmlns:xsi="http://www.w3.org/2001/XMLSchema-instance"
       xmlns:context="http://www.springframework.org/schema/context"
       xmlns:rabbit="http://www.springframework.org/schema/rabbit"
       xsi:schemaLocation="http://www.springframework.org/schema/beans
       http://www.springframework.org/schema/beans/spring-beans.xsd
       http://www.springframework.org/schema/context
       https://www.springframework.org/schema/context/spring-context.xsd
       http://www.springframework.org/schema/rabbit
       http://www.springframework.org/schema/rabbit/spring-rabbit.xsd">
    <!--加载配置文件-->
    <context:property-placeholder location="classpath:rabbitmq.properties"/>

    <!-- 定义rabbitmq connectionFactory

        publisher-confirms="true" 消息发送可确认
        publisher-returns="true"
    -->
    <rabbit:connection-factory id="connectionFactory" host="${rabbitmq.host}"
                               port="${rabbitmq.port}"
                               username="${rabbitmq.username}"
                               password="${rabbitmq.password}"
                               virtual-host="${rabbitmq.virtual-host}"
                               publisher-confirms="true"
                               publisher-returns="true"
    />
    <!--定义管理交换机、队列-->
    <rabbit:admin connection-factory="connectionFactory"/>

    <!--定义rabbitTemplate对象操作可以在代码中方便发送消息-->
    <rabbit:template id="rabbitTemplate" connection-factory="connectionFactory"/>


    <!--
        死信交换机配置步骤
        1、配置正常的队列和交换机
        2、配置死信交换机和队列
        3、将正常交换机和死信交换机配置
            - 死信交换机名称 x-dead-letter-exchange
            - 发送到死信交换机的路由分配规则 x-dead-letter-routing-key

        要测试配置是否成功
        需要有消息可以死亡
        1、设置队列过期
        2、设置队列长度 限流
    -->

    <!-- 1配置正常的队列和交换机 -->
    <rabbit:queue id="test-dlx-normal-queue" name="test-dlx-normal-queue" >
        <!-- 3、绑定死信队列交换机 -->
        <rabbit:queue-arguments>
            <!-- 3.1绑定交换机 -->
            <entry key="x-dead-letter-exchange" value="test-dlx-dead-exchange" />
            <!-- 3.2设定死亡分配规则 -->
            <entry key="x-dead-letter-routing-key" value="dlx.anyRule"/>

            <!-- 4.1死亡时限 -->
            <entry key="x-message-ttl" value="10000" value-type="java.lang.Integer"/>
            <!-- 4.2限流控制 -->
            <entry key="x-max-length" value="10" value-type="java.lang.Integer"/>

        </rabbit:queue-arguments>
    </rabbit:queue>
    <rabbit:topic-exchange name="test-dlx-normal-exchange" >
        <rabbit:bindings>
            <rabbit:binding pattern="test.dlx.#" queue="test-dlx-normal-queue"></rabbit:binding>
        </rabbit:bindings>
    </rabbit:topic-exchange>

    <!-- 2配置死信队列和交换机 -->
    <rabbit:queue id="test-dlx-dead-queue" name="test-dlx-dead-queue" >
    </rabbit:queue>
    <rabbit:topic-exchange name="test-dlx-dead-exchange" >
        <rabbit:bindings>
            <rabbit:binding pattern="dlx.#" queue="test-dlx-dead-queue"></rabbit:binding>
        </rabbit:bindings>
    </rabbit:topic-exchange>

</beans>
测试代码:
    /**
     * 死信测试
     */
    @Test
    public void deadExchangeTest() {
        rabbitTemplate.convertAndSend(
                "test-dlx-normal-exchange",
                "test.dlx.anyRule",
                " deadExchange queue message test ... ");
    }

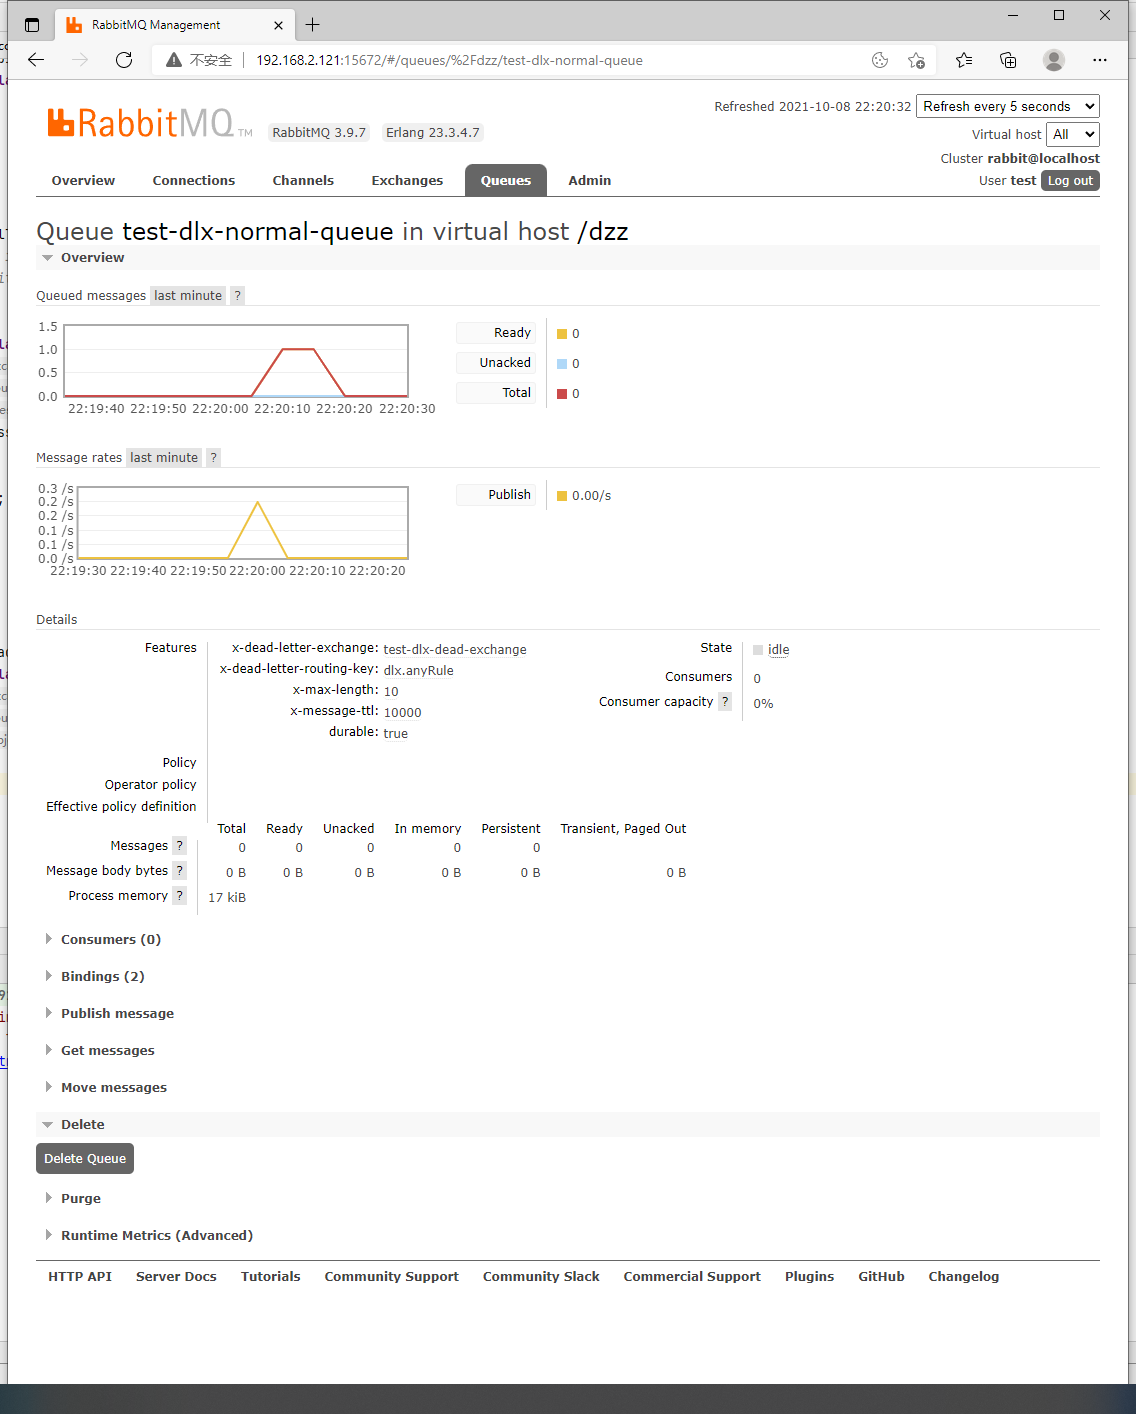
正常队列可以看到经过了过期时间,消息死亡
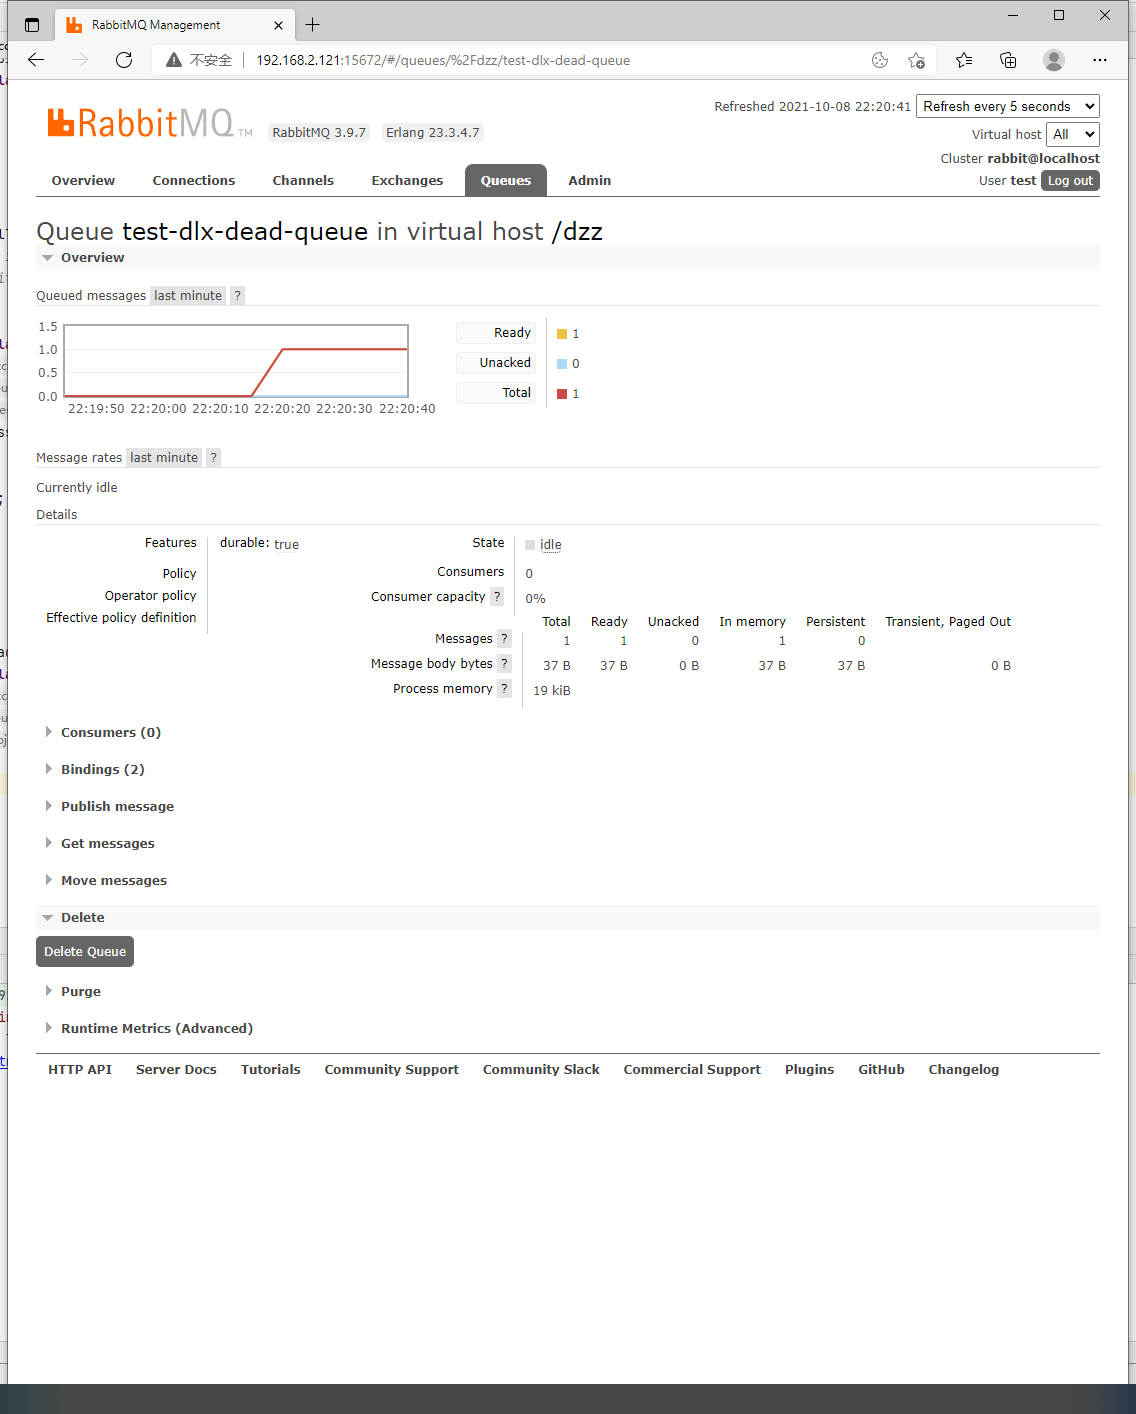
死信队列在正常队列的消息死亡后被队列分配进来:
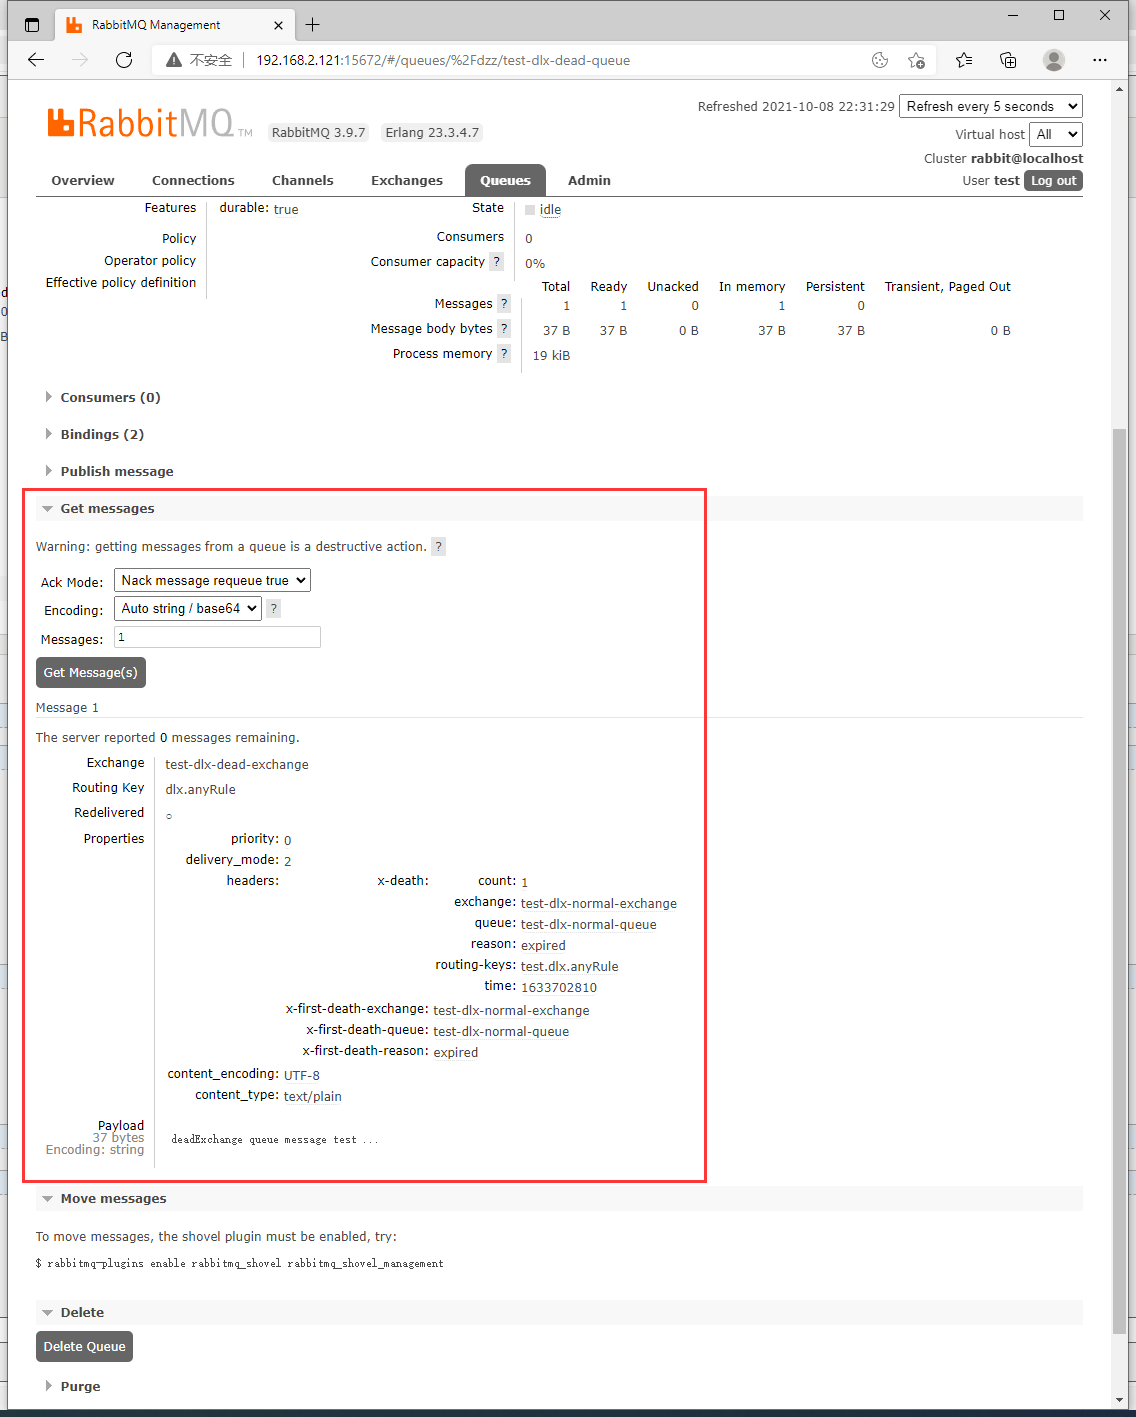
监控面板这里也能查找我们发送的那条消息:
测试长度限制触发死信:
    /**
     * 死信测试
     */
    @Test
    public void deadExchangeTest() {
//        rabbitTemplate.convertAndSend(
//                "test-dlx-normal-exchange",
//                "test.dlx.anyRule",
//                " deadExchange queue message test ... ");

        for (int i = 0; i < 15; i++) {
            rabbitTemplate.convertAndSend(
                    "test-dlx-normal-exchange",
                    "test.dlx.anyRule",
                    " deadExchange queue message test ... ");
        }

    }
前面的10条进入正常队列
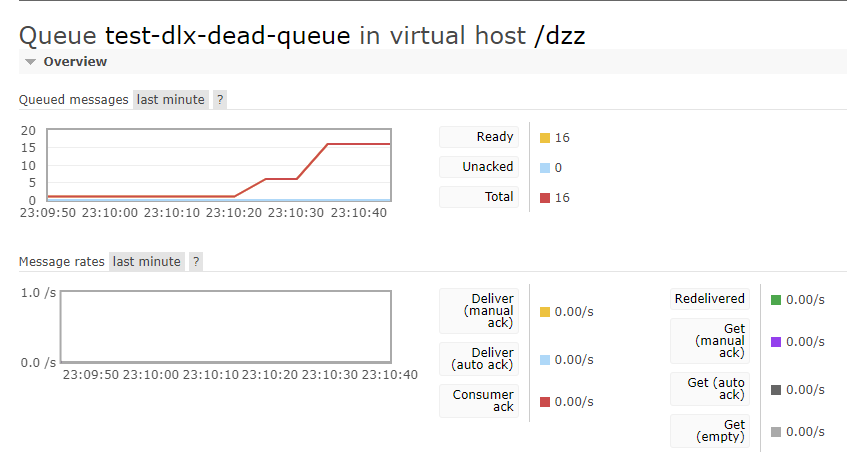
后面5条满列了,只能被分配死信里面
再到时间过期,剩下10条也进去了
后面的5条因为满列了,分配到死信

时间过期,入列的10条也进去了

看死信的曲线图也是这样的过程
情况三,绝收:
编写消费者服务的死信监听器类
复制Acknowledge监听器做了一些调整,异常不打印出来,一堆爆红省略
package cn.dzz.rabbitmq.listener;

import com.rabbitmq.client.Channel;
import org.springframework.amqp.core.Message;
import org.springframework.amqp.rabbit.listener.api.ChannelAwareMessageListener;
import org.springframework.stereotype.Component;

import java.nio.charset.StandardCharsets;

/**
 * 手动确认配置:
 * 1、监听器容器配置项acknowledge更改为manual
 * <rabbit:listener-container connection-factory="connectionFactory" auto-declare="true" acknowledge="manual">
 *   <rabbit:listener ref="acknowledgeListener" queue-names="confirm-test-queue" />
 * </rabbit:listener-container>
 *
 * 2、监听器改用实现ChannelAwareMessageListener接口
 *
 * 3、消息处理成功 调用basicAck()签收响应
 * 4、处理失败 调用basicNack()签收拒绝 broker重新发送
 *
 *
 */
@Component
public class DeadExchangeListener implements ChannelAwareMessageListener {
    @Override
    public void onMessage(Message message, Channel channel) throws Exception {
        long deliveryTag = 0;
        Thread.sleep(2000); // 让消息别那么快的一直发送,慢点发

        try {

            System.out.println(new String(message.getBody(), StandardCharsets.UTF_8));

            // 处理业务逻辑
            // todo...

            int i = 10 / 0; // 这个异常会被捕获,然后触发RabbitMQ一直让消息重新入列发送

            // 业务签收
            deliveryTag = message.getMessageProperties().getDeliveryTag();

            channel.basicAck(deliveryTag, true);

        } catch (Exception exception) {
            // exception.printStackTrace();
            System.out.println("已经触发异常Catch 消息被拒绝 .... ");
            /**
             *     public void basicNack(long deliveryTag, boolean multiple, boolean requeue) throws IOException {
             *         long realTag = deliveryTag - this.activeDeliveryTagOffset;
             *         if (multiple && deliveryTag == 0L) {
             *             realTag = 0L;
             *         } else if (realTag <= 0L) {
             *             return;
             *         }
             *
             *         this.transmit(new Nack(realTag, multiple, requeue));
             *         this.metricsCollector.basicNack(this, deliveryTag);
             *     }
             *     long deliveryTag 签收的标签
             *     boolean multiple 允许签收多条消息?
             *     boolean requeue 是否重回队列? 消息重新入列?RabbitMQ重新发送
             */
            channel.basicNack(deliveryTag, true, false); // 被拒绝的消息不再重回队列, 这样这个消息才会分配到死信队列中

            /**
             * 和上面区别就是没有多消息签收的参数
             *     public void basicReject(long deliveryTag, boolean requeue) throws IOException {
             *         long realTag = deliveryTag - this.activeDeliveryTagOffset;
             *         if (realTag > 0L) {
             *             this.transmit(new Reject(realTag, requeue));
             *             this.metricsCollector.basicReject(this, deliveryTag);
             *         }
             *
             *     }
             *     channel.basicReject(deliveryTag, true);
             */

        }
    }
}
监听器容器注册进来:
<?xml version="1.0" encoding="UTF-8"?>
<beans xmlns="http://www.springframework.org/schema/beans"
       xmlns:xsi="http://www.w3.org/2001/XMLSchema-instance"
       xmlns:context="http://www.springframework.org/schema/context"
       xmlns:rabbit="http://www.springframework.org/schema/rabbit"
       xsi:schemaLocation="http://www.springframework.org/schema/beans
       http://www.springframework.org/schema/beans/spring-beans.xsd
       http://www.springframework.org/schema/context
       https://www.springframework.org/schema/context/spring-context.xsd
       http://www.springframework.org/schema/rabbit
       http://www.springframework.org/schema/rabbit/spring-rabbit.xsd">
    <!--加载配置文件-->
    <context:property-placeholder location="classpath:rabbitmq.properties"/>

    <!-- 定义rabbitmq connectionFactory -->
    <rabbit:connection-factory id="connectionFactory" host="${rabbitmq.host}"
                               port="${rabbitmq.port}"
                               username="${rabbitmq.username}"
                               password="${rabbitmq.password}"
                               virtual-host="${rabbitmq.virtual-host}"/>

    <context:component-scan base-package="cn.dzz.rabbitmq.listener" />

    <!--
        定义监听器容器
        acknowledge="manual" 默认就是none
    -->
    <rabbit:listener-container connection-factory="connectionFactory" auto-declare="true" acknowledge="manual">
        <!-- 监听的是正常的队列 -->
        <rabbit:listener ref="deadExchangeListener" queue-names="test-dlx-normal-queue" />
    </rabbit:listener-container>

</beans>
监听测试:
监听服务就是一直跑着收消息就行:
import org.junit.Test;
import org.junit.runner.RunWith;
import org.springframework.test.context.ContextConfiguration;
import org.springframework.test.context.junit4.SpringJUnit4ClassRunner;

@RunWith(SpringJUnit4ClassRunner.class)
@ContextConfiguration(locations = "classpath*:consumer-config.xml")
public class SpringConsumerTest {

    @Test
    public void simpleListenerTest() {
        System.out.println("监听测试");
        while(true) {

        }
    }
}
生产者来发送一条消息:
    /**
     * 死信测试
     */
    @Test
    public void deadExchangeTest() {
//        rabbitTemplate.convertAndSend(
//                "test-dlx-normal-exchange",
//                "test.dlx.anyRule",
//                " deadExchange queue message test ... ");

//        for (int i = 0; i < 15; i++) {
//            rabbitTemplate.convertAndSend(
//                    "test-dlx-normal-exchange",
//                    "test.dlx.anyRule",
//                    " deadExchange queue message test ... ");
//        }

        rabbitTemplate.convertAndSend(
                "test-dlx-normal-exchange",
                "test.dlx.anyRule",
                "消息拒绝测试 。。。。 在死信队列查看此消息 ");

    }
先启动消费者监听,然后生产者发送
会看到消息在正常队列中存活了一下,就被分配到死信队列中了
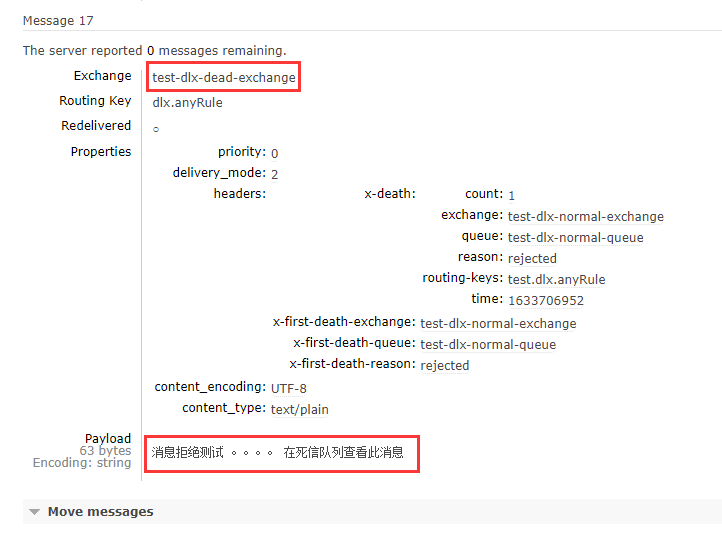
消费者输出信息:
监听测试
消息拒绝测试 。。。。 在死信队列查看此消息
已经触发异常Catch 消息被拒绝 ....