四,vue-router路由
1.简介
使用Vue.js开发SPA(Single Page Application)单页面应用
根据不同url地址,显示不同的内容,但显示在同一个页面中,称为单页面应用
参考官网:https://router.vuejs.org/zh/
下载
使用cnpm下载
cnpm install vue-router@2.7.0 -S
下载后的js文件在当前目录下
node_modules/vue-router/dist
2.基本用法
html
<div id='itany'>
        <div>
            <!-- 使用router-link组件来定义导航,to属性指定链接url  -->
            <!-- <router-link> 默认会被渲染成一个 `<a>` 标签 -->
            <router-link to="/home">主页</router-link>
			<router-link to="/news">新闻</router-link>
        </div>
        <div>
            <!-- router-view用来显示路由的内容 -->
            <!-- 路由出口 -->
            <!-- 路由匹配到的组件将渲染在这里 -->
            <router-view></router-view>
        </div>
    </div>
JavaScripts
<script>
        // 1.定义组件
        var Home={
            template:'<h3>我是主页</h3>'
        }
        var News={
            template:'<h3>我是新闻</h3>'
        }
        // 2.配置路由
        const routes=[
            {path:'/home',component:Home},
            {path:'/news',component:News},
        ]
        // 3.创建路由实例
        const router=new VueRouter({
            // routes //简写相当于routes:routes
            routes,
            // mode:'history'
        });
        // 4.创建跟实例并将路由挂载到Vue实例上
        new Vue({
            el:'#itany',
            router  // 注入路由
        });
    </script>
完整代码如下day03/09.html
注意:引入vue.js需要在vue-router.js之前,否则控制台报错,原因不明
Unknown custom element: <router-link>
<!DOCTYPE html>
<html lang="en">
<head>
    <meta charset="UTF-8">
    <meta name="viewport" content="width=device-width, initial-scale=1.0">
    <title>路由基本用法</title>
    <style>
        .router-link-active{
            font-size: 20px;
            color:#ff7300;
            text-decoration: none;
        }
    </style>
    <script src='js/vue.js'></script>
    <script src='js/vue-router.js'></script>

</head>
<body>
    <div id='itany'>
        <div>
            <!-- 使用router-link组件来定义导航,to属性指定链接url  -->
            <!-- <router-link> 默认会被渲染成一个 `<a>` 标签 -->
            <router-link to="/home">主页</router-link>
			<router-link to="/news">新闻</router-link>
        </div>
        <div>
            <!-- router-view用来显示路由的内容 -->
            <!-- 路由出口 -->
            <!-- 路由匹配到的组件将渲染在这里 -->
            <router-view></router-view>
        </div>
    </div>
    <script>
        // 1.定义组件
        var Home={
            template:'<h3>我是主页</h3>'
        }
        var News={
            template:'<h3>我是新闻</h3>'
        }
        // 2.配置路由
        const routes=[
            {path:'/home',component:Home},
            {path:'/news',component:News},
        ]
        // 3.创建路由实例
        const router=new VueRouter({
            // routes //简写相当于routes:routes
            routes,
            // mode:'history'
        });
        // 4.创建跟实例并将路由挂载到Vue实例上
        new Vue({
            el:'#itany',
            router  // 注入路由
        });
    </script>
</body>
</html>
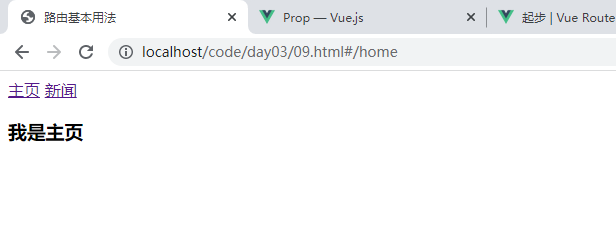
页面显示,点击主页显示我是主页,新闻显示我是新闻
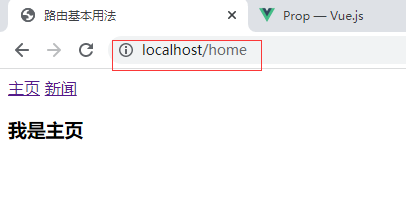
注意到点击链接会自动加#,如果不想看到这个#修改路由实例模式mode默认为hash修改为history
 const router=new VueRouter({
            // routes //简写相当于routes:routes
            routes,
            mode:'history'
        });
页面显示
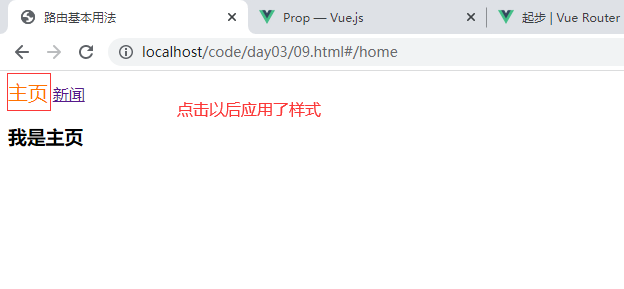
点击主页或者新闻也是有默认样式的,可以通过控制台查看到

修改样式,在<head>标签内增加以下代码
<style>
        .router-link-active{
            font-size: 20px;
            color:#ff7300;
            text-decoration: none;
        }
</style>
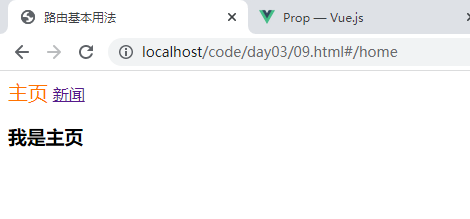
页面显示
如果觉得这个样式名称太复杂也可以修改样式名
 // 3.创建路由实例
        const router=new VueRouter({
            // routes //简写相当于routes:routes
            routes,
            // mode:'history'
            linkActiveClass:'active' //更新活动链接的class类名
 });
同时样式定义的时候也修改对应的名称
<style>
        /* .router-link-active{
            font-size: 20px;
            color:#ff7300;
            text-decoration: none;
        } */
          .active{
            font-size: 20px;
            color:#ff7300;
            text-decoration: none;
        }
    </style>
默认打开页面是不显示主页或者新闻的需要点击才显示,可以通过路由重定向,例如打开首页显示Home或者在没有找到路由的情况下跳转至Home
修改配置路由代码
 // 2.配置路由
    const routes=[
        {path:'/home',component:Home},
        {path:'/news',component:News},
       {path:'*',redirect:'/home'} //重定向
     ]
页面显示,默认显示Home,如果随意写一个没有的路由也会跳到Home
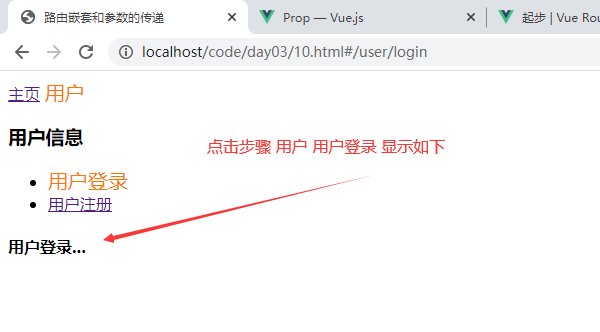
3.路由嵌套和参数的传递
路由嵌套:路由对应的链接下还有链接
把上面设置的路由新闻处改成用户,用户下面又有两个链接分别为用户登录和用户注册
day03/10.html
<!DOCTYPE html>
<html lang="en">
<head>
    <meta charset="UTF-8">
    <meta name="viewport" content="width=device-width, initial-scale=1.0">
    <title>路由嵌套和参数的传递</title>
    <style>
          .active{
            font-size: 20px;
            color:#ff7300;
            text-decoration: none;
        }
    </style>
    <script src='js/vue.js'></script>
    <script src='js/vue-router.js'></script>
    <!-- <script src='js/vue.js'></script> -->

</head>
<body>
    <div id='itany'>
        <div>
            <!-- 使用router-link组件来定义导航,to属性指定链接url  -->
            <!-- <router-link> 默认会被渲染成一个 `<a>` 标签 -->
            <router-link to="/home">主页</router-link>
			<router-link to="/user">用户</router-link>
        </div>
        <div>
            <!-- router-view用来显示路由的内容 -->
            <!-- 路由出口 -->
            <!-- 路由匹配到的组件将渲染在这里 -->
            <router-view></router-view>
        </div>
    </div>
    <template id='user'>
        <div>
            <h3>用户信息</h3>
            <ul>
                <li><router-link to="/user/login">用户登录</router-link></li>
                <li><router-link to="/user/regist">用户注册</router-link></li>
            </ul>
             <!-- 路由匹配到的组件将渲染在这里,需要设置否则不渲染,点击无显示 -->
            <router-view></router-view>
        </div>
    </template>
    <script>
        // 1.定义组件
        var Home={
            template:'<h3>我是主页</h3>'
        }
        var User={
            template:'#user'
        }
        var Login={
            template:'<h4>用户登录...</h4>'
        }
        var Regist={
            template:'<h4>用户注册...</h4>'
        }
        // 2.配置路由
        const routes=[
            {
                path:'/home',
                component:Home
            },

            {
                path:'/user',
                component:User,
                children:[
                    {
                        path:'login',
                        component: Login
                    },
                    {
                        path:'regist',
                        component: Regist
                    },
                ]
            },
            {
                path:'*',
                redirect:'/home'
            } //重定向
        ]
            // 3.创建路由实例
            const router=new VueRouter({
                // routes //简写相当于routes:routes
                routes,
                // mode:'history'
                linkActiveClass:'active' //更新活动链接的class类名
            });
        // 4.创建跟实例并将路由挂载到Vue实例上
        new Vue({
            el:'#itany',
            router  // 注入路由
        });
    </script>
</body>
</html>
解析:在设置路由下新加关键字children对应嵌套的路由,写法是一致的
页面显示
上面写法是把标签<router-link>写入到标签<li>内,也可以直接写<router-link>标签通过关键字tag来指定包含的标签类型为<li>,以下为简化写法,效果是一样的
                <!-- <li><router-link to="/user/login">用户登录</router-link></li>
                <li><router-link to="/user/regist">用户注册</router-link></li> -->
                <router-link to="/user/login" tag='li'>用户登录</router-link>
                <router-link to="/user/regist" tag='li'>用户注册</router-link>
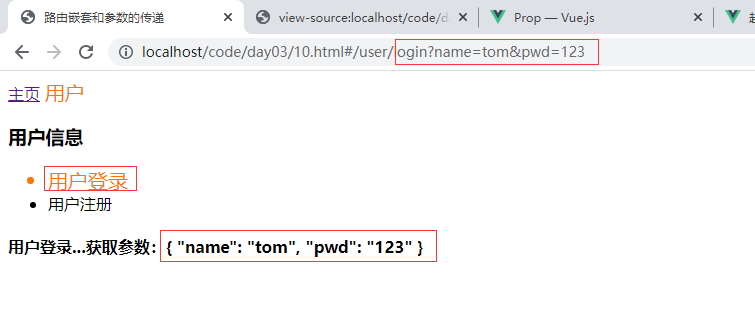
传递参数的两种形式
a.查询字符串:login?name=tom&pwd=123
{{$route.query}}
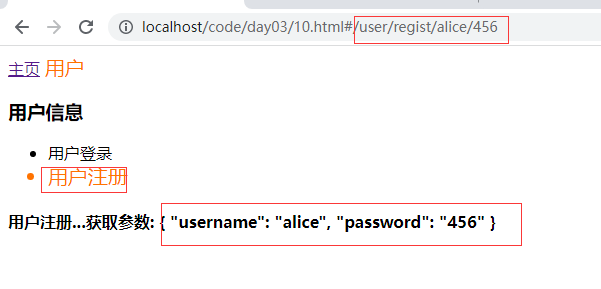
b.rest风格url:regist/alice/456
{{$route.params}}
传递参数获取示例,修改代码,演示两种传递参数及如何获取传递的参数
<!DOCTYPE html>
<html lang="en">
<head>
<meta charset="UTF-8">
<meta name="viewport" content="width=device-width, initial-scale=1.0">
<title>路由嵌套和参数的传递</title>
<style>
.active{
font-size: 20px;
color:#ff7300;
text-decoration: none;
}
</style>
<script src='js/vue.js'></script>
<script src='js/vue-router.js'></script>
<!-- <script src='js/vue.js'></script> -->
</head>
<body>
<div id='itany'>
<div>
<!-- 使用router-link组件来定义导航,to属性指定链接url -->
<!-- <router-link> 默认会被渲染成一个 `<a>` 标签 -->
<router-link to="/home">主页</router-link>
<router-link to="/user">用户</router-link>
</div>
<div>
<!-- router-view用来显示路由的内容 -->
<!-- 路由出口 -->
<!-- 路由匹配到的组件将渲染在这里 -->
<router-view></router-view>
</div>
</div>
<template id='user'>
<div>
<h3>用户信息</h3>
<ul>
<!-- <li><router-link to="/user/login">用户登录</router-link></li>
<li><router-link to="/user/regist">用户注册</router-link></li> -->
<router-link to="/user/login?name=tom&pwd=123" tag='li'>用户登录</router-link>
<router-link to="/user/regist/alice/456" tag='li'>用户注册</router-link>
</ul>
<!-- 路由匹配到的组件将渲染在这里,需要设置否则不渲染,点击无显示 -->
<router-view></router-view>
</div>
</template>
<script>
// 1.定义组件
var Home={
template:'<h3>我是主页</h3>'
}
var User={
template:'#user'
}
var Login={
template:'<h4>用户登录...获取参数:{{$route.query}}</h4>'
}
var Regist={
template:'<h4>用户注册...获取参数: {{$route.params}}</h4>'
}
// 2.配置路由
const routes=[
{
path:'/home',
component:Home
},
{
path:'/user',
component:User,
children:[
{
path:'login',
component: Login
},
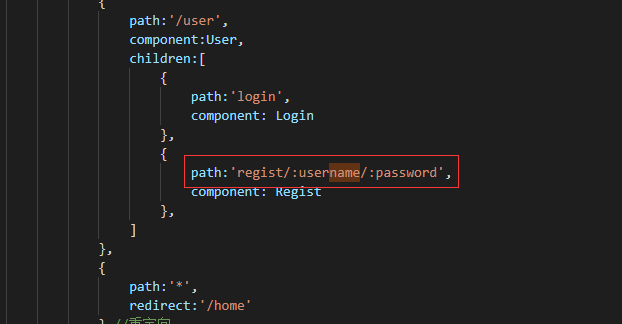
{
path:'regist/:username/:password',
component: Regist
},
]
},
{
path:'*',
redirect:'/home'
} //重定向
]
// 3.创建路由实例
const router=new VueRouter({
// routes //简写相当于routes:routes
routes,
// mode:'history'
linkActiveClass:'active' //更新活动链接的class类名
});
// 4.创建跟实例并将路由挂载到Vue实例上
new Vue({
el:'#itany',
router // 注入路由
});
</script>
</body>
</html>
解析
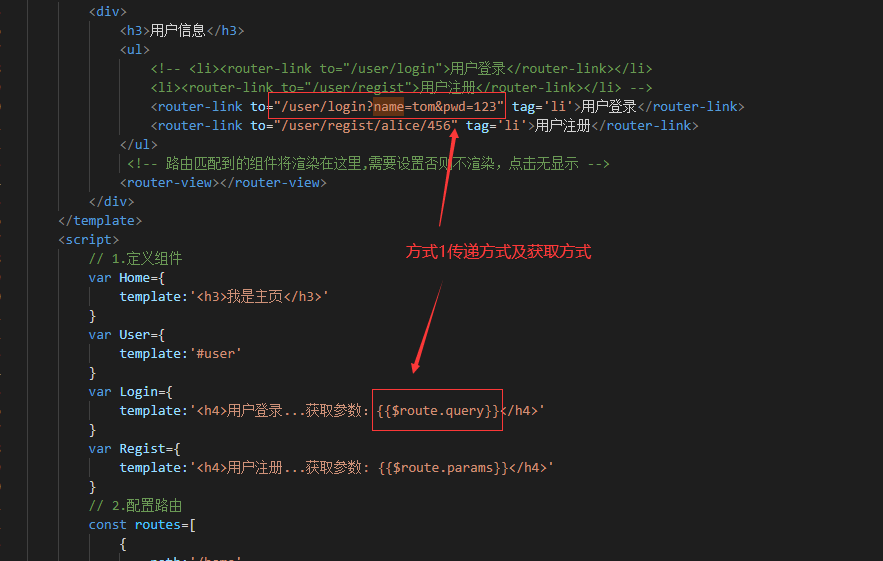
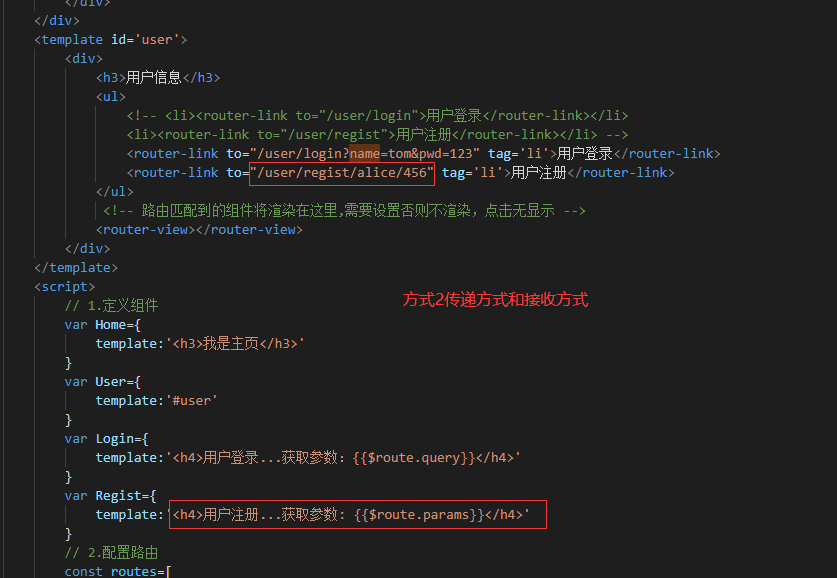
注意:使用方式1直接传递即可,使用方式2为了不让浏览器认为传递的参数是路由需要定义,传递参数的方式,如下
页面显示
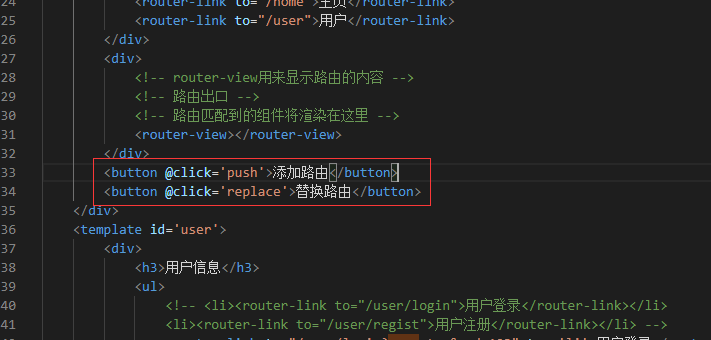
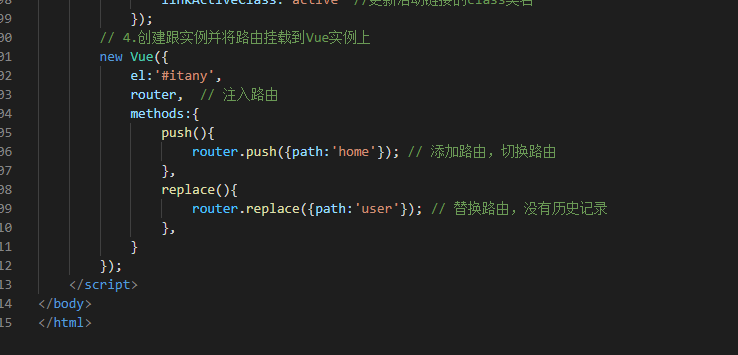
4.路由实例的方法
router.push()添加路由,功能上与<route-link>相同
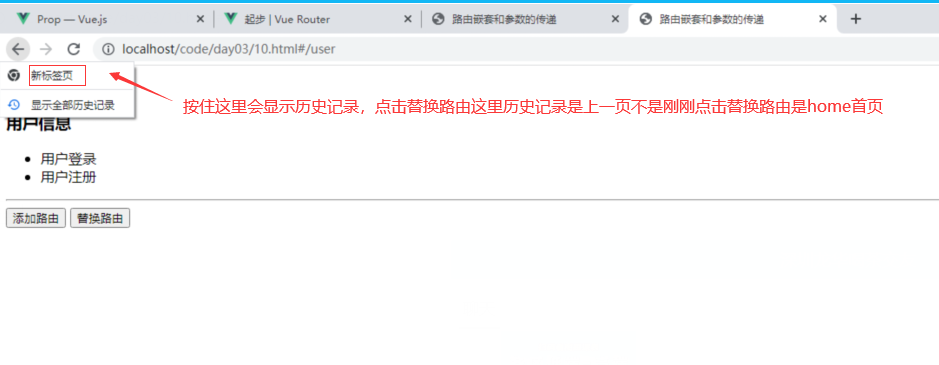
router.replace()替换路由,不产生历史记录
示例 day03/10.html
<!DOCTYPE html>
<html lang="en">
<head>
    <meta charset="UTF-8">
    <meta name="viewport" content="width=device-width, initial-scale=1.0">
    <title>路由嵌套和参数的传递</title>
    <style>
          .active{
            font-size: 20px;
            color:#ff7300;
            text-decoration: none;
        }
    </style>
    <script src='js/vue.js'></script>
    <script src='js/vue-router.js'></script>
    <!-- <script src='js/vue.js'></script> -->

</head>
<body>
    <div id='itany'>
        <div>
            <!-- 使用router-link组件来定义导航,to属性指定链接url  -->
            <!-- <router-link> 默认会被渲染成一个 `<a>` 标签 -->
            <router-link to="/home">主页</router-link>
			<router-link to="/user">用户</router-link>
        </div>
        <div>
            <!-- router-view用来显示路由的内容 -->
            <!-- 路由出口 -->
            <!-- 路由匹配到的组件将渲染在这里 -->
            <router-view></router-view>
        </div>
        <button @click='push'>添加路由</button>
        <button @click='replace'>替换路由</button>
    </div>
    <template id='user'>
        <div>
            <h3>用户信息</h3>
            <ul>
                <!-- <li><router-link to="/user/login">用户登录</router-link></li>
                <li><router-link to="/user/regist">用户注册</router-link></li> -->
                <router-link to="/user/login?name=tom&pwd=123" tag='li'>用户登录</router-link>
                <router-link to="/user/regist/alice/456" tag='li'>用户注册</router-link>
            </ul>
             <!-- 路由匹配到的组件将渲染在这里,需要设置否则不渲染,点击无显示 -->
             <div>
                <router-view></router-view>
             </div>
            <hr>

        </div>
    </template>
    <script>
        // 1.定义组件
        var Home={
            template:'<h3>我是主页</h3>'
        }
        var User={
            template:'#user'
        }
        var Login={
            template:'<h4>用户登录...获取参数:{{$route.query}}</h4>'
        }
        var Regist={
            template:'<h4>用户注册...获取参数: {{$route.params}}</h4>'
        }
        // 2.配置路由
        const routes=[
            {
                path:'/home',
                component:Home
            },

            {
                path:'/user',
                component:User,
                children:[
                    {
                        path:'login',
                        component: Login
                    },
                    {
                        path:'regist/:username/:password',
                        component: Regist
                    },
                ]
            },
            {
                path:'*',
                redirect:'/home'
            } //重定向
        ]
            // 3.创建路由实例
            const router=new VueRouter({
                // routes //简写相当于routes:routes
                routes,
                // mode:'history'
                linkActiveClass:'active' //更新活动链接的class类名
            });
        // 4.创建跟实例并将路由挂载到Vue实例上
        new Vue({
            el:'#itany',
            router,  // 注入路由
            methods:{
                push(){
                    router.push({path:'home'}); // 添加路由,切换路由
                },
                replace(){
                    router.replace({path:'user'}); // 替换路由,没有历史记录
                },
            }
        });
    </script>
</body>
</html>
解析
增加两个按钮分别调用添加路由和替换路由的方法
方法如下,分别把路由指向home和user
页面显示
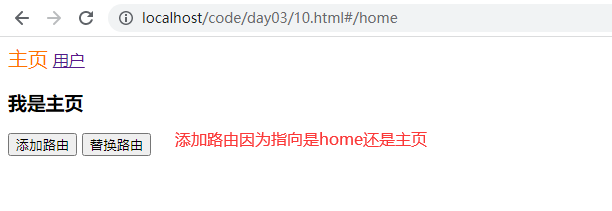
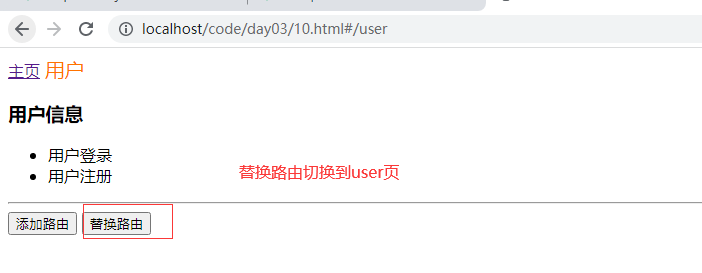
两者的区别在于替换路由是没有历史记录的即替换路由的上一页
5.路由结合动画
利用之前学的animate.css可以给路由结合动画,只需要给<router-view></router-view>标签套在<transition>标签内即可
day03/10.html
<!DOCTYPE html>
<html lang="en">
<head>
    <meta charset="UTF-8">
    <meta name="viewport" content="width=device-width, initial-scale=1.0">
    <link rel="stylesheet" href="css/animate.css">
    <title>路由嵌套和参数的传递</title>
    <style>
          .active{
            font-size: 20px;
            color:#ff7300;
            text-decoration: none;
        }
    </style>
    <script src='js/vue.js'></script>
    <script src='js/vue-router.js'></script>
    <!-- <script src='js/vue.js'></script> -->

</head>
<body>
    <div id='itany'>
        <div>
            <!-- 使用router-link组件来定义导航,to属性指定链接url  -->
            <!-- <router-link> 默认会被渲染成一个 `<a>` 标签 -->
            <router-link to="/home">主页</router-link>
			<router-link to="/user">用户</router-link>
        </div>
        <div>
            <!-- router-view用来显示路由的内容 -->
            <!-- 路由出口 -->
            <!-- 路由匹配到的组件将渲染在这里 -->
            <transition enter-active-class="animated bounceInLeft" leave-active-class="animated bounceOutRight">
                <router-view></router-view>
            </transition>
        </div>
        <button @click='push'>添加路由</button>
        <button @click='replace'>替换路由</button>
    </div>
    <template id='user'>
        <div>
            <h3>用户信息</h3>
            <ul>
                <!-- <li><router-link to="/user/login">用户登录</router-link></li>
                <li><router-link to="/user/regist">用户注册</router-link></li> -->
                <router-link to="/user/login?name=tom&pwd=123" tag='li'>用户登录</router-link>
                <router-link to="/user/regist/alice/456" tag='li'>用户注册</router-link>
            </ul>
             <!-- 路由匹配到的组件将渲染在这里,需要设置否则不渲染,点击无显示 -->
             <div>

                    <router-view></router-view>

             </div>
            <hr>

        </div>
    </template>
    <script>
        // 1.定义组件
        var Home={
            template:'<h3>我是主页</h3>'
        }
        var User={
            template:'#user'
        }
        var Login={
            template:'<h4>用户登录...获取参数:{{$route.query}}</h4>'
        }
        var Regist={
            template:'<h4>用户注册...获取参数: {{$route.params}}</h4>'
        }
        // 2.配置路由
        const routes=[
            {
                path:'/home',
                component:Home
            },

            {
                path:'/user',
                component:User,
                children:[
                    {
                        path:'login',
                        component: Login
                    },
                    {
                        path:'regist/:username/:password',
                        component: Regist
                    },
                ]
            },
            {
                path:'*',
                redirect:'/home'
            } //重定向
        ]
            // 3.创建路由实例
            const router=new VueRouter({
                // routes //简写相当于routes:routes
                routes,
                // mode:'history'
                linkActiveClass:'active' //更新活动链接的class类名
            });
        // 4.创建跟实例并将路由挂载到Vue实例上
        new Vue({
            el:'#itany',
            router,  // 注入路由
            methods:{
                push(){
                    router.push({path:'home'}); // 添加路由,切换路由
                },
                replace(){
                    router.replace({path:'user'}); // 替换路由,没有历史记录
                },
            }
        });
    </script>
</body>
</html>
解析
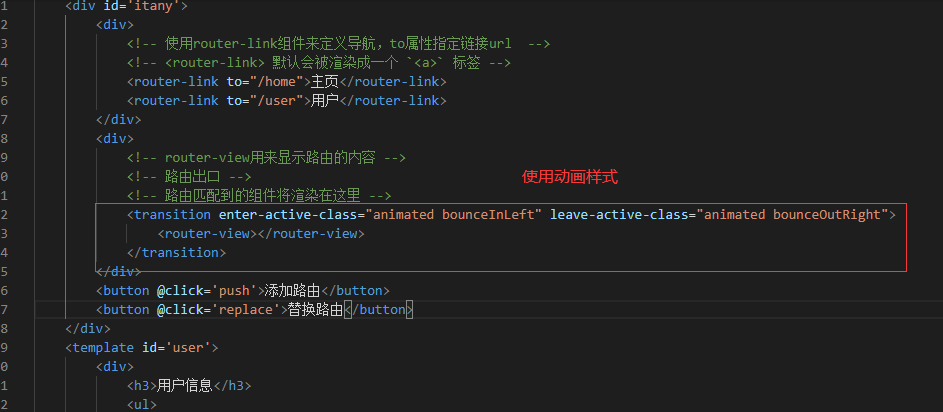
添加动态进入出去动画
五,单文件组件
1. .vue文件
.vue文件,称为单文件组件,是Vue.js自定义的一种文件格式,一个.vue文件就是一个单独的组件,在文件内封装了组件相关的代码:html,css,js
.vue文件由三部分组成<template> <style><script>
<template>
    html
</template>
<style>
    css
</style>
<script>
    js
</script>
2.vue-loader
浏览器本身并不认识.vue结尾的文件,所以必须对.vue文件加载和解析,此时需要vue-loader
类似的loader还有许多,如:html-loader ,css-loader,style-loader,babel-loader等
需要注意的是vue-loader是基于webpack的
3.webpack
webpack是一个前端资源模块化加载器和打包工具,它能够把各种资源都作为模块来使用和处理
实际上,webpack是通过不同的loader将这些资源加载后进行打包,然后输出打包后的文件
简单来说,webpack就是一个模块加载器,所有的资源都可以作为模块来加载,最后打包输出。
webpack官网:https://webpack.github.io/
webpack版本:v1.x v2.x
webpack有一个核心配置文件:webpack.config.js,必须放在项目的根目录下
4.示例,步骤
4.1 创建项目,目录结构如下:
webpack-demo
|index.html |main.js 入口文件 |App.vue vue文件 |package.json 工程文件 |webpack.config.js webpack配置文件 |.babelrc Babel配置文件
其他文件手动创建,package.json可以通过目录创建初始文件
cnpm init --yes
4.2编写App.vue
每个部分都有一个简单的内容
<template>
	<div id="itany">
		<h1>welcome to itany</h1>

	</div>
</template>

<script>

	console.log(111);

</script>

<style>
	body{
		background-color:#ccc;
	}
</style>
4.3安装相关模块
cnpm install vue -S
-S为生产依赖,-D为开发依赖
cnpm init --yes
cnpm install -D webpack webpack-dev-server vue-loader vue-html-loader css-loader vue-style-loader file-loader babel-loader babel-core babel-preset-env vue-template-compiler webpack-cli
注意:复制粘贴安装可能会出现字符编码问题无法安装,可以手动输入安装,安装后会更新package.json文件
以下代码初始化package.json文件
cnpm init --yes
运行完毕以后package.json文件
{
  "name": "webpack-demo",
  "version": "1.0.0",
  "description": "",
  "main": "main.js",
  "scripts": {
    "dev": "webpack-dev-server  --hot --port 8800 --host 0.0.0.0"
  },
  "keywords": [],
  "author": "",
  "license": "ISC",
  "dependencies": {
    "vue": "^2.3.4"
  },
  "devDependencies": {
    "babel-core": "^6.25.0",
    "babel-loader": "^7.1.1",
    "babel-preset-env": "^1.5.2",
    "css-loader": "^0.28.4",
    "file-loader": "^0.11.2",
    "vue-html-loader": "^1.2.4",
    "vue-loader": "^13.0.0",
    "vue-style-loader": "^3.0.1",
    "vue-template-compiler": "^2.3.4",
    "webpack": "^3.0.0",
    "webpack-cli": "^4.9.1",
    "webpack-dev-server": "^2.5.0"
  }
}
修改了默认的scripts语句,下面语句的意思是环境dev启动本机的8800端口 允许所有主机访问,注意需要--host 0.0.0.0否则只能是本机访问
"dev": "webpack-dev-server --hot --port 8800 --host 0.0.0.0"
如果安装失败可以使用以下方法重新安装
rm -rf node_modules
rm -rf package-lock.json
npm cache clear --force
npm install
4.5编写main.js
main.js
/**
 * 使用ES6语法引入模板
 */
import Vue from 'vue'
import App from './App.vue'

new Vue({
        el:'#app',
        render:function(h){ //使用render函数渲染组件
                return h(App);
        }
});
解析
import Vue from 'vue'
会从当前目录node_modules 查找模块
4.5 编写webpack.config.js
webpack.config.js
module.exports={
        //配置入口文件
        entry:'./main.js',
        //配置入口文件输出位置
        output:{
                path:__dirname, //项目根路径
                filename:'build.js'
        },
        //配置模块加载器
        module:{
                rules:[
                        {
                                test:/\.vue$/, //所有以.vue结尾的文件都由vue-loader加载
                                loader:'vue-loader'
                        },
                        {
                                test:/\.js$/, //所有以.js结尾的文件都由babel-loader加载,除了node_modules以外
                                loader:'babel-loader',
                                exclude:/node_modules/
                        }
                ]
        }
}
4.6 编写.babelrc
.babelrc
{
        "presets":[
                ["env",{"module":false}]
        ]
}
~
4.7 编写package.json
{
  "name": "webpack-demo",
  "version": "1.0.0",
  "description": "",
  "main": "main.js",
  "scripts": {
    "dev": "webpack-dev-server  --hot --port 8800 --host 0.0.0.0"
  },
  "keywords": [],
  "author": "",
  "license": "ISC",
  "dependencies": {
    "vue": "^2.3.4"
  },
  "devDependencies": {
    "babel-core": "^6.25.0",
    "babel-loader": "^7.1.1",
    "babel-preset-env": "^1.5.2",
    "css-loader": "^0.28.4",
    "file-loader": "^0.11.2",
    "vue-html-loader": "^1.2.4",
    "vue-loader": "^13.0.0",
    "vue-style-loader": "^3.0.1",
    "vue-template-compiler": "^2.3.4",
    "webpack": "^3.0.0",
    "webpack-cli": "^4.9.1",
    "webpack-dev-server": "^2.5.0"
  }
}
4.8 运行测试
cnpm run dev
实际就相当于执行以下命令
webpack-dev-server --hot --port 8800 --host 0.0.0.0
启动8800端口

页面访问
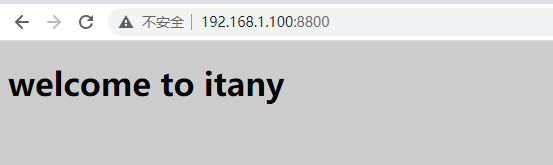
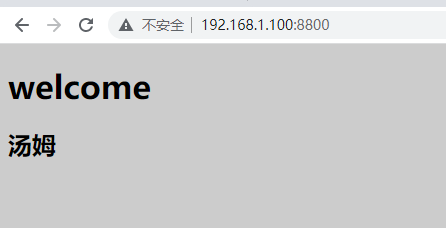
修改App.vue可以实现热加载,例如修改以下内容
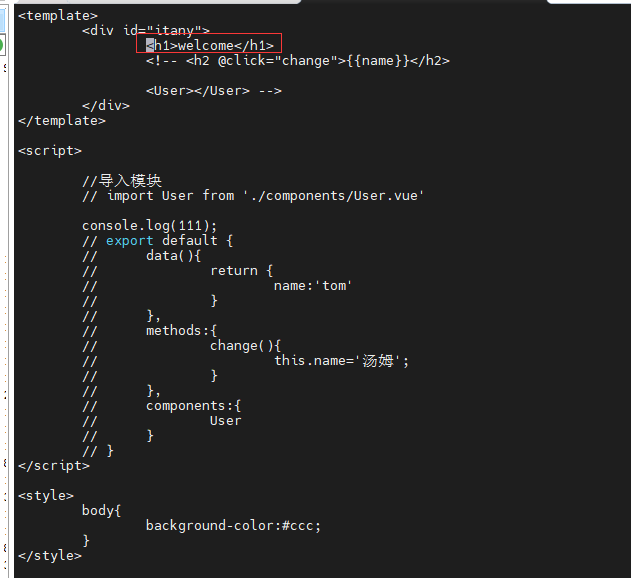
不需要重启,页面显示
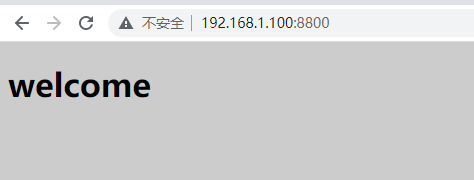
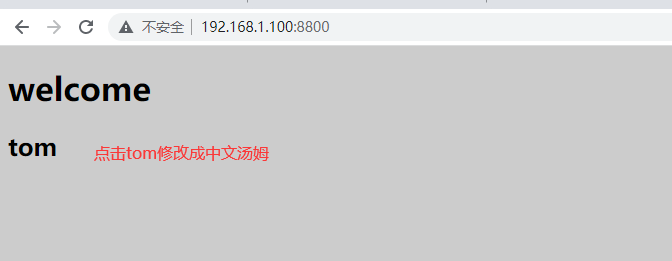
修改使点击tom修改name属性
<template>
        <div id="itany">
                <h1>welcome</h1>
                <h2 @click="change">{{name}}</h2>

        <!--    <User></User> -->
        </div>
</template>

<script>

        //导入模块
        // import User from './components/User.vue'

        // console.log(111);
        export default {
                data(){
                        return {
                                name:'tom'
                        }
                },
                methods:{
                        change(){
                                this.name='汤姆';
                        }
                },
                //components:{
                //      User
                // }
         }
</script>

<style>
        body{
                background-color:#ccc;
        }
</style>
页面显示
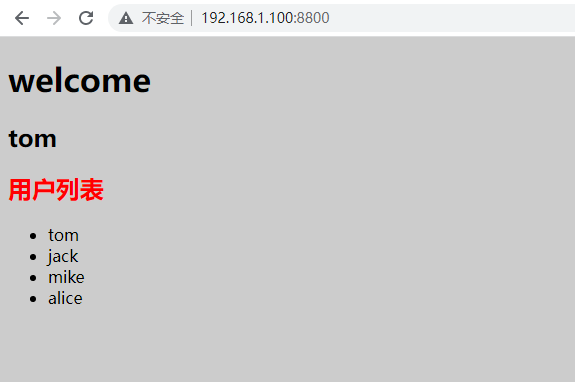
开发组件展示一个用户的信息
 cat components/User.vue
<template>
        <div class="user">
                <h2>用户列表</h2>
                <ul>
                        <li v-for="value in users">{{value}}</li>
                </ul>
        </div>
</template>

<script>
        export default {
                data(){
                        return {
                                users:['tom','jack','mike','alice']
                        }
                }
        }
</script>

<style scoped> /* scoped表示该样式只在当前组件中有效 */
        h2{
                color:red;
        }
修改App.vue
# cat App.vue
<template>
        <div id="itany">
                <h1>welcome</h1>
                <h2 @click="change">{{name}}</h2>

        <User></User>
        </div>
</template>

<script>

        //导入模块
        import User from './components/User.vue'

        // console.log(111);
        export default {
                data(){
                        return {
                                name:'tom'
                        }
                },
                methods:{
                        change(){
                                this.name='汤姆';
                        }
                },
                components:{
                        User
                 }
         }
</script>

<style>
        body{
                background-color:#ccc;
        }
</style>
页面显示
六,vue-cli脚手架
1.简介
vue-cli是一个vue脚手架,可以快速搭建项目结构
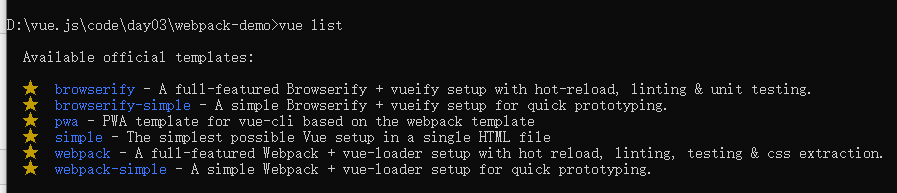
vue-cli本身集成了多种项目模板:
simple 很少使用简单 webpack 包含ESLint代码规范的检查unit单元测试 webpack-simple 没有代码规范检查和单元测试 browserify 使用的也比较多 browserify-simple
2.示例
2.1 安装vuecli,配置vue命令环境
全局安装
cnpm install vue-cli -g
查看版本
D:\vue.js\code\day03\webpack-demo>vue --version
2.9.6
列出可用的模板
2.2 初始化项目,生成项目模板
语法:vue init 模板名 项目名
D:\vue.js\code\day03>vue init webpack-simple vue-cli-demo
2.3 进入生成的项目目录,安装模块包
cd vue-cli-demo
cnpm install
cnpm run dev
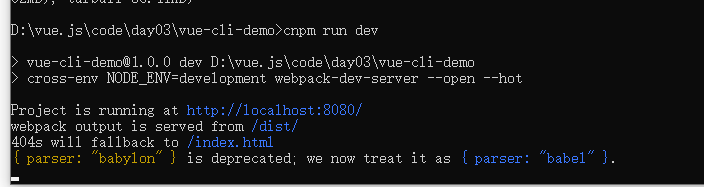
在windows下自动打开浏览器
生产中将项目打包
cnpm run build // 将项目打包输出dist目录,项目上线的话要讲dist目录拷贝到服务器上
3. 使用webpack模板
vue init webpack vue-cli-demo2
ESLint是用来统一代码规范和风格的工具,如缩进、空格、符号等,要求比较严格
eslint规则官网:https://eslint.org/
cnpm install
cnpm run dev
cnpm run build
访问首页是一样的
模块化开发
初始化
在新建的day04运行
D:\vue.js\code\day04>vue init webpack-simple vue-cli-demo
1.vue-router模块化
安装vue-router,生产依赖
cnpm install vue-router -S
2.编辑main.js
引用vue-router
src/main.js
import Vue from 'vue'
import VueRouter from 'vue-router'
import App from './App.vue'

// 使用vue-router
Vue.use(VueRouter);


new Vue({
  el: '#app',
  render: h => h(App)
})
修改App.vue
<template>
  <div id="app">
    {{msg}}
  </div>
</template>

<script>
export default {
  name: 'app',
  data () {
    return {
      msg: 'Welcome to itany'
    }
  }
}
</script>

<style>
#app {
  font-family: 'Avenir', Helvetica, Arial, sans-serif;
  -webkit-font-smoothing: antialiased;
  -moz-osx-font-smoothing: grayscale;
  text-align: center;
  color: #2c3e50;
  margin-top: 60px;
}

h1, h2 {
  font-weight: normal;
}

ul {
  list-style-type: none;
  padding: 0;
}

li {
  display: inline-block;
  margin: 0 10px;
}

a {
  color: #42b983;
}
</style>
运行
cd vue-cli-demo
cnpm install
cnpm run dev
页面显示

继续编辑App.vue增加主页和新闻链接
<template>
  <div id="app">
    {{msg}}
    <h3>
      <router-link to="/home">主页</router-link>
      <router-link to="/news">新闻</router-link>
    </h3>
    <div>
      <keep-alive>
        <!-- 渲染显示 -->
        <router-view> </router-view>
      </keep-alive>
    </div>
  </div>

</template>

<script>
export default {
  name: 'app',
  data () {
    return {
      msg: 'Welcome to itany'
    }
  }
}
</script>

<style>
#app {
  font-family: 'Avenir', Helvetica, Arial, sans-serif;
  -webkit-font-smoothing: antialiased;
  -moz-osx-font-smoothing: grayscale;
  text-align: center;
  color: #2c3e50;
  margin-top: 60px;
}

h1, h2 {
  font-weight: normal;
}

ul {
  list-style-type: none;
  padding: 0;
}

li {
  display: inline-block;
  margin: 0 10px;
}

a {
  color: #42b983;
}
</style>
在目录src下新建文件夹components新增Home.vue和News.vue
Home.vue
<template>
    <div id="home">
        <h3>这是主页</h3>
    </div>
</template>
News.vue
<template>
    <div id="news">
        <h3>这是新闻</h3>
    </div>
</template>
在src下新增路由配置文件
router.config.js
import Home from './components/Home.vue'
import News from './components/News.vue'

export default{
    routes:[
        {
            path:'/home',
            component:Home
        },
        {
            path:'/news',
            component:News
        },
    ]
}
在main.js引入注入路由
import Vue from 'vue'
import VueRouter from 'vue-router'
import App from './App.vue'
import routerConfig from './router.config.js'
// 使用vue-router
Vue.use(VueRouter);

// 创建路由实例
const router=new VueRouter(routerConfig);

new Vue({
  el: '#app',
  render: h => h(App),
  // 注入路由
  router
})
启动项目
cnpm run dev
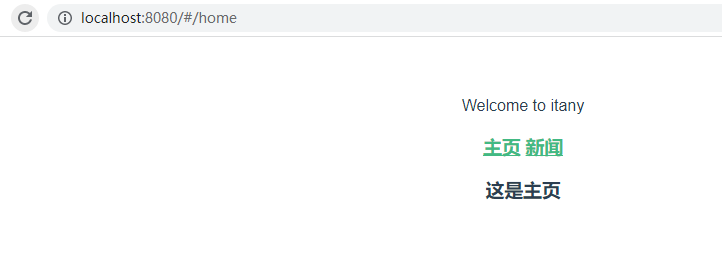
页面显示

打印路由信息以及监视路由的变化,在App.vue增加以下代码
mounted(){
    console.log(this.$route)
  },
  watch:{
    $route:function(newValue,oldValue) {
      console.log('路由发送变化,跳转到:'+newValue.path)
    }
  }
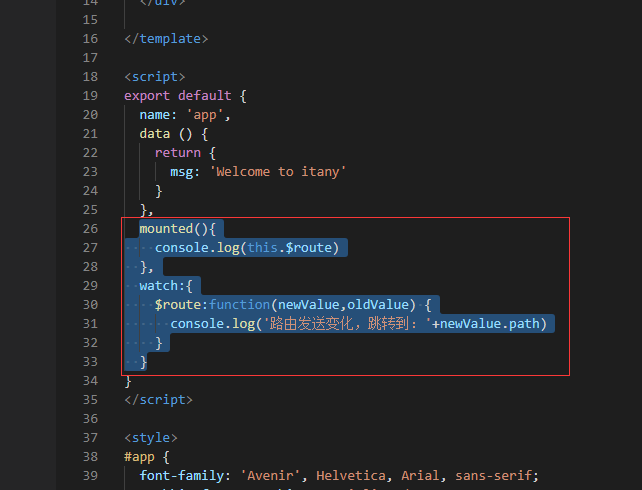
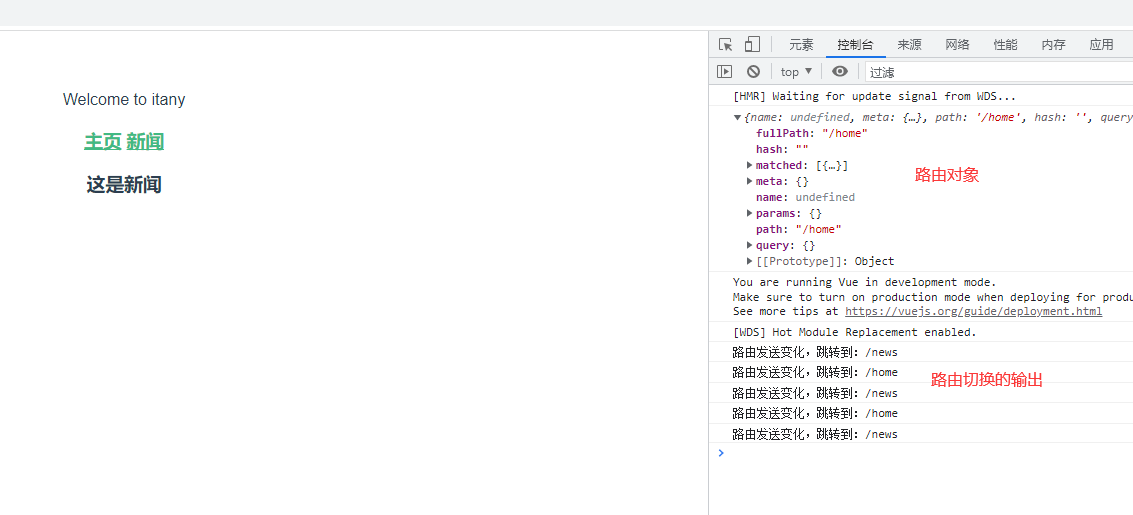
打印路由对象以及监视路由如果发生了变化则打印新路由信息
页面显示
2. axios模块化
安装
cnpm install axios -S
使用axios的两种方式
方式1:在每个组件中引入axios
方式2:在入口文件main.js全局引入并添加到Vue的原型中
方式1示例
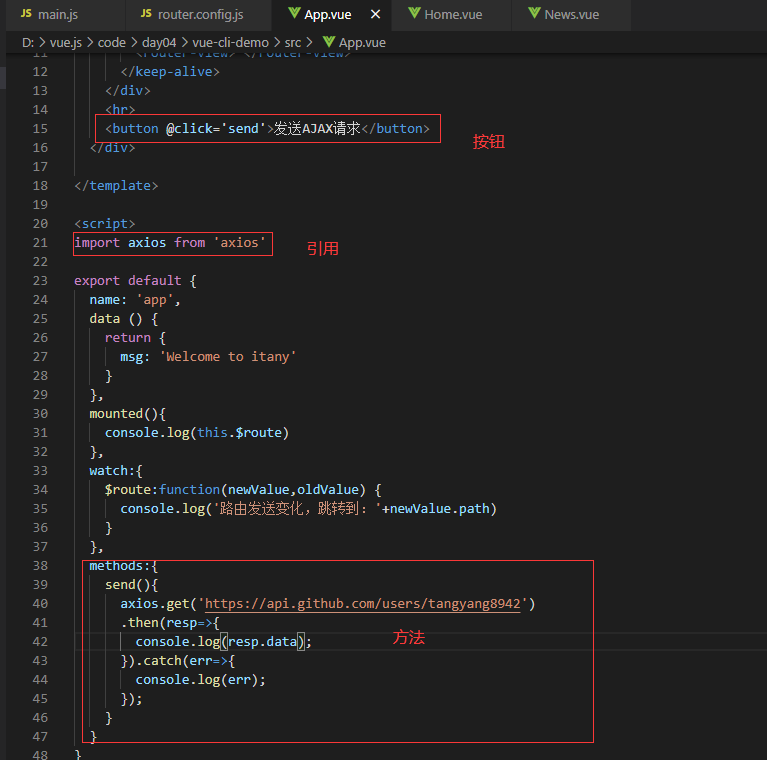
App.vue
<template>
<div id="app">
{{msg}}
<h3>
<router-link to="/home">主页</router-link>
<router-link to="/news">新闻</router-link>
</h3>
<div>
<keep-alive>
<!-- 渲染显示 -->
<router-view> </router-view>
</keep-alive>
</div>
<hr>
<button @click='send'>发送AJAX请求</button>
</div>
</template>
<script>
import axios from 'axios'
export default {
name: 'app',
data () {
return {
msg: 'Welcome to itany'
}
},
mounted(){
console.log(this.$route)
},
watch:{
$route:function(newValue,oldValue) {
console.log('路由发送变化,跳转到:'+newValue.path)
}
},
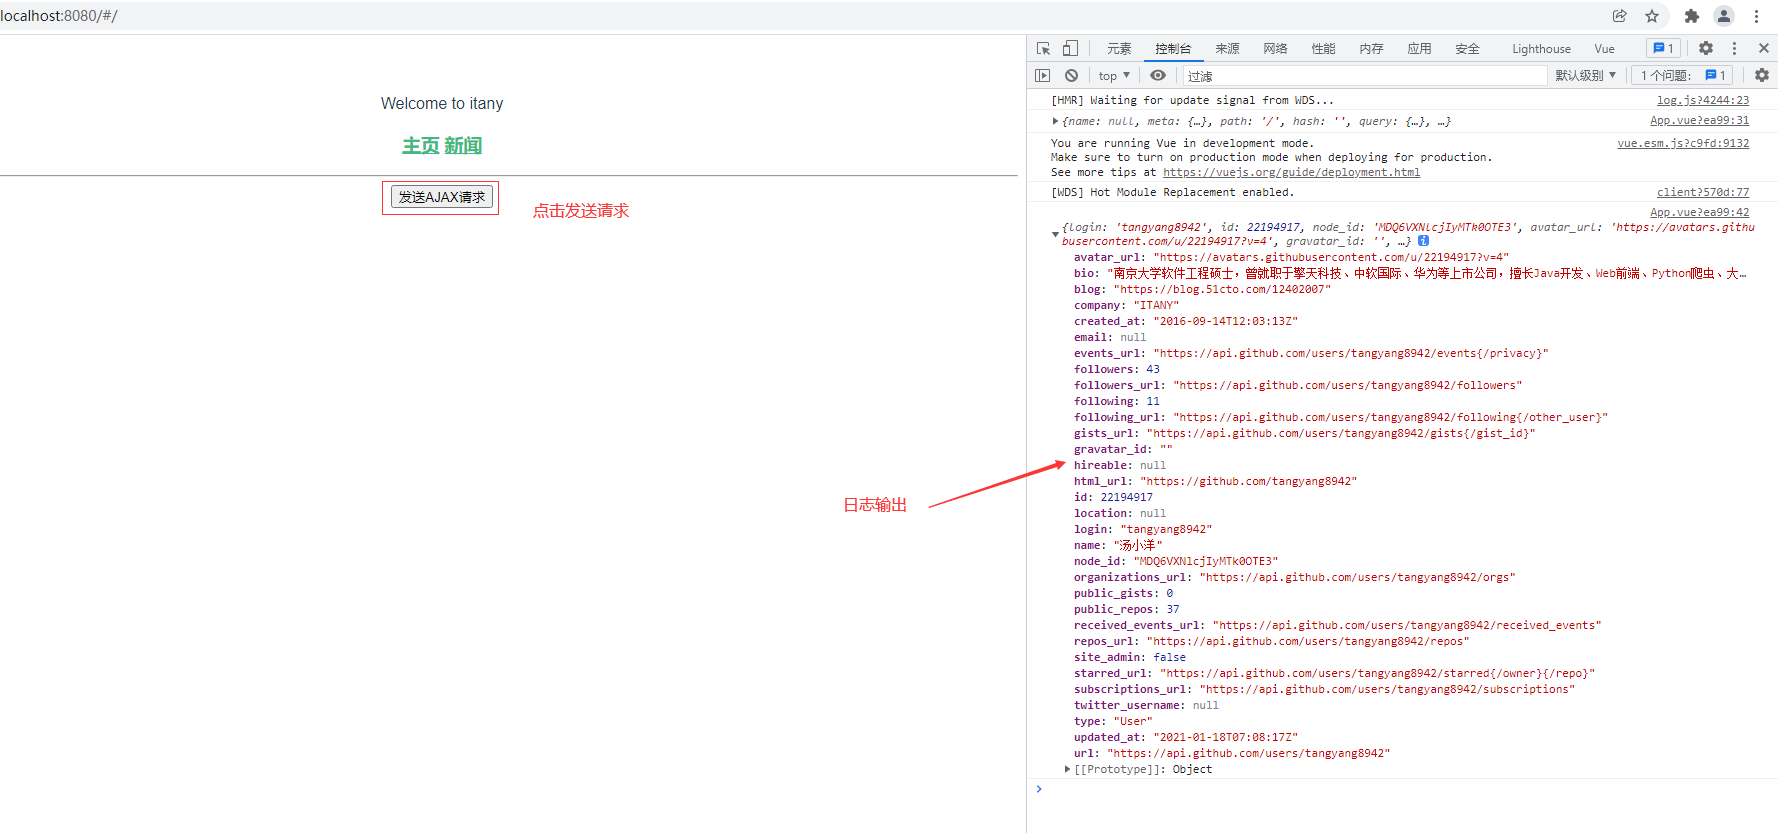
methods:{
send(){
axios.get('https://api.github.com/users/tangyang8942')
.then(resp=>{
console.log(resp.data);
}).catch(err=>{
console.log(err);
});
}
}
}
</script>
<style>
#app {
font-family: 'Avenir', Helvetica, Arial, sans-serif;
-webkit-font-smoothing: antialiased;
-moz-osx-font-smoothing: grayscale;
text-align: center;
color: #2c3e50;
margin-top: 60px;
}
h1, h2 {
font-weight: normal;
}
ul {
list-style-type: none;
padding: 0;
}
li {
display: inline-block;
margin: 0 10px;
}
a {
color: #42b983;
}
</style>
页面显示
如果需要在Home组件中引用则需要在Home.vue引入这样使用不方便
使用方式2示例
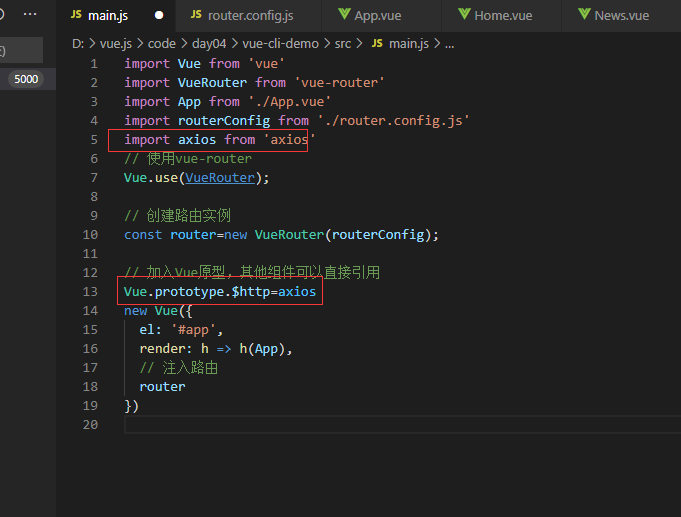
修改入口文件main.js
import Vue from 'vue'
import VueRouter from 'vue-router'
import App from './App.vue'
import routerConfig from './router.config.js'
import axios from 'axios'
// 使用vue-router
Vue.use(VueRouter);

// 创建路由实例
const router=new VueRouter(routerConfig);

// 加入Vue原型,其他组件可以直接引用
Vue.prototype.$http=axios
new Vue({
  el: '#app',
  render: h => h(App),
  // 注入路由
  router
})
需要使用axios的地方直接使用this.$http使用,修改App.vue

效果是一样的
3.为自定义组件添加事件
src/compoents自定义组件 MyButton.vue
<template>
    <button>自定义按钮</button>
</template>

<style>
    button{
        100px;
        height: 30px;
        background-color:#ccc;
        color:red;
    }
</style>
在App.vue引入组件并绑定事件send
<template>
  <div id="app">
    {{msg}}
    <h3>
      <router-link to="/home">主页</router-link>
      <router-link to="/news">新闻</router-link>
    </h3>
    <div>
      <keep-alive>
        <!-- 渲染显示 -->
        <router-view> </router-view>
      </keep-alive>
    </div>
    <hr>
    <button @click='send'>发送AJAX请求</button>
    <MyButton @click.native='send'></MyButton>
  </div>

</template>

<script>
// import axios from 'axios'
import MyButton from './components/MyButton.vue'

export default {
  name: 'app',
  data () {
    return {
      msg: 'Welcome to itany'
    }
  },
  mounted(){
    console.log(this.$route)
  },
  watch:{
    $route:function(newValue,oldValue) {
      console.log('路由发送变化,跳转到:'+newValue.path)
    }
  },
  methods:{
    send(){
      this.$http.get('https://api.github.com/users/tangyang8942')
      .then(resp=>{
        console.log(resp.data);
      }).catch(err=>{
        console.log(err);
      });
    }
  },
  components:{
    MyButton
  }
}
</script>

<style>
#app {
  font-family: 'Avenir', Helvetica, Arial, sans-serif;
  -webkit-font-smoothing: antialiased;
  -moz-osx-font-smoothing: grayscale;
  text-align: center;
  color: #2c3e50;
  margin-top: 60px;
}

h1, h2 {
  font-weight: normal;
}

ul {
  list-style-type: none;
  padding: 0;
}

li {
  display: inline-block;
  margin: 0 10px;
}

a {
  color: #42b983;
}
</style>
解析
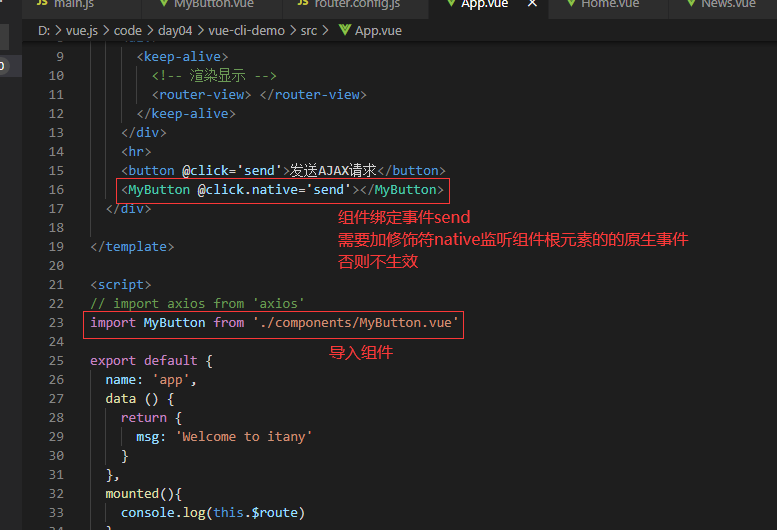
注意自定义需要需要加修饰符native监听组件根元素的原生事件,否则不生效
点击按钮调用send方法,和上面例子效果是一样的