1.整合SpringMVC
刚才案例已经能实现mvc自动配置,这里我们主要解决以下3个问题
- 修改端口
- 静态资源
- 拦截器配置
修改端口
查看SpringBoot的全局属性可知,端口通过以下方式配置:
# 映射端口
server.port=80
重启服务后测试:
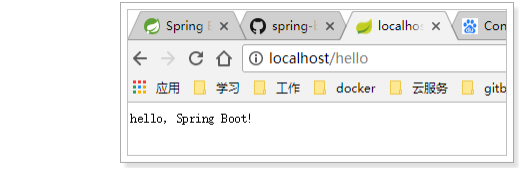
访问静态资源
ResourceProperties的类,里面就定义了静态资源的默认查找路径:
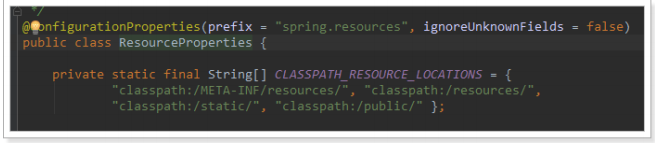
默认的静态资源路径为:
- classpath:/META-INF/resources/
- classpath:/resources/
- classpath:/static/
- classpath:/public
只要静态资源放在这些目录中任何一个,SpringMVC都会帮我们处理。
我们习惯会把静态资源放在 classpath:/static/ 目录下。我们创建目录,并且添加一些静态资源:
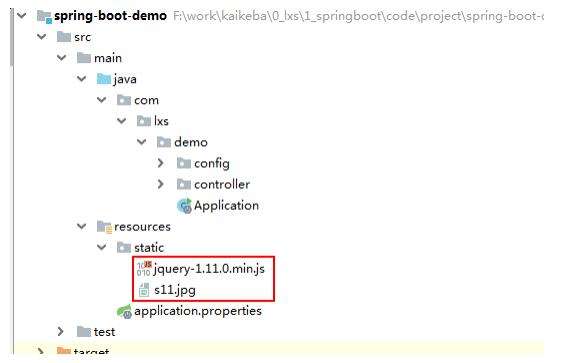
重启项目后测试:

添加拦截器
拦截器也是我们经常需要使用的,在SpringBoot中该如何配置呢?
首先我们定义一个拦截器:
public class LoginInterceptor implements HandlerInterceptor {

    private Logger logger = LoggerFactory.getLogger(LoginInterceptor.class);

    @Override
    public boolean preHandle(HttpServletRequest request, HttpServletResponse response, Object
handler) {
        logger.debug("处理器执行前执行!");
        return true;
    }

    @Override
    public void postHandle(HttpServletRequest request, HttpServletResponse response, Object
handler, ModelAndView modelAndView) {
        logger.debug("处理器执行后执行!");
    }

    @Override
    public void afterCompletion(HttpServletRequest request, HttpServletResponse response, Object
handler, Exception ex) {
        logger.debug("跳转后执行!");
    }
}
通过实现 WebMvcConfigurer 并添加 @Configuration 注解来实现自定义部分SpringMvc配置:
@Configuration
public class MvcConfig implements WebMvcConfigurer{
    /**
    * 通过@Bean注解,将我们定义的拦截器注册到Spring容器
    * @return
    */
    @Bean
    public LoginInterceptor loginInterceptor(){
        return new LoginInterceptor();
    }

    /**
    * 重写接口中的addInterceptors方法,添加自定义拦截器
    * @param registry
    */
    @Override
    public void addInterceptors(InterceptorRegistry registry) {
        // 通过registry来注册拦截器,通过addPathPatterns来添加拦截路径
        registry.addInterceptor(this.loginInterceptor()).addPathPatterns("/**");
    }
}
ant path路径匹配通配符
- ‘?’ 匹配任何单字符
- ‘*’ 匹配0或者任意数量的字符
- ‘/**’ 匹配0或者更多的目录
结构如下:
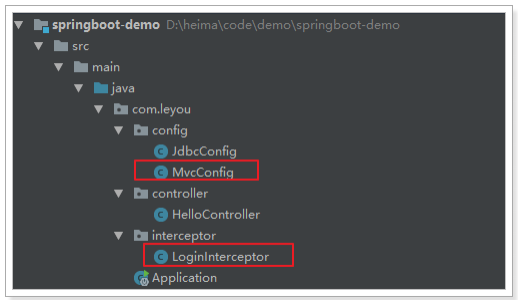
接下来运行并查看日志:
你会发现日志中什么都没有,因为我们记录的log级别是debug,默认是显示info以上,我们需要进行配置。
SpringBoot通过 logging.level.*=debug 来配置日志级别,*填写包名
# 设置com.lxs包的日志级别为debug
logging.level.com.lxs=debug
再次运行查看:
2018-05-05 17:50:01.811 DEBUG 4548 --- [p-nio-80-exec-1] com.lxs.interceptor.LoginInterceptor
: preHandle method is now running!
2018-05-05 17:50:01.854 DEBUG 4548 --- [p-nio-80-exec-1] com.lxs.interceptor.LoginInterceptor
: postHandle method is now running!
2018-05-05 17:50:01.854 DEBUG 4548 --- [p-nio-80-exec-1] com.lxs.interceptor.LoginInterceptor
: afterCompletion method is now running!
2.整合jdbc
导入t_user.sql数据库脚本
/*
SQLyog Ultimate v12.09 (64 bit)
MySQL - 5.7.18 : Database - springboot
*********************************************************************
*/


/*!40101 SET NAMES utf8 */;

/*!40101 SET SQL_MODE=''*/;

/*!40014 SET @OLD_UNIQUE_CHECKS=@@UNIQUE_CHECKS, UNIQUE_CHECKS=0 */;
/*!40014 SET @OLD_FOREIGN_KEY_CHECKS=@@FOREIGN_KEY_CHECKS, FOREIGN_KEY_CHECKS=0 */;
/*!40101 SET @OLD_SQL_MODE=@@SQL_MODE, SQL_MODE='NO_AUTO_VALUE_ON_ZERO' */;
/*!40111 SET @OLD_SQL_NOTES=@@SQL_NOTES, SQL_NOTES=0 */;
CREATE DATABASE /*!32312 IF NOT EXISTS*/`springboot` /*!40100 DEFAULT CHARACTER SET utf8 */;

USE `springboot`;

/*Table structure for table `tb_user` */

DROP TABLE IF EXISTS `tb_user`;

CREATE TABLE `tb_user` (
  `id` bigint(20) NOT NULL AUTO_INCREMENT,
  `user_name` varchar(50) DEFAULT NULL,
  `password` varchar(50) DEFAULT NULL,
  `name` varchar(50) DEFAULT NULL,
  `age` int(11) DEFAULT NULL,
  `sex` int(11) DEFAULT NULL,
  `birthday` date DEFAULT NULL,
  `created` date DEFAULT NULL,
  `updated` date DEFAULT NULL,
  `note` varchar(2000) DEFAULT NULL,
  PRIMARY KEY (`id`)
) ENGINE=InnoDB AUTO_INCREMENT=6 DEFAULT CHARSET=utf8;

/*Data for the table `tb_user` */

insert  into `tb_user`(`id`,`user_name`,`password`,`name`,`age`,`sex`,`birthday`,`created`,`updated`,`note`) values (1,'zhangsan','1','张三',18,1,'2019-02-27','2019-02-27','2019-02-27','在学习Java...'),(2,'lisi','1','李四',18,1,'2019-02-27','2019-02-27','2019-02-27','在学习Java...'),(3,'wangwu','1','王五',18,1,'2019-02-27','2019-02-27','2019-02-27','在学习Java...'),(4,'fanbingbing','1','范冰冰',18,2,'2019-02-27','2019-02-27','2019-02-27','在学习Java...'),(5,'guodegang','1','郭德纲',18,1,'2019-02-27','2019-02-27','2019-02-27','在学习Java...');

/*!40101 SET SQL_MODE=@OLD_SQL_MODE */;
/*!40014 SET FOREIGN_KEY_CHECKS=@OLD_FOREIGN_KEY_CHECKS */;
/*!40014 SET UNIQUE_CHECKS=@OLD_UNIQUE_CHECKS */;
/*!40111 SET SQL_NOTES=@OLD_SQL_NOTES */;
引入依赖
<dependency>
    <groupId>org.springframework.boot</groupId>
    <artifactId>spring-boot-starter-jdbc</artifactId>
</dependency>
<dependency>
    <groupId>org.springframework.boot</groupId>
    <artifactId>spring-boot-starter-test</artifactId>
</dependency>
当然,不要忘了数据库驱动,SpringBoot并不知道我们用的什么数据库,这里我们选择MySQL:
<dependency>
    <groupId>mysql</groupId>
    <artifactId>mysql-connector-java</artifactId>
    <version>5.1.46</version>
</dependency>
配置连接池
其实,在刚才引入jdbc启动器的时候,SpringBoot已经自动帮我们引入了一个连接池:
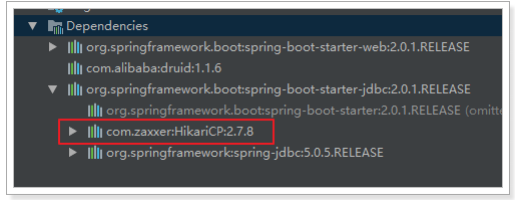
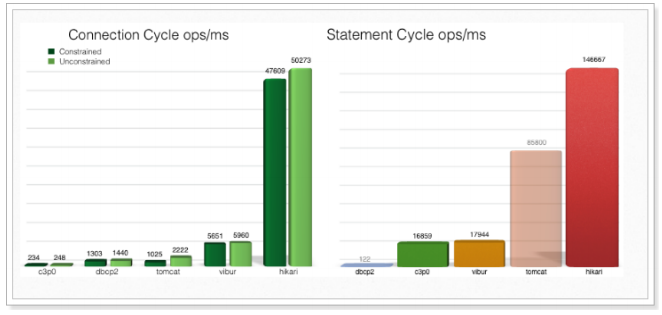
HikariCP应该是目前速度最快的连接池了,我们看看它与c3p0的对比:
因此,我们只需要指定连接池参数即可:
# 连接四大参数
spring.datasource.url=jdbc:mysql://localhost:3306/springboot
spring.datasource.username=root
spring.datasource.password=123
# 可省略,SpringBoot自动推断
spring.datasource.driverClassName=com.mysql.jdbc.Driver
spring.datasource.hikari.idle-timeout=60000
spring.datasource.hikari.maximum-pool-size=30
spring.datasource.hikari.minimum-idle=10
实体类
public class User implements Serializable {
    private Long id;
    // 用户名
    //自动转换下换线到驼峰命名user_name -> userName
    private String userName;
    // 密码
    private String password;
    // 姓名
    private String name;
    // 年龄
    private Integer age;
    // 性别,1男性,2女性
    private Integer sex;
    // 出生日期
    private Date birthday;
    // 创建时间
    private Date created;
    // 更新时间
    private Date updated;
    // 备注
    private String note;
}
dao
@Repository
public class JdbcDao {
    @Autowired
    private JdbcTemplate jdbcTemplate;
    public List<User> findAll() {
        return jdbcTemplate.query("select * from tb_user", new BeanPropertyRowMapper<>(User.class));
    }
}
测试
@RunWith(SpringRunner.class)
@SpringBootTest
public class JdbcDaoTest {

    @Autowired
    private JdbcDao jdbcDao;

    @Test
    public void findAll() {
        List<User> list = jdbcDao.findAll();
        for (User user : list) {
        System.out.println(user);
        }
    }
}
3.整合mybatis
mybatis
SpringBoot官方并没有提供Mybatis的启动器,不过Mybatis官网自己实现了:
<!--mybatis -->
<dependency>
    <groupId>org.mybatis.spring.boot</groupId>
    <artifactId>mybatis-spring-boot-starter</artifactId>
    <version>1.3.2</version>
</dependency>
配置,基本没有需要配置的:
# mybatis 别名扫描
mybatis.type-aliases-package=com.lxs.domain
# mapper.xml文件位置,如果没有映射文件,请注释掉
mybatis.mapper-locations=classpath:mappers/*.xml
实体类,直接使用之前jdbc用到的实体类
public class User implements Serializable {
    private Long id;
    // 用户名
    //自动转换下换线到驼峰命名user_name -> userName
    private String userName;
    // 密码
    private String password;
    // 姓名
    private String name;
    // 年龄
    private Integer age;
    // 性别,1男性,2女性
    private Integer sex;
    // 出生日期
    private Date birthday;
    // 创建时间
    private Date created;
    // 更新时间
    private Date updated;
    // 备注
    private String note;
}
接口
public interface UserDao {
    public List<User> findAll();
}
映射文件
<?xml version="1.0" encoding="UTF-8"?>
<!DOCTYPE mapper PUBLIC "-//mybatis.org//DTD Mapper 3.0//EN"
"http://mybatis.org/dtd/mybatis-3-mapper.dtd">


<mapper namespace="com.lxs.demo.dao.UserDao">
  <select id="findAll" resultType="user">
    select * from tb_user
  </select>
</mapper>
Mapper的加载接口代理对象方式有2种
第一种:使用@Mapper注解(不推荐)
需要注意,这里没有配置mapper接口扫描包,因此我们需要给每一个Mapper接口添加 @Mapper 注解,才能被识别。
第二种设置MapperScan,注解扫描的包(推荐)
@MapperScan("dao所在的包"),自动搜索包中的接口,产生dao的代理对象
@SpringBootApplication
@MapperScan("com.lxs.demo.dao")
    public class Application {
        public static void main(String[] args) {
        SpringApplication.run(Application.class, args);
    }
}
测试
引入测试构建
<dependency>
    <groupId>org.springframework.boot</groupId>
    <artifactId>spring-boot-starter-test</artifactId>
</dependency>
测试代码
@RunWith(SpringRunner.class)
@SpringBootTest
public class UserDaoTest {
    @Autowired
    private UserDao userDao;
    @Test
    public void testFindAll() {
        List<User> list = userDao.findAll();
    }
}
通用mapper
概念
使用Mybatis时,最大的问题是,要写大量的重复SQL语句在xml文件中,除了特殊的业务逻辑SQL语句之外,
还有大量结构类似的增删改查SQL。而且,当数据库表结构改动时,对应的所有SQL以及实体类都需要更改。
这大量增加了程序员的负担。避免重复书写CRUD映射的框架有两个:
- 通用mybatis(tk mybatis)
- mybatis plus,通能更加强大
通用Mapper的作者也为自己的插件编写了启动器,我们直接引入即可:
<!-- 通用mapper -->
<dependency>
    <groupId>tk.mybatis</groupId>
    <artifactId>mapper-spring-boot-starter</artifactId>
    <version>2.0.2</version>
</dependency>
实体类
tk mybatis 实体类使用的注解是jpa注解
@Table(name = "tb_user")
public class User implements Serializable {
    private static final long serialVersionUID = 1L;

    @Id
    @GeneratedValue(strategy = GenerationType.IDENTITY)
    private Long id;

    // 用户名
    private String userName;
    ....
注意事项:
1. 默认表名=类名,字段名=属性名
2. 表名可以使用 @Table(name = "tableName") 进行指定
3. @Column(name = "fieldName") 指定
4. 使用 @Transient 注解表示跟字段不进行映射
不需要做任何配置就可以使用了。
@Mapper
public interface UserMapper extends tk.mybatis.mapper.common.Mapper<User>{
    public List<User> findByUser(User user);
}
自定义映射文件
映射复杂方法 resources/mappers/UserMapper.xml
<?xml version="1.0" encoding="UTF-8"?>
<!DOCTYPE mapper PUBLIC "-//mybatis.org//DTD Mapper 3.0//EN"
"http://mybatis.org/dtd/mybatis-3-mapper.dtd">
<mapper namespace="com.lxs.demo.dao.UserMapper">
    <select id="findByUser" resultType="user">
    SELECT * FROM tb_user
    <where>
        <if test="name != null">
        name like '%${name}%'
        </if>
        <if test="note != null">
        and note like '%${note}%'
        </if>
    </where>
    </select>
</mapper>
一旦继承了Mapper,继承的Mapper就拥有了Mapper所有的通用方法:
Select 方法: List<T> select(T record); 说明:根据实体中的属性值进行查询,查询条件使用等号
方法: T selectByPrimaryKey(Object key); 说明:根据主键字段进行查询,方法参数必须包含完整的主键属性,
查询条件使用等号
方法: List<T> selectAll(); 说明:查询全部结果,select(null)方法能达到同样的效果
方法: T selectOne(T record); 说明:根据实体中的属性进行查询,只能有一个返回值,有多个结果是抛出异
常,查询条件使用等号
方法: int selectCount(T record); 说明:根据实体中的属性查询总数,查询条件使用等号
Insert 方法: int insert(T record); 说明:保存一个实体,null的属性也会保存,不会使用数据库默认值
方法: int insertSelective(T record); 说明:保存一个实体,null的属性不会保存,会使用数据库默认值
Update 方法: int updateByPrimaryKey(T record); 说明:根据主键更新实体全部字段,null值会被更新
方法: int updateByPrimaryKeySelective(T record); 说明:根据主键更新属性不为null的值
Delete 方法: int delete(T record); 说明:根据实体属性作为条件进行删除,查询条件使用等号
方法: int deleteByPrimaryKey(Object key); 说明:根据主键字段进行删除,方法参数必须包含完整的主键属性
Example方法 方法: List<T> selectByExample(Object example); 说明:根据Example条件进行查询 重点:这
个查询支持通过 Example 类指定查询列,通过 selectProperties 方法指定查询列
方法: int selectCountByExample(Object example); 说明:根据Example条件进行查询总数
方法: int updateByExample(@Param("record") T record, @Param("example") Object example); 说明:根据
Example条件更新实体 record 包含的全部属性,null值会被更新
方法: int updateByExampleSelective(@Param("record") T record, @Param("example") Object example); 说
明:根据Example条件更新实体 record 包含的不是null的属性值
方法: int deleteByExample(Object example); 说明:根据Example条件删除数据
注意要把MapperScan类改成tk-mybatis构件的类
import tk.mybatis.spring.annotation.MapperScan;
@SpringBootApplication
@EnableConfigurationProperties
@MapperScan("com.lxs.demo.dao")
    public class Application {
注意:必须使用tk mybatis的MapperScan
启动测试
@RunWith(SpringRunner.class)
@SpringBootTest
public class UserDaoTest {
    @Autowired
    private UserDao userDao;

    @Test
    public void testFindByUser() {
        User condition = new User();
        condition.setName("a");
        List<User> list = userMapper.findByUser(condition);
        for (User user : list) {
            System.out.println(user);
        }
}

@Test
public void testFindAll() {
    List<User> list = userDao.selectAll();
    for (User user : list) {
        System.out.println(user);
    }
}

@Test
public void testFindById() {
    User user = userDao.selectByPrimaryKey(4);
    System.out.println(user);
}

@Test
public void testFindByExample() {
    Example example = new Example(User.class);
    example.createCriteria().andLike("name", "%a%");
    userMapper.selectByExample(example).forEach(user -> {
    System.out.println(user);
    });
}

@Test
public void testInsert() {
    User user = new User();
    user.setAge(18);
    user.setBirthday(new Date());
    user.setCreated(new Date());
    user.setName("周星驰");
    userDao.insert(user);
}