1:安装
1.1:在ubuntu1804上安装docker的社区版,具体配置信息如下:
 1 # step 1: 安装必要的一些系统工具
 2 root@template-ubuntu-20200606:~# sudo apt-get update
 3 root@template-ubuntu-20200606:~# sudo apt-get -y install apt-transport-https ca-certificates curl software-properties-common
 4 # step 2: 安装GPG证书
 5 root@template-ubuntu-20200606:~# curl -fsSL https://mirrors.aliyun.com/docker-ce/linux/ubuntu/gpg | sudo apt-key add -
 6 # Step 3: 写入软件源信息
 7 root@template-ubuntu-20200606:~# sudo add-apt-repository "deb [arch=amd64] https://mirrors.aliyun.com/docker-ce/linux/ubuntu $(lsb_release -cs) stable"
 8 # Step 4: 更新并安装软件源里Docker-CE的最新版
 9 root@template-ubuntu-20200606:~# sudo apt-get -y update
10 root@template-ubuntu-20200606:~# sudo apt-get -y install docker-ce
11
12 # 安装指定版本的Docker-CE:
13 # Step 1: 查找Docker-CE的版本:
14 root@template-ubuntu-20200606:~# apt-cache madison docker-ce
15 #   docker-ce | 17.03.1~ce-0~ubuntu-xenial | https://mirrors.aliyun.com/docker-ce/linux/ubuntu xenial/stable amd64 Packages
16 #   docker-ce | 17.03.0~ce-0~ubuntu-xenial | https://mirrors.aliyun.com/docker-ce/linux/ubuntu xenial/stable amd64 Packages
17 # Step 2: 安装指定版本的Docker-CE: (VERSION例如上面的17.03.1~ce-0~ubuntu-xenial)
18 root@template-ubuntu-20200606:~#  sudo apt-get -y install docker-ce=[VERSION]  docker-ce-cli=[VERSION]
这了目前这步,docker已经安装成功
启动并设置docker开机启动
1 启动并设置开机启动
2 root@template-ubuntu-20200606:~# systemctl start docker
3 root@template-ubuntu-20200606:~# systemctl enable docker
4 Synchronizing state of docker.service with SysV service script with /lib/systemd/systemd-sysv-install.
5 Executing: /lib/systemd/systemd-sysv-install enable docker
验证docker的版本,见如下图片
1 root@template-ubuntu-20200606:~# docker -v
2 Docker version 18.09.9, build 039a7df9ba

1.2:在centos7系统上通过yum安装docker的社区版
 1 # step 1: 安装必要的一些系统工具
 2 [root@molson ~]#  yum install -y yum-utils device-mapper-persistent-data lvm2
 3 # Step 2: 添加软件源信息
 4 [root@molson ~]#  yum-config-manager --add-repo https://mirrors.aliyun.com/docker-ce/linux/centos/docker-ce.repo
 5 # Step 3: 更新并安装Docker-CE
 6 [root@molson ~]#  yum makecache fast
 7 [root@molson ~]#  yum -y install docker-ce
 8 # Step 4: 开启Docker服务
 9 [root@molson ~]# service docker start
10
11 # 注意:
12 # 官方软件源默认启用了最新的软件,您可以通过编辑软件源的方式获取各个版本的软件包。例如官方并没有将测试版本的软件源置为可用,您可以通过以下方式开启。同理可以开启各种测试版本等。
13 # vim /etc/yum.repos.d/docker-ee.repo
14 #   将[docker-ce-test]下方的enabled=0修改为enabled=1
15 #
16 # 安装指定版本的Docker-CE:
17 # Step 1: 查找Docker-CE的版本:
18 [root@molson ~]#  yum list docker-ce.x86_64 --showduplicates | sort -r
19 #   Loading mirror speeds from cached hostfile
20 #   Loaded plugins: branch, fastestmirror, langpacks
21 #   docker-ce.x86_64            17.03.1.ce-1.el7.centos            docker-ce-stable
22 #   docker-ce.x86_64            17.03.1.ce-1.el7.centos            @docker-ce-stable
23 #   docker-ce.x86_64            17.03.0.ce-1.el7.centos            docker-ce-stable
24 #   Available Packages
25 # Step2: 安装指定版本的Docker-CE: (VERSION例如上面的17.03.0.ce.1-1.el7.centos)
26 [root@molson ~]#  yum -y install docker-ce-版本 docker-ce-cli-版本
到了这步,dockers已经按照成功了,设置docker开机启动
1 [root@molson ~]# systemctl start docker
2 [root@molson ~]# systemctl enable docker
3 Created symlink from /etc/systemd/system/multi-user.target.wants/docker.service to /usr/lib/systemd/system/docker.service.
验证按照docker的版本信息
1 [root@molson ~]# docker -v
2 Docker version 18.09.9, build 039a7df9ba

2:Docker的基本操作
2.1:容器的状态
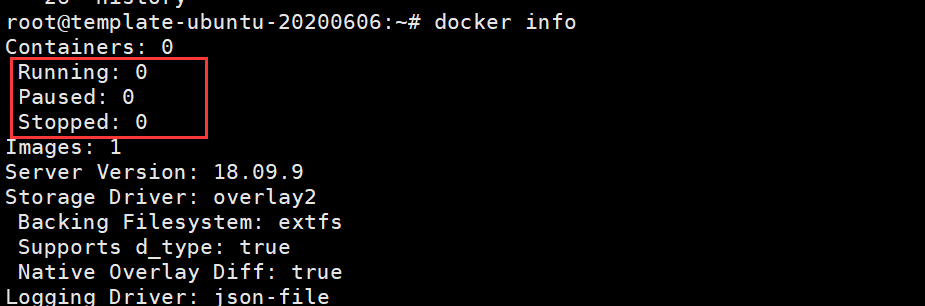
一个容器在某个时间点有以下的状态信息:
1 created:已经被创建 (使用 docker ps -a 命令可以列出)但是还没有被启动 (使用 docker ps 命令还无法列出)
2 running:运行中
3 paused:容器的进程被暂停了
4 restarting:容器的进程正在重启过程中
5 exited:上图中的 stopped 状态,表示容器之前运行过但是现在处于停止状态(要区别于 created 状态,它是指一个新创出的尚未运行过的容器)。可以通过 start 命令使其重新进入 running 状态
6 destroyed:容器被删除了,再也不存在了
可以通过docker info 命令查看当前宿主机上容器状态信息,具体信息如下图
2.2:docker镜像管理
Docker镜像含有启动容器所需要的文件系统及所需要的内容,因此镜像主要用于创建启动docker容器。
2.2.1:搜索镜像
在官方的docker仓库钟搜索指定的docker镜像,会发现里面有好多镜像文件,如下图
1 #不指定版本搜索
2 docker search centos:7.6
3
4 #指定版本搜索
5 docker search centos:7.6

2.2.2:下载镜像
从docker仓库中下载镜像到本地文件,格式命令如下
root@template-ubuntu-20200606:~# docker pull 仓库服务器:端口/项目名称/镜像名称:tag(版本)号
具体下载某个镜像如下图:
1 root@template-ubuntu-20200606:~#docker pull alpine
2
3 root@template-ubuntu-20200606:~#docker pull nginx
4
5 root@template-ubuntu-20200606:~#docker pull centos
6
7 root@template-ubuntu-20200606:~#docker pull httpd
8
9 root@template-ubuntu-20200606:~#docker pull tomcat
2.2.3:查看本地的镜像文件,主要使用命令:docker images,具体见如下图片

通过上图可以很清楚的看到镜像的相关信息如下:
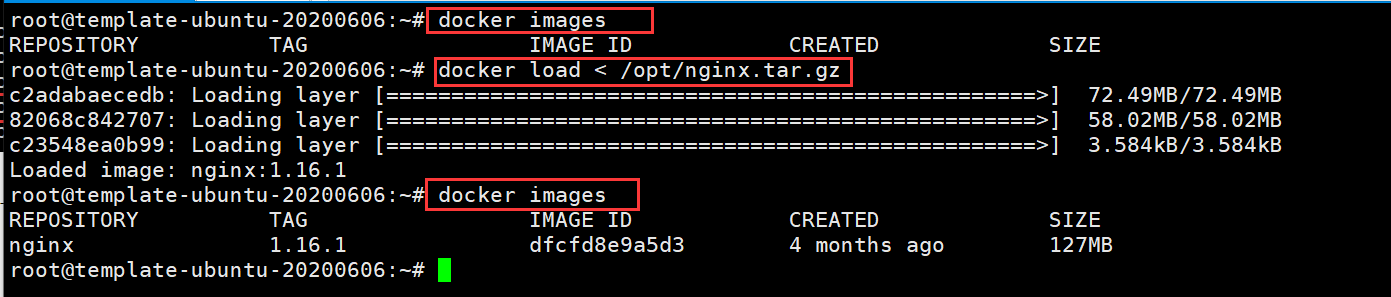
2.2.5:镜像导入
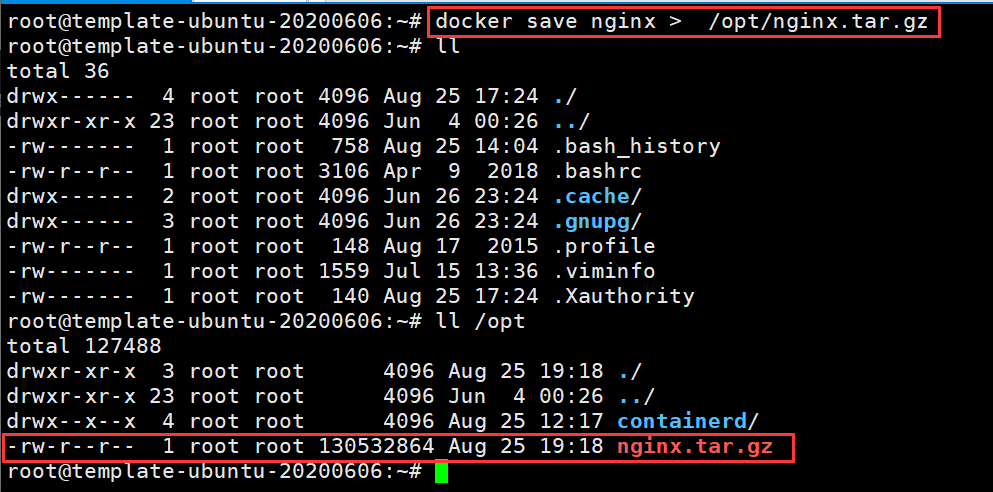
将镜像导入到docker中,命令如下:docker load < 镜像文件,具体见下图
2.2.6:删除镜像
将镜像从docker中删除,命令如下:docker rmi 镜像名称,具体如下图

总结:企业使用镜像及常见的操作主要是以下几种:搜索,下载,导出,导入,删除
命令总结:
# docker load -i centos-latest.tar.xz #导入本地镜像
# docker save 镜像名 > /opt/导出文件名 #导出镜像
# docker rmi 镜像ID/镜像名称 #删除指定ID的镜像,通过镜像启动容器的时候镜像不能被删除,除非将容器全部关闭
# docker rm 容器ID/容器名称 #删除容器
# docker rm 容器ID/容器名-f #强制删除正在运行的容器