通过关键点Keypoints中两个API的学习,对应于BBox,其应该也会存在两个API,一个用于生成BBox,另一个整合BBox。
事实上,开发人员也是这样设计的:
-
-
BoundingBoxesOnImage
不知道之后其他的标记是不是也是这样!
BBox
对于BBox,通常用于目标检测中对物体进行标记,此处为矩形。因此,其通过左上角点和右下角点的坐标表示(x1,y1,x2,y2)。
与关键点Keypoints一致,其只受改变图像几何外观的图像增强技术的影响,高斯噪声之类的对其没有影响。
API: BoundingBox
BBox的输入参数:
imgaug.augmentables.bbs.BoundingBox(x1, y1, x2, y2, label=None):
可以看到,包含5个输入,4个坐标和1个物体类别标签label。
BoundingBox有一些重要的属性:.x1, .y1, .x2, .y2, .height, .width, .center_x, .center_y, .area
BBox的一些方法:
-
project(from_shape, to_shape) : 投射一个bbox从一个尺寸大小的图像到另一个尺寸大小。
-
*extend([all_sides], [top], [right], [bottom], [left]) *
-
*intersection(other, [default]) * :交集
-
*union(other) * :并集
-
*iou(other) * : 交并比
-
*is_fully_within_image(image) * 判断所有的bbox是否都在图像内
-
*is_partly_within_image(image) * 确定bbox至少有一部分在图像内
-
*clip_out_of_image(image) * :剪切掉在图像外侧的BBox
-
*shift([x], [y]) * : 移动bbox
-
*draw_on_image(image, [color], [alpha], [size], [copy], [raise_if_out_of_image]) *:绘制BBox和它的label
-
*draw_label_on_image(image, [color], [color_text], [color_bg], [alpha], [size], [size_text], [height], [copy], [raise_if_out_of_image]) * :只绘制label
-
*draw_box_on_image(image, [color], [alpha], [size], [copy], [raise_if_out_of_image) * :只绘制边框
-
*extract_from_image(image, [pad], [pad_max], [prevent_zero_size] *:从图像中提取边框中包含的像素
API:BoundingBoxesOnImage
BoundingBoxesOnImage()输入参数:
imgaug.augmentables.bbs.BoundingBoxesOnImage(bounding_boxes, shape)
BoundingBoxesOnImage中包含的一些方法:
-
on(image): 图形变化后bbox的再计算
-
*from_xyxy_array(xyxy, shape) *: 通过(N, 4)numpy数组生成
-
*to_xyxy_array([dtype]) *: 生成(N, 4)的numpy数组
-
*draw_on_image([color], [alpha], [size], [copy], [raise_if_out_of_image]) *:绘制bbox和image
-
*remove_out_of_image([fully], [partly]) *: 移除掉一些完全不在或者部分不在图像中的bbox
-
*clip_out_of_image() *: 剪切掉所有的bbox
-
*shift([x], [y]) *:平移所有的bbox
另外,imgaug中还有一些其他的API,例如增强BBOx和图像aug.augment(images=..., bounding_boxes=...) && aug.augment_bounding_boxes()。
Example
绘制bbox
1 import imgaug as ia
2 import imageio
3 from imgaug.augmentables.bbs import BoundingBox, BoundingBoxesOnImage
4 %matplotlib inline
5 ia.seed(1)
6 img = imageio.imread("samoye.jpg")
7 bbs = BoundingBoxesOnImage([
8     BoundingBox(x1=65, y1=1, x2=417, y2=396)], shape=img.shape)
9 ia.imshow(bbs.draw_on_image(img, size=2))
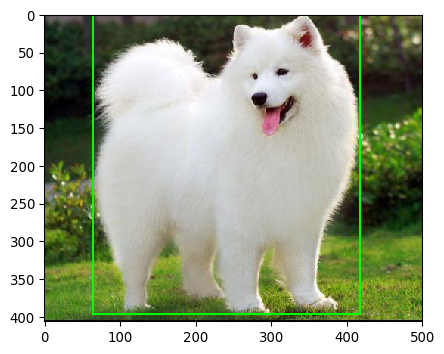
对图像使用增强方法后绘制
仿射变换
1 # 定义方法 2 from imgaug import augmenters as iaa 3 ia.seed(1) 4 5 seq = iaa.Sequential([iaa.GammaContrast(1.5), 6 iaa.Affine(translate_percent={"x":0.1}, scale=0.8)]) 7 8 # 作用于图像和bbox上 9 image_aug, bbs_aug = seq(image=img, bounding_boxes=bbs) 10 # 绘制 11 ia.imshow(bbs_aug.draw_on_image(image_aug, size=2))
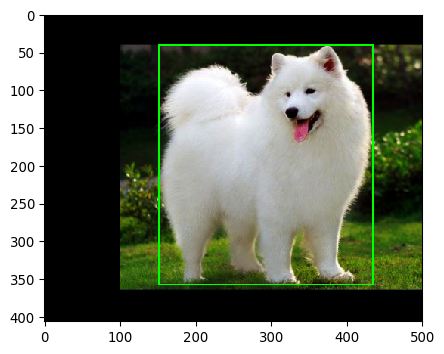
旋转45°包含的问题
1 image_aug, bbs_aug = iaa.Affine(rotate=45)(image=img, bounding_boxes=bbs)
2 ia.imshow(bbs_aug.draw_on_image(image_aug, size=1))
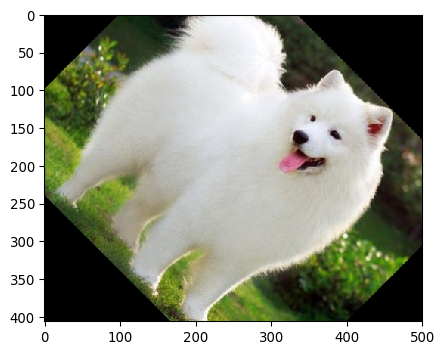
官方教程中使用的图像旋转后可以看到bbox,但bbox并未很好的跟随目标进行旋转。这里使用的图像旋转后,并不能看到bbox。官方教程中解释说这种问题源于非目标像素是边框的一部分。在旋转之后,必须绘制一个新的边界框来合并这些非对象像素。
绘制
和关键点一致,bbox的draw_on_image()方法同样可以通过color、size、alpha等参数调节bbox的颜色 粗细 透明度。
1 import numpy as np
2 image_bbs = np.copy(img)
3 image_bbs = bbs.draw_on_image(img, color=[255, 0, 0], size=3)
4 print("color=[255,0,0],size=3,")
5 ia.imshow(image_bbs)
6 print("color=[0,255,0],size=10,alpha=0.5")
7 image_bbs_1=bbs.draw_on_image(img, color=[0,255,0],size=10,alpha=0.5)
8 ia.imshow(image_bbs_1)
color=[255,0,0],size=3,
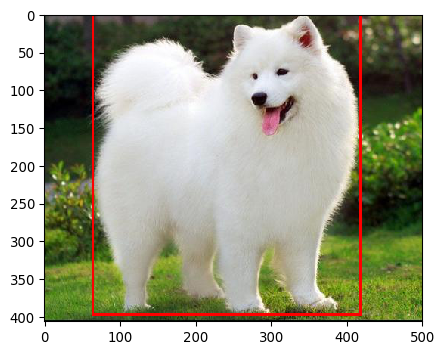
color=[0,255,0],size=10,alpha=0.5
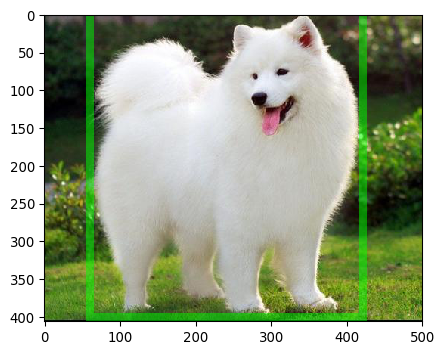
从中又可以看出,当size较大时,靠近边缘的bbox边界有可能绘制不出。
另外,bbox通常用于目标检测,需要添加目标的label进行可视化。bbox中还包含label的字段。当bbox初始化时包含了label,显示时就会直接显示label;若初始化时未赋值label,则需要赋值才可以显示。
1 bbs_label = bbs.deepcopy() 2 bbs_label[0].label = "dog" 3 4 image_bbs = bbs_label.draw_on_image(img, size=1) 5 ia.imshow(image_bbs)
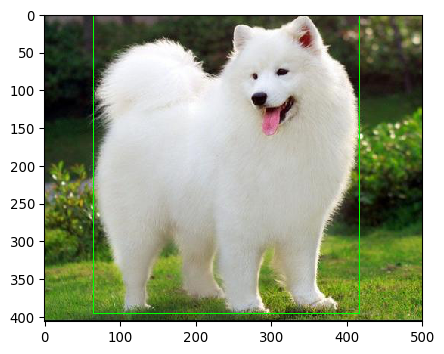
但由于上边框贴近图像边缘,label并未绘制显示。
换一张图像...
1 image = imageio.imread("fox.jpg")
2
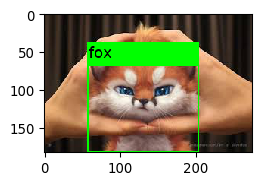
3 bbox = BoundingBoxesOnImage([BoundingBox(x1=58, y1=19, x2=203, y2=183)
4                             ], shape=image.shape)
5 bbox[0].label = "fox"
6 image_bbox = bbox.draw_on_image(image, size=2)
7 ia.imshow(image_bbox)

提取目标区域
BoundingBox包含extract_from_image(image)方法,可以提取出目标区域的图像。
1 fox = bbox.bounding_boxes[0].extract_from_image(image)
2 ia.imshow(fox)
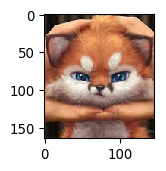
如果想要提取到目标及目标周边的一些区域,可以结合使用extend方法,先将bbox进行延伸,再提取延伸后的bbox区域的图像。
1 fox = bbox.bounding_boxes[0].extend(
2     all_sides=0, left=30, right=10).extract_from_image(image)
3 ia.imshow(fox)
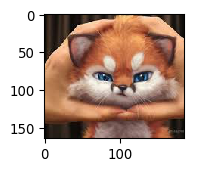
除了extend方法,shift方法可以对bbox进行移动,就像Keypoints。
1 bb = bbox.bounding_boxes[0].shift(x=20, y=20)
2 ia.imshow(bb.draw_on_image(image, size=2))
3 ia.imshow(bb.extract_from_image(image))
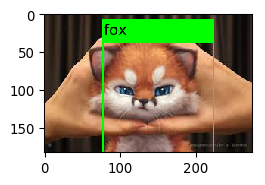
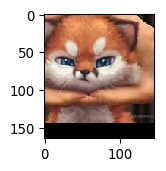
综上所述,extend可以更改bbox的形状,可以扩张或者缩小bbox;而shift只能对bbox进行平移,不会影响bbox的尺寸。
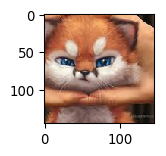
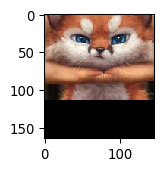
同时,当对原有的bbox往y轴方向移动20个像素点,bbox将会处于图像外界。如上述第二张图像,会有一溜黑边。当然,如果不希望出现这种情况,可以增加参数pad=False,如下述图所示,生成的图像将不会有黑边。
1 bb = bbox.bounding_boxes[0].shift(x=20, y=20)
2 ia.imshow(bb.extract_from_image(image, pad=False))
裁剪bbox
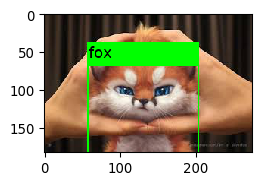
当图像经过变换后,对应的bbox有可能部分处于图像的外侧,剪掉图像平面外的边界框的部分可以使用.clip_out_of_image(<image or shape tuple>)方法。下述代码首先将bbox移动到部分处于图像外侧,并对bbox进行裁剪。
 1 print("-------------------")
 2 print("shifted by 50 px - y")
 3 print("-------------------")
 4 bb = bbox.bounding_boxes[0].shift(y=50)
 5 print("before clip")
 6 ia.imshow(bb.draw_on_image(image, size=2))
 7 ia.imshow(bb.extract_from_image(image))
 8 bb_clip =bb.clip_out_of_image(image.shape)
 9 print("after clip")
10 ia.imshow(bb_clip.draw_on_image(image, size=2))
11 ia.imshow(bb_clip.extract_from_image(image))
-------------------
shifted by 50 px - y
-------------------
before clip
after clip
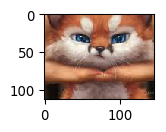
可以看出,当剪切掉图像外侧的bbox后,在原图中显示的bbox可以很好的显示边界。
将bbox投射到其他图像上
与Keypoints相同,bbox也具有应对图像缩放后保持bbox一致的方法:
-
project
-
on
 1 import numpy as np
 2 import imageio
 3 import imgaug as ia
 4 from imgaug.augmentables.bbs import BoundingBox, BoundingBoxesOnImage
 5 from imgaug import augmenters as iaa
 6 %matplotlib inline
 7 img = imageio.imread("koala.jpg")
 8
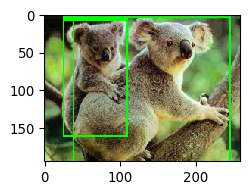
 9 bbox = BoundingBoxesOnImage([BoundingBox(x1=26, y1=8, x2=109, y2=160)
10                             , BoundingBox(x1=39, y1=4, x2=245, y2=194)], shape=img.shape)
11 bbox[0].label = "koala"
12 bbox[1].label = "koala"
13 ia.imshow(bbox.draw_on_image(img, size=2))
14 print(img.shape)
(194, 259, 3)
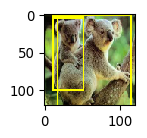
将图像缩放到120*120
1 img_resize = ia.imresize_single_image(img, (120, 120))
2 ia.imshow(img_resize)
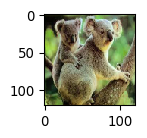
1 print("Bounding box without changes:")
2 ia.imshow(bbox.draw_on_image(img_resize, size=2))
3
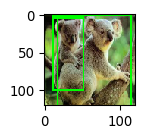
4 print("Bounding box with project(from, to)")  # 需要对bbox中的Boundingbox进行处理
5 ia.imshow(bbox.bounding_boxes[0].project(from_shape=img.shape, to_shape=img_resize.shape).draw_on_image(img_resize, size=2, copy=False))
6 ia.imshow(bbox.bounding_boxes[1].project(from_shape=img.shape, to_shape=img_resize.shape).draw_on_image(img_resize, size=2, copy=False))
7
8 print("Bounding box with on(shape)")   # 可以对整个bbox进行处理
9 ia.imshow(bbox.on(img_resize.shape).draw_on_image(img_resize, color=(255,255,0), size=2))
Bounding box without changes:
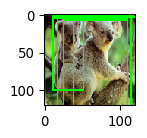
Bounding box with project(from, to)
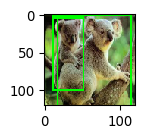
Bounding box with on(shape)
交集、并集、交并比
bbox之间通常会计算IoU,imgaug中提供了相应的方法:
-
BoundingBox.intersection(other_bounding_box)
-
BoundingBox.union(other_bounding_box)
-
BoundingBox.iou(other_bounding_box)
intersection
1 bb_intersection = bbox.bounding_boxes[0].intersection(bbox.bounding_boxes[1])
2 ia.imshow(bb_intersection.draw_on_image(img, size=2))
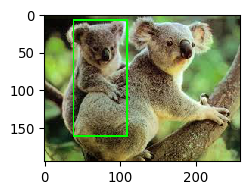
如上图所示,返回的bb_intersection实际上是两个bbox交集的bbox。
同时,可以通过bb_intersection获取到交集的高度、宽度、面积等信息。
1 print("The intersection has a height of %.4f, width of %.4f and an area of %.4f"%(
2 bb_intersection.height, bb_intersection.width, bb_intersection.area))
The intersection has a height of 152.0000, width of 70.0000 and an area of 10640.0000
union
1 bb_union = bbox.bounding_boxes[0].union(bbox.bounding_boxes[1])
2 ia.imshow(bb_union.draw_on_image(img, size=2))
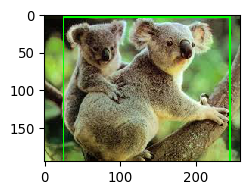
如上图所示,返回的bb_union实际上是两个bbox并集的bbox。
同理,可以通过bb_bb_union获取到交集的高度、宽度、面积等信息。
1 print("The union has a height of %.4f, width of %.4f and an area of %.4f"%(
2 bb_union.height, bb_union.width, bb_union.area))
The union has a height of 190.0000, width of 219.0000 and an area of 41610.0000
IoU
1 iou = bbox.bounding_boxes[0].iou(bbox.bounding_boxes[1])
2 print("IoU: %.4f"%(iou))
IoU: 0.2588
整理总结
本节主要介绍了imgaug中BoundingBox和BoundingBoxesOnImage两个API,以及API中包含的方法。