3.1 基本操作
-
注册GitHub账号
-
在本地创建一个本地库并初始化
-
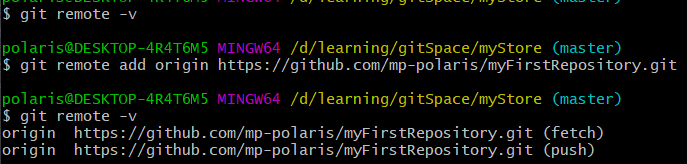
登录到GitHub创建一个远程库
注意:windows的凭据管理器中会保存github登录信息。如果要切换登录者,先删除相应凭据
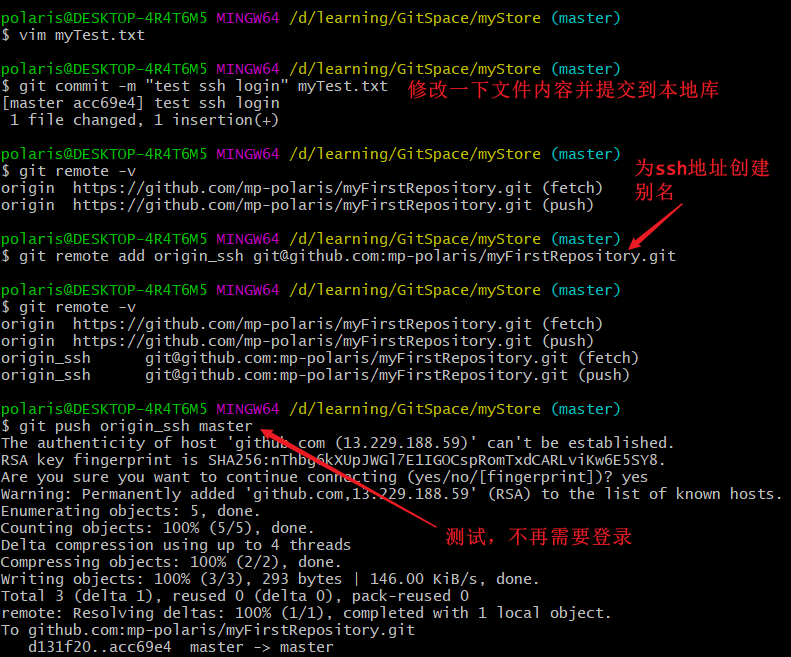
- 给远程库地址起一个别名
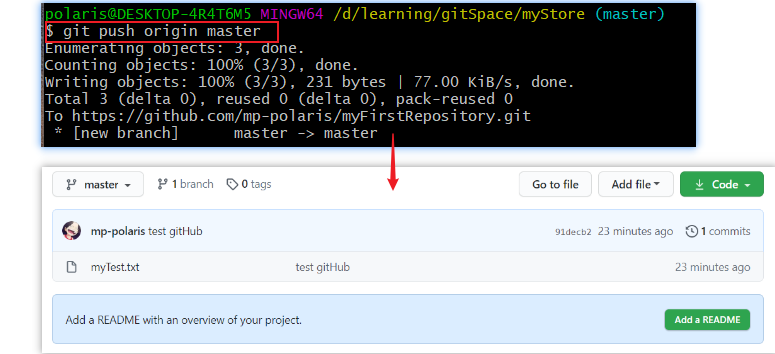
3.2 push操作
git push [远程地址] [分支名]
-
两个参数
-
-u
git push -u表示加了参数-u后,以后即可直接用git push代替git push origin master -
-f
git push -f表示将目前自己本机的代码库推送到远端,并覆盖
-
注:其实在推送时,尽量避免
git push -f的操作,或者说git push -f是一个需要谨慎的操作,它是将本地历史覆盖到远端仓库的行为。例如b开发者在a进行git push -f前已经进行git pull操作,所以历史上的commit2是可以查找到,但是如果没有任何其他开发者进行pull,a再改变历史并强制推送,这部分数据就会丢失。当然也并非禁止使用-f,有时,如果代码组内review后,确认代码正确无误,保证大家未pull的情况下,强制推送后,可以保持目录树清洁。
3.3 clone操作
git clone[远程地址]
能够完整的把远程库下载到本地
同时会替我们创建origin远程地址别名
会初始化本地库

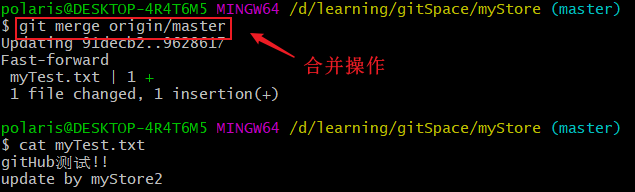
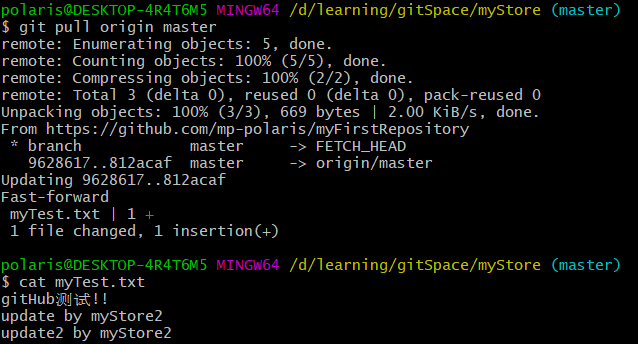
3.4 pull操作
pull操作是fetch操作和merge操作的合并
git fetch [远程库地址别名] [远程分支名] 命令
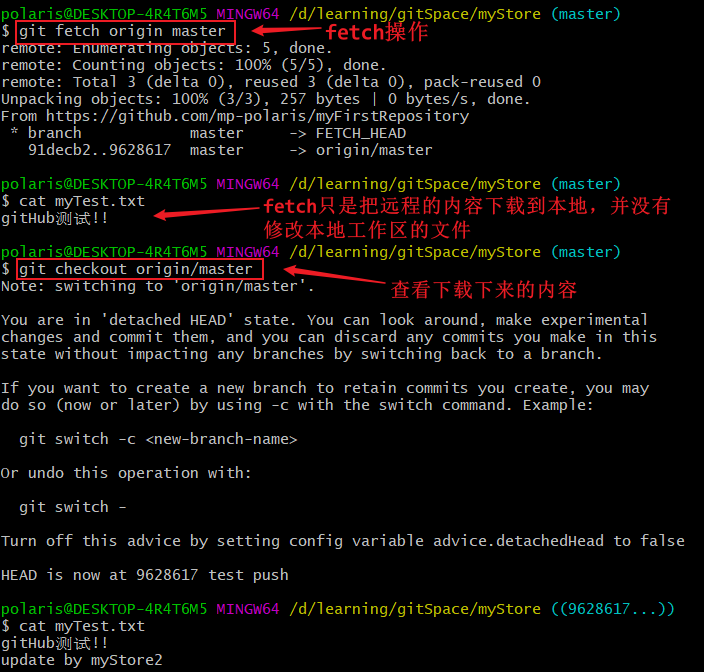
git merge [远程库地址别名 / 远程分支名] 命令
git pull [远程库地址别名] [远程分支名] 命令
直接执行pull操作(拉取合并二合一)
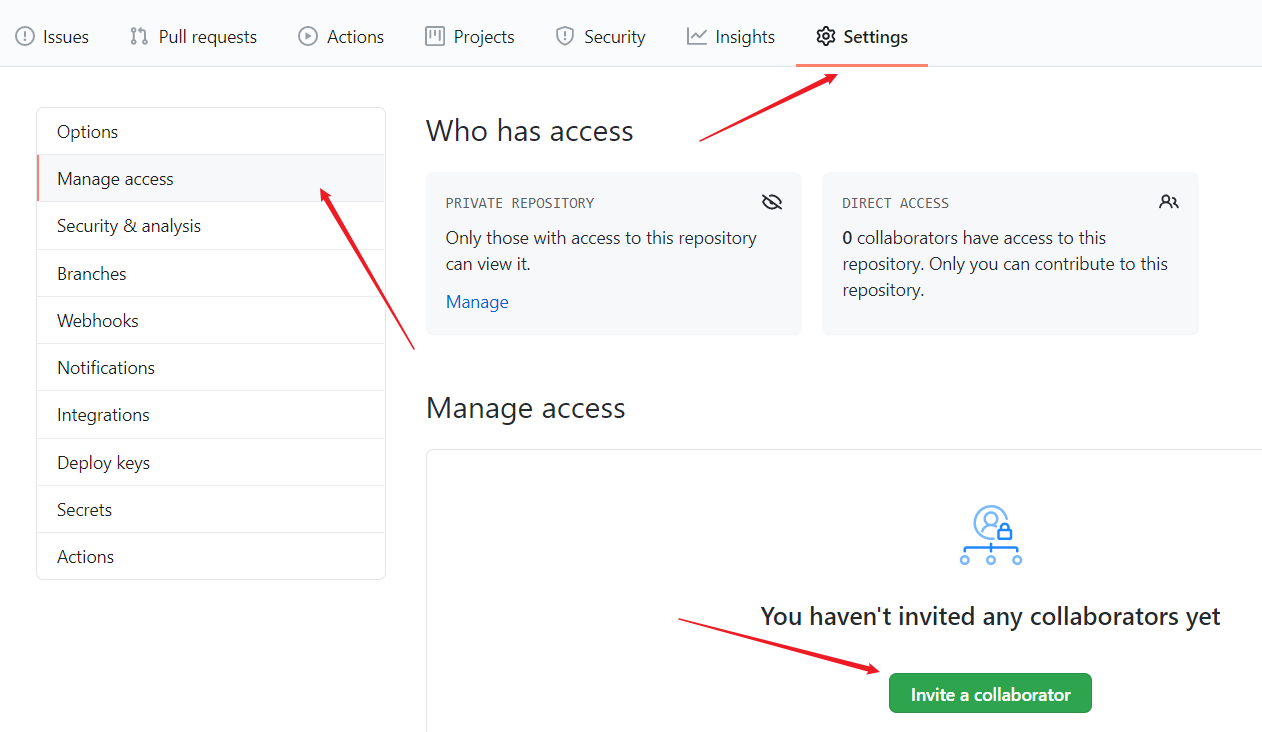
3.5 邀请合作者
被邀请的人就能执行push操作了,即写的权限
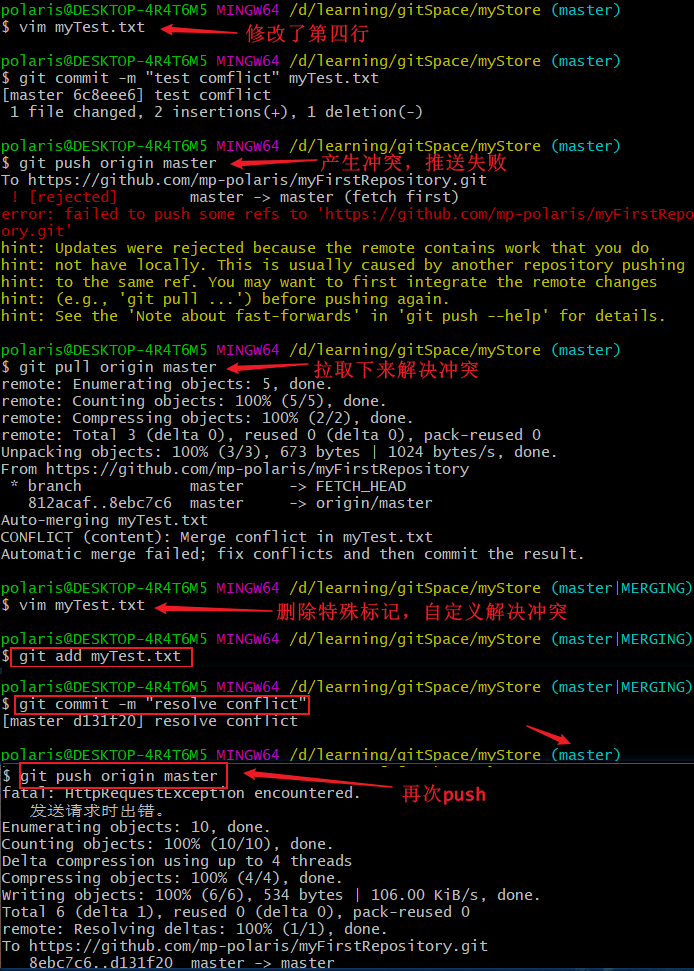
3.6 协同开发时冲突的解决
注意:
如果不是基于GitHub远程库的最新版本所作的修改,便不能推送,必须先拉取
拉取下来之后如果进入冲突状态,则按照"分支冲突解决"操作解决即可
如果其他协作者先push了内容
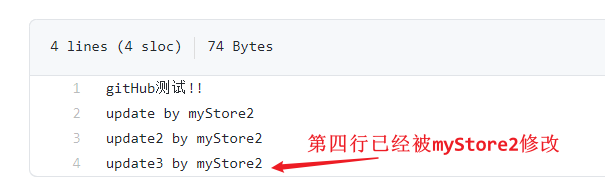
当前人员有push了部分相同内容就会产生冲突
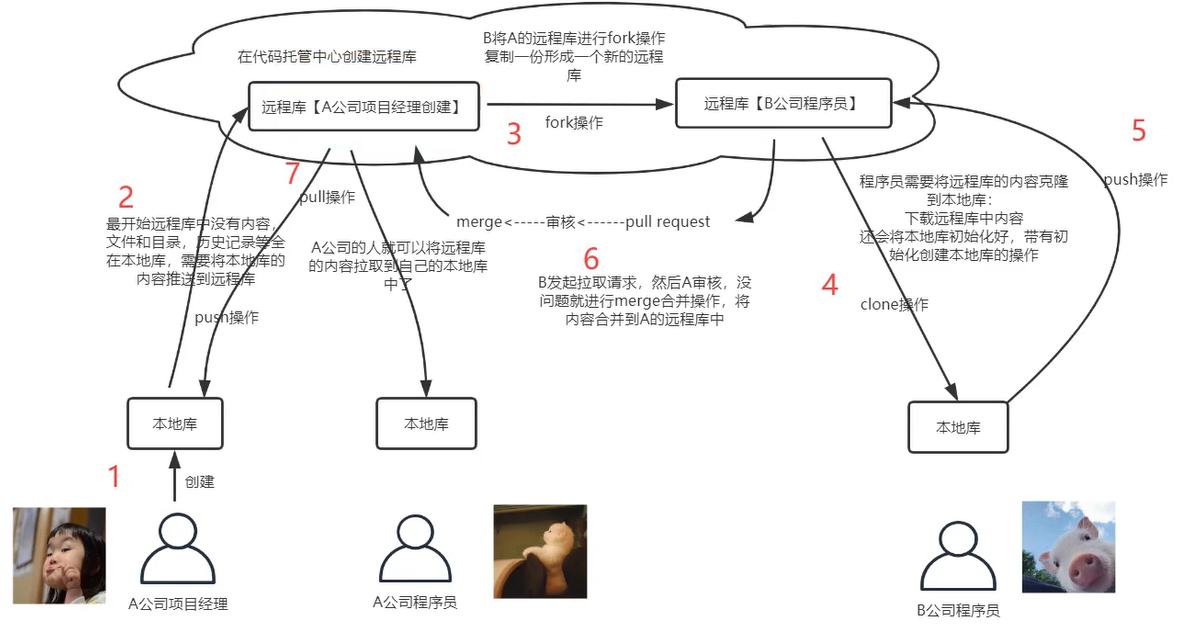
3.7 跨团队协作操作
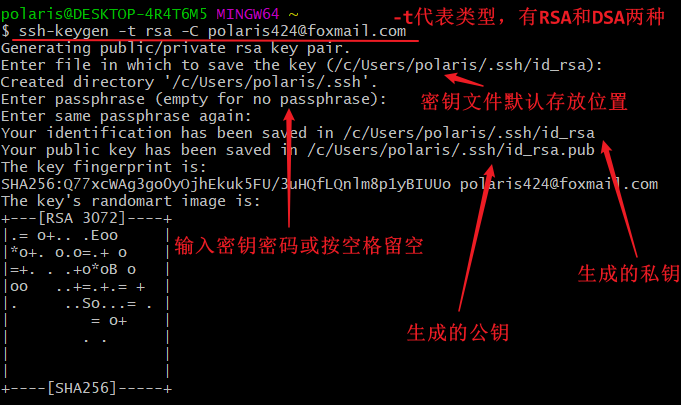
3.8 SSH免密登录
win10 OS提供凭据功能,第一次登录后以后就可以免登录。但是其他OS如果没有凭据功能则每次都需要登录。SSH可以解决这个问题 - 免密登录
① 进入当前用户的家目录~
② 删除之前创建的(如果有).ssh 目录

③ 运行命令生成.ssh 密钥目录
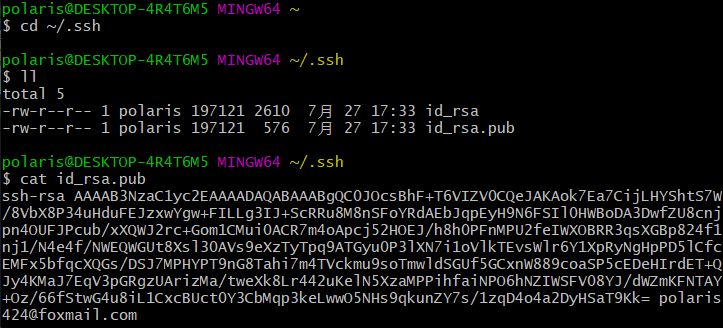
④ 进入.ssh 目录查看文件列表
⑤ 查看 id_rsa.pub 文件内容
⑥ 复制 id_rsa.pub 文件内容,登录 GitHub,点击用户头像→Settings→SSHandGPG keys →NewSSHKey→输入复制的密钥信息
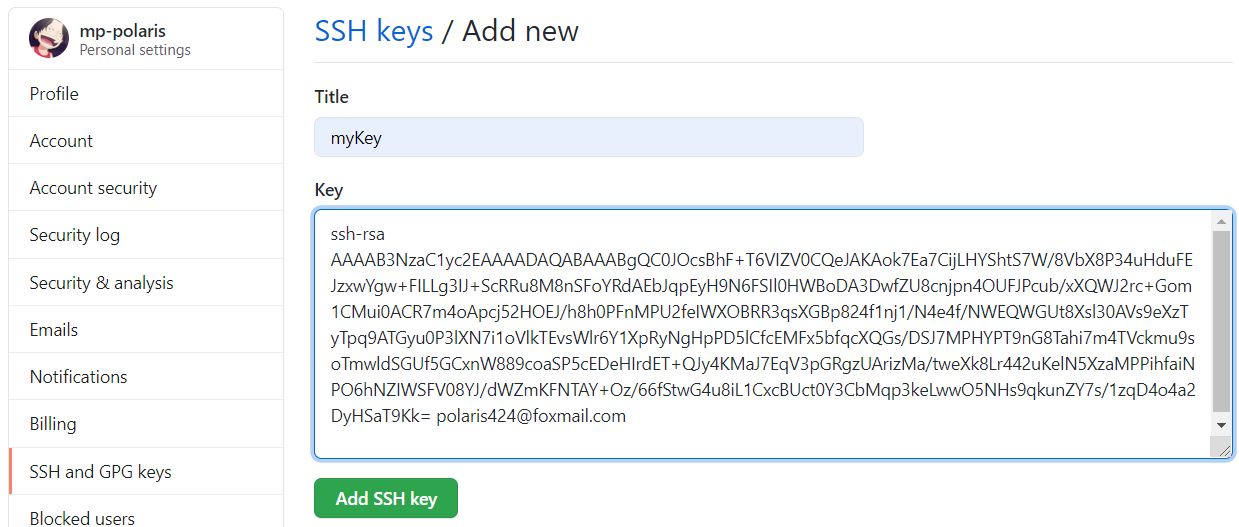
⑦ 回到 Gitbash 创建远程地址别名 ,推送文件进行测试