今天主要是分析一下Launcher里面的所有应用列表。Android4.0 Launcher的所有应用列表跟2.X比较大的区别就是多了Widget的显示。下面会详细分析Launcher里面有关所有应用列表配置和代码分析。
1、AllApp列表配置文件
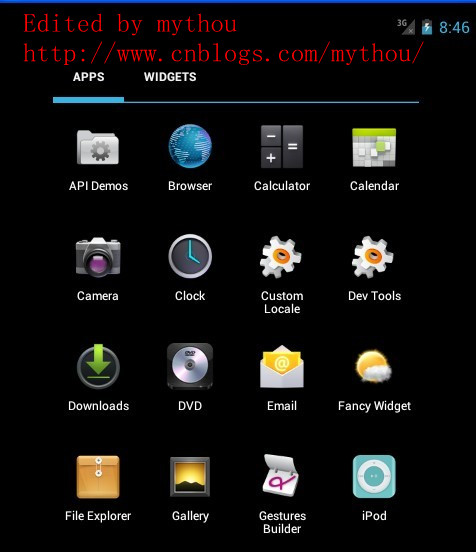
配置AllAPP应用列表界面的配置文件是 esLayoutapps_customize_pane.xml文件。AllAPP列表使用了一个TabHost组织了两个页面(全部应用和Widget),通过界面上面的TabHost进行切换。下面是TabHost的配置和AllAPP界面配置,我这里需要把Widget部分功能取消,因为我做的Launcher把Widget放到workspace里面实现了。
//Edited by mythou
//http://www.cnblogs.com/mythou/
<!-- 取消TabHost的显示,把TabHost设置为0dp高,避免影响all app显示 mythou -->
<com.android.launcher2.AppsCustomizeTabHost
    android:background="@android:color/transparent">
    <LinearLayout
        android:id="@+id/apps_customize_content"
        android:orientation="vertical"
        android:layout_width="match_parent"
        android:layout_height="match_parent">

        <!-- TabHost栏,配置TahHost栏的高度宽度
        我这里把TabHost取消了,因为我的Launcher需要把Widget反正workspace里面实现,
        所以全部应用列表修改成和2.X的Launcher一样 mythou-->
        <FrameLayout
            android:id="@+id/tabs_container"
            android:layout_width="0dp"
            android:layout_height="0dp"
            android:layout_marginTop="0dp"
            android:layout_gravity="center_horizontal">
       <!-- TabHost上面Widget 的按钮-->
            <com.android.launcher2.FocusOnlyTabWidget
                android:id="@android:id/tabs"
                android:layout_width="match_parent"
                android:layout_height="match_parent"
                android:layout_gravity="left"
                android:background="@android:color/transparent"
                android:tabStripEnabled="false"
                android:tabStripLeft="@null"
                android:tabStripRight="@null"
                android:divider="@null" />
       <!--TabHost 右边的Android市场的图标,不需要可以去掉-->
            <include
                android:id="@+id/market_button"
                layout="@layout/market_button"
                android:layout_width="wrap_content"
                android:layout_height="match_parent"
                android:layout_gravity="right" />

        </FrameLayout>

     <!--下面这里就是我们所有应用列表的选项和所有应用列表的显示View
        需要注意的是AppsCustomizePagedView同时支持显示所有应用列表和Widget列表 mythou-->
        <FrameLayout
            android:id="@android:id/tabcontent"
            android:layout_width="match_parent"
            android:layout_height="match_parent"
            >
       <!-- 所有应用列表是通过自定义VIewAppsCustomizePagedView显示,后面会详细分析这个View
          下面只对部分重要属性加入注释-->
            <com.android.launcher2.AppsCustomizePagedView
                android:id="@+id/apps_customize_pane_content"
                android:layout_width="match_parent"
                android:layout_height="match_parent"
         //MaxAppCellCountX 和MaxAppCellCounY指的是所有App图标排列的最大行列数。
         //一般设置为-1,表示无限制
                launcher:maxAppCellCountX="@integer/apps_customize_maxCellCountX"
                launcher:maxAppCellCountY="@integer/apps_customize_maxCellCountY"
         //pageLayoutWidthGap和pageLayoutHeightGap分别表示菜单界面与屏幕边缘的距离,
         //一般小屏幕这里设置为-1。避免边框太窄误触屏幕才需要设置。
                launcher:pageLayoutWidthGap="@dimen/apps_customize_pageLayoutWidthGap"
                launcher:pageLayoutHeightGap="@dimen/apps_customize_pageLayoutHeightGap"
                launcher:pageLayoutPaddingTop="50dp"
         //pageLayoutPaddingXXX指的是内填充,这个和系统的padding一样
                launcher:pageLayoutPaddingBottom="@dimen/apps_customize_pageLayoutPaddingBottom"
                launcher:pageLayoutPaddingLeft="@dimen/apps_customize_pageLayoutPaddingLeft"
                launcher:pageLayoutPaddingRight="@dimen/apps_customize_pageLayoutPaddingRight"
         //widgetCellWithGap和widgetCellHeightGap指的是widget列表界面各个widget之间的间隔,
         //和系统的margin属性类似
                launcher:widgetCellWidthGap="@dimen/apps_customize_widget_cell_width_gap"
                launcher:widgetCellHeightGap="@dimen/apps_customize_widget_cell_height_gap"
         //widgetCountX和WidgetCountY都是表示Widget界面每行每列显示多少Widget
                launcher:widgetCountX="@integer/apps_customize_widget_cell_count_x"
                launcher:widgetCountY="@integer/apps_customize_widget_cell_count_y"
         //提示界面的焦点
                launcher:clingFocusedX="@integer/apps_customize_cling_focused_x"
                launcher:clingFocusedY="@integer/apps_customize_cling_focused_y"
                launcher:maxGap="@dimen/workspace_max_gap" />
       <!-- 加载全部应用时的旋转动画 -->
            <FrameLayout
                android:id="@+id/animation_buffer"
                android:layout_width="match_parent"
                android:layout_height="match_parent"
                android:background="#FF000000"
                android:visibility="gone" />
       <!-- 分页符,代表多少页和当前页面-->
            <include
                android:id="@+id/paged_view_indicator"
                layout="@layout/scroll_indicator"
                android:layout_width="wrap_content"
                android:layout_height="wrap_content"
                android:layout_gravity="bottom" />
        </FrameLayout>
    </LinearLayout>
  <!--第一次进入所有应用列表的提示界面,和workspace提示界面一样-->
    <include layout="@layout/all_apps_cling"
        android:id="@+id/all_apps_cling"
        android:layout_width="match_parent"
        android:layout_height="match_parent"/>

</com.android.launcher2.AppsCustomizeTabHost>
上面已经针对TabHost的配置文件给了详细注释,这里需要说明的一点是,不管是所有应用列表还是Widget列表都是通过AppsCustomizedPagedView显示出来,也就是说这个自定义View支持两种形式显示。下面我们先对AppsCustomizeTabHost做个简单分析。
2、AppsCustomizeTabHost分析
AppsCustomizeTabHost是继承了TabHost的之类,主要是对TabHost进行扩展,增加一些功能。AppsCustomizeTabHost的代码不多,这里主要对生成AllAPP和Widget页面选项部分介绍一下。
//Edited by mythou
//http://www.cnblogs.com/mythou/
  protected void onFinishInflate()
    {
        //.......//创建所有应用列表Tab mythou
        TextView tabView;
        String label;
        label = mContext.getString(R.string.all_apps_button_label);
        tabView = (TextView) mLayoutInflater.inflate(R.layout.tab_widget_indicator, tabs, false);
        tabView.setText(label);
        tabView.setContentDescription(label);
        addTab(newTabSpec(APPS_TAB_TAG).setIndicator(tabView).setContent(contentFactory));
        //Widget的Tab页面
        label = mContext.getString(R.string.widgets_tab_label);
        tabView = (TextView) mLayoutInflater.inflate(R.layout.tab_widget_indicator, tabs, false);
        tabView.setText(label);
        tabView.setContentDescription(label);
        addTab(newTabSpec(WIDGETS_TAB_TAG).setIndicator(tabView).setContent(contentFactory));
        //设置监听器
        setOnTabChangedListener(this);

        AppsCustomizeTabKeyEventListener keyListener = new AppsCustomizeTabKeyEventListener();
        View lastTab = tabs.getChildTabViewAt(tabs.getTabCount() - 1);
        lastTab.setOnKeyListener(keyListener);

        //Android商店按钮
        View shopButton = findViewById(R.id.market_button);
        shopButton.setOnKeyListener(keyListener);

        // Hide the tab bar until we measure
        mTabsContainer.setAlpha(0f);
    }
onFinishInflate回调函数里面执行了创建TabHost需要的Tab View,这个函数在View加载完配置文件的时候会执行。除了创建TabHost外,还有几个函数需要注意了解。
3、Tab变化时执行onTabChanged
在TabHost切换选项的时候,会执行onTabChanged回调函数,这里执行了切换页面的操作,具体切换其实是切换AppsCustomizedPagedView类里面的切换,因为所有应用和Widget都是依靠AppsCustomizedPagedView来显示。onTabChanged里面有两个地方需要注意一下:
//Edited by mythou
//http://www.cnblogs.com/mythou/
    public void onTabChanged(String tabId)
    {
    //使用Runnable执行一个切换的动画效果,因为切换的时候会存在数据加载导致的延时问题。
    //在加载切换数据的过程中,加入动画可以增强用户体验 mythou
        post(new Runnable()
        {
            @Override
            public void run()
            {
                ArrayList<View> visiblePages = new ArrayList<View>();
                for (int i = visiblePageRange[0]; i <= visiblePageRange[1]; i++)
                {
                    visiblePages.add(mAppsCustomizePane.getPageAt(i));
                }

                //保证每个页面都是使用统一的动画效果
                mAnimationBuffer.scrollTo(mAppsCustomizePane.getScrollX(), 0);

                // mAppsCustomizePane显示子页面是使用相反的顺序,所以添加页面动画的时候,
                //也是使用相反的添加顺序
                for (int i = visiblePages.size() - 1; i >= 0; i--)
                {
                    View child = visiblePages.get(i);
            //增加切换动画缓存,提供下面切换动画使用
                    mAnimationBuffer.addView(child, p);
                }

                // Toggle the new content
                onTabChangedStart();
                onTabChangedEnd(type);

                //过渡动画开始
                ObjectAnimator outAnim = ObjectAnimator.ofFloat(mAnimationBuffer, "alpha", 0f);
         //。。。。。。。。
    }
onTabChanged主要是提供了一个切换页面的动画,以为切换TabHost的时候,会存在一个加载和切换数据的过程,这个过程需要消耗一定时间,所以开了一个线程来执行一个过渡动画,增强用户体验。Launcher里面很多切换操作都存在类似的操作,每个操作都伴随着一个动画效果。主要目的就是让用户觉得界面操作流畅。
4、onLauncherTransitionStart和onLauncherTransitionEnd
这两个方法是在Launcher.java类里面调用的,具体调用时机就是从workspace切换到AllAPP列表的时候,切换前会调用onLauncherTransitionStart方法,切换后也会调用onLauncherTransitionEnd。看名字我们大概也能猜出这两个方法的作用,也是提供一个过渡的动画效果。onLauncherTransitionEnd还会调用提示界面。
今天就讲到这里,下次会开始进入AppsCustomizedPagedView分析。
Launcher分析系列文章:
Android Launcher分析和修改1——Launcher默认界面配置(default_workspace)
Android Launcher分析和修改2——Icon修改、界面布局调整、壁纸设置
Android Launcher分析和修改3——Launcher启动和初始化
Android Launcher分析和修改4——初始化加载数据
Android Launcher分析和修改5——HotSeat分析
Android Launcher分析和修改6——页面滑动(PagedView)
Edited by mythou
原创博文,转载请标明出处:http://www.cnblogs.com/mythou/p/3182286.html