本博客通过debug方式简单跟一下Springboot application启动的源码,Springboot的启动源码是比较复杂的,本博客只是简单梳理一下源码,浅析其原理
为了方便跟源码,先找个Application类,打个断点,进行调试,如图所示:
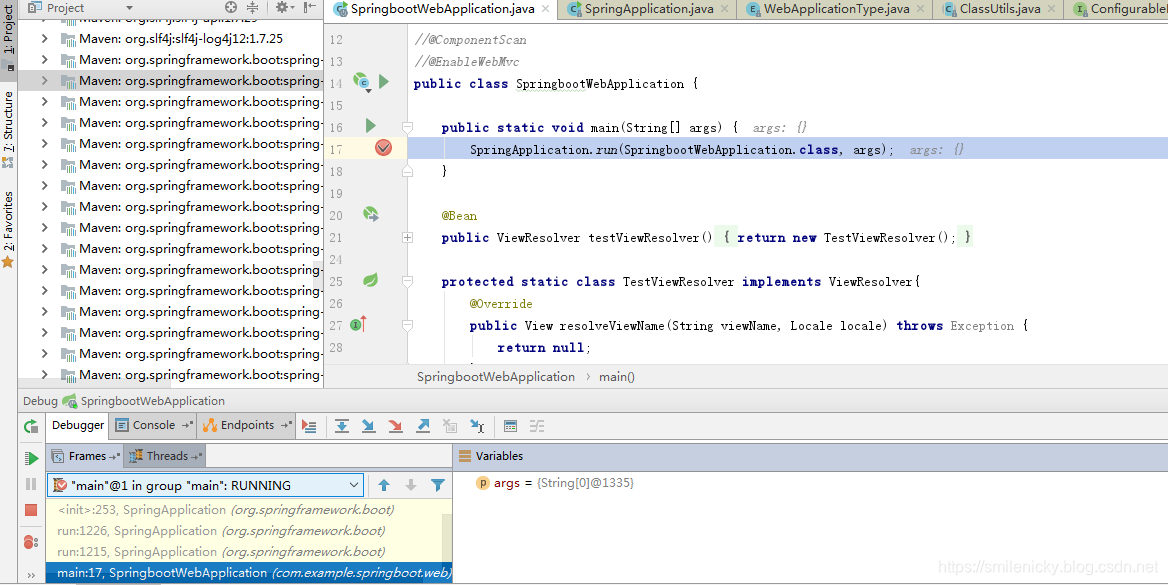
step into,run方法调用了SpringApplication的run方法
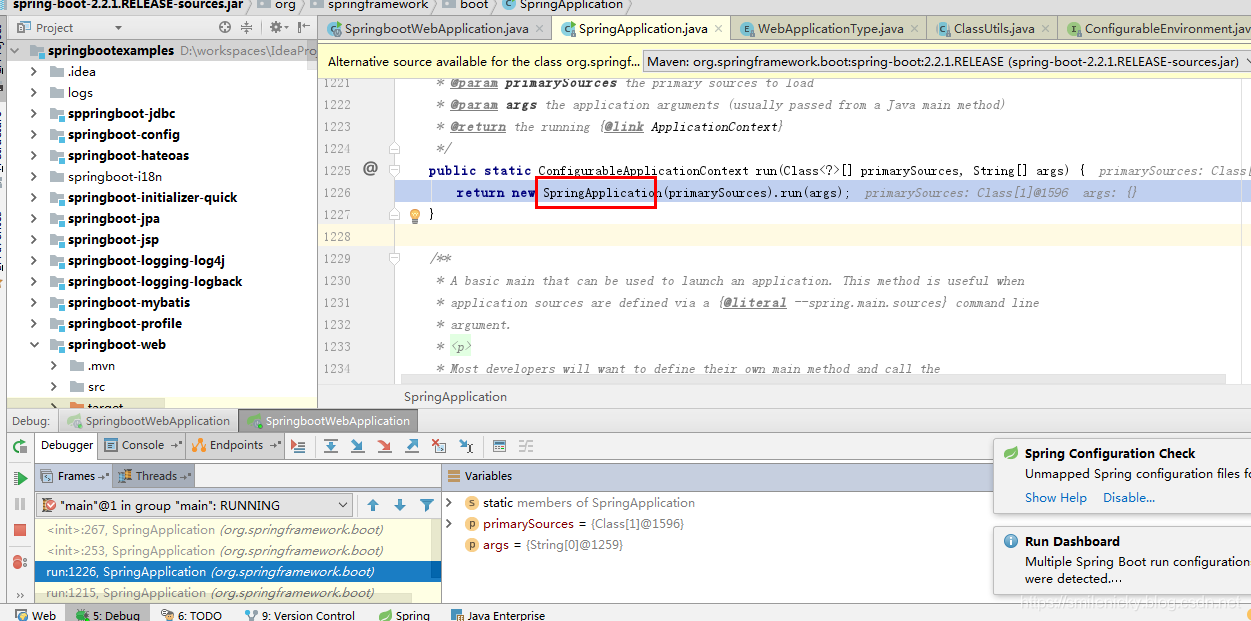
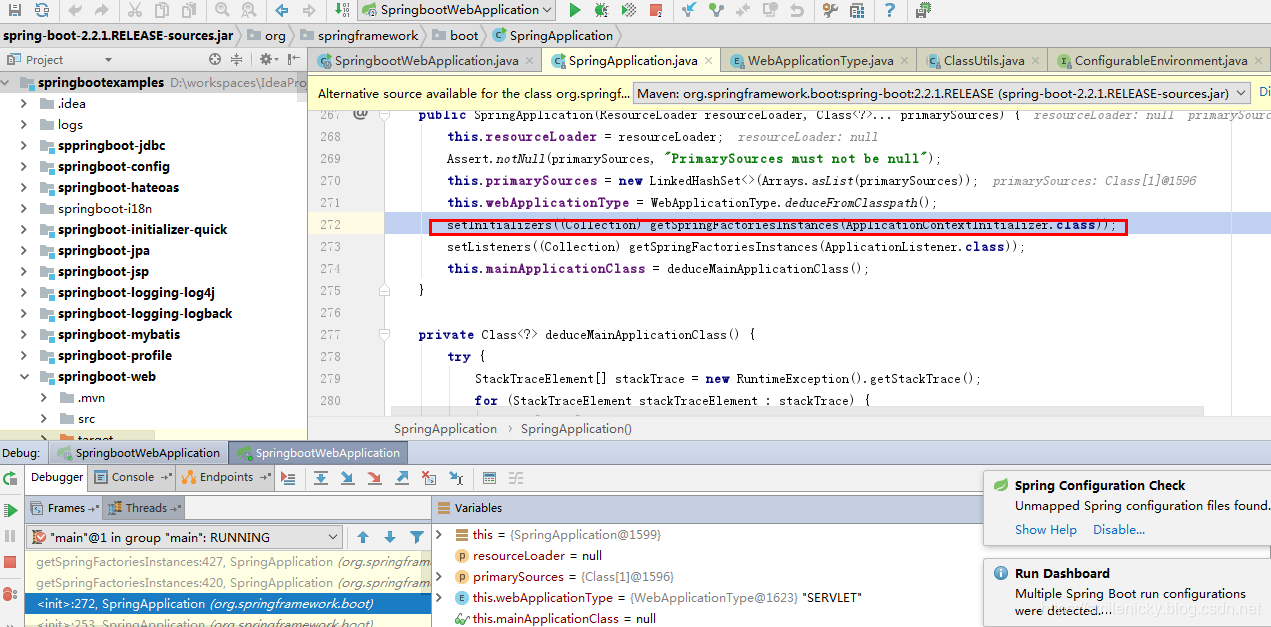
通过debug,Springboot启动过程,会先执行如下关键的构造函数
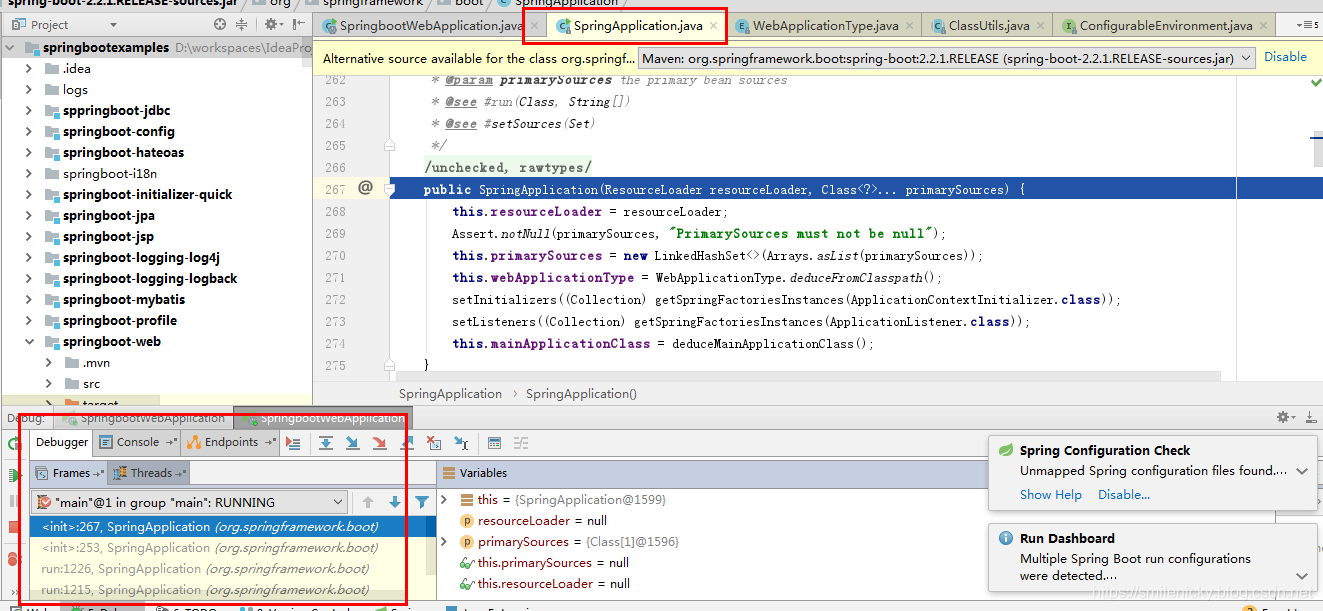
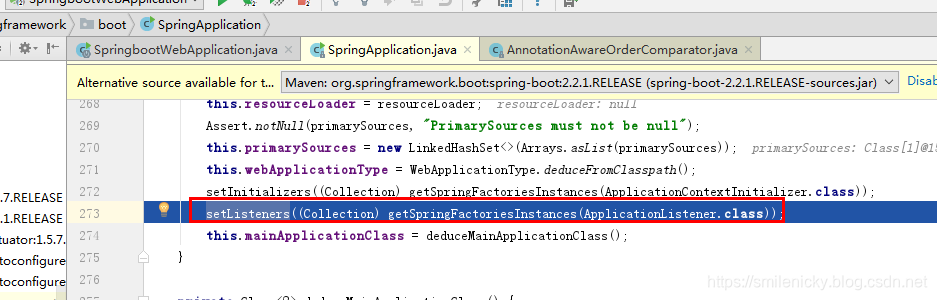
分析构造函数源码:
public SpringApplication(ResourceLoader resourceLoader, Class<?>... primarySources) {
		this.resourceLoader = resourceLoader;
		Assert.notNull(primarySources, "PrimarySources must not be null");
		this.primarySources = new LinkedHashSet<>(Arrays.asList(primarySources));
		// 判断当前的web类型
		this.webApplicationType = WebApplicationType.deduceFromClasspath();
		//设置初始化的ApplicationInitializer类,从类路径下面的META-INF/spring.factories配置文件获取所有的ApplicationInitializer保存起来
		setInitializers((Collection) getSpringFactoriesInstances(ApplicationContextInitializer.class));
		//同理,从类路径下面的META-INF/spring.factories配置文件获取所有的ApplicationListener保存起来
		setListeners((Collection) getSpringFactoriesInstances(ApplicationListener.class));
		//从多个配置类中找到有main方法的主配置类
		this.mainApplicationClass = deduceMainApplicationClass();
	}
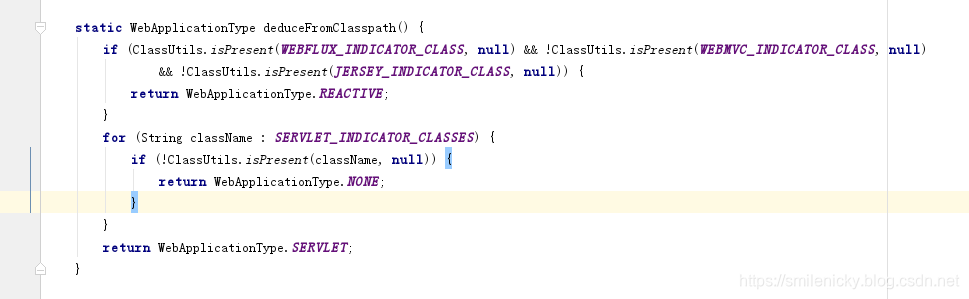
注意:上面过程其实就是创建Springboot的Application启动类的过程
deduceFromClasspath方法是判断web类型的
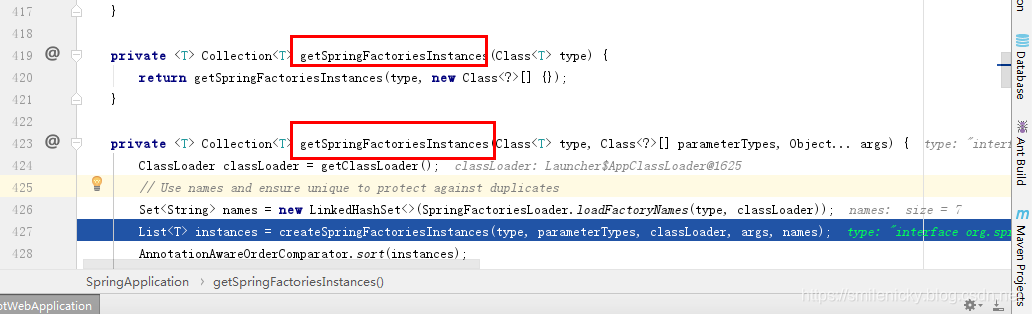
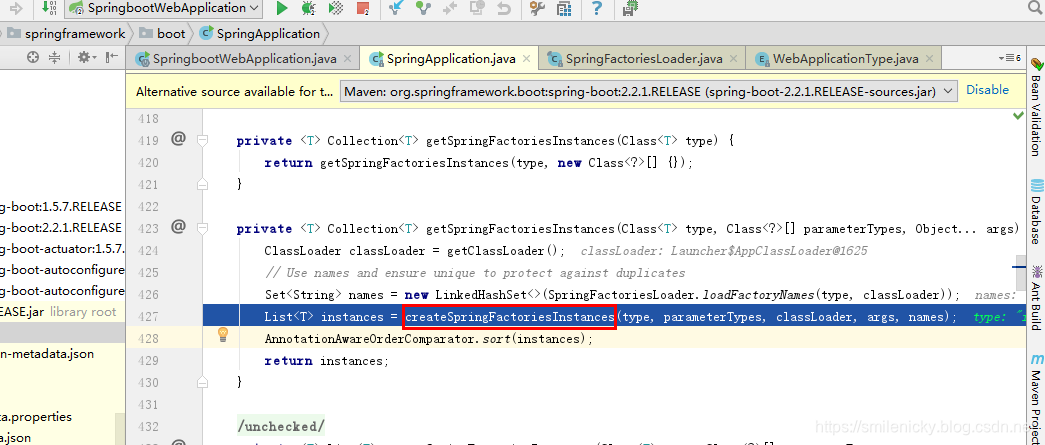
继续debug ApplicationContextInitializer这些Initializer类,可以说是初始化类的设置过程
SpringFactoriesLoader.loadFactoryNames(type, classLoader)获取所有的Initializer类的类名
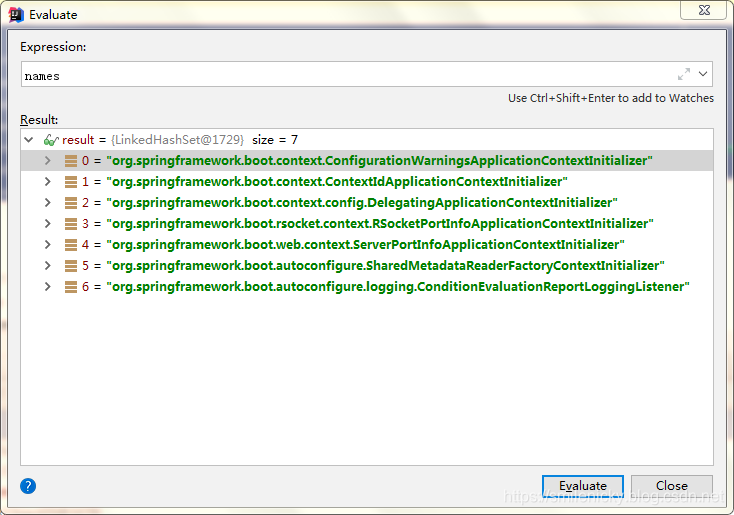
Evaluate可以看出扫描到如下的类
继续debug,这个是Spring框架的底层类
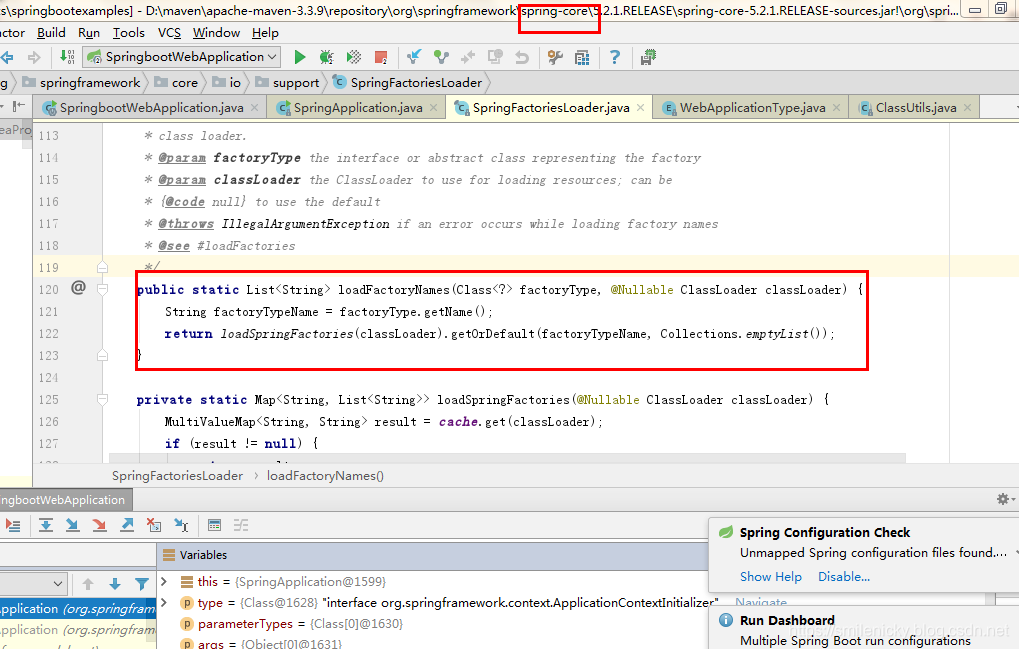
找到主要的源码,loadSpringFactories方法也是从如下的位置获取配置信息的

从META-INF/spring.factories获取对应的配置信息
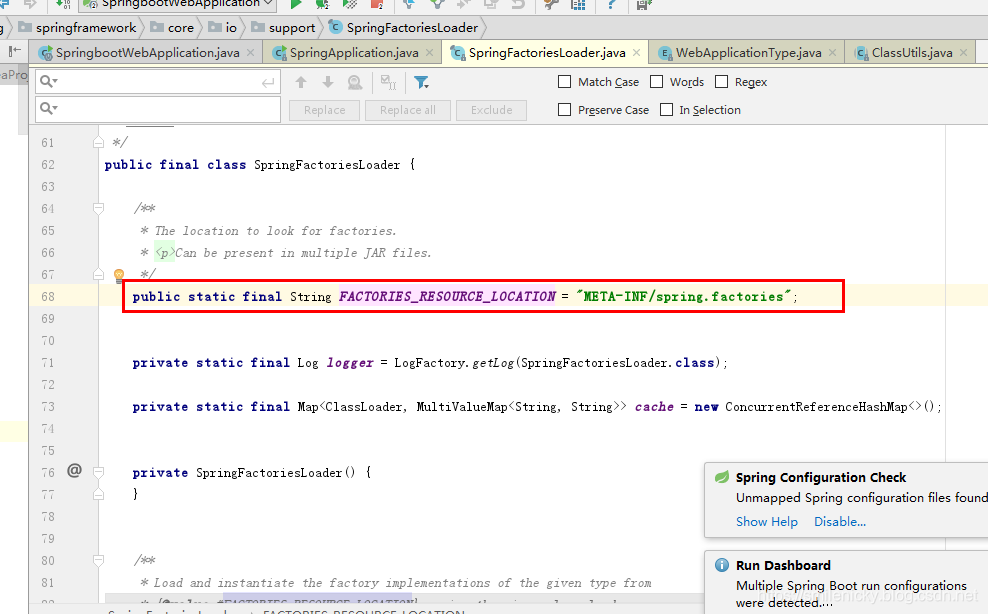
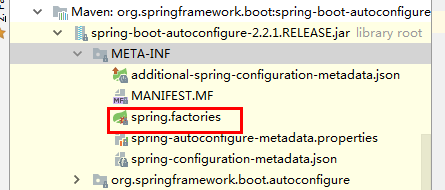
框架的文件位置在autoconfiguration工程里,显然如果要自定义Initializer类的话,自己新建一些Initializer类,然后自己写个META-INF/spring.factories类,也是可以被扫描到的
private static Map<String, List<String>> loadSpringFactories(@Nullable ClassLoader classLoader) {
		//用一个ConcurrentReferenceHashMap来缓存信息
		MultiValueMap<String, String> result = cache.get(classLoader);
		if (result != null) { //缓存读取到配置信息,返回缓存数据
			return result;
		}
		// 缓存读取不到的情况,重新从META-INF/spring.factories配置文件读取
		try {
			Enumeration<URL> urls = (classLoader != null ?
					classLoader.getResources(FACTORIES_RESOURCE_LOCATION) :
					ClassLoader.getSystemResources(FACTORIES_RESOURCE_LOCATION));
			result = new LinkedMultiValueMap<>();
			// 遍历循环读取配置信息
			while (urls.hasMoreElements()) {
				URL url = urls.nextElement();
				UrlResource resource = new UrlResource(url);
				// 用PropertiesLoaderUtils工具类读取资源文件
				Properties properties = PropertiesLoaderUtils.loadProperties(resource);
				for (Map.Entry<?, ?> entry : properties.entrySet()) {
				//获取到Initializer对应的全类名
					String factoryTypeName = ((String) entry.getKey()).trim();
					for (String factoryImplementationName : StringUtils.commaDelimitedListToStringArray((String) entry.getValue())) {
						result.add(factoryTypeName, factoryImplementationName.trim());
					}
				}
			}
			// 重新放在缓存里
			cache.put(classLoader, result);
			return result;
		}
		catch (IOException ex) {
			throw new IllegalArgumentException("Unable to load factories from location [" +
					FACTORIES_RESOURCE_LOCATION + "]", ex);
		}
	}
ApplicationInitializer类的全类名都被扫描到之后,返回刚才的源码,继续看看,如图,从命名看应该是进行类的实例化过程
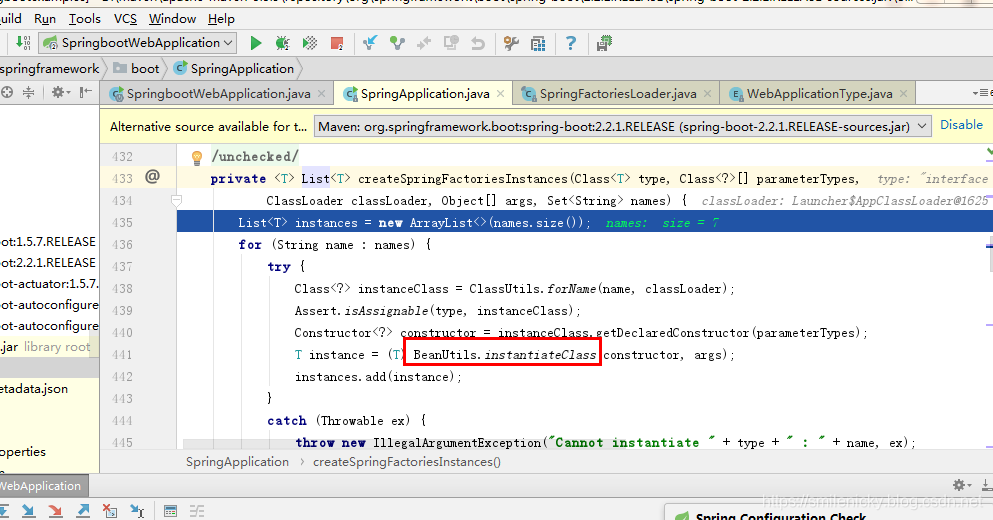
step into,果然是的,还是调用了Spring框架的底层工具类,BeanUtils进行类的实例化过程
setListeners方法的过程同理,本文就不详细分析:
继续往下debug,deduceMainApplicationClass方法
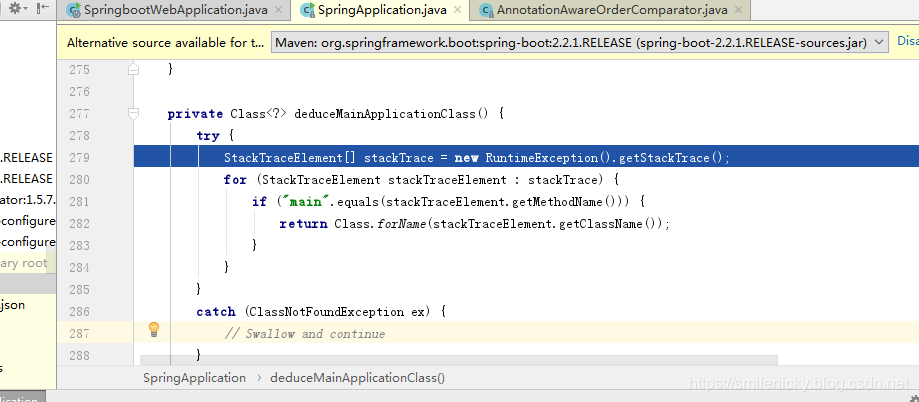
private Class<?> deduceMainApplicationClass() {
		try {
			//获取运行时的堆栈属性数组
			StackTraceElement[] stackTrace = new RuntimeException().getStackTrace();
			for (StackTraceElement stackTraceElement : stackTrace) {
				//有main方法的Application类返回
				if ("main".equals(stackTraceElement.getMethodName())) {
					return Class.forName(stackTraceElement.getClassName());
				}
			}
		}
		catch (ClassNotFoundException ex) {
			// Swallow and continue
		}
		return null;
	}
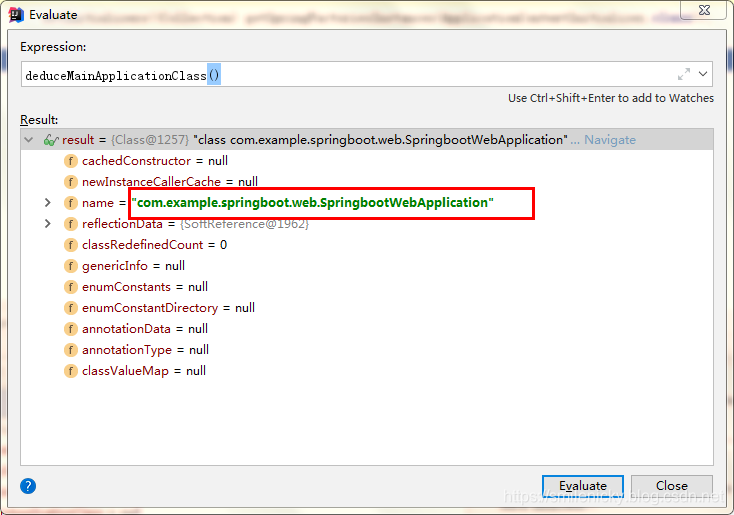
获取到的就是创建Springboot工程时的Application类
Springboot的Application类创建成功之后,才真正开始执行run方法
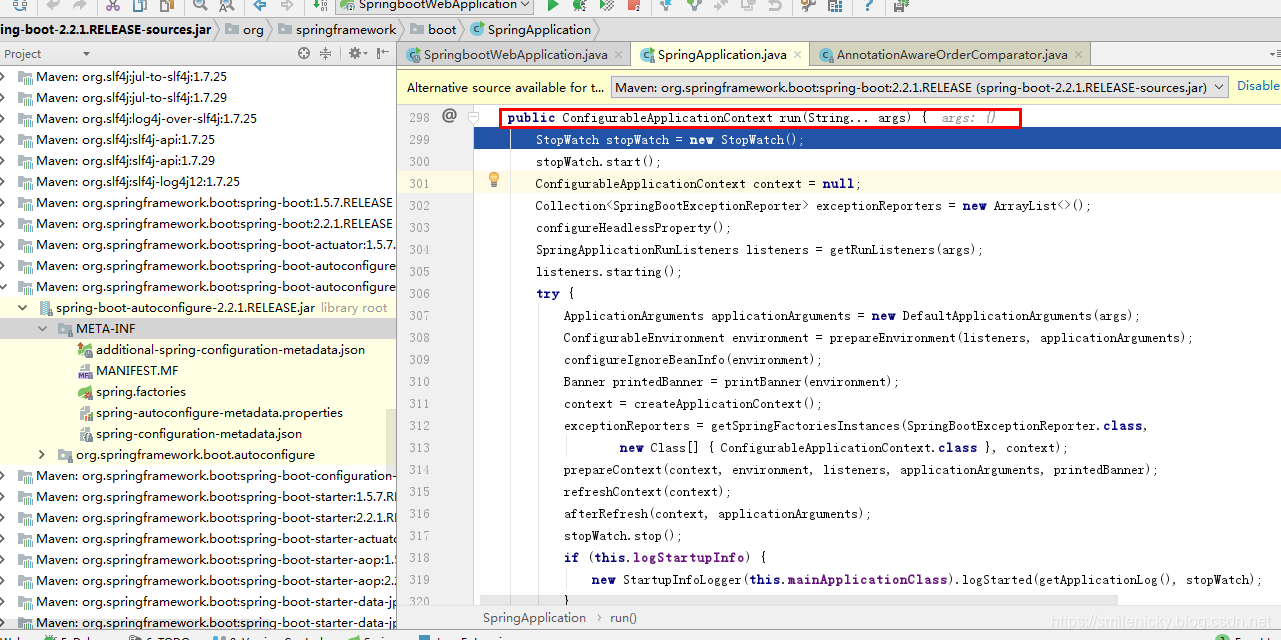
public ConfigurableApplicationContext run(String... args) {
StopWatch stopWatch = new StopWatch();
stopWatch.start();
ConfigurableApplicationContext context = null;
Collection<SpringBootExceptionReporter> exceptionReporters = new ArrayList<>();
//校验java.awt.headless的
configureHeadlessProperty();
//从META-INF/spring.factories获取SpringApplicationRunListeners,和前面的分析同理,本文就不详细介绍
SpringApplicationRunListeners listeners = getRunListeners(args);
//回调SpringApplicationRunListeners 的starting方法
listeners.starting();
try {
//封装命令行参数
ApplicationArguments applicationArguments = new DefaultApplicationArguments(args);
//准备环境,环境创建完成之后,再回调SpringApplicationRunListeners 的environmentPrepared方法,表示环境准备好
ConfigurableEnvironment environment = prepareEnvironment(listeners, applicationArguments);
configureIgnoreBeanInfo(environment);
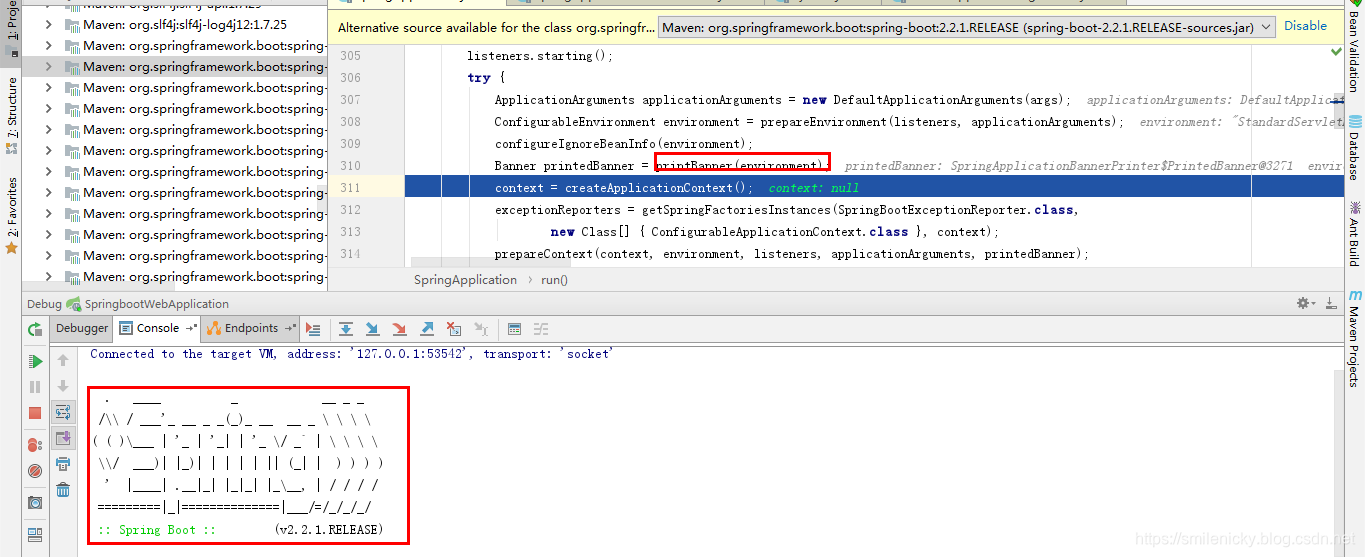
//控制台打印Banner信息的,后面再简单分析
Banner printedBanner = printBanner(environment);
// 创建Spring的IOC容器,创建过程比较复杂,会分析是web类型的ioc容器,还是普通的ioc容器等等
context = createApplicationContext();
exceptionReporters = getSpringFactoriesInstances(SpringBootExceptionReporter.class,
new Class[] { ConfigurableApplicationContext.class }, context);
//将environment保存到ioc,执行applyInitializers方法,applyInitializers方法执行完成之后,再回调SpringApplicationRunListeners的contextPrepared方法
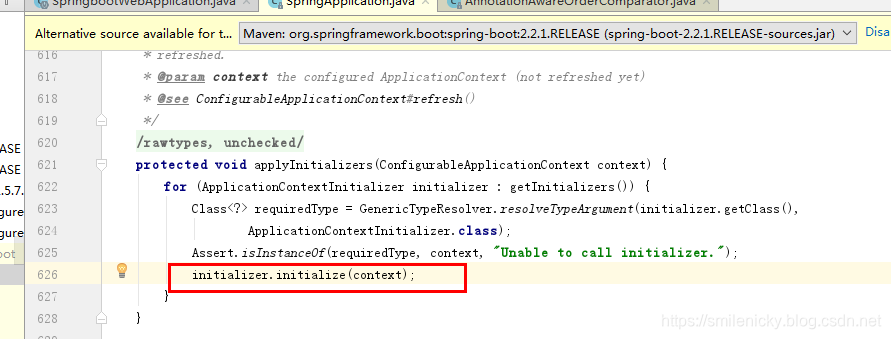
//applyInitializers方法作用:回调之前保存的所有的ApplicationContextInitializer的initialize方法
prepareContext(context, environment, listeners, applicationArguments, printedBanner);
//刷新ioc容器,其实就是ioc容器的初始化过程,还没进行属性设置,后置处理器,仅仅是扫描、创建、加载所有组件等等过程
refreshContext(context);
afterRefresh(context, applicationArguments);
stopWatch.stop();
if (this.logStartupInfo) {
new StartupInfoLogger(this.mainApplicationClass).logStarted(getApplicationLog(), stopWatch);
}
//回调所有SpringApplicationRunListener的started方法
listeners.started(context);
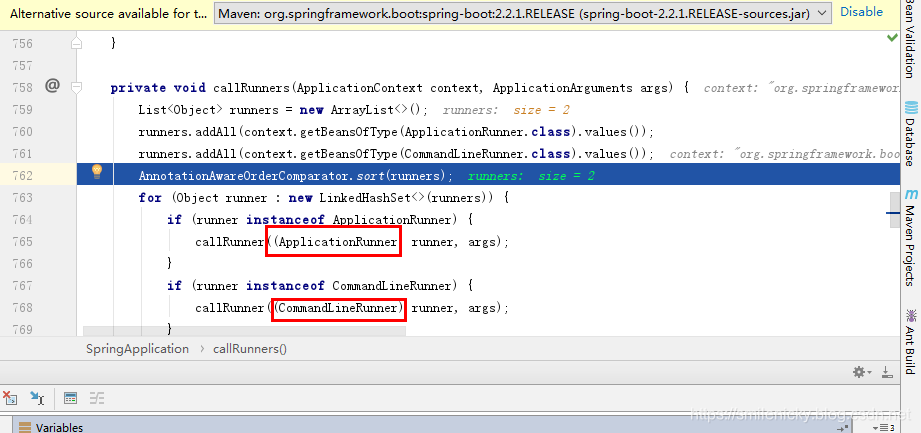
//从ioc容器中获取所有的ApplicationRunner和CommandLineRunner进行回调,ApplicationRunner先回调,CommandLineRunner再回调
callRunners(context, applicationArguments);
}
catch (Throwable ex) {
handleRunFailure(context, ex, exceptionReporters, listeners);
throw new IllegalStateException(ex);
}
try {
//回调所有SpringApplicationRunListener的running方法
listeners.running(context);
}
catch (Throwable ex) {
handleRunFailure(context, ex, exceptionReporters, null);
throw new IllegalStateException(ex);
}
//Springboot应用启动成功后,才返回启动的ioc容器
return context;
}
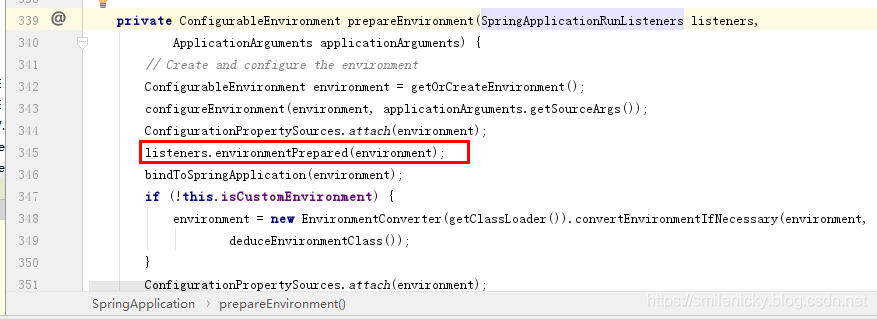
回顾一下前面源码的环境准备方法,找重点代码,如图,可以看出环境准备完成后会回调SpringApplicationRunListener的environmentPrepared方法,表示环境准备完成
banner打印的方法,如图,执行完成,控制台的banner信息就打印出来了:
ioc初始化之前,会执行applyInitializers方法,执行完成后,再回调SpringApplicationRunListener的contextPrepared方法
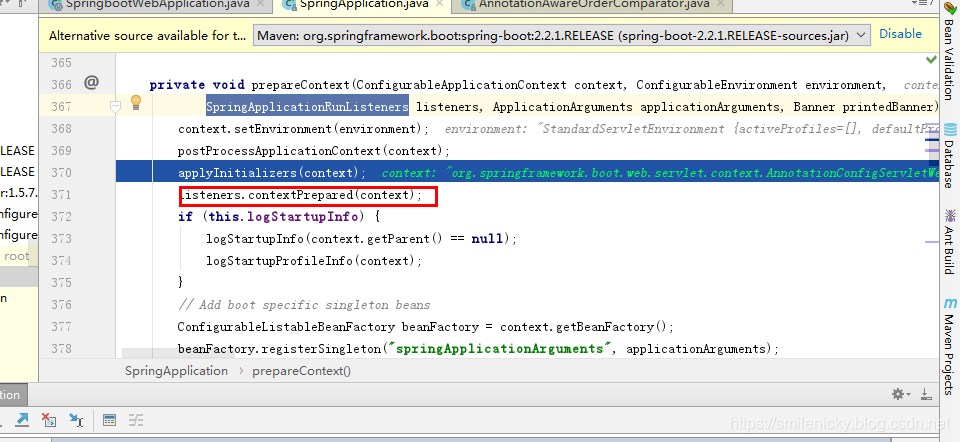
applyInitializers():回调之前保存的所有的ApplicationContextInitializer的initialize方法
从ioc容器中获取所有的ApplicationRunner和CommandLineRunner进行回调
ok,从源码的简单分析,可以看出有几个重要的事件监听机制,下面引用尚硅谷视频的例子:
只需要放在ioc容器中的有:
- ApplicationRunner
@Component
public class HelloApplicationRunner implements ApplicationRunner {
    @Override
    public void run(ApplicationArguments args) throws Exception {
        System.out.println("ApplicationRunner...run....");
    }
}
- CommandLineRunner
@Component
public class HelloCommandLineRunner implements CommandLineRunner {
    @Override
    public void run(String... args) throws Exception {
        System.out.println("CommandLineRunner...run..."+ Arrays.asList(args));
    }
}
配置在META-INF/spring.factories的有:
- ApplicationContextInitializer
public class HelloApplicationContextInitializer implements
ApplicationContextInitializer<ConfigurableApplicationContext> {
    @Override
    public void initialize(ConfigurableApplicationContext applicationContext) {

 System.out.println("ApplicationContextInitializer...initialize..."+applicationContext);
    }
}
- SpringApplicationRunListener
package com.example.springboot.web.listener;

import org.springframework.boot.SpringApplication;
import org.springframework.boot.SpringApplicationRunListener;
import org.springframework.context.ConfigurableApplicationContext;
import org.springframework.core.env.ConfigurableEnvironment;

public class HelloSpringApplicationRunListener implements SpringApplicationRunListener {

    //必须有的构造器
    public HelloSpringApplicationRunListener(SpringApplication application, String[] args){

    }

    @Override
    public void starting() {
        System.out.println("SpringApplicationRunListener...starting...");
    }

    @Override
    public void environmentPrepared(ConfigurableEnvironment environment) {
        Object o = environment.getSystemProperties().get("os.name");
        System.out.println("SpringApplicationRunListener...environmentPrepared.."+o);
    }

    @Override
    public void contextPrepared(ConfigurableApplicationContext context) {
        System.out.println("SpringApplicationRunListener...contextPrepared...");
    }

    @Override
    public void contextLoaded(ConfigurableApplicationContext context) {
        System.out.println("SpringApplicationRunListener...contextLoaded...");
    }


}
配置(META-INF/spring.factories)
org.springframework.context.ApplicationContextInitializer=
com.example.springboot.web.listener.HelloApplicationContextInitializer

org.springframework.boot.SpringApplicationRunListener=
com.example.springboot.web.listener.HelloSpringApplicationRunListener
例子下载:github下载链接