步骤 1 : 可运行项目
本知识点是建立在 上一个知识点 的基础上进行的改进
首先下载一个简单的可运行项目作为演示:网盘链接:https://t.cn/A6AlcQ4s
下载后解压,比如解压到 E:projectspringboot 目录下
步骤 2 : 表结构和数据
首先要创建一个表和增加一些数据:建表和数据
步骤 3 : application.properties
增加数据库相关配置
#thymeleaf 配置
spring.thymeleaf.mode=HTML5
spring.thymeleaf.encoding=UTF-8
spring.thymeleaf.content-type=text/html
#缓存设置为false, 这样修改之后马上生效,便于调试
spring.thymeleaf.cache=false
#上下文
server.context-path=/thymeleaf

#数据库
spring.datasource.url=jdbc:mysql://127.0.0.1:3306/ryan?characterEncoding=UTF-8
spring.datasource.username=root
spring.datasource.password=admin
spring.datasource.driver-class-name=com.mysql.jdbc.Driver
步骤 4 : pom.xml
修改pom.xml, 增加 jdbc,mybatis, pageHelper 的jar包
<?xml version="1.0" encoding="UTF-8"?>
<project xmlns="http://maven.apache.org/POM/4.0.0" xmlns:xsi="http://www.w3.org/2001/XMLSchema-instance"
    xsi:schemaLocation="http://maven.apache.org/POM/4.0.0 http://maven.apache.org/xsd/maven-4.0.0.xsd">
    <modelVersion>4.0.0</modelVersion>

  <groupId>com.ryan</groupId>
  <artifactId>thymeleaf</artifactId>
  <version>0.0.1-SNAPSHOT</version>
  <name>thymeleaf</name>
  <description>thymeleaf</description>
  <packaging>war</packaging>

    <parent>
        <groupId>org.springframework.boot</groupId>
        <artifactId>spring-boot-starter-parent</artifactId>
        <version>1.5.9.RELEASE</version>
    </parent>

    <dependencies>
        <dependency>
            <groupId>org.springframework.boot</groupId>
            <artifactId>spring-boot-starter-web</artifactId>
        </dependency>
        <dependency>
          <groupId>org.springframework.boot</groupId>
          <artifactId>spring-boot-starter-thymeleaf</artifactId>
        </dependency>
        <dependency>
            <groupId>org.springframework.boot</groupId>
            <artifactId>spring-boot-starter-tomcat</artifactId>

        </dependency>
        <dependency>
              <groupId>junit</groupId>
              <artifactId>junit</artifactId>
              <version>3.8.1</version>
              <scope>test</scope>
        </dependency>
        <!-- servlet依赖. -->
        <dependency>
              <groupId>javax.servlet</groupId>
              <artifactId>javax.servlet-api</artifactId>

        </dependency>
              <dependency>
                     <groupId>javax.servlet</groupId>
                     <artifactId>jstl</artifactId>
              </dependency>
        <!-- tomcat的支持.-->
        <dependency>
               <groupId>org.apache.tomcat.embed</groupId>
               <artifactId>tomcat-embed-jasper</artifactId>

        </dependency>
        <dependency>
            <groupId>org.springframework.boot</groupId>
            <artifactId>spring-boot-devtools</artifactId>
            <optional>true</optional> <!-- 这个需要为 true 热部署才有效 -->
        </dependency>
        <!-- mybatis -->
        <dependency>
            <groupId>org.mybatis.spring.boot</groupId>
            <artifactId>mybatis-spring-boot-starter</artifactId>
            <version>1.1.1</version>
        </dependency>
        <!-- mysql -->
        <dependency>
            <groupId>mysql</groupId>
            <artifactId>mysql-connector-java</artifactId>
            <version>5.1.21</version>
        </dependency>
        <!-- pageHelper -->
        <dependency>
            <groupId>com.github.pagehelper</groupId>
            <artifactId>pagehelper</artifactId>
            <version>4.1.6</version>
        </dependency>
    </dependencies>

    <properties>
        <java.version>1.8</java.version>
    </properties>

    <build>
        <plugins>
            <plugin>
                <groupId>org.springframework.boot</groupId>
                <artifactId>spring-boot-maven-plugin</artifactId>
            </plugin>
        </plugins>
    </build>

</project>
步骤 5 : 增加实体类 Category
package com.ryan.springboot.pojo;

public class Category {

    private int id;

    private String name;
    public int getId() {
        return id;
    }
    public void setId(int id) {
        this.id = id;
    }
    public String getName() {
        return name;
    }
    public void setName(String name) {
        this.name = name;
    }

}
步骤 6 : 增加 CategoryMapper
package com.ryan.springboot.mapper;

import java.util.List;

import org.apache.ibatis.annotations.Delete;
import org.apache.ibatis.annotations.Insert;
import org.apache.ibatis.annotations.Mapper;
import org.apache.ibatis.annotations.Select;
import org.apache.ibatis.annotations.Update;

import com.ryan.springboot.pojo.Category;

@Mapper
public interface CategoryMapper {

    @Select("select * from category_ ")
    List<Category> findAll();

    @Insert(" insert into category_ ( name ) values (#{name}) ")
    public int save(Category category);

    @Delete(" delete from category_ where id= #{id} ")
    public void delete(int id);

    @Select("select * from category_ where id= #{id} ")
    public Category get(int id);

    @Update("update category_ set name=#{name} where id=#{id} ")
    public int update(Category category);

}
步骤 7 : 增加控制类 CategoryController
package com.ryan.springboot.web;
import java.util.List;

import org.springframework.beans.factory.annotation.Autowired;
import org.springframework.stereotype.Controller;
import org.springframework.ui.Model;
import org.springframework.web.bind.annotation.RequestMapping;
import org.springframework.web.bind.annotation.RequestParam;

import com.github.pagehelper.PageHelper;
import com.github.pagehelper.PageInfo;
import com.ryan.springboot.mapper.CategoryMapper;
import com.ryan.springboot.pojo.Category;

@Controller
public class CategoryController {
    @Autowired CategoryMapper categoryMapper;

    @RequestMapping("/addCategory")
    public String listCategory(Category c) throws Exception {
        categoryMapper.save(c);
        return "redirect:listCategory";
    }
    @RequestMapping("/deleteCategory")
    public String deleteCategory(Category c) throws Exception {
        categoryMapper.delete(c.getId());
        return "redirect:listCategory";
    }
    @RequestMapping("/updateCategory")
    public String updateCategory(Category c) throws Exception {
        categoryMapper.update(c);
        return "redirect:listCategory";
    }
    @RequestMapping("/editCategory")
    public String listCategory(int id,Model m) throws Exception {
        Category c= categoryMapper.get(id);
        m.addAttribute("c", c);
        return "editCategory";
    }

    @RequestMapping("/listCategory")
    public String listCategory(Model m,@RequestParam(value = "start", defaultValue = "0") int start,@RequestParam(value = "size", defaultValue = "6") int size) throws Exception {
        PageHelper.startPage(start,size,"id desc");
        List<Category> cs=categoryMapper.findAll();
        PageInfo<Category> page = new PageInfo<>(cs);
        m.addAttribute("page", page);
        return "listCategory";
    }

}
步骤 8 : 增加 PageHelperConfig
配置 PageHealper
package com.ryan.springboot.config;

import java.util.Properties;

import org.springframework.context.annotation.Bean;
import org.springframework.context.annotation.Configuration;

import com.github.pagehelper.PageHelper;

@Configuration
public class PageHelperConfig {

    @Bean
    public PageHelper pageHelper() {
        PageHelper pageHelper = new PageHelper();
        Properties p = new Properties();
        p.setProperty("offsetAsPageNum", "true");
        p.setProperty("rowBoundsWithCount", "true");
        p.setProperty("reasonable", "true");
        pageHelper.setProperties(p);
        return pageHelper;
    }
}
步骤 9 : listCategory.html
增加和查询的页面 listCategory.html
<!DOCTYPE HTML>
<html xmlns:th="http://www.thymeleaf.org">
<head>
    <title>hello</title>
    <meta http-equiv="Content-Type" content="text/html; charset=UTF-8" />
</head>
<body>

<div style="500px;margin:20px auto;text-align: center">
    <table align='center' border='1' cellspacing='0'>
        <tr>
            <td>id</td>
            <td>name</td>
            <td>编辑</td>
            <td>删除</td>
        </tr>
        <tr th:each="c:${page.list}">
            <td th:text="${c.id}"></td>
            <td th:text="${c.name}"></td>
            <td><a th:href="@{/editCategory(id=${c.id})}">编辑</a></td>
            <td><a th:href="@{/deleteCategory(id=${c.id})}">删除</a></td>
        </tr>
    </table>
    <br/>
    <div>
            <a th:href="@{/listCategory(start=0)}">[首  页]</a>
            <a th:href="@{/listCategory(start=${page.pageNum-1})}">[上一页]</a>
            <a th:href="@{/listCategory(start=${page.pageNum+1})}">[下一页]</a>
            <a th:href="@{/listCategory(start=${page.pages})}">[末  页]</a>
    </div>
    <br/>
    <form action="addCategory" method="post">

    name: <input name="name"/> <br/>
    <button type="submit">提交</button>

    </form>
</div>

</body>
</html>
步骤 10 : editCategory.html
修改页面
<!DOCTYPE HTML>
<html xmlns:th="http://www.thymeleaf.org">
<head>
    <title>hello</title>
    <meta http-equiv="Content-Type" content="text/html; charset=UTF-8" />
</head>
<body>
<div style="margin:0px auto; 500px">

    <form action="updateCategory" method="post">

    name: <input name="name" th:value="${c.name}"/> <br/>

    <input name="id" type="hidden" th:value="${c.id}"/>
    <button type="submit">提交</button>

    </form>
</div>
</body>

</html>
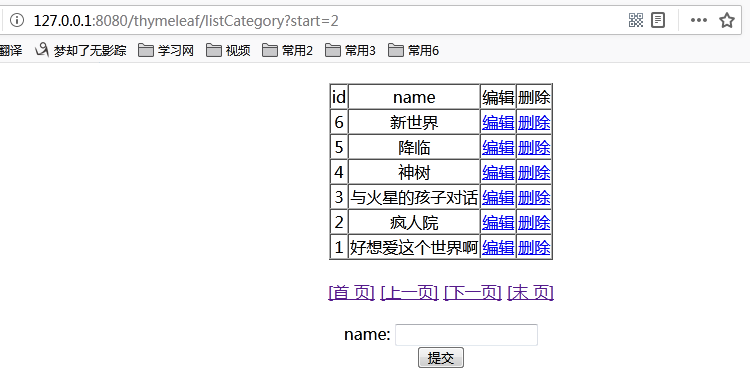
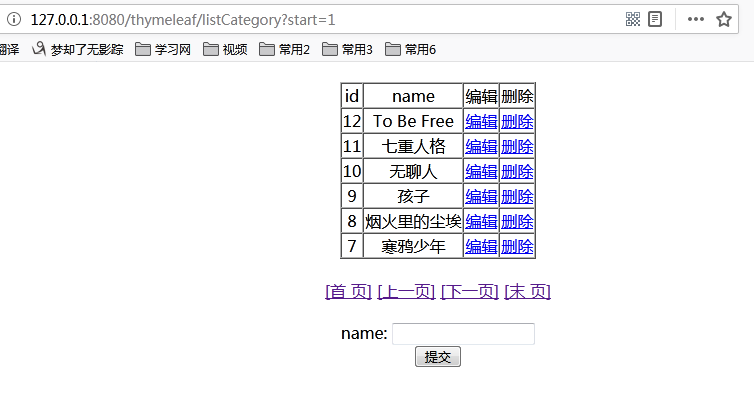
步骤 11 : 重启测试
重新运行 Application.java 然后访问地址:
显示效果:
更多关于 Springboot_thymeleaf_CRUD 详细内容,点击学习: https://t.cn/A6A33oTQ