最近开发部总监需要部署JIRA管理项目,就安装了一个JIRA8.5.7版安装并破解后,有天断电重启了,发现启动不了提示连接不上数据库。后来我又换了台机器重新安装后又进行了重启发现此破解版本存在问题。并了保证能安全使用。就选择使用旧版本8.0.2.
下面我就把自己的安装过程做一个记录备忘。
需要用到的文件:
atlassian-jira-software-8.0.2-x64.bin
atlassian-extras-3.2.jar
jdk-8u201-linux-x64.rpm
mysql-connector-java-5.1.49.jar
上传 jdk-8u201-linux-x64.rpm
安装jdk
rpm -ivh jdk-8u201-linux-x64.rpm
查看是否安装成功: java -version
看一下CentOS 7系统是否已安装mysql历史版本
rpm -qa|grep mysql
rpm -qa|grep mariadb
存在mysql历史版本可用以下命令,依次进行卸载。
yum -y remove  mysql安装包名称
yum -y remove  mariadb安装包名称
CentOS7默认yum安装数据库是mariadb,因此需要通过repo源进行安装mysql最新版本。
[root@localhost ~]# wget http://repo.mysql.com/mysql57-community-release-el7-8.noarch.rpm
[root@localhost ~]# rpm -ivh mysql57-community-release-el7-8.noarch.rpm
[root@localhost ~]# yum install -y mysql mysql-server
[root@localhost ~]# mysql -V   //查看当前安装mysql版本
mysql5.7安装完成后,初始密码为随机密码,需要修改一下密码.
[root@localhost ~]# systemctl start mysqld   //启动mysql服务
[root@localhost ~]# grep "password" /var/log/mysqld.log  //通过log查看初始密码
2019-09-18T08:17:00.010786Z 1 [Note] A temporary password is generated for root@localhost: i8d?ur_#rr+O    //i8d?ur_#rr+O此为mysql初始密码
[root@localhost ~]# mysql -u root -p
Enter password:                         //输入初始密码i8d?ur_#rr+O
Welcome to the MySQL monitor.  Commands end with ; or g.
Your MySQL connection id is 3
Server version: 5.7.27
Copyright (c) 2000, 2019, Oracle and/or its affiliates. All rights reserved.
Oracle is a registered trademark of Oracle Corporation and/or its
affiliates. Other names may be trademarks of their respective
owners.
Type 'help;' or 'h' for help. Type 'c' to clear the current input statement.
mysql>
mysql密码重置
mysql> alter user 'root'@'localhost' identified by 'Password@123..';   //重置mysql密码为:Password@123..
Query OK, 0 rows affected (0.00 sec)

mysql> update mysql.user set host='%' where host='localhost';  //root用户可使用任意IP登录数据库
Query OK, 3 rows affected (0.00 sec)
Rows matched: 3  Changed: 3  Warnings: 0

mysql> flush privileges;   //刷新权限
mysql默认配置的路径:
- 配置文件:/etc/my.cnf
- 数据库文件:/var/lib/mysql
- 日志文件:/var/log/var/log/mysqld.log
- 服务启动脚本:/usr/lib/systemd/system/mysqld.service
- socket文件:/var/run/mysqld/mysqld.pid
JRIA数据库创建及用户创建:
create database jira default character set utf8 collate utf8_bin;
grant all on jira.* to 'jira@’%' identified by 'jira';
flush privileges;
上传atlassian-jira-software-8.0.2-x64.bin到根目录。
更改此文件权限为可执行
chmod +x atlassian-jira-software-8.0.2-x64.bin
安装Jira
./atlassian-jira-software-8.0.2-x64.bin

依次选择安装,最后选n 先不启动JIRA.
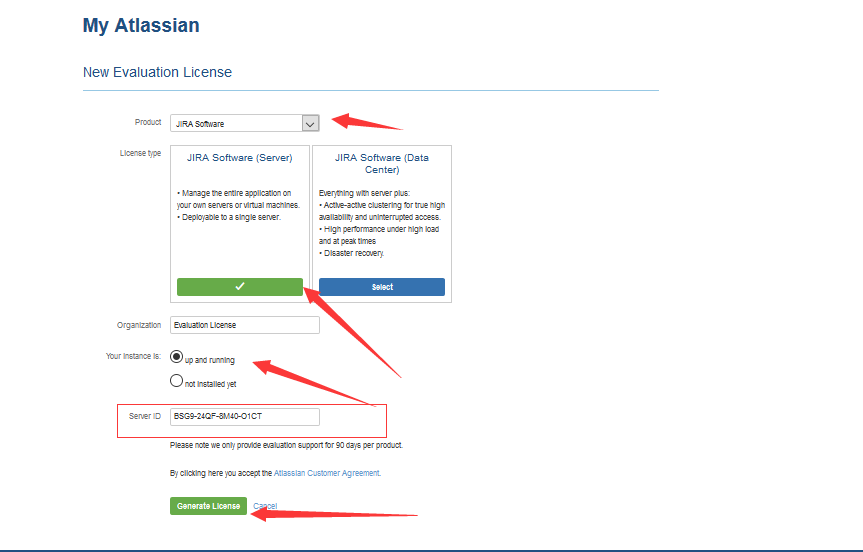
对JIRA进行破解、先备份文件再复制破解文件、复制数据连接JAR文件、
mv /opt/atlassian/jira/atlassian-jira/WEB-INF/lib/atlassian-extras-3.2.jar /opt/atlassian/jira/atlassian-jira/WEB-INF/lib/atlassian-extras-3.2bak.jar
cp atlassian-extras-3.2.jar /opt/atlassian/jira/atlassian-jira/WEB-INF/lib/
cp mysql-connector-java-5.1.49.jar /opt/atlassian/jira/atlassian-jira/WEB-INF/lib/
启动JIRA服务 /opt/atlassian/jira/bin/start-jira.sh
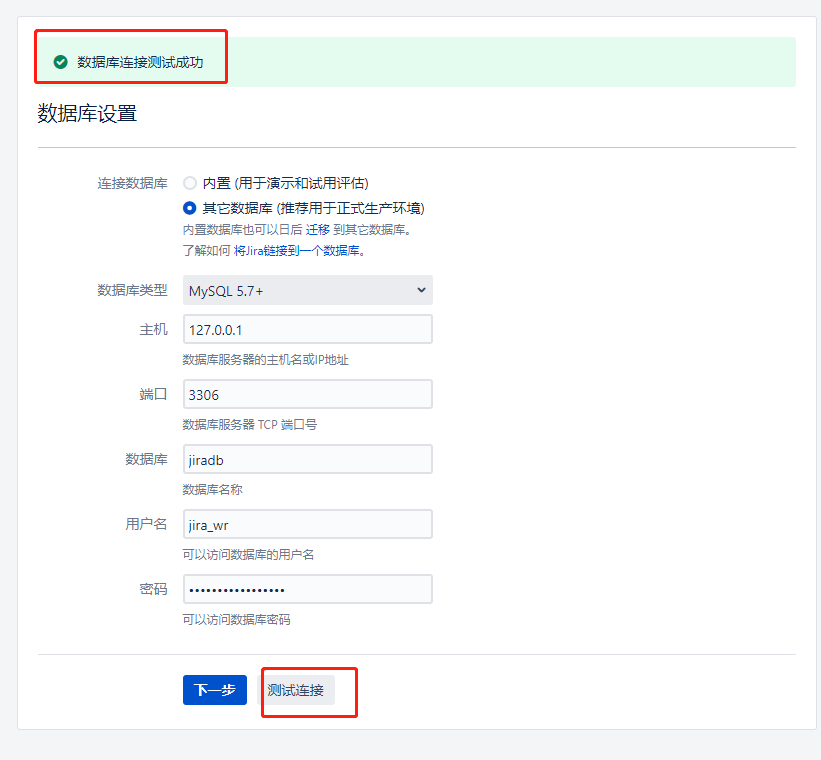
启动以后进行数据库连接配置。


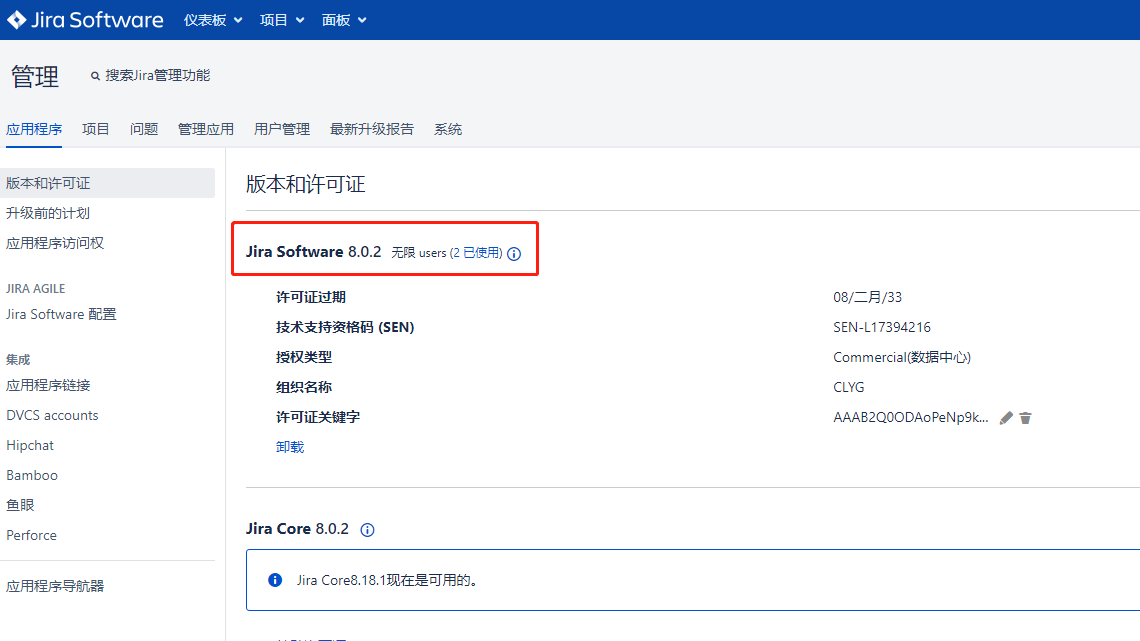
如下是配置成功后进入系统可以看到系统已破解。
参考链接:
https://www.xiaosige.com/post/afb30e04.html
https://www.liuwg.com/archives/jira
https://blog.csdn.net/qq_44656741/article/details/114536414