摘要: 本文介绍主流浏览器的搜索引擎插件标准。本文还解释如何在浏览器的添加搜索引擎插件。
本文内容:
简介
现今主流的浏览器基本都支持在搜索栏上添加自定义的搜索引擎。当然,不同的浏览器采用的搜索引擎添加方式不同,下面就我所知道的4种方式逐一作一介绍。
一、 Sherlock标准
Sherlock是使用比较广泛的一种搜索引擎标准,支持Mozilla内核的浏览器,在Firefox1.0以上版本及Netscape7.1以上版本使用。
先给出XXX网站用Sherlock标准写好的示例:
# Mozilla Firefox 1.0/Netscape 7.1 plugin for XXX.com Search Engine v2.
# by OscarXie at XXX dot com
#<oscarx55@126.com>
# Created: December 01, 2006
# Use Sherlock Standard
#
<search
version="7.1"
name="XXX.com"
description="Shopping,Buy computer parts and accessories,ipod accessories,collectable toys and model kits!"
method="GET"
action="http://www.XXX.com/Product/ProductList.aspx"
searchForm="http://www.XXX.com/Product/SearchProduct.aspx"
queryEncoding="ISO-8859-1"
queryCharset="ISO-8859-1"
>
<input name="sourceid" value="Mozilla-search">
<input name="submit" value="search">
<input name="description" user>
<inputnext name=page factor=1>
<inputprev>
<interpret
browserResultType="result"
charset="ISO-8859-1"
resultListStart='<tr class="trListTitle">'
resultListEnd="</tr>"
resultItemStart='<td valign="top" height="40" align="left" class="chieftext">'
resultItemEnd="<td colspan="7" valign="top" align="left">"
priceStart='<span class="featureprice">'
priceEnd="</span>"
>
</search>
<browser
update="http://mycroft.mozdev.org/update.php/id0/XXX.src"
updateIcon="http://mycroft.mozdev.org/update.php/id0/XXX.jpg"
updateCheckDays="7"
>
1、
# Mozilla plug-in file for XXX by OscarXie <oscarx55@126.com>
#注释插件信息,参见http://mycroft.mozdev.org/deepdocs/headerinfo.html
2、
#开始Plugin信息
<search
#以search开头
3、
version="7.1"
#注意,这个version并不是指plugin自己的版本。请参见http://mycroft.mozdev.org/deepdocs/searchtag.html
4、
name="XXX.com"
#name用来显示在选择搜索引擎的下拉菜单里
5、
description=" Shopping,Buy computer parts and accessories,ipod accessories,collectable toys and model kits!"
#属性,是必须的
6、
method="GET"
action=""
searchForm=""
#属性action、searchForm和method比较重要了,是plugin能否工作正常的条件之一。searchForm要指定包含输入搜索条件表单(Form)的那个页面的url,action则和搜索表单里的action一样,查看包含表单的那个页面的源代码就知道了;method呢,显然应该跟表单的method属性一样,但是现在只能用GET。
7、
queryEncoding=""
queryCharset=""
#根据网站使用的语言,queryEncoding和queryCharset这两个属性也要加上,例如,中文的为gb2312
8、
<input name="sourceid" value="Mozilla-search">
#input标签,INPUT标签是用来告诉Mozilla把什么信息提交给搜索页面的,这个名为sourceid的INPUT是用来告诉搜索页面是Mozilla-search提交查询请求的,满足网站统计的需要。
9、
<input name="key" user>
#user表示这个是需要用户在搜索工具栏里输入的查询信息。这种需要用户输入的INPUT标签只能有一个。name的值要看搜索页面的源代码来确定。如果搜索页面的那个input的name是key,所以这里的name也是key。
10、
<input name="forum_num" value="-1">
<input name="mode" value="title">
#根据网站搜索页面的源代码查看是否还有信息,这些就不能要求用户输入了,所以直接用value来指定固定的值。
11、
<inputnext name="begin" factor="50">
<inputprev>
<inputnext name="page_n" factor="1">
<inputprev>
#inputnext和inputprev标签比较特殊,用来实现在Mozilla的侧栏(sidebar)里将查询结果分页。factor表示下一 页时属性的增长值。上面的代码表示每次按下“下一页”,begin会增加50,按下“前一页”则减少50。(注:factor是从0开始计算的。而CU的 搜索中page_n这个参数是从1开始的,所以在sidebar里的分页工作得不正常。已经有人提出了这个问题)
#input标签的文档参见http://mycroft.mozdev.org/deepdocs/inputtags.html
12、
<interpret
browserResultType="result"
charset="ISO-8859-1"
resultListStart='<tr class="trListTitle">'
resultListEnd="</tr>"
resultItemStart='<td valign="top" height="40" align="left" class="chieftext">'
resultItemEnd="<td colspan="7" valign="top" align="left">"
priceStart='<span class="featureprice">'
priceEnd="</span>"
>
#INTERPRET标签则是用来告诉Mozilla如何解释查询返回的结果的。至少要包括resultListStart、resultListEnd、 resultItemStart和resultItemEnd这四个属性。这里,resultListStart和resultListEnd是告诉Mozilla从什么地方开始查找查询结果,直到遇见什么为止。 resultItemStart和resultItemEnd告诉Mozilla在它们指定的范围内找<a xhref="">标签以便生成sidebar里的查询结果列表。
#interpret标签参见http://mycroft.mozdev.org/deepdocs/interprettag.html
13、
</search>
#结束search标签
14、
<browser
update="http://mycroft.mozdev.org/update.php/id0/chinaunix.src"
updateIcon="http://mycroft.mozdev.org/update.php/id0/chinaunix.gif"
updateCheckDays="7"
>
#需要BROWSER标签来指定与插件更新相关的一些信息,如更新的url和检查周期
#Browser标签参见http://mycroft.mozdev.org/deepdocs/browsertag.html
15、
这样一个完整的示例代码就成型了。
16、
现在保存这个文本文件,扩展名必须是.src。还需要为插件准备一个图标文件。这个图标得是16x16像素的gif、jpg、jpge或png文件,文件名必须和插件代码的名字一致。比如,我这个代码文件叫XXX.src,那么它的图标文件就得是XXX.gif或 XXX.png等什么的。详细要求在这里:http://mycroft.mozdev.org/deepdocs/iconinfo.html
17、
在把你的插件提交到Mycroft之前,请遵照这里http://mycroft.mozdev.org/quality.html 的要求检查一番吧。怎么安装(http://mycroft.mozdev.org/deepdocs/installing.html )你的插件呢?最简单的办法,直接copy到Mozilla的searchplugins目录。默认情况下,Windows 下这个目录是C:/Program Files/Mozilla.org/Mozilla/searchplugins(比如Firefox安装在C:/Program Files/Mozilla Firefox/searchplugins),Linux下是/usr/lib/Mozilla/searchplugins(非root用户需要写权限)。

图1 Check Syntax
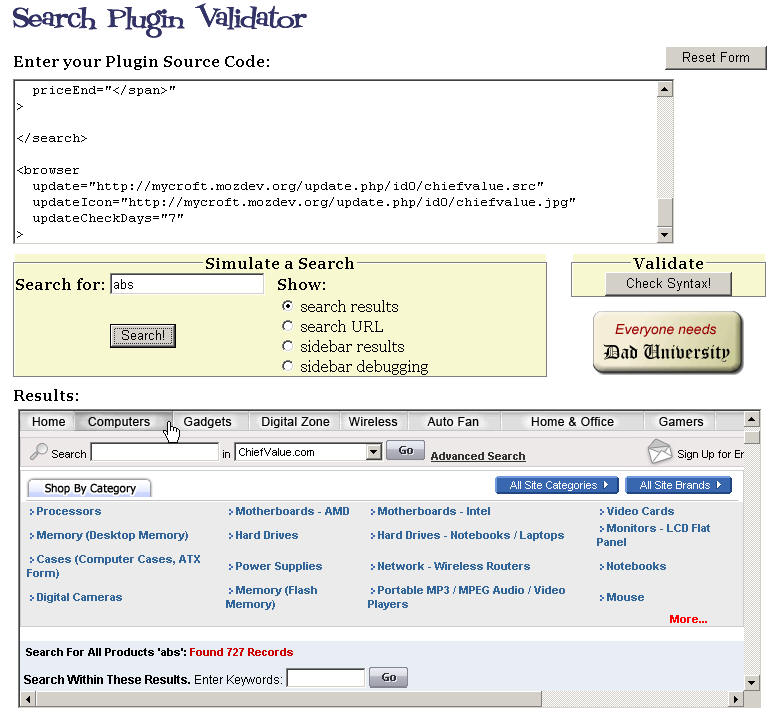
图2 Search Results
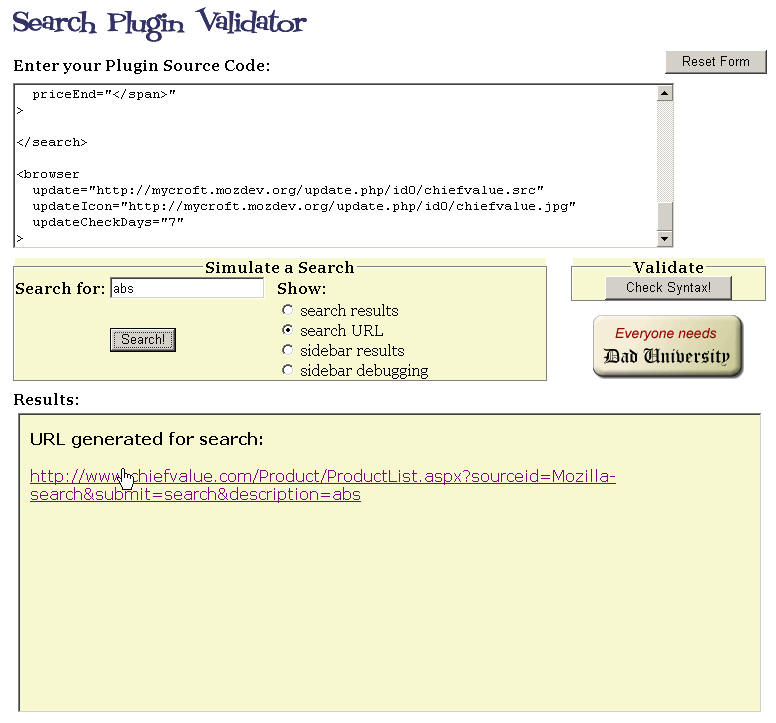
图3 Search URL
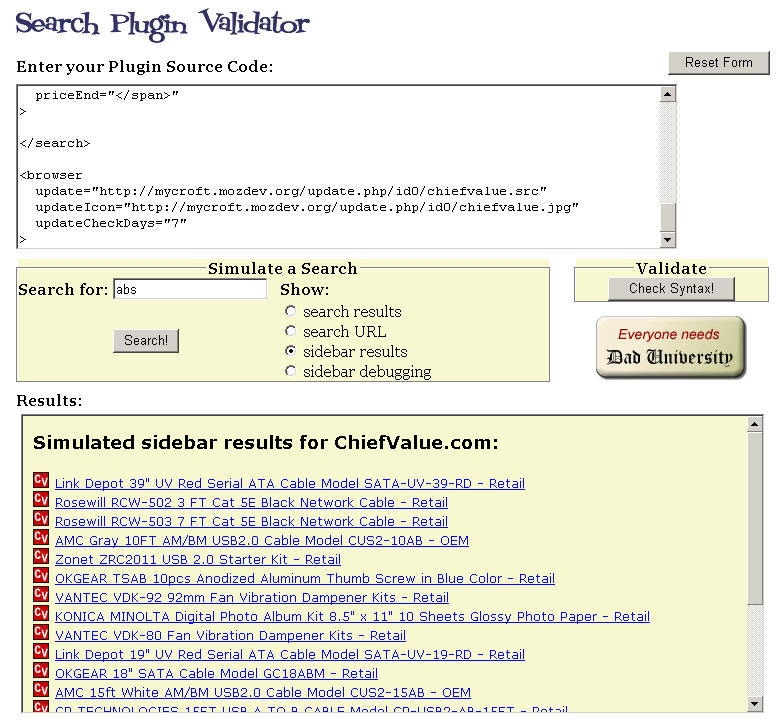
图4 Sidebar Results
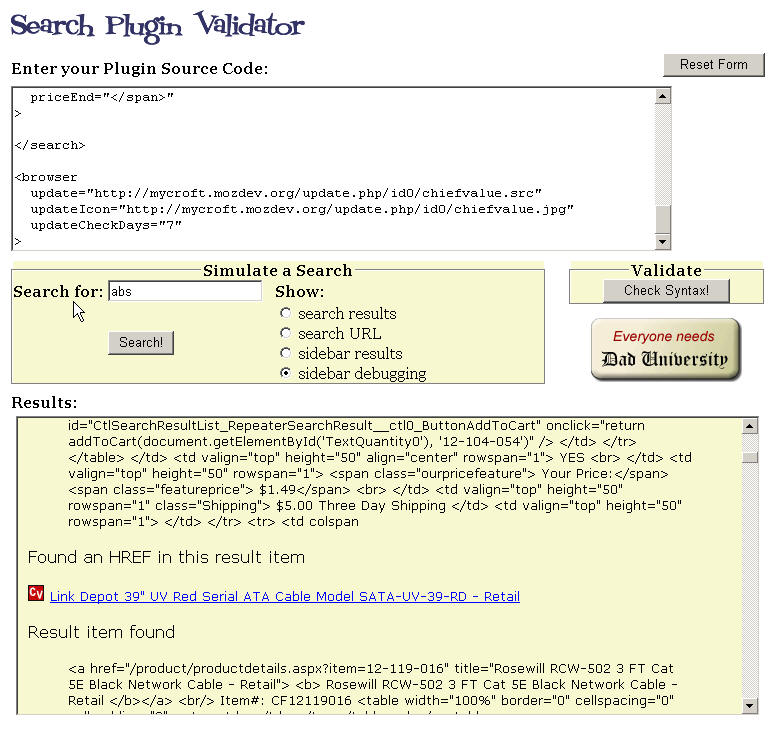
图5 Sidebar Debugging
18、
一切正常?只要你满意就可以提交了。http://mycroft.mozdev.org/submit.html
提交分3个步骤,第一步上传.src文件,第二步上传符合格式的图标,第三步填写插件信息。提交后就可以在Mycroft中查找到了:

图6
19、
Mycroft有很详细的制作教程(http://mycroft.mozdev.org/deepdocs/deepdocs.html ),甚至还有一个plugin生成页面帮你(http://mycroft.mozdev.org/generator/ )。
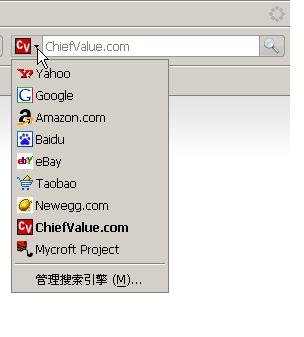
图7 Firefox搜索栏