1. spring cloud配置中心server
1.1 创建git仓库
首先在github上搭建一个存储配置中心的仓库,需要创建两个分支,一个是master,一个是dev分支。自己学习可以用公开库,真实环境使用的话,还是需要私库,或者自己搭建git服务器。

1.2 搭建server
使用spring cloud搭建服务器,工具使用idea,新建maven工程,配置pom.xml文件
<dependencyManagement>
        <dependencies>
            <dependency>
                <groupId>org.springframework.cloud</groupId>
                <artifactId>spring-cloud-dependencies</artifactId>
                <version>Finchley.SR1</version>
                <type>pom</type>
                <scope>import</scope>
            </dependency>
        </dependencies>
    </dependencyManagement>

    <dependencies>
        <dependency>
            <groupId>org.springframework.cloud</groupId>
            <artifactId>spring-cloud-config-server</artifactId>
        </dependency>
    </dependencies>
创建springboot启动类,启动类要加上@SpringBootApplication 和 @EnableConfigServer 这两个注解。
@SpringBootApplication: springboot启动注解
@EnableConfigServer: springcloud config server的注解,必须要加上
@SpringBootApplication
@EnableConfigServer
public class Application {

    public static void main(String[] args) {
        SpringApplication.run(Application.class, args);
    }
}
创建配置文件bootstrap.yml
spring:
  cloud:
    config:
      server:
        git:
          uri: https://github.com/hanggle/ConfigCenter.git  #git仓库地址,就是刚才创建的git仓库
          skipSslValidation: true #跳过校验
          basedir: d:///myspace///config-center///config #从git仓库拉取到的文件在本地存储的位置,可自行修改或删掉,默认存储在C盘
        # bootstrap: true
server:
  port: 8889
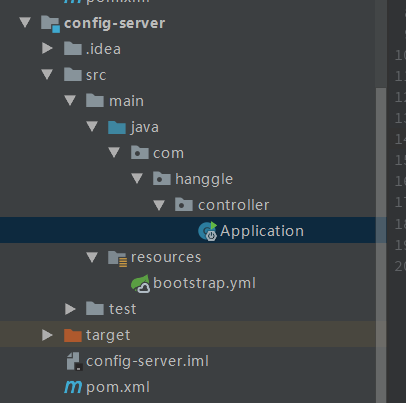
config-server的目录结构:
启动springboot,启动成功后可以在浏览器查看拉取到的配置信息,路径的访问有以下几种:
/{application}/{profile}[/{label}]
/{application}-{profile}.yml
/{label}/{application}-{profile}.yml
/{application}-{profile}.properties
/{label}/{application}-{profile}.properties
我创建的文件名是:application-dev.yml ,application-prod.yml
路径中占位符的表示是:
application 对应我文件中的 application
profile 对应 dev或prod
label 对应分支 master(默认是master 分支)
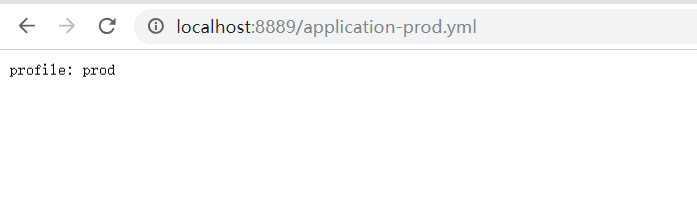
访问示例:
默认master分支

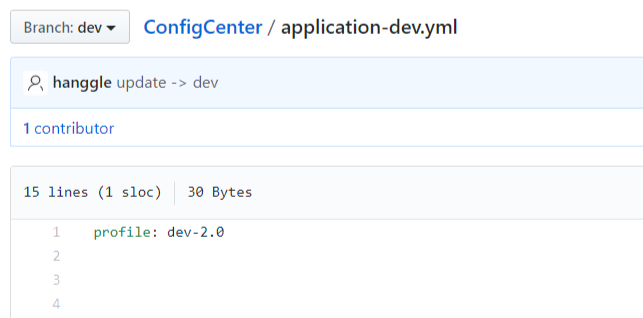
dev分支:

有兴趣的同学可以都试试,配置没问题都可以访问得到。
到此单机配置服务中心搭建完成了。
2. spring cloud配置中心client
使用spring cloud搭建服务器,工具使用idea,新建maven工程,配置pom.xml文件
<parent>
        <groupId>org.springframework.boot</groupId>
        <artifactId>spring-boot-starter-parent</artifactId>
        <version>2.0.4.RELEASE</version>
    </parent>

    <dependencyManagement>
        <dependencies>
            <dependency>
                <groupId>org.springframework.cloud</groupId>
                <artifactId>spring-cloud-dependencies</artifactId>
                <version>Finchley.SR1</version>
                <type>pom</type>
                <scope>import</scope>
            </dependency>
        </dependencies>
    </dependencyManagement>

    <dependencies>
        <dependency>
            <groupId>org.springframework.boot</groupId>
            <artifactId>spring-boot-starter-web</artifactId>
        </dependency>
        <dependency>
            <groupId>org.springframework.cloud</groupId>
            <artifactId>spring-cloud-starter-config</artifactId>
        </dependency>
    </dependencies>
创建springboot启动类
@SpringBootApplication
public class ClientApplication {

    public static void main(String[] args) {
        SpringApplication.run(ClientApplication.class, args);
    }
}
创建测试controller
@RestController
public class TestController {

    @Value("${mydev}")
    private String userName;
    @Value("${profile}")
    private String profile;
    @Value("${name}")
    private String name;

    @GetMapping("/test")
    public String home() {
        return "mydev: " + userName +"    profile:" + profile + " name:" + name;
    }

}
配置文件
application.yml
server:
  port: 8081
  name: config-client
mydev: ${profile}
bootstrap.yml
spring:
  application:
    name: application # 指的是application-dev.xml中的application
  cloud:
    config:
      uri: http://localhost:8889 # config-server 地址
      profile: dev # 后缀  指的是application-dev.xml中的dev
      label: dev # git 分支
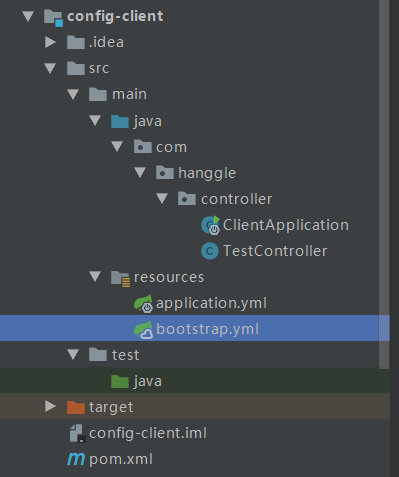
项目结构
启动成功后访问
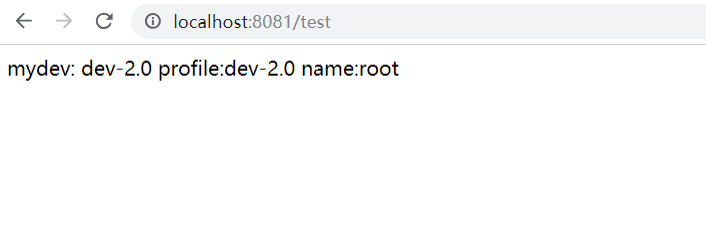
我在Github上的dev分支配置
在上面我通过两种方式读取配置属性:
1、直接在java文件中使用(peofile属性)
2、是在xml文件中陪之后再在java中使用(mydev属性)
比较推荐第二种,虽然多了一步,但是可以清除的知道来源,方便找问题。
3. 总结
到此初步完成简单的使用和测试,复杂的使用还需要再研究官方文档:http://cloud.spring.io/spring-cloud-config/single/spring-cloud-config.html
单一服务肯定没办法保证高可用性,具体方案待续。。。。。。