一:orm新增,删除,创建表
1 orm的创建
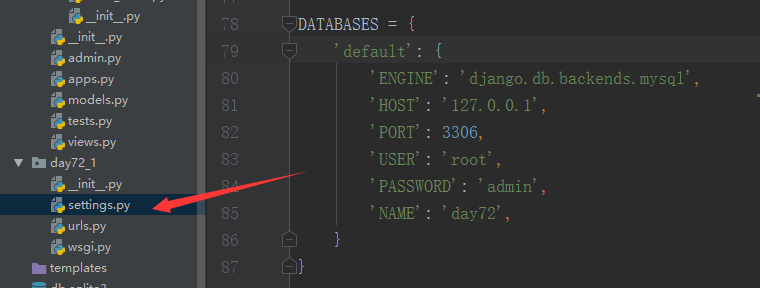
(1) 创建完django 项目后,设置对settingsj进行设置


DATABASES = {
    'default': {
        'ENGINE': 'django.db.backends.mysql',
        'HOST': '127.0.0.1',
        'PORT': 3306,
        'USER': 'root',
        'PASSWORD': 'admin',
        'NAME': 'day72',
    }
}
(2)对app下面的__init__进行设置
import pymysql
pymysql.install_as_MySQLdb()

(3) tools--->Run manage.py Task
python3 manage.py makemigrations
只需要敲命令:makemigrations(记录数据库的修改记录)
python3 manage.py migrate
只需要敲命令:migrate(把数据同步到数据库)
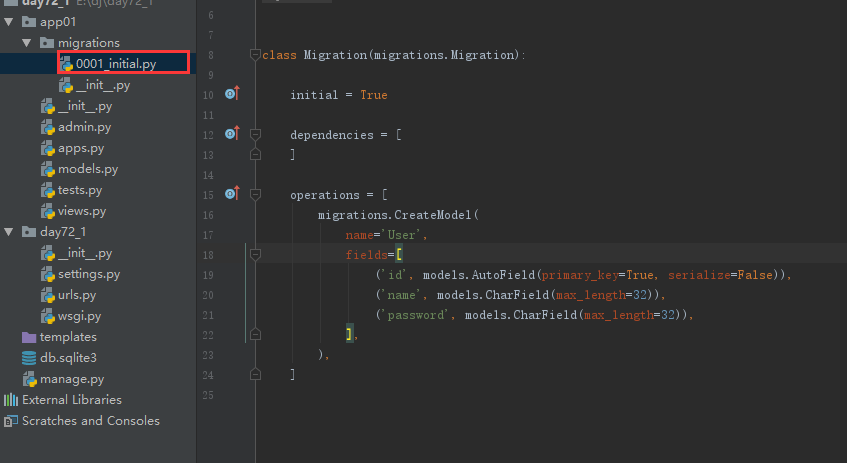
(4)就会看到下面的代码,不能删任何东西
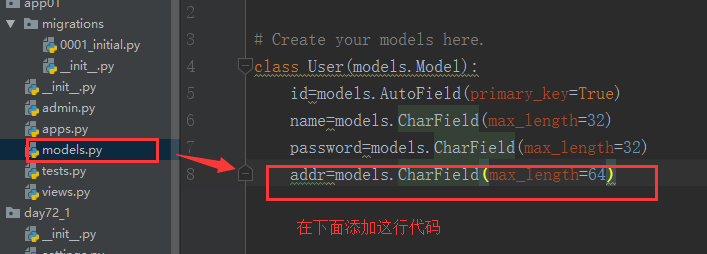
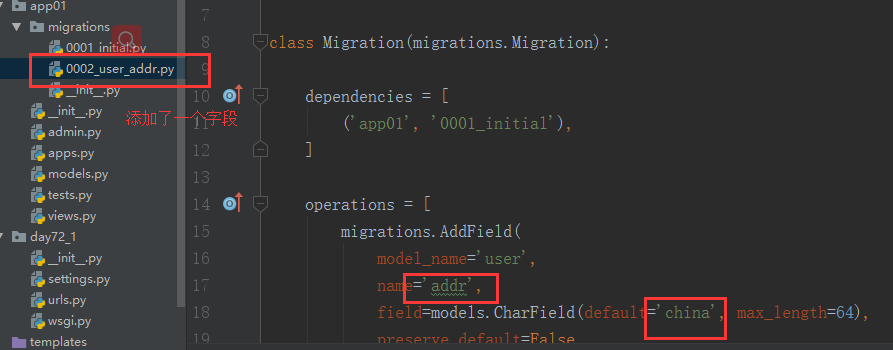
2 orm的新增
addr=models.CharField(max_length=64)
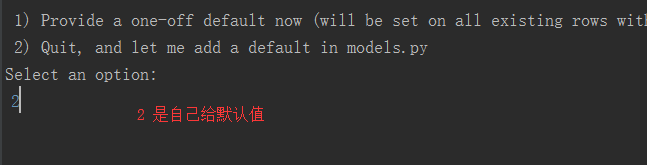
先敲python3 manage.py makemigrations
会出现这种情况(1 给默认值,传一个字符串))

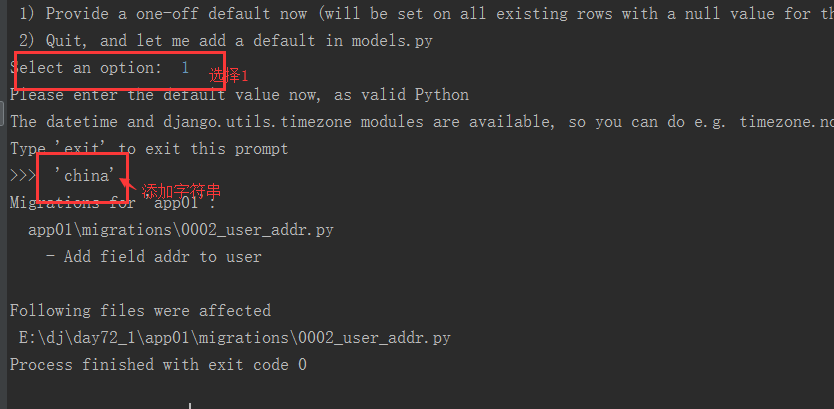
再敲python3 manage.py migrate


再敲python3 manage.py migrate
3 orm字段的删除

python3 manage.py migrate
二::django请求的生命周期
先访问url --> 查数据库--->拿模板 ,查询出来的数据库结果渲染到模板上,返回回去
web服务器 --> 实现这个协议的socket(把数据进行封装)-->web应用程序,进入了路由层的视图函数-->从数据库拿数据,进行数据的处理-->模板层拿模板,用数据渲染到模板上,最后原路返回到浏览器
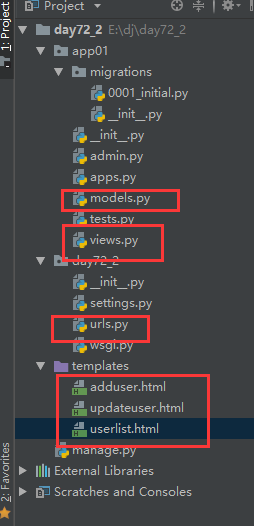
三:实现用户的增删查改
小项目总目录
# -*- coding: utf-8 -*-
# Generated by Django 1.11.9 on 2018-11-06 12:09
from __future__ import unicode_literals

from django.db import migrations, models


class Migration(migrations.Migration):

    initial = True

    dependencies = [
    ]

    operations = [
        migrations.CreateModel(
            name='User',
            fields=[
                ('id', models.AutoField(primary_key=True, serialize=False)),
                ('name', models.CharField(max_length=32)),
                ('sex', models.CharField(max_length=32)),
                ('age', models.CharField(max_length=32)),
            ],
        ),
    ]
import pymysql
pymsql.install_as_MySQLdb()
from django.db import models

# Create your models here.
class User(models.Model):
    id=models.AutoField(primary_key=True)
    name=models.CharField(max_length=32)
    sex=models.CharField(max_length=32)
    age=models.CharField(max_length=32)
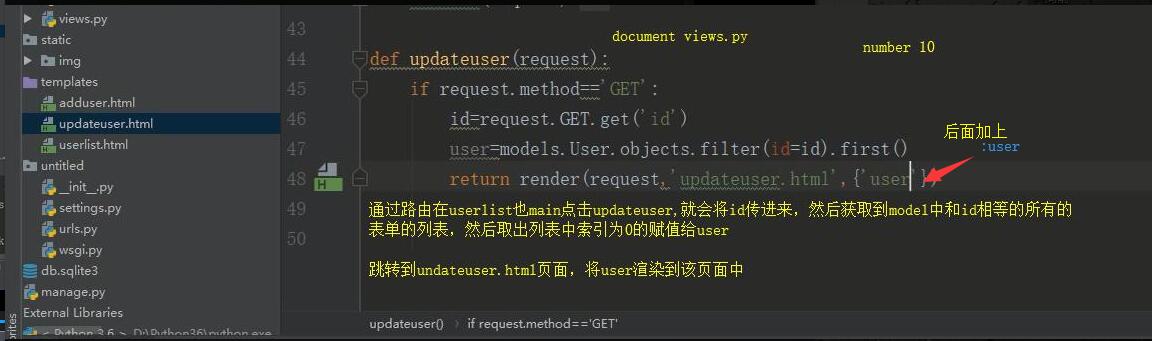
from django.shortcuts import render,redirect
from app01 import models
# Create your views here.
def userlist(request):
    if request.method=='GET':
        ret= models.User.objects.all()
        return render(request,'userlist.html',{'user_list':ret})

def deleteuser(request):
    if request.method == 'GET':
        id = request.GET.get('id')
        # 删除数据
        ret = models.User.objects.filter(id=id).delete()
        return redirect('/userlist/')
def adduser(request):
    if request.method == 'GET':
        return render(request,'adduser.html')
    elif request.method=='POST':
        name=request.POST.get('name')
        sex=request.POST.get('sex')
        age=request.POST.get('age')

        user=models.User(name=name,sex=sex,age=age)
        user.save()
        return redirect('/userlist/')


def updateuser(request):
    if request.method == 'GET':
        id = request.GET.get('id')
        user = models.User.objects.filter(id=id).first()
        return render(request, 'updateuser.html', {'user': user})  # 将user传给updateuser当作参数
    elif request.method == 'POST':
        id=request.GET.get('id')
        print(id)
        name = request.POST.get("name")
        sex = request.POST.get("sex")
        age = request.POST.get("age")
        user=models.User.objects.filter(id=id).update(name=name,sex=sex,age=age)
        return redirect('/userlist/')
"""
Django settings for day72_2 project.

Generated by 'django-admin startproject' using Django 1.11.9.

For more information on this file, see
https://docs.djangoproject.com/en/1.11/topics/settings/

For the full list of settings and their values, see
https://docs.djangoproject.com/en/1.11/ref/settings/
"""

import os

# Build paths inside the project like this: os.path.join(BASE_DIR, ...)
BASE_DIR = os.path.dirname(os.path.dirname(os.path.abspath(__file__)))


# Quick-start development settings - unsuitable for production
# See https://docs.djangoproject.com/en/1.11/howto/deployment/checklist/

# SECURITY WARNING: keep the secret key used in production secret!
SECRET_KEY = 'j+dzo(f#+gv13_tac67$^&5g963h-wxr8_dcoj40!egwzxk6$2'

# SECURITY WARNING: don't run with debug turned on in production!
DEBUG = True

ALLOWED_HOSTS = []


# Application definition

INSTALLED_APPS = [
    'django.contrib.admin',
    'django.contrib.auth',
    'django.contrib.contenttypes',
    'django.contrib.sessions',
    'django.contrib.messages',
    'django.contrib.staticfiles',
    'app01.apps.App01Config',
]

MIDDLEWARE = [
    'django.middleware.security.SecurityMiddleware',
    'django.contrib.sessions.middleware.SessionMiddleware',
    'django.middleware.common.CommonMiddleware',
    # 'django.middleware.csrf.CsrfViewMiddleware',
    'django.contrib.auth.middleware.AuthenticationMiddleware',
    'django.contrib.messages.middleware.MessageMiddleware',
    'django.middleware.clickjacking.XFrameOptionsMiddleware',
]

ROOT_URLCONF = 'day72_2.urls'

TEMPLATES = [
    {
        'BACKEND': 'django.template.backends.django.DjangoTemplates',
        'DIRS': [os.path.join(BASE_DIR, 'templates')]
        ,
        'APP_DIRS': True,
        'OPTIONS': {
            'context_processors': [
                'django.template.context_processors.debug',
                'django.template.context_processors.request',
                'django.contrib.auth.context_processors.auth',
                'django.contrib.messages.context_processors.messages',
            ],
        },
    },
]

WSGI_APPLICATION = 'day72_2.wsgi.application'


# Database
# https://docs.djangoproject.com/en/1.11/ref/settings/#databases

DATABASES = {
    'default': {
        'ENGINE': 'django.db.backends.mysql',
        'HOST': '127.0.0.1',
        'PORT': 3306,
        'USER': 'root',
        'PASSWORD': 'admin',
        'NAME': 'day72_2',
    }
}

# Password validation
# https://docs.djangoproject.com/en/1.11/ref/settings/#auth-password-validators

AUTH_PASSWORD_VALIDATORS = [
    {
        'NAME': 'django.contrib.auth.password_validation.UserAttributeSimilarityValidator',
    },
    {
        'NAME': 'django.contrib.auth.password_validation.MinimumLengthValidator',
    },
    {
        'NAME': 'django.contrib.auth.password_validation.CommonPasswordValidator',
    },
    {
        'NAME': 'django.contrib.auth.password_validation.NumericPasswordValidator',
    },
]


# Internationalization
# https://docs.djangoproject.com/en/1.11/topics/i18n/

LANGUAGE_CODE = 'en-us'

TIME_ZONE = 'UTC'

USE_I18N = True

USE_L10N = True

USE_TZ = True


# Static files (CSS, JavaScript, Images)
# https://docs.djangoproject.com/en/1.11/howto/static-files/

STATIC_URL = '/static/'
"""day72_2 URL Configuration

The `urlpatterns` list routes URLs to views. For more information please see:
    https://docs.djangoproject.com/en/1.11/topics/http/urls/
Examples:
Function views
    1. Add an import:  from my_app import views
    2. Add a URL to urlpatterns:  url(r'^$', views.home, name='home')
Class-based views
    1. Add an import:  from other_app.views import Home
    2. Add a URL to urlpatterns:  url(r'^$', Home.as_view(), name='home')
Including another URLconf
    1. Import the include() function: from django.conf.urls import url, include
    2. Add a URL to urlpatterns:  url(r'^blog/', include('blog.urls'))
"""
from django.conf.urls import url
from django.contrib import admin
from app01 import views
urlpatterns = [
    url(r'^admin/', admin.site.urls),
    url(r'^userlist/', views.userlist),
    url(r'^deleteuser/', views.deleteuser),
    url(r'^adduser/', views.adduser),
    url(r'^updateuser/', views.updateuser),

]
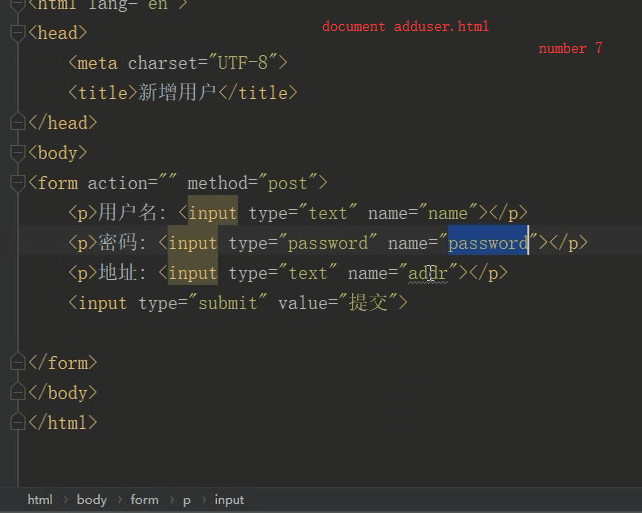
<!DOCTYPE html>
<html lang="en">
<head>
    <meta charset="UTF-8">
    <title>添加作者</title>
</head>
<body>
<div>
<form action="" method="post">
    <p>用户名:<input type="text" name="name"></p>
    <p>性别:<input type="text" name="sex"></p>
    <p>年龄:<input type="text" name="age"></p>
    <input type="submit" value="提交">
</form>
</div>
</body>
</html>
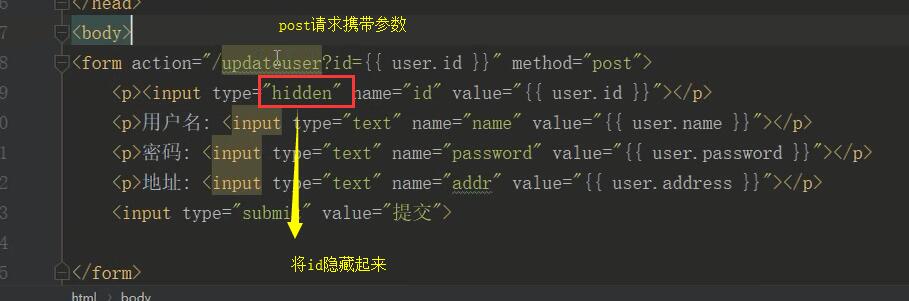
<!DOCTYPE html>
<html lang="en">
<head>
    <meta charset="UTF-8">
    <title>更改数据</title>
</head>
<body>
<form action="" method="post">
    <h2>更改数据</h2>
    <p><input type="hidden" name="id" value="{{ user.id }}"></p>
    <p>作者名:<input type="text" name="name" value="{{ user.name }}"></p>
    <p>性别:<input type="text" name="sex" value="{{ user.sex }}"></p>
    <p>年龄:<input type="text" name="age" value="{{ user.age }}"></p>
    <input type="submit" value="提交">
</form>
</body>
</html>
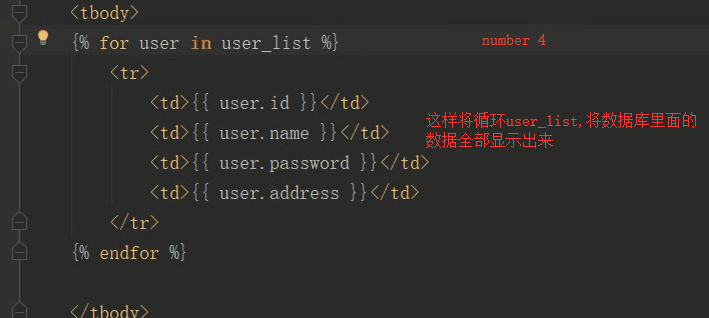
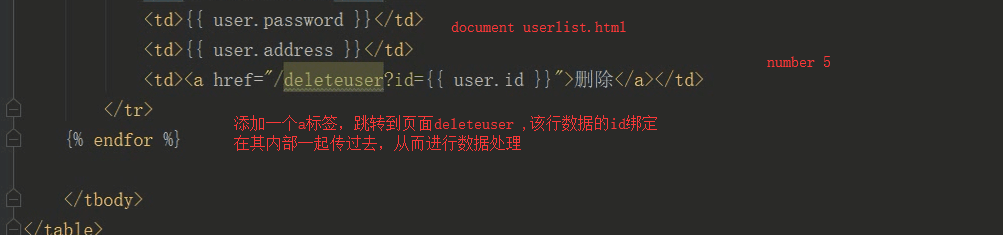
<!DOCTYPE html>
<html lang="en">
<head>
    <meta charset="UTF-8">
    <title>显示页面</title>
    <style>
        table{
            text-align: center;
            font: normal 20px/40px "STSong";
            margin: auto;
        }
    </style>
</head>
<body >
<table border="1">
<thead >
    <tr >
        <td>id</td>
        <td>name</td>
        <td>sex</td>
        <td>age</td>
    </tr>
</thead>
<tbody>
    {% for user in user_list %}
    <tr>
        <td>{{ user.id }}</td>
        <td>{{ user.name }}</td>
        <td>{{ user.sex }}</td>
        <td>{{ user.age }}</td>
        <td><a href="/deleteuser?id={{ user.id }}">删除</a></td>
        <td><a href="/updateuser?id={{ user.id }}">改变</a></td>
    </tr>
    {% endfor %}

    <a href="/adduser/" style="100%;line-height:40px;margin-left:50%">添加作者</a>


</tbody>
</table>
</body>
</html>
==========具体的实现方法及其讲解=============


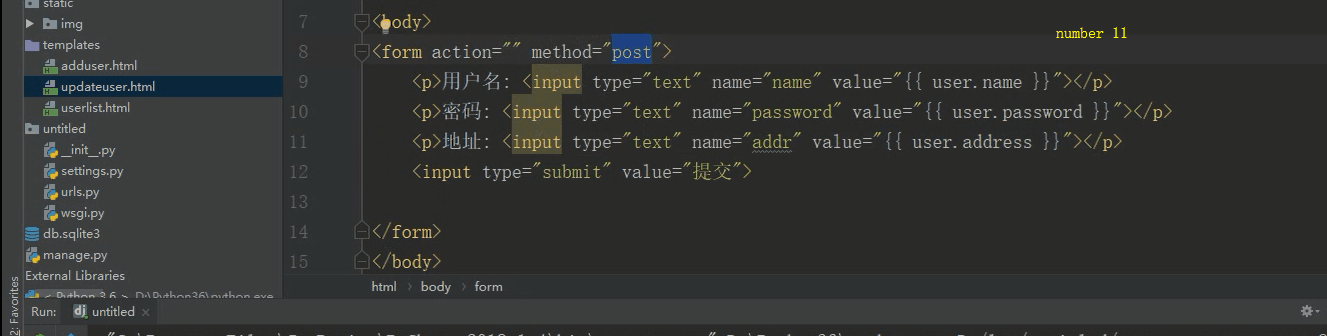
不管请求方式是get还是post,只要携带数据的,都通过GET取值

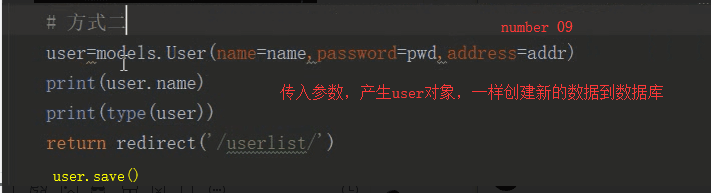
总结
    1 orm 创建表,新增字段,修改,删除字段,不能创建数据库
        -字段属性phone=models.CharField(max_length=64,null=True)
        -null=True 代表该列可以为空
    2 数据的增删改查
        -增(1):User.objects.create(address='')
        -增(2):实例化产生一个user对象,user对象的save方法
        -删:User.objects.filter(id=1,name='lqz').first().delete()
        -删:User.objects.filter(id=1,name='lqz').delete()
        -改:User.objects.filter(id=1,name='lqz').update()
        -查:User.objects.all()
            user=User.objects.filter(name='lqz')
            user.name
    3 前后台交互
        -id=1&name='lqz'&
        <form action="/updateuser/?id={{ user.id }}" method="post">
            <p><input type="hidden" name="id" value="{{ user.id }}"></p>
            <p>用户名: <input type="text" name="name" value="{{ user.name }}"></p>
            <p>密码: <input type="text" name="password" value="{{ user.password }}"></p>
            <p>地址: <input type="text" name="addr" value="{{ user.address }}"></p>
            <input type="submit" value="提交">
        </form>
    4 django生命周期
    5 一对多,多对多
        -publish_id
        -publish=models.ForeignKey(to='Publish', to_field='id')
        book.publish_id
        book.publish
        多对多:(自动创建第三张表)
        authors = models.ManyToManyField(to='Author')