https://stackoverflow.com/questions/21083170/how-to-configure-port-for-a-spring-boot-application
原文: https://www.colabug.com/2020/0205/6947647/
https://docs.spring.io/spring-boot/docs/current/maven-plugin/reference/htmlsingle/#goals

_____________________________________________
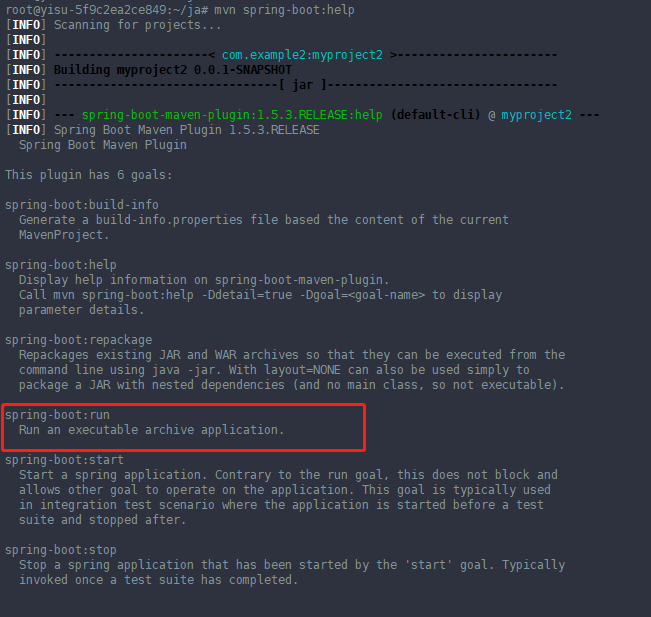
初学spring boot的时候,按照官方文档,都是建立了一个项目之后,然后执行 mvn spring-boot:run
就能把这个项目运行起来,我就很好奇这个指令到底做了什么,以及为什么项目里包含了main方法的那个class,要加一个 @SpringBootApplication
的注解呢?为什么加了这个注解 @SpringBootApplication
之后, mvn spring-boot:run
指令就能找到这个class并执行它的main方法呢?
首先我注意到,用maven新建的spring boot项目,pom.xml 里面有这么一条配置:
<build>
<plugins>
<plugin>
<groupId>org.springframework.boot</groupId>
<artifactId>spring-boot-maven-plugin</artifactId>
</plugin>
</plugins>
</build>
看来 mvn spring-boot:run
指令应该就是这个插件提供的。按照之前写的 《spring boot源码编译踩坑记》
这篇文章把spring boot的源码项目导入IDEA之后,在 spring-boot-project/spring-boot-tools/spring-boot-maven-plugin
找到了这个插件的源码。
由于不懂maven插件的开发机制,看不太懂,于是去找了下 maven的插件开发文档
,根据官方的文档,一个maven插件会有很多个目标,每个目标就是一个 Mojo 类,比如 mvn spring-boot:run
这个指令,spring-boot这部分是一个maven插件,run这部分是一个maven的目标,或者指令。
根据maven插件的开发文档,定位到 spring-boot-maven-plugin 项目里的RunMojo.java,就是 mvn spring-boot:run
这个指令所运行的java代码。关键方法有两个,一个是 runWithForkedJvm
,一个是 runWithMavenJvm
,如果pom.xml是如上述配置,则运行的是 runWithForkedJvm
,如果pom.xml里的配置如下,则运行 runWithMavenJvm
:
<build>
<plugins>
<plugin>
<groupId>org.springframework.boot</groupId>
<artifactId>spring-boot-maven-plugin</artifactId>
<configuration>
<fork>false</fork>
</configuration>
</plugin>
</plugins>
</build>
runWithForkedJvm
与 runWithMavenJvm
的区别,在于前者是起一个进程来运行当前项目,后者是起一个线程来运行当前项目。
我首先了解的是 runWithForkedJvm
:
private int forkJvm(File workingDirectory, List<String> args, Map<String, String> environmentVariables)
throws MojoExecutionException {
try {
RunProcess runProcess = new RunProcess(workingDirectory, new JavaExecutable().toString());
Runtime.getRuntime().addShutdownHook(new Thread(new RunProcessKiller(runProcess)));
return runProcess.run(true, args, environmentVariables);
}
catch (Exception ex) {
throw new MojoExecutionException("Could not exec java", ex);
}
}
根据这段代码, RunProcess
是由spring-boot-loader-tools 这个项目提供的,需要提供的workingDirectory 就是项目编译后的 *.class 文件所在的目录,environmentVariables 就是解析到的环境变量,args里,对于spring-boot的那些sample项目,主要是main方法所在的类名,以及引用的相关类库的路径。
workingDirectory 可以由maven的 ${project} 变量快速获得,因此这里的关键就是main方法所在的类是怎么找到的,以及引用的相关类库的路径是如何获得的。
找main方法所在的类的实现是在 AbstractRunMojo.java
里面:
mainClass = MainClassFinder.findSingleMainClass(this.classesDirectory, SPRING_BOOT_APPLICATION_CLASS_NAME);
MainClassFinder.java
是由spring-boot-loader-tools提供的,找到main方法所在的类主要是如下的代码:
static <T> T doWithMainClasses(File rootFolder, MainClassCallback<T> callback) throws IOException {
if (!rootFolder.exists()) {
return null; // nothing to do
}
if (!rootFolder.isDirectory()) {
throw new IllegalArgumentException("Invalid root folder '" + rootFolder + "'");
}
String prefix = rootFolder.getAbsolutePath() + "/";
Deque<File> stack = new ArrayDeque<>();
stack.push(rootFolder);
while (!stack.isEmpty()) {
File file = stack.pop();
if (file.isFile()) {
try (InputStream inputStream = new FileInputStream(file)) {
ClassDescriptor classDescriptor = createClassDescriptor(inputStream);
if (classDescriptor != null && classDescriptor.isMainMethodFound()) {
String className = convertToClassName(file.getAbsolutePath(), prefix);
T result = callback.doWith(new MainClass(className, classDescriptor.getAnnotationNames()));
if (result != null) {
return result;
}
}
}
}
if (file.isDirectory()) {
pushAllSorted(stack, file.listFiles(PACKAGE_FOLDER_FILTER));
pushAllSorted(stack, file.listFiles(CLASS_FILE_FILTER));
}
}
return null;
}
这里的核心就是利用java的classloader,找到含有main方法的类,然后再判断这个类有没有使用了 @SpringBootApplication
注解,有的话,就属于要执行的代码文件了。如果项目里面有多个含有main方法且被 @SpringBootApplication
注解的类的话,我看代码应该是直接选择找到的第一个开运行。
读取依赖的库路径,在spring-boot-maven-plugin里有大量的代码来实现,还是利用maven本身的特性实现的。
根据了解到的这些信息,我新建了一个普通的java项目bootexp,用一段简单的代码来运行起一个spring boot项目,这个spring boot项目就是spring官方给出的 <<Build a Restful Web Service>>
。我的普通的java项目放在 github
上,springboot_run_v1 这个tag即为可运行的代码。
package com.shahuwang.bootexp;
import java.io.File;
import java.io.IOException;
import java.util.ArrayList;
import java.util.HashMap;
import java.util.List;
import java.util.Map;
import org.springframework.boot.loader.tools.JavaExecutable;
import org.springframework.boot.loader.tools.MainClassFinder;
import org.springframework.boot.loader.tools.RunProcess;
public class Runner
{
public static void main( String[] args ) throws IOException {
String SPRING_BOOT_APPLICATION_CLASS_NAME = "org.springframework.boot.autoconfigure.SpringBootApplication";
File classesDirectory = new File("C:shareootsample	argetclasses");
String mainClass = MainClassFinder.findSingleMainClass(classesDirectory, SPRING_BOOT_APPLICATION_CLASS_NAME);
RunProcess runProcess = new RunProcess(classesDirectory, new JavaExecutable().toString());
Runtime.getRuntime().addShutdownHook(new Thread(new RunProcessKiller(runProcess)));
List<String> params = new ArrayList<>();
params.add("-cp");
params.add("相关库路径")
params.add(mainClass);
Map<String, String> environmentVariables = new HashMap<>();
runProcess.run(true, params, environmentVariables);
}
private static final class RunProcessKiller implements Runnable {
private final RunProcess runProcess;
private RunProcessKiller(RunProcess runProcess) {
this.runProcess = runProcess;
}
@Override
public void run() {
this.runProcess.kill();
}
}
}
相关库的路径获取,都是spring-boot-maven-plugin这个项目里面的私有方法,所以我这里直接在 bootsample 这个spring boot项目下执行 mvn spring-boot:run -X
, 输出classpath,把classpath复制过来即可。执行bootexp这个项目,即可运行起 bootsample 这个spring boot项目了。
所以为什么spring boot的项目,main方法所在的类都要加上注解 @SpringBootApplication 这个疑问也得到了解决。
综上, mvn spring-boot:run
这个指令为什么能运行起一个spring boot项目就没有那么神秘了,这里主要的难点就两个,一个是maven插件的开发,获得项目的配置信息,执行起指令;一个是类加载机制,以及注解分析。
后续继续看maven插件开发的相关信息,以及类加载机制
______________________
mv 启动spring boot修改端口
If you would like to run it locally, use this -
mvn spring-boot:run -Drun.jvmArguments='-Dserver.port=8085'
As of Spring Boot 2.0, here's the command that works (clues were here):
mvn spring-boot:run -Dspring-boot.run.arguments=--server.port=8085


___________________________
As said in docs either set server.port as system property using command line option to jvm -Dserver.port=8090 or add application.properties in /src/main/resources/ with
server.port=8090
For random port use
server.port=0
Similarly add application.yml in /src/main/resources/ with
server:
  port : 8090