刚才我们看到在Jenkins的内置构建触发器中,轮询SCM可以实现Gitlab代码更新,项目自动构建,但是
该方案的性能不佳。那有没有更好的方案呢? 有的。就是利用Gitlab的webhook实现代码push到仓
库,立即触发项目自动构建。

1.jenkins操作----------------------------------------------
安装Gitlab Hook插件
需要安装两个插件:
Gitlab Hook和GitLab

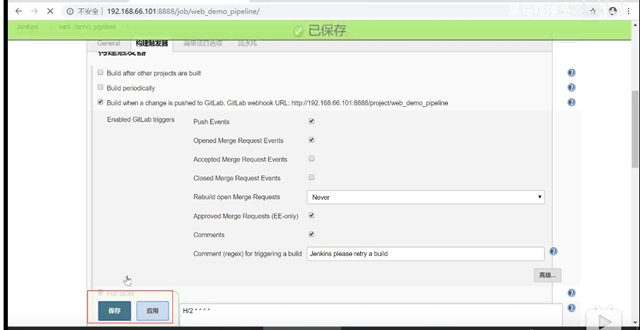
设置自动构建


等会需要把生成的webhook URL配置到Gitlab中
2.Gitlab操作-----------------------------------------------------------------
Gitlab配置webhook
1)开启webhook功能
使用root账户登录到后台,点击Admin Area -> Settings -> Network > outbound requests
勾选"Allow requests to the local network from web hooks and services"


2)在项目添加webhook
点击项目->Settings->Integrations
注意:一定要在项目下配置

这里填入的连接是jenkins安装了webhook后生成的连接,把它复制到gitlab


jenkins配置--------------------------------------------------

注意:以下设置必须完成,否则会报错!
Manage Jenkins->Confifigure System


回到gitlab操作---------------------------------------------------------------------


3.通过以上设置jenkins gitlab设置好了,现在jenkins配置构建脚本,先测试流水线测试
参考链接: https://www.bilibili.com/video/BV1kJ411p7mV?p=27
1.拉取代码

2.构建(不用生成的方式也行 )


3.命令执行不用脚本生成器方式

4.远程项目部署

全部代码
pipeline {
agent any
stages {
stage('拉取代码') {
steps {
checkout([$class: 'GitSCM', branches: [[name: '*/master']], doGenerateSubmoduleConfigurations: false, extensions: [], submoduleCfg: [], userRemoteConfigs: [[credentialsId: 'fbc65d5d-5c95-4313-9d2b-306e8dbc200c', url:'git@192.168.66.102:itheima_group/web_demo.git']]])
}
}
stage('编译构建') {
steps {
sh 'mvn clean package'
}
}
stage('项目部署') {
steps {
deploy adapters: [tomcat8(credentialsId: 'ad6cc9f6-c3a0-4c80-bdc1-f3ddb3aa915d', path: '', url: 'http://192.168.66.102:8080/')], contextPath: null, war: 'target/*.war'
}
}
}
}

通过以上步骤实现了流水线构建,现在测试流水线的自动构建
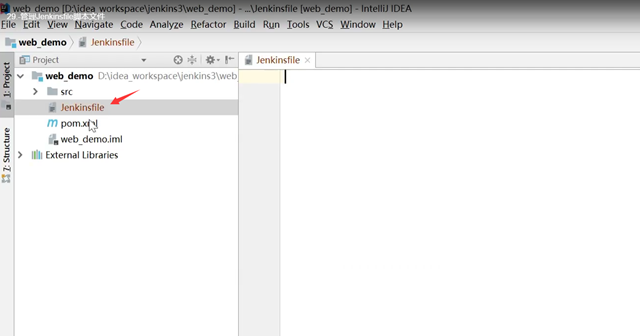
1.在idea上新建Jenkinsfile脚本,并把以上的脚本内容复制进去
因为如果脚本放在jenkins上容易丢失,大概步骤
1.生成git代码
2.编译打包
3.构建
下图配置好的结果图:

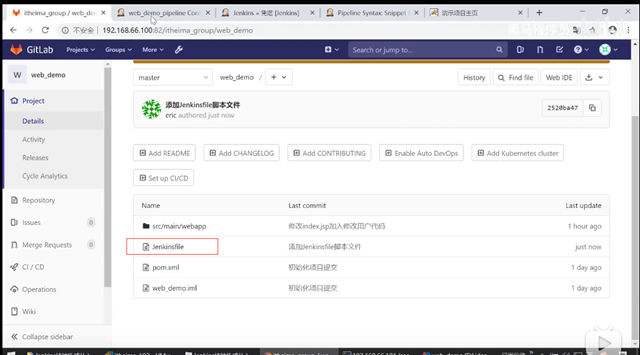
2.把脚本加入版本管理,先提交到本地仓库

push推上去


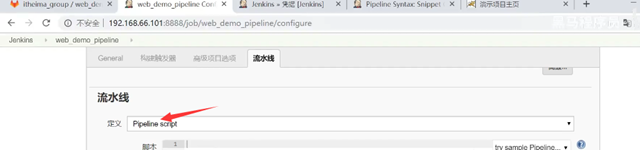
回到jenkins配置,选择指定脚本的方式。这样脚本就不用写在jenkins上了


最后测试.idea上更改代码后提交会发现一提交就会触发构建

更改代码后提交-push

回到jenkins里看看发现自动在构建
