网上查了许多关于springboot与quartz资料,发现使用XML配置的很少,简单整理了下,算是定时任务入门参考吧。
- 在pom.xml文件中,添加配置
       <dependency>
            <groupId>org.springframework.boot</groupId>
            <artifactId>spring-boot-starter-quartz</artifactId>
        </dependency>
- 创建任务定时处理类 SysDataJob
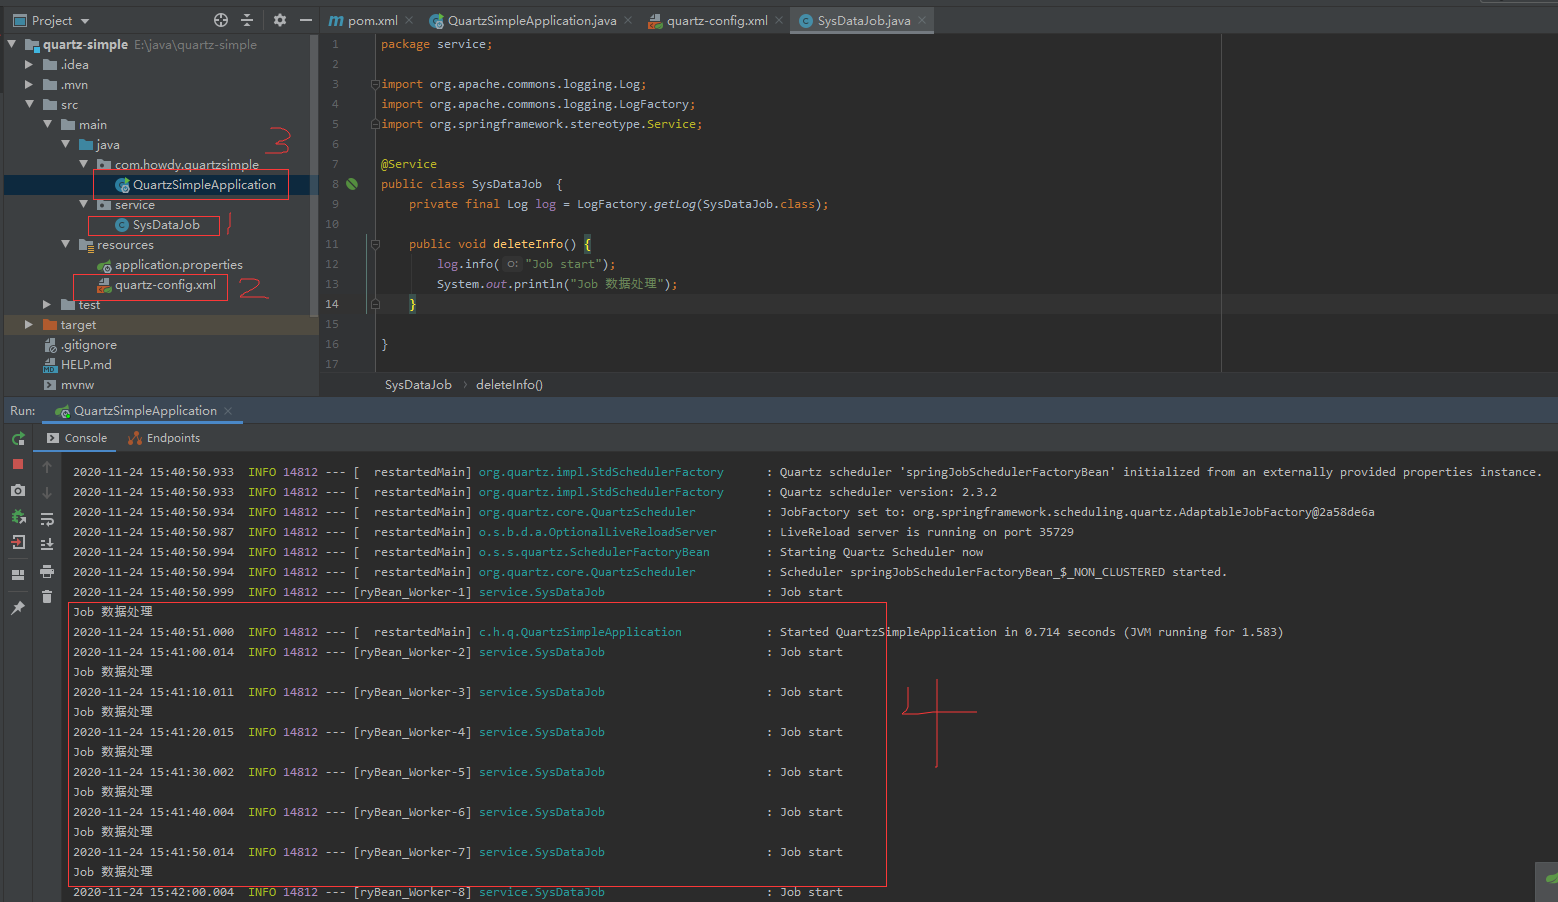
package service;

import org.apache.commons.logging.Log;
import org.apache.commons.logging.LogFactory;
import org.springframework.stereotype.Service;

@Service
public class SysDataJob  {
    private final Log log = LogFactory.getLog(SysDataJob.class);

    public void deleteInfo() {
        log.info("Job start");
        System.out.println("Job 数据处理");
    }

}
- 在resources文件下,创建quartz-config.xml
<?xml version="1.0" encoding="UTF-8"?>
<beans xmlns="http://www.springframework.org/schema/beans"
       xmlns:xsi="http://www.w3.org/2001/XMLSchema-instance"
       xsi:schemaLocation="http://www.springframework.org/schema/beans
http://www.springframework.org/schema/beans/spring-beans.xsd">

    <!--定时删除数据库数据任务-->
    <!-- 配置Job类 -->
    <bean id="sysDataJob" class="service.SysDataJob"></bean>
    <!-- 配置JobDetail -->
    <bean id="springQtzJob" class="org.springframework.scheduling.quartz.MethodInvokingJobDetailFactoryBean">
        <!-- 执行目标job -->
        <property name="targetObject" ref="sysDataJob"></property>
        <!-- 要执行的方法 -->
        <property name="targetMethod" value="deleteInfo"></property>
        <property name="concurrent" value="false"></property><!--配置为false不允许任务并发执行-->
    </bean>
    <!-- 配置tirgger触发器 -->
    <bean id="cronTrigger1" class="org.springframework.scheduling.quartz.CronTriggerFactoryBean">
        <!-- jobDetail -->
        <property name="jobDetail" ref="springQtzJob"></property>
        <!-- cron表达式,执行时间每10秒执行一次 -->
        <!-- 可以根据自己的需求指定执行时间 -->
        <property name="cronExpression" value="0/10 0/1 0/1 * * ? "></property>
    </bean>
    <!-- 配置调度工厂 -->
    <bean id="springJobSchedulerFactoryBean" class="org.springframework.scheduling.quartz.SchedulerFactoryBean">
        <property name="triggers">
            <list>
                <ref bean="cronTrigger1"></ref>
                <!-- <ref bean="cronTrigger2"></ref>-->
            </list>
        </property>

    </bean>
</beans>
在应用程序启动时,添加注解,指定xml路径 @ImportResource("classpath:quartz-config.xml")
package com.howdy.quartzsimple;

import org.springframework.boot.SpringApplication;
import org.springframework.boot.autoconfigure.SpringBootApplication;
import org.springframework.context.annotation.ImportResource;

@SpringBootApplication
@ImportResource("classpath:quartz-config.xml")
public class QuartzSimpleApplication {

    public static void main(String[] args) {
        SpringApplication.run(QuartzSimpleApplication.class, args);
    }

}
- 完整的目录结构,最后打印日志,是每10秒执行一次
源码下载:https://download.csdn.net/download/haojuntu/13184110