整理人:pt007@vip.sina.com
1、准备环境
主机:window10
Phpstorm版本:2018.2.1 X64
Phpstudy版本:2018
PHP版本:5.6.27
php开发工具下载:https://www.php.cn/xiazai/gongju
2、安装步骤
2.1 安装Xdebug
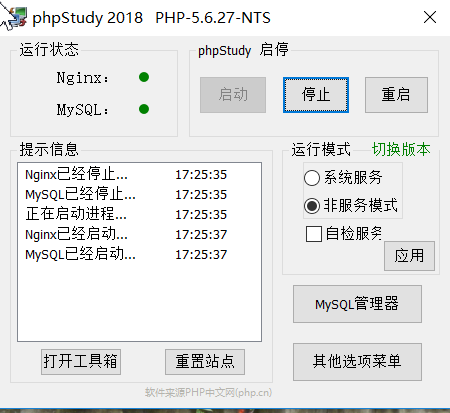
本地的环境是用phpStudy搭建的,直接在phpStudy可以勾选Xdebug:
//打开并配置php.ini,保存后记得重启phpstudy:
php.ini文件位置:E:phpStudy2018PHPTutorialphpphp-5.6.27-nts
[XDebug]
zend_extension="E:phpStudy2018PHPTutorialphpphp-5.6.27-ntsextphp_xdebug.dll"
xdebug.profiler_output_dir="E:phpStudy2018PHPTutorial mpxdebug"
xdebug.trace_output_dir="E:phpStudy2018PHPTutorial mpxdebug"
xdebug.remote_enable=1
xdebug.profiler_enable_trigger=0
xdebug.remote_handler=dbgp
xdebug.remote_mode=req
xdebug.remote_host=localhost
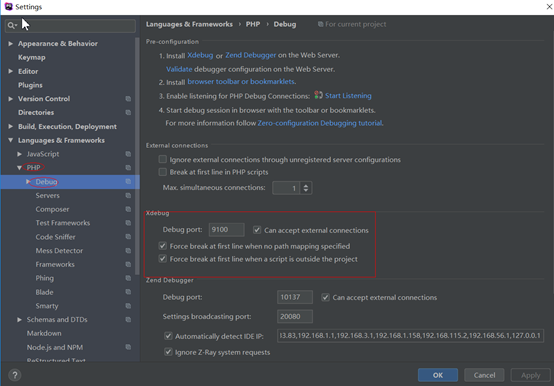
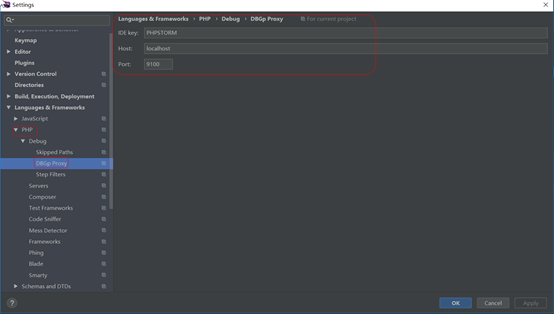
xdebug.remote_port=9100
xdebug.idekey="PHPSTORM"
xdebug.profiler_output_dir = "d: mp"
//验证xdebug安装是否成功:
2.2 配置phpstorm
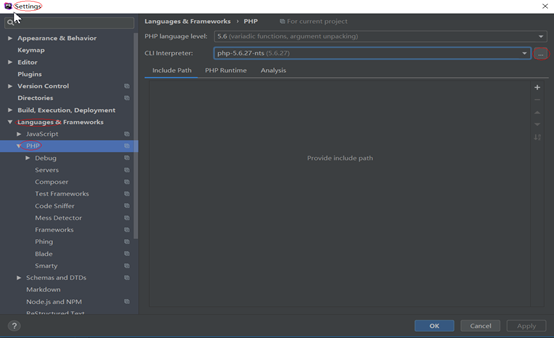
2.2.1 配置phpstorm软件的php版本
File->Settings
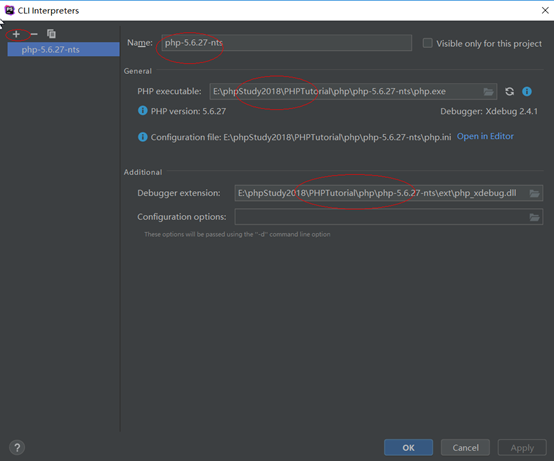
2.2.2 添加服务器
//可以配置一个公网IP,也可以是本机localhost:
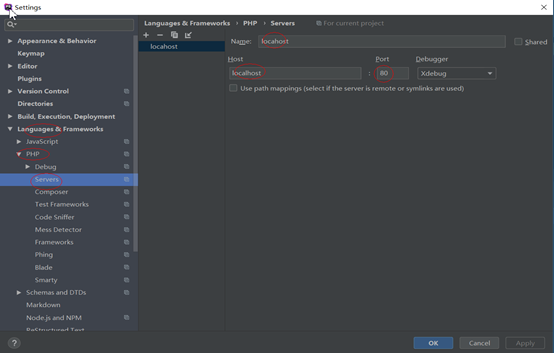
2.2.3 Debug配置
//设置debug端口,这里设为9100,需要跟php.ini的配置一一对应:
2.2.4 DBGp Proxy配置
2.2.5 调试配置
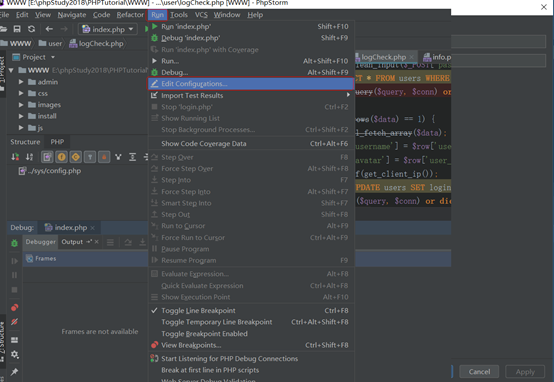
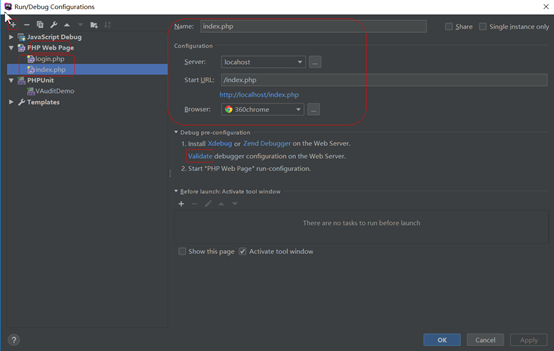

2.3 chrome端xdebug-helper插件安装
//chrome下的插件:xdebug-helper 需要翻墙安装
https://chrome.google.com/webstore/detail/xdebug-helper/eadndfjplgieldjbigjakmdgkmoaaaoc?hl=zh-CN
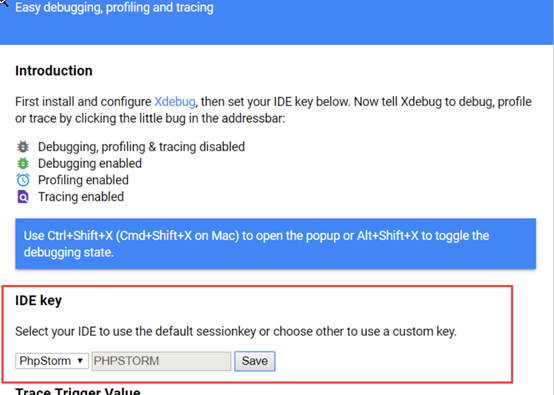
2.4 动态调试
1、首先启动phpstudy2018
2、在程序里面打完断点后,phpstorm开启监听:

3、Run->Debug 在弹出的窗口中选择我们要动态调试的php程序:
如:index.php
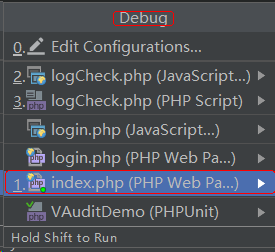
//调试结果如下图所示:
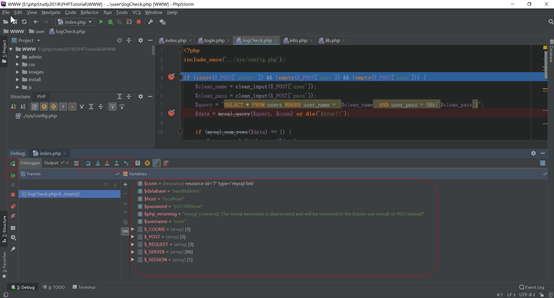
2.5 两个坑
//pear安装
如果你出现Cannot find PHPUnit in include path (.;C:php5pear),可能是pear和PHPUnit未安装
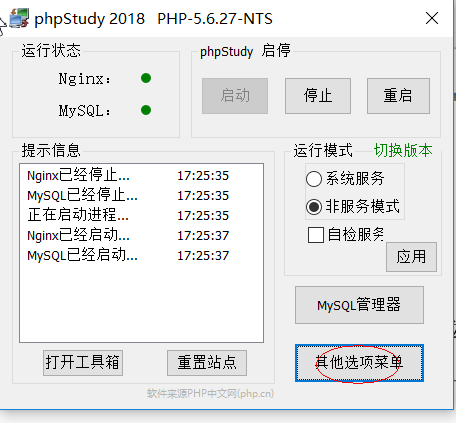
安装pear可以借助phpstudy,在其它选项,其它高级应用里面,安装pear即可,也可以手动安装,首先要找到go-pear.phar
E:phpStudy2018PHPTutorial oolspear
把go-pear.phar复制到php安装目录:
(E:phpStudy2018PHPTutorialphpphp-5.6.27-nts)
php go-pear.phar 执行一下就行了,安装过程一路默认即可!

//PHPUnit安装:
这个安装走的坑也不少,最主要是找对版本,从官网拿下来了一张图:
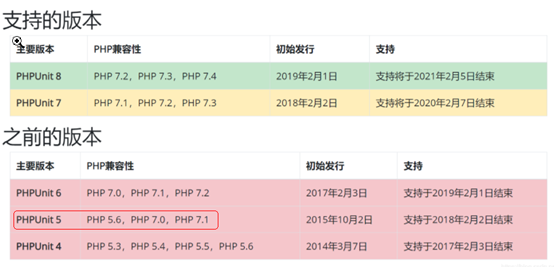
//php5.6下载phpunit5版本:phpunit-5.6.2.phar
请将下载的文件命名为phpunit.phar并考入目录:
cd E:phpStudy2018PHPTutorialphpphp-5.6.27-nts,执行:
echo @php "%~dp0phpunit.phar" %* > phpunit.cmd
phpunit -version //会显示phpunit版本的信息表示安装成功
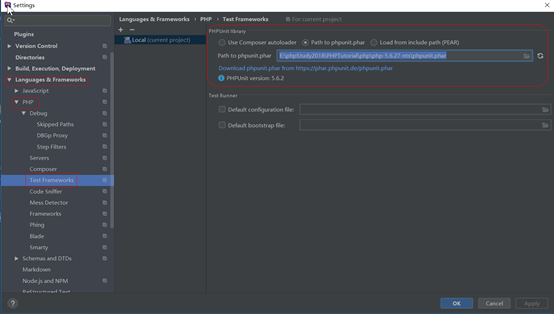
然后在phpstorm中找到test framework并设置为:
E:phpStudy2018PHPTutorialphpphp-5.6.27-ntsphpunit.phar
