介绍
用于编写html代码,还可以嵌入模板代码更快更方便的完成页面开发,再通过在视图中渲染模板,将生成最终的html字符串返回给客户端浏览器。
模板包含两部分:
- 静态部分,包含html、css、js。
- 动态部分,就是模板语言。
过程:
模版的创建过程,对于模版,其实就是读取模版(其中嵌套着模版标签),然后将 Model 中获取的数据插入到模版中,最后将信息返回给用户。
配置文件
在学习模板之前,你还需要了解一下模板的配置。
settings.py
TEMPLATES = [
    {
        'BACKEND': 'django.template.backends.django.DjangoTemplates',
        'DIRS': [os.path.join(BASE_DIR, 'templates')]
        ,
        'APP_DIRS': True,
        'OPTIONS': {
            'context_processors': [
                'django.template.context_processors.debug',
                'django.template.context_processors.request',
                'django.contrib.auth.context_processors.auth',
                'django.contrib.messages.context_processors.messages',
            ],
        },
    },
]
1. BACKEND : 指定模板的引擎。
2. DIRS : 指定保存模板的目录。
3. APP_DIRS : 是否要在应用中搜索模板本。
4. OPTIONS : 有关模板的选项。
模板加载
模板的加载方式,分为两种。
第一种
from django.template import loader

t = loader.get_template("模板名称")
html = t.render("传入信息")
return HttpResponse(html)
第二种
from django.shortcuts import render

return render(request,'模板的名称','传入信息')
render参数:
- request: 用于生成响应的请求对象。
- template_name:要使用的模板的完整名称,可选的参数
- context:添加到模板上下文的一个字典。默认是一个空字典。如果字典中的某个值是可调用的,视图将在渲染模板之前调用它。
- content_type:生成的文档要使用的MIME类型。默认为 DEFAULT_CONTENT_TYPE 设置的值。默认为'text/html'
- status:响应的状态码。默认为200。
- useing: 用于加载模板的模板引擎的名称。
关于模板
模板语法
- 变量:两个大括号括起来的 {{变量名}}
- 标签:代码段 {% 代码块 %}
- 过滤器:就是一个竖线(|),即:{{变量名 | 参数}}
- 注释:{# 这里是注释 #}
表达式
orandnotin==,!=,<,>,<=,>=
变量
变量:两个大括号括起来的 {{变量名}}
模板碰到变量的时候,计算这个变量的值,然后将结果输出,变量名有字母、数字、下划线组成。必须以字母或下划线开头。
当模板引擎碰到圆点的时候,会按照如下的顺序进行查询:
- 字典。把圆点前面的内容理解为一个字典,圆点后面的内容理解为键
- 属性或方法查询。把圆点前面的内容理解为一个对象,圆点后面的内容理解为对象里面的属性或方法(访问方法不能加括号,方法也不能定义参数)
- 数字索引查询。把圆点前面的内容理解为列表或元组。圆点后面的内容理解为下标(下标只能为数字,不能为字符串)
实例
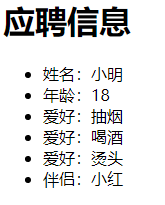
<!DOCTYPE html>
<html lang="en">
<head>
    <meta charset="UTF-8">
    <title>Title</title>
</head>
<body>

<h1>应聘信息</h1>
<ul>
    <li>姓名:{{ name }}</li>
    <li>年龄:{{ age.age }}</li>
    <li>爱好:{{ hobby.0 }}</li>
    <li>爱好:{{ hobby.1 }}</li>
    <li>爱好:{{ hobby.2 }}</li>
    <li>伴侣:{{ partner_name.name }}</li>
</ul>

</body>
</html>
app_name/views.py
from django.shortcuts import render,HttpResponse

class Info():
    @staticmethod
    def age():
        return 18

def index(request):
    info = {
        'name':'小明',
        'age':Info,
        'hobby':['抽烟','喝酒','烫头'],
        'partner_name':{
            'name':'小红',
            'age':28
        }
    }
    return render(request,'info.html',info)
结果:
标签
标签:代码段 {% 代码块 %}
if标签
语法
{% if ... %}
逻辑1
{% elif ... %}
逻辑2
{% else %}
逻辑3
{% endif %}
实例
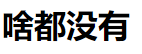
{% if hasHouse and hasCar%}
    <h1>{{ name }}有房有车</h1>
{% elif hasHouse %}
    <h1>{{ name }}有房</h1>
{% elif hasCar %}
    <h1>{{ name }}有车</h1>
{% else %}
    <h1>{{ name }}啥都没有</h1>
{% endif %}
app_name/views.py
from django.shortcuts import render,HttpResponse

def index(request):
    info = {
        'name':'小明',
        'hasHouse':None,
        'hasCar':None,
    }
    return render(request,'info.html',info)
结果:
for标签
语法
{% for ... in ... %}

{% endfor %}
更多
{% for ... in ... %}

{{ forloop.counter }}#表示当前是第几次循环
{% empty %} #列表是空或不存在的时候,执行这里

{% endfor %}
实例
你还记得,我们刚开始获取hobby变量时的过程吗,hobby.0、hobby1...用for标签后就会简单许多。
<ul>
    <li>{{ name }}爱好:
      {% for foo in hobby %}
          <span>{{ foo }}</span>
      {% endfor %}
    </li>
</ul>
app_name/views.py
from django.shortcuts import render,HttpResponse

def index(request):
    info = {
        'name':'小明',
        'hobby':['抽烟','喝酒','烫头'],
    }
    return render(request,'info.html',info)
结果:

过滤器
过滤器:就是一个竖线(|),即:{{变量名 | 参数}}
语法
{{变量|过滤器1:参数1|过滤器2:参数2...}}
{{ variable | truncatechars:14 | upper }}
实例
string='Welcome to Beijing'

<h1>string={{string}}</h1>
<h1>大写内容是:{{ string | upper }}</h1>
<h1>省略后的内容:{{ string | truncatechars:14 }}</h1>
<h1>省略后的内容:{{ string | truncatewords:1 }}</h1>
<h1>省略后的大写内容:{{ string | truncatechars:14 | upper }}</h1>
# 可以在if标签中,使用过滤器,并结合运算符一起使用
{% if name|length > 2 %}

# 过滤器可以用来串联,构成过滤器链
name | lower | upper

# 过滤器可以传递参数
list | join:”,”

# 设置默认值的过滤器
value | default:”0”

#设置日期
value | date:”YYYY-mm-dd”

#标签输出(安全的)
value | safe:"输出标签"
更多参数:https://www.cnblogs.com/huangxm/p/6286144.html
自定义
simple_tag
1、在app中创建templatetags包。
2、在该目下创建任意py文件,即:xxxx.py
# app/templatetags/register.py

from django import template
from django.utils.html import format_html

register = template.Library()

@register.simple_tag
def page_cut(current,number):
    page = ""
    for i in range(1,number+1):
        if current == i:
            page += "<a>%s</a>"%i
        else:
            page += "<a href='?page=%s'>%s</a>"%(i,i)
    return format_html(page)
3、在使用自定义simple_tag的html文件中导入之前创建的 xx.py 文件名
{% load xx %}
4、使用simple_tag
{% page_cut current_page number_page %}
如下:
{% load register %}
<!DOCTYPE html>
<html lang="en">
<head>
    <meta charset="UTF-8">
    <title>Title</title>
    <style>
        div a{
            margin-right: 10px;
        }
        div:before{
            content: 'Page:';
        }
    </style>
</head>
<body>

<div>
    {% page_cut current_page number_page %}
</div>

</body>
</html>
运行结果:

filter
创建方式一致,只是装饰器和调用的方法需要更改。
# app/templatetags/register.py

from django import template
from django.utils.html import format_html

register = template.Library()

@register.filter
def square(x,y):
   return pow(x,y)
使用
{{ 2|square:2 }}
模板继承
说明
- 如果在模版中使用extends标签,它必须是模版中的第一个标签
- 不能在一个模版中定义多个相同名字的block标签
- 子模版不必定义全部父模版中的blocks,如果子模版没有定义block,则使用了父模版中的默认值
- 如果发现在模板中大量的复制内容,那就应该把内容移动到父模板中
- 使用可以获取父模板中block的内容
- 为了更好的可读性,可以给endblock标签一个名字
语法
继承格式
{% block name%} {% endblock %}
导入模板
extends
{% extends "xxx.html" %}
只能导入一个。
局部继承
include
- 导入的代码块相当于一个完整的组件, 可以包含html标签, css样式, js语法
- 如果你想在网页上乱入一块广告, include是非常乐意效劳的
- 可以导入多个。
{% include xxx.html%}
实例
- base.html 为基类
- index.html 为子类
base.html
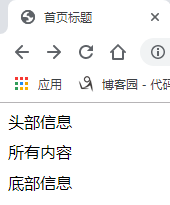
<!DOCTYPE html>
<html lang="en">
<head>
    <meta charset="UTF-8">
    <title>{% block title %}{% endblock title %}</title>
</head>
<body>

{% block  nav%}
   <div>头部信息</div>
{% endblock nav%}

{% block container %}
{% endblock container %}

{% block page_bottom%}
    <div>底部信息</div>
{% endblock page_bottom %}

</body>
</html>
index.html
{% extends 'base.html' %}
<!DOCTYPE html>
<html lang="en">
<head>
    <meta charset="UTF-8">
    <title>{% block title %}首页标题{% endblock title%}</title>
</head>
<body>

{% block container %}
    <div style="height: 40px;line-height: 40px">所有内容</div>
{% endblock container%}

</body>
</html>
views.py
from django.shortcuts import render,HttpResponse

# Create your views here.

def index(request):
    return render(request,'index.html')
结果
URL反向解析
作用
根据urls列表中关键字name=来确定唯一的名字,可以根据这个名字反推出此url的信息。
语法
视图中
url(regex, views, kwargs=None, name="别名")
也可以将:url改成re_path,如下:
re_path(regex, views, kwargs=None, name="别名")
模板中
{% url '别名' %}
{% url '别名' '参数值1' '参数值2' %}
实例
index.html
<!DOCTYPE html>
<html lang="en">
<head>
    <meta charset="UTF-8">
    <title>Index</title>
</head>
<body>

<ul>
    <li>姓名:{{ name }}</li>
    <li>个人博客:<a href="{% url 'person_info' name%}">{{ name }}</a></li>
</ul>

</body>
</html>
views.py
from django.shortcuts import render,HttpResponse

# Create your views here.

def index(request,name):
    info = {'name':name}
    return  render(request,'index.html',info)

def person_info(request,name):
    content = name + '的博客'
    return HttpResponse(content)
urls.py
from django.urls import path,re_path
from . import views

urlpatterns = [
    re_path('^index/(w+)$',views.index,name='index'),
    re_path('^person_info/(w+)$',views.person_info,name='person_info')
]
运行
访问:127.0.0.1/index/Kidd
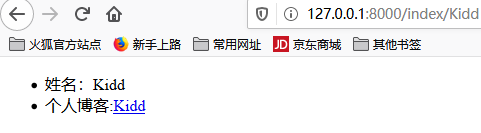
点击,个人博客
命名空间
主 url.py
from django.contrib import admin
from django.urls import path,include

urlpatterns = [
    path('admin/', admin.site.urls),
    path("", include(("app_manage.urls","study"),namespace="study"))
]
url.py
from django.urls import path
from . import views

urlpatterns = [
    path("", views.index, name="index"),
    path("timetable.html", views.timetable, name="timetable")
]
views.py
from django.shortcuts import render,reverse,redirect,HttpResponse

# Create your views here.
def index(request, *args, **kwargs):
    return redirect(reverse("study:timetable"))

def timetable(request, *args, **kwargs):
    if request.method == "GET":
        return render(request, "timetable.html")