1 实验环境
三台服务器
gitlab 192.168.7.139
Jenkins 192.168.7.140
java 192.168.7.141
[root@jenkins ~]# cat /etc/redhat-release
CentOS Linux release 7.3.1611 (Core)
[root@jenkins ~]# uname -a
Linux jenkins 3.10.0-862.6.3.el7.x86_64 #1 SMP Tue Jun 26 16:32:21 UTC 2018 x86_64 x86_64 x86_64 GNU/Linux
2 centos7 搭建gitlab服务器
安装gitlab的依赖包
yum install curl openssh-server openssh-clients postfix cronie policycoreutils-python -y
yum install -y patch
gitlab下载地址
https://mirrors.tuna.tsinghua.edu.cn/gitlab-ce/yum/el7
下载安装包
wget https://mirrors.tuna.tsinghua.edu.cn/gitlab-ce/yum/el7/gitlab-ce-10.0.3-ce.0.el7.x86_64.rpm
RPM安装
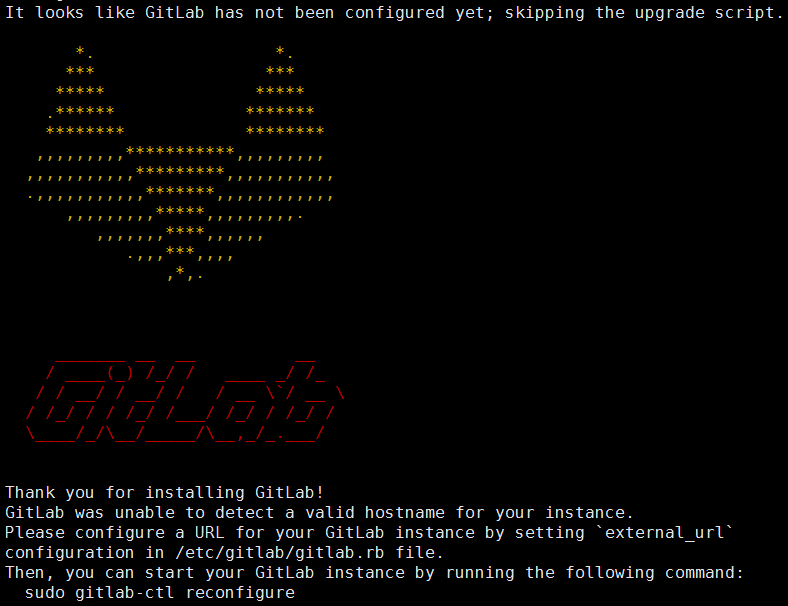
rpm -ivh gitlab-ce-10.0.3-ce.0.el7.x86_64.rpm
出现以下界面说明安装成功
修改gitlab的配置文件 /etc/gitlab/gitlab.rb
第13行 修改为自己搭建的gitlab的主机名称或者ip地址
原 external_url 'http://gitlab.example.com'
修改后 external_url 'http://192.168.7.139'
退出保存后需要重新加载配置文件 使之生效 需要等待几分钟
gitlab-ctl reconfigure
软件部分安装完毕 下面就是web页面配置部分
gitlab的默认端口是80
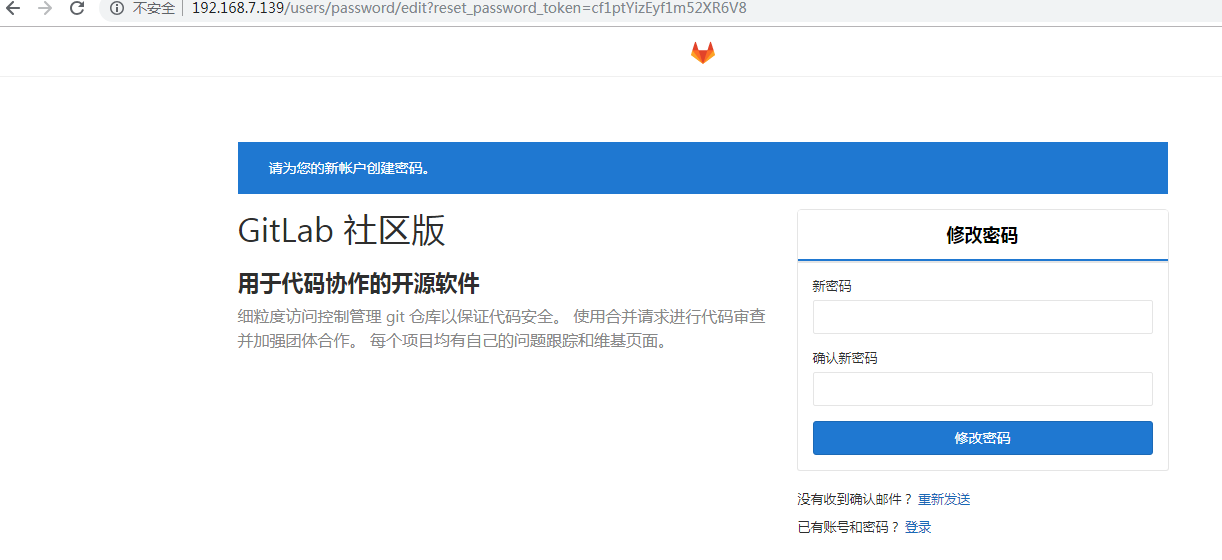
使用浏览器 访问一下地址 http://192.168.7.139
进入下面界面 用户在界面上填入新的密码 该密码是管理员的密码 (密码要求至少8位) 密码 123456 默认管理员是root
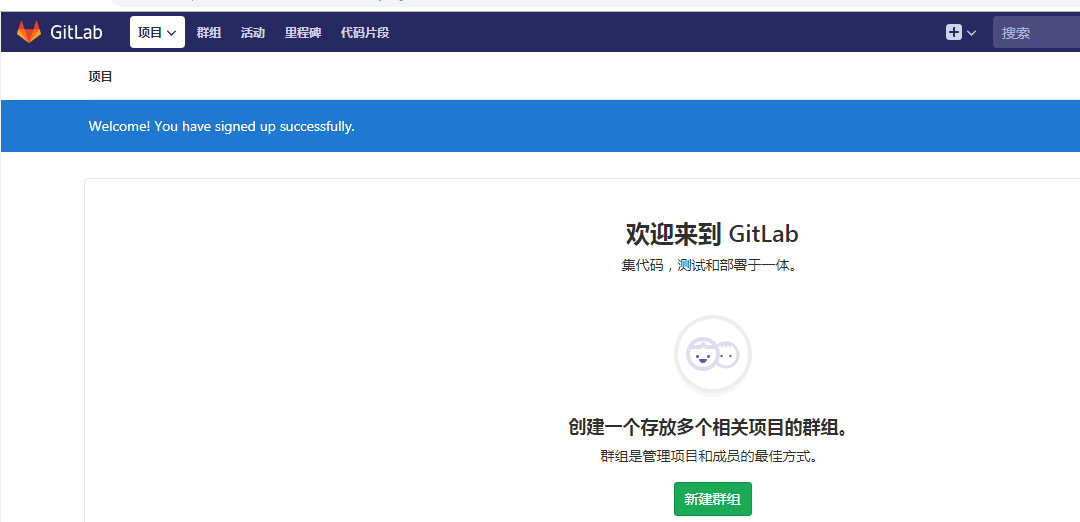
进入gitlab的界面
安装gitlab的汉化包
需要在主机上安装git
yum install git -y
查看git的版本
git --version
git version 1.8.3.1
下载gitlab的汉化包
git clone https://gitlab.com/xhang/gitlab.git
当前下载的汉化包为10.0.4 但是安装的gitlab的版本是10.0.3
停止gitlab服务
gitlab-ctl stop
切换到刚才从gitlab上download的汉化包目录
cd /home/soft/gitlab
找出安装的 10.0.3 版本和 汉化版本10.0.4 中的不同点
git diff v10.0.3 v10.0.4-zh > ../10.0.3-zh.diff
进入到上一级目录
将 10.0.3-zh.diff 的补丁添加到 gitlab 中
patch -d /opt/gitlab/embedded/service/gitlab-rails -p1 < 10.0.3-zh.diff
执行完命令后 按回车 再按y
重新加载配置文件
gitlab-ctl reconfigure
重新启动gitlab服务
gitlab-ctl start
出现下面的界面 说明启动成功
[root@gitlab softwares]# gitlab-ctl restart
ok: run: gitaly: (pid 17834) 1s
ok: run: gitlab-monitor: (pid 17849) 0s
ok: run: gitlab-workhorse: (pid 17853) 1s
ok: run: logrotate: (pid 17895) 0s
ok: run: nginx: (pid 17902) 1s
ok: run: node-exporter: (pid 17908) 0s
ok: run: postgres-exporter: (pid 17918) 0s
ok: run: postgresql: (pid 17925) 0s
ok: run: prometheus: (pid 17935) 1s
ok: run: redis: (pid 17944) 0s
ok: run: redis-exporter: (pid 17948) 1s
ok: run: sidekiq: (pid 17959) 1s
ok: run: unicorn: (pid 17968) 0s
配置gitlab 用户注册时的邮箱通知信息
修改 /etc/gitlab/gitlab.rb 配置文件,该邮箱地址是未来gitlab 向用户发送邮件时的推送邮箱
425 gitlab_rails['smtp_enable'] = true
426 gitlab_rails['smtp_address'] = "smtp.qq.com" # 用户输入自己的smtp服务器地址,例如作者的时163 的企业服务地址
427 gitlab_rails['smtp_port'] = 25 # 用户smtp 的端口号
428 gitlab_rails['smtp_user_name'] = "***@qq.com" # 用户的邮箱地址
429 gitlab_rails['smtp_password'] = "PASSWORD" # 用户的邮箱密码
430 gitlab_rails['smtp_domain'] = "qq.com" # 用户邮箱的域名
431 gitlab_rails['smtp_authentication'] = "login"
432 gitlab_rails['smtp_enable_starttls_auto'] = true
433 gitlab_rails['smtp_tls'] = false
44 gitlab_rails['gitlab_email_from'] = '***@qq.com' # 用户的邮箱地址
566 user['git_user_email'] = "***@qq.com" # 用户的邮箱地址
重新加载gitlab配置文件
gitlab-ctl reconfigure
在重新加载后,可以通过以下命令查看刚才修改的内容是否生效
gitlab-ctl show-config | grep smtp_password
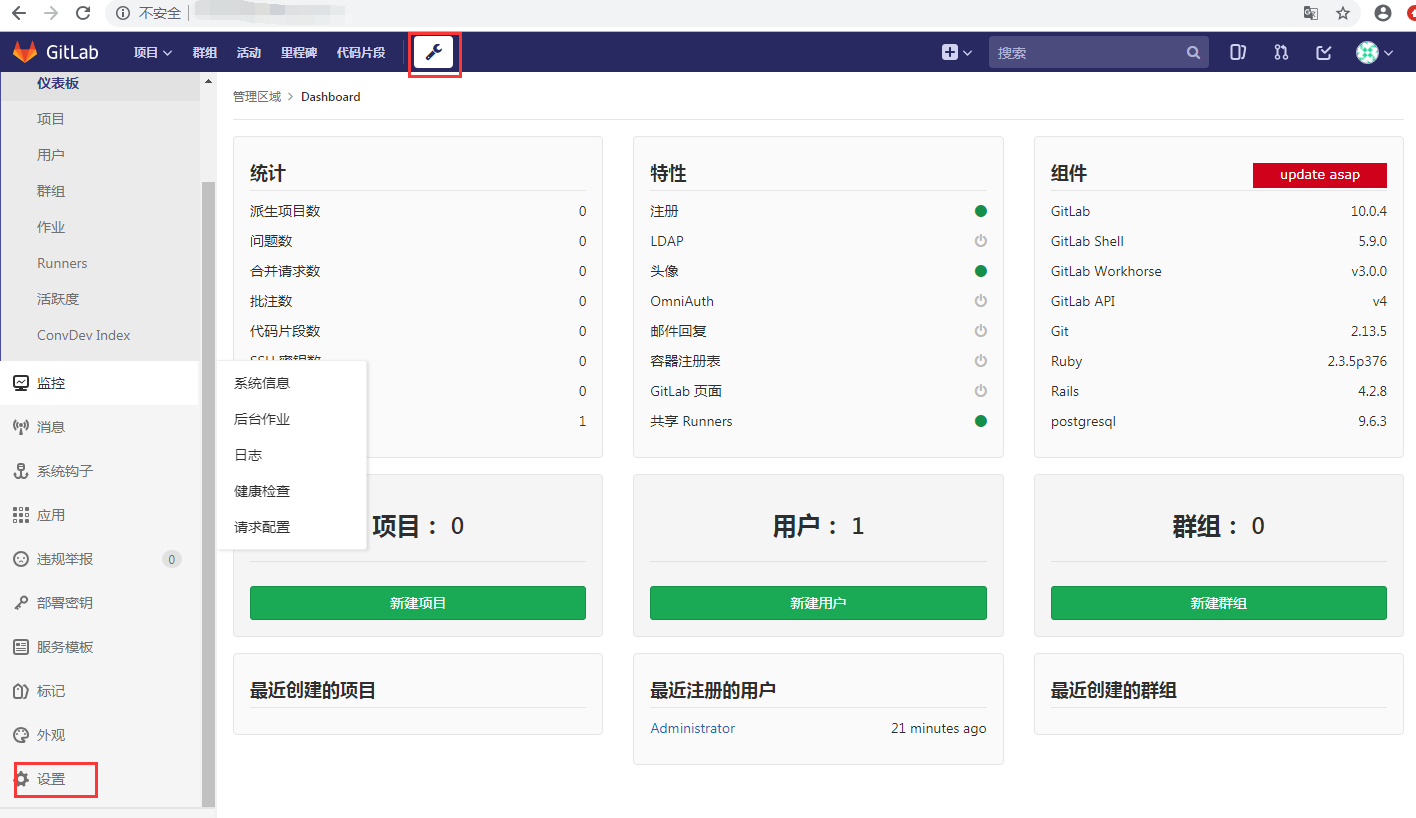
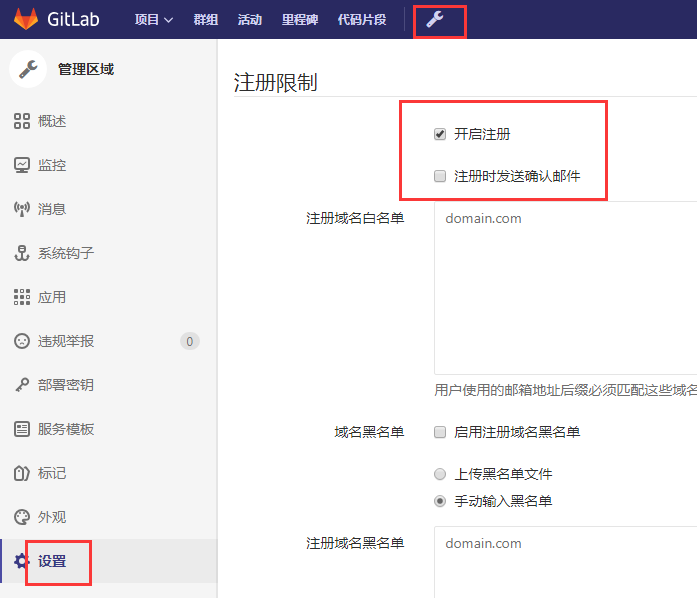
管理员还需要在web的管理页面上修改对应的配置,管理员的配置页面可以点击以下按钮
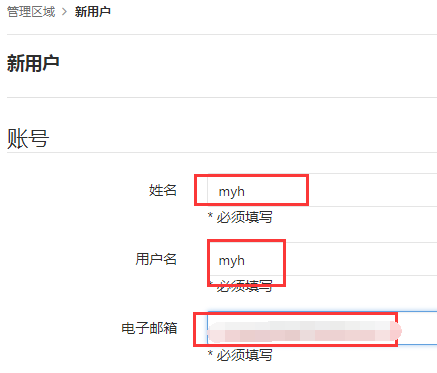
如果管理员需要手动添加新用户可以在如下界面操作

=======================================================
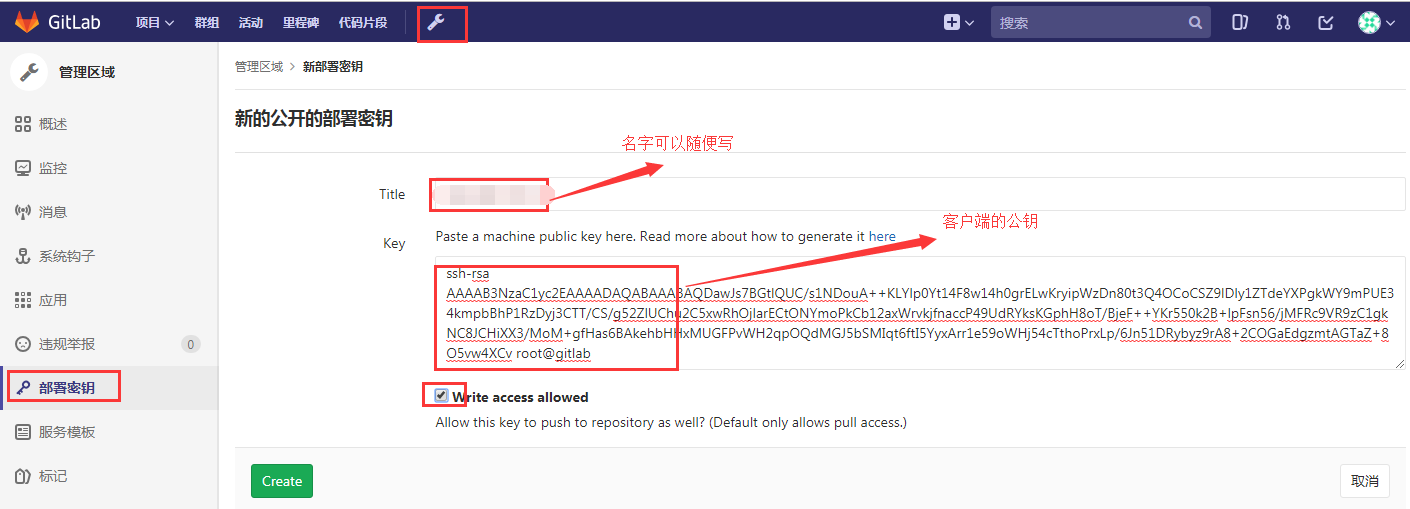
上传git客户端的公钥到gitlab服务器上
开始在gitlab上创建项目

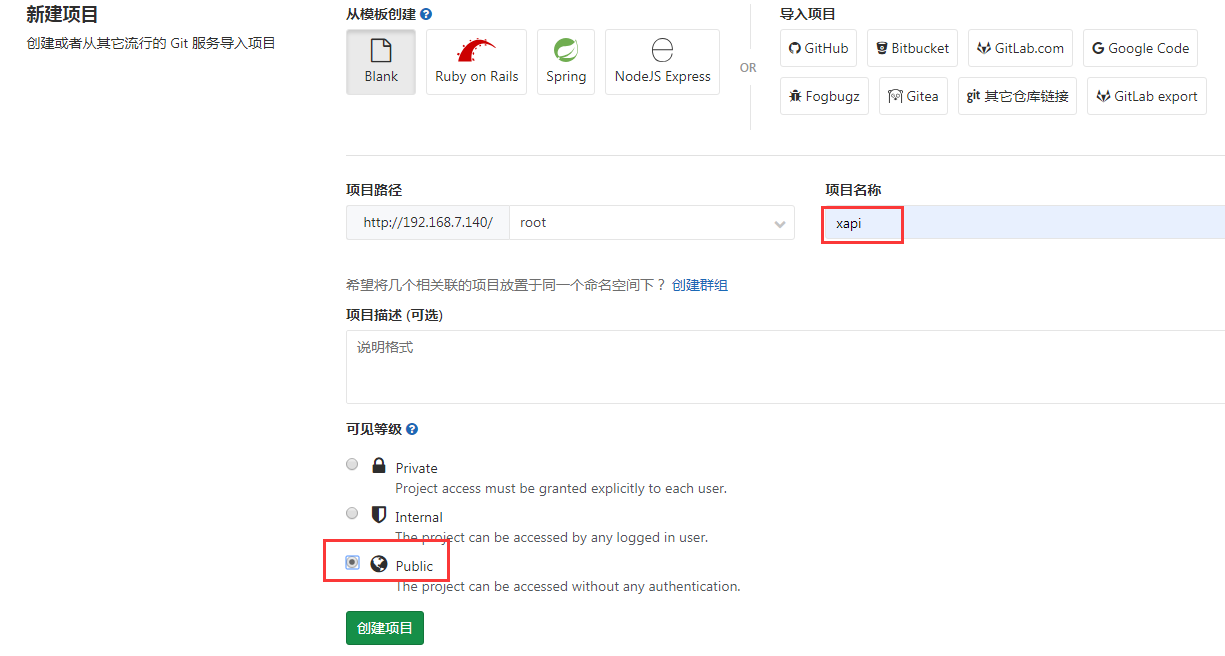
在Git客户端上进行操作
git config --global user.name "root"
git config --global user.email "***@com.cn"
git clone http://192.168.7.140/root/xapi.git
cd xapi/
touch README.md
git add README.md
git commit -m "add README"
git push -u origin master
===========================================================
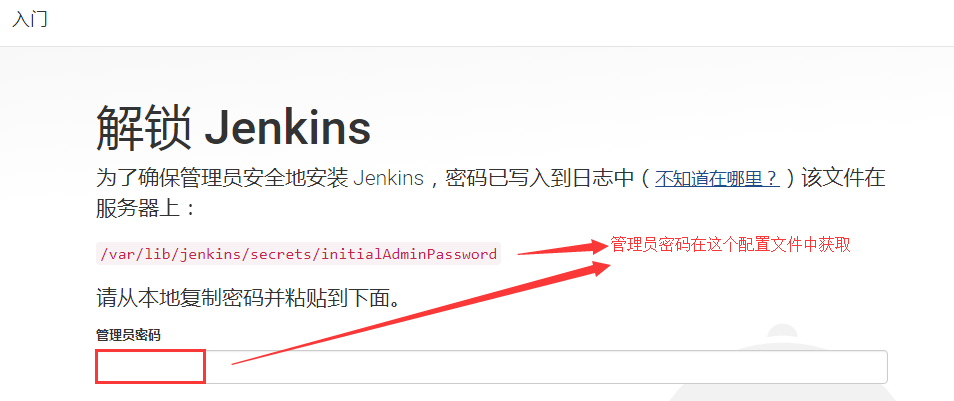
jenkins的安装部署使用
yum安装Jenkins
wget -O /etc/yum.repos.d/jenkins.repo https://pkg.jenkins.io/redhat/jenkins.repo
rpm --import https://pkg.jenkins.io/redhat/jenkins.io.key
yum install jenkins
systemctl status jenkins
systemctl enable jenkins
systemctl start jenkins
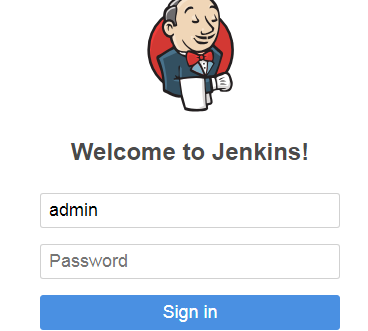
通过浏览器登录到Jenkins的管理界面 http://192.168.7.139:8080/
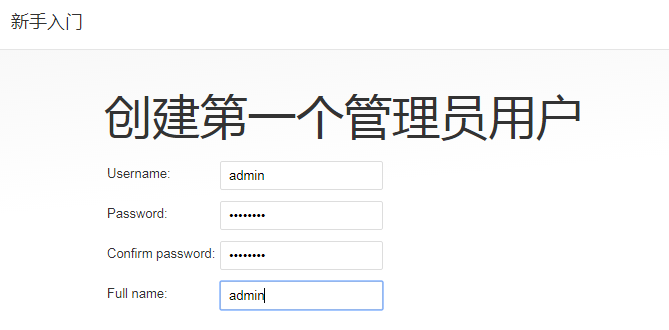

下面开始使用Jenkins
登录