1. 安装
http://nginx.org/en/download.html
下载你想要的版本,我下载的稳定版本,点击就开始下载了。解压到合适的目录下,双击目录下的nginx.exe就启动nginx啦
nginx的默认端口是80,启动成功后在浏览器地址栏中输入localhost既可以看下启动成功,如截图三
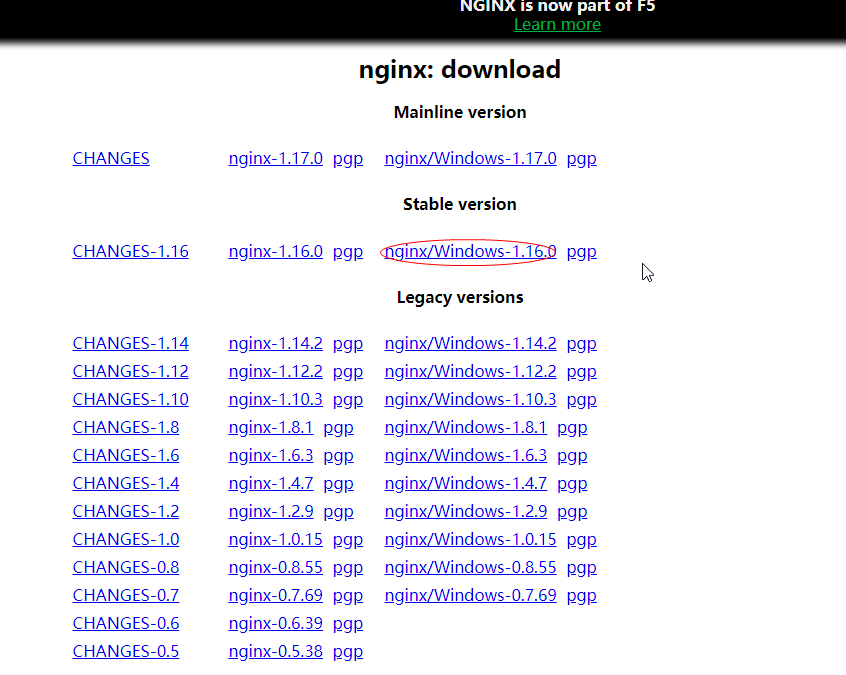
截图一如上
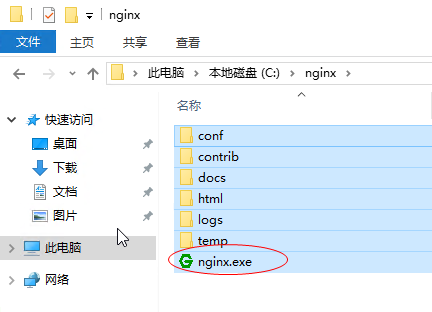
截图二如上

截图三如上
在安装Nginx前,需要确保系统安装了g++,gcc, openssl-devel、pcre-devel和zlib-devel软件。
1.安装必须软件:yum -y install zlib zlib-devel openssl openssl--devel pcre pcre-devel
2.Linux下也差不多,都是安装Nginx的依赖包:yum install GeoIP gd libXpm libxslt
3.下载对应的包,比如xxx.tar.gz 用命令tar -xvf xxx.tar.gz 加压缩到当前目录,然后进入目录用命令./configure进行配置,再用命令make进行编译,再用命令make install进行安装
【源码的安装一般由3个步骤组成:配置(configure)、编译(make)、安装(make install)】
4. whereis nginx查找一下【find / -name nginx】
5. 启动命令 一般是/usr/local/nginx/sbin/nginx
6.然后在浏览器中输入url进行访问
解压缩后启动即可,启动成功后可以看到welcome页面【截图下次附上】
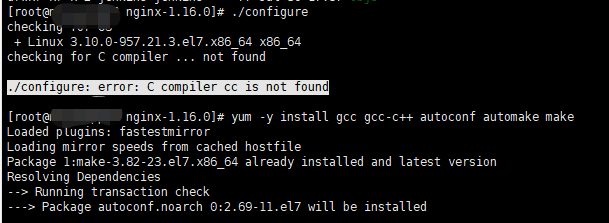
可能会遇到的错:
1)./configure: error: C compiler cc is not found
解决方案: 安装yum -y install gcc gcc-c++ autoconf automake make
nginx: [emerg] the "ssl" parameter requires ngx_http_ssl_module in /usr/local/nginx/conf/nginx.conf:37
2)没有安装ssl_module
解决方案:首先安装相应的ssl_module, yum install openssl openssl-devel 之后进行重新编译
./configure --prefix=/usr/local/nginx --with-http_stub_status_module --with-http_ssl_module
再make下
之后查询/usr/local/nginx/sbin/nginx -V
若显示--prefix=/usr/local/nginx --with-http_stub_status_module对应的参数,即安装成功
3)80端口已经被占,需要修改端口号
2. 代理
worker_processes  1;

events {
    worker_connections  1024;
}


http {
    include       mime.types;
    default_type  application/octet-stream;

	sendfile        on;

    keepalive_timeout  65;

    server {
        listen       80;
        server_name  88bugs;
		location / {
            proxy_pass http://localhost:8083;
        }
     }
}
worker_processes 1;
events {
worker_connections 1024;
}
http {
include mime.types;
default_type application/octet-stream;
sendfile on;
keepalive_timeout 65;
server {
listen 80;
server_name 88bugs;
location / {
proxy_pass http://localhost:8083;
}
}
}
目的是让所以访问本台机器80的端口的,都被路由到8083端口
之前你可能访问xx.xx.xx.xx:8083才能访问到你要的页面
之后你 访问不带端口,即80端口就能访问原本需要访问xx.xx.xx.xx:8083的网站